
Last Updated on May 21, 2026
When it comes to repairing your computer and recovering from system failures, it can be hard to find the right tool for the job. And many times, you need multiple tools to get the job done, or at least to help you figure out what is wrong. This is where a repair and recovery USB toolkit like Live USB Malekal can really help you out.
Live USB Malekal is an all-in-one system repair and recovery USB toolkit and is similar to NVH BOOT, Medicat and Hirens Boot CD. It works by booting your computer with the flash drive and running the required tools needed to repair or reconfigure your computer. You can even use it to reinstall Windows.

To configure your Live USB Malekal flash drive, you will need to download the ISO file from the Live USB Malekal website. Then you can use your favorite flash drive creation software such as Rufus to create a bootable flash drive.
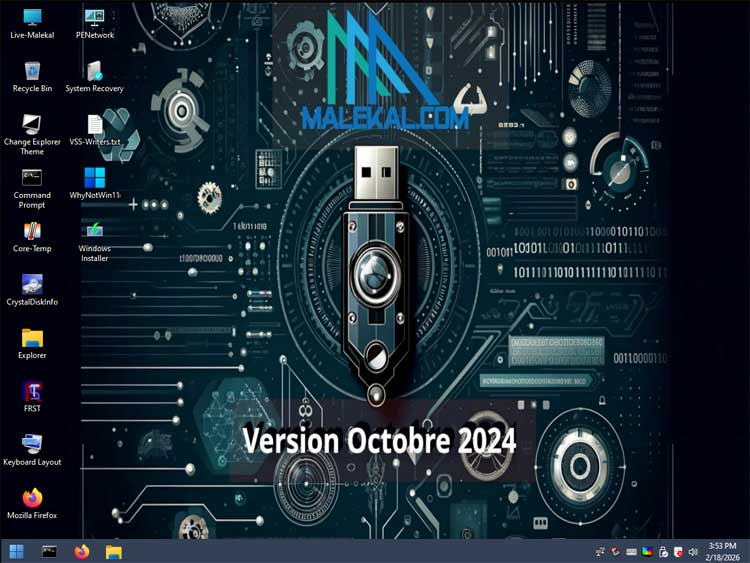
Once you boot your computer with the Live USB Malekal flash drive, it will look like it’s loading Windows, but it is really going into its own custom Windows desktop interface along with its own taskbar and start menu.
There will be several icons on the desktop for various custom tools as well as standard shortcuts for a Windows command prompt, File Explorer, and even a Recycle Bin. You may find that there are some standalone tools sitting on the desktop that are not listed with the other apps found in the start menu. Keep this in mind when searching for specific utilities.
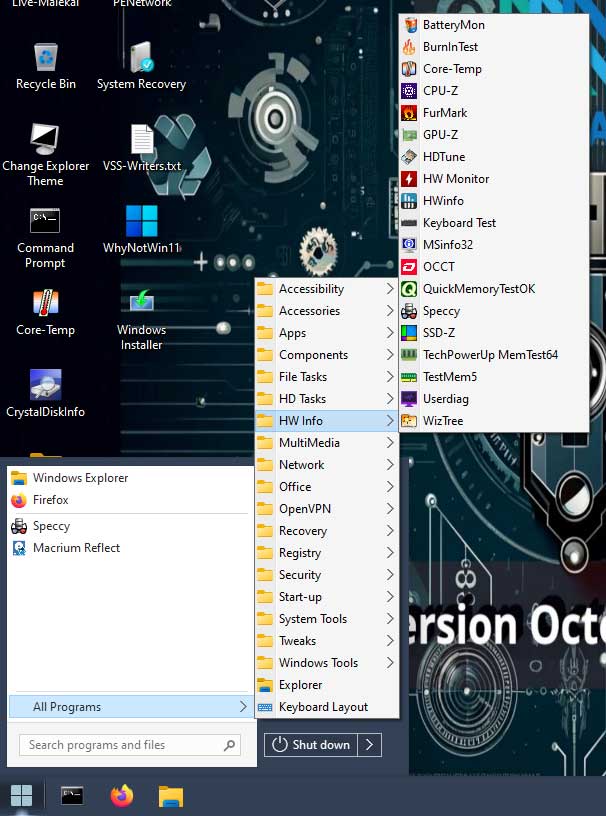
To access the other tools, you can click the start button and then click on All Programs. Here you will see that all the tools are heavily separated into distinct categories making it much easier to find exactly what you are looking for.
1. Access Accessibility Features
Here you will find tools such as the on-screen keyboard and the narrator app. These are incredibly useful if your physical keyboard stops responding during a system crash. Navigating the rescue environment remains entirely possible without standard peripheral input.
2. Utilize Basic Accessories
If you need to use the calculator or WordPad, you can find them right here. These basic utilities help you take quick notes or calculate drive partition sizes during a complex repair. Standard Notepad is also available for quickly opening text-based log files.
3. Launch Portable Apps
This section contains NirLauncher and the Windows System Control Center. These portable software suites bundle hundreds of tiny administrative utilities together in one single interface. You can run deep system diagnostics without installing any software directly onto the host drive.
4. Perform Complex File Tasks
If you need to use extraction tools such as 7-Zip, Everything, or Rufus, you will find them here along with other file management utilities. Navigating a broken file directory is much faster using these third-party programs. You can safely compress and extract large backup archives before modifying the raw disk.
5. Execute Heavy HD Tasks
This section contains the core tools you need to create bootable flash drives and check hard drive health. You can create and restore raw disk backups using Macrium Reflect before attempting a risky repair. It also includes software to safely manage and resize your hard drive partitions without data loss.
6. Review Detailed HW Info
There are many tools here you can use to view deep information about your hardware components. You get direct access to CPU info readers and intensive RAM testers to identify physical failures. You will even find WizTree here to visually see exactly what massive files are eating up the space on your hard drive.
7. Play Files with MultiMedia
Here you will find tools to play standalone media files such as VLC Media Player. Testing audio and video output from a rescue environment helps isolate hardware issues from software driver problems. You can quickly verify if the sound card is physically working before reinstalling Windows.
8. Troubleshoot the Network
This section contains tools to manage your local network and connect to remote computers. You will find essential apps such as AnyDesk, TeamViewer, Remote Desktop, WinSCP, and Wireshark. These allow off-site technicians to remote into your broken machine and perform the actual repairs for you.
9. Open Documents in Office
This section might not be too useful unless you need to use a dedicated notepad app or PDF reader. Software licenses or repair instructions are often saved as PDF files on the host drive. These tools let you read that critical documentation without booting the primary operating system.
10. Establish a Secure OpenVPN
Here you will find the StartOpenVPN application ready to launch. Establishing a virtual private network from a bootable environment secures your diagnostic traffic on untrusted networks. It guarantees your file transfers and remote sessions remain completely encrypted from outside observation.
11. Execute File Recovery
If you need to recover deleted or completely lost files, you can use powerful tools such as PhotoRec and Recuva from here. You can also use TestDisk to locate missing partitions and rebuild broken file systems. These applications scan the raw physical sectors of the drive to salvage data by bypassing the corrupted master file table entirely.
12. Modify the Windows Registry
If you need to fix severe registry issues causing boot loops, you will find the Windows Registry Editor here. It also includes Remote Regedit to load the native registry hive of the broken offline operating system. You can manually delete corrupted keys or malware entries preventing the computer from starting.
13. Bypass System Security
This section contains tools that can be used to forcefully reset local user account passwords. Clients often forget their login credentials and get locked completely out of their own machines. You can blank out the Windows password and extract the original Windows product key for a clean installation.
14. Check Start-up Applications
This will show any background apps actively set to start up with the computer. It will most likely be completely empty since you are running a temporary WinPE environment. Checking this folder verifies no malicious scripts are attempting to inject themselves into the rescue boot sequence.
15. Run Advanced System Tools
Here you will find a massive variety of deep system tools such as Autoruns, Blue Screen View, and Dism++. You can analyze recent crash dump files to pinpoint exactly which faulty driver caused the blue screen of death. Process Monitor and System Recovery allow you to dig into the exact background processes halting the machine.
16. Apply Custom System Tweaks
This section only has a couple of very specific tools including Set Max Resolution and Start VSS Service. Adjusting the display resolution helps older monitors properly render the rescue environment interface. Starting the Volume Shadow Copy service ensures you can interact with locked system files safely.
17. Access Native Windows Tools
Here you will find typical built-in Windows tools such as Device Manager and Disk Management. The Windows Services tool is also available to force start or stop critical background processes. These familiar native utilities operate exactly the same way they do in a standard Windows 11 installation.
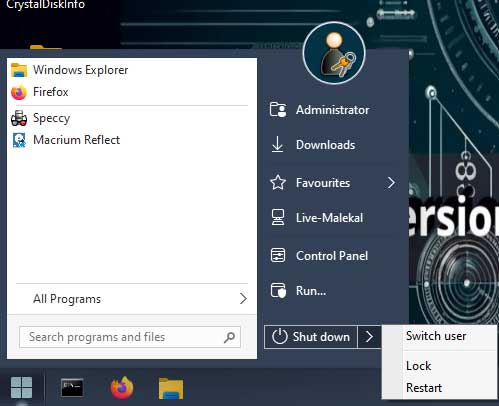
Once you have finished using the required tools, you can click on the start button and either shutdown or reboot your computer.
As you can see, Live USB Malekal has a large variety of system repair and recovery tools that you can use to hopefully get your computer up and running again.
For additional training resources, check out our online IT training courses.
Check out our extensive IT book series.


