Last Updated on June 29, 2026
Troubleshooting Windows issues can be a daunting task and most of the time there is not an obvious solution, and you will need to do some online research to find the answer to your problem. And when you do find a possible solution, you need to hope that it is something you can actually attempt to do without the help of an expert!
Many times, you will find that you need to boot your computer into Safe Mode to perform the steps to fix your Windows problems. But if Windows won’t start correctly or fully load, then getting into Safe Mode can be difficult since the methods used to get into Safe Mode are usually done while logged into Windows itself. So, if you are having an issue such as a black screen when logging in because of a faulty video card driver and need to remove it, this won’t be possible when booted normally.
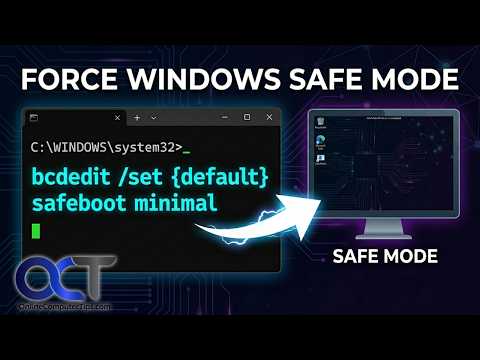
Fortunately, there is a command you can use to force Windows into Safe Mode on the next reboot so you can perform the steps required to get your computer up and running again. This bypasses the standard boot sequence and locks the system into a diagnostic state.
Booting to the Windows Recovery Environment
1. Boot from Installation Media
To do this, you will need to boot your computer with your Windows installation media/flash drive as if you were going to install Windows itself, even though you are not. Ensure your BIOS is set to boot from the USB drive first. Wait for the initial setup files to load into memory.
2. Select the Repair Option
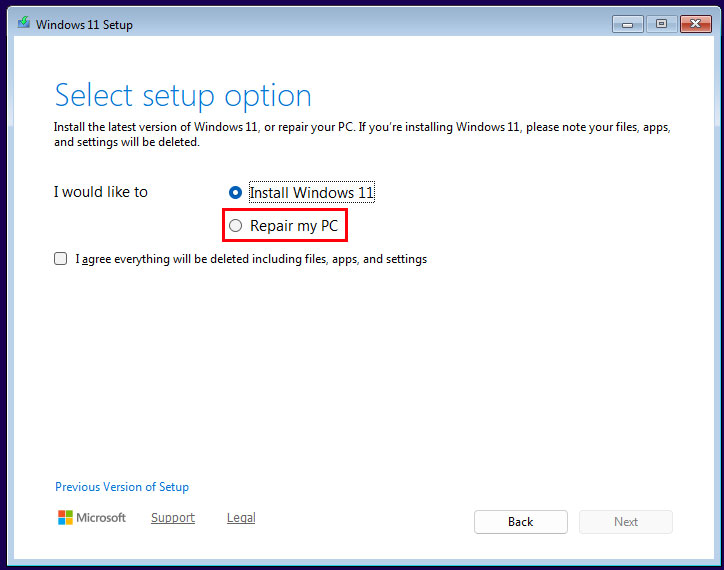
Once you are on the Windows setup screen, you will choose your language and keyboard settings. When you get to the main setup screen, you will choose the Repair my PC option rather than the Install Windows 11 option. This link is usually located in the bottom left corner of the window.
3. Navigate the Recovery Menus
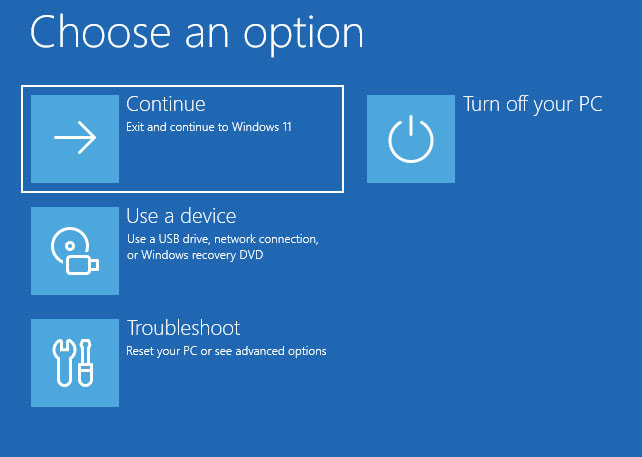
You will then be taken to the blue Windows RE (Recovery Environment) screen. When you get to the Choose an option menu, you will want to select the Troubleshoot option. This unlocks the advanced diagnostic tools.
4. Open the Command Prompt
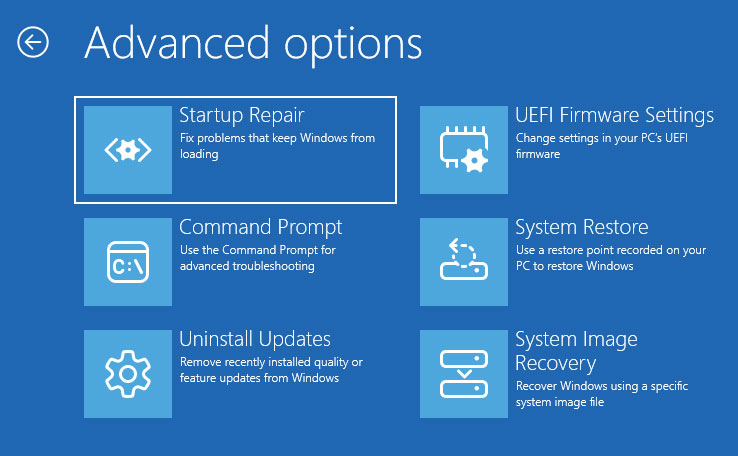
On the next screen, you will see a list of advanced repair tools. You will then need to click on Command Prompt. This opens a black terminal window with full administrative access to your offline operating system.
Configuring the Safe Mode Boot Commands
1. Understand the Bcdedit Utility
Once you are at the command prompt, you can then use the bcdedit command to force Windows to boot into Safe Mode on the next restart. bcdedit is a Windows command-line utility that lets you control how the system starts by viewing and changing the settings Windows uses during the boot process. You will have three different commands you can choose from when using this.
2. Choose the Minimal Option
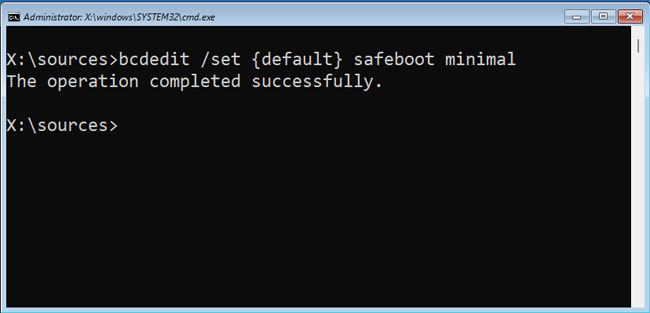
Type bcdedit /set {default} safeboot minimal to load the standard diagnostic environment. Minimal loads Windows with just the core drivers and services needed to diagnose basic system issues. This is the safest and most common option to use.
3. Choose the Network Option
Type bcdedit /set {default} safeboot network if you need to download drivers or research solutions. Network loads the core system plus network support so you can access the internet while troubleshooting.
4. Choose the DsRepair Option
Type bcdedit /set {default} safeboot dsrepair only if you are working on a server. DsRepair starts a domain controller without Active Directory running, allowing administrators to repair or restore it. You will most likely want to use minimal unless you need internet access, then you can use the network option.
5. Execute the Command
After typing the command and pressing enter, you should see a message that says the operation completed successfully. This confirms the boot record has been permanently altered.
Booting into Safe Mode and Reverting the Changes
1. Restart the Computer
Now you can exit out of the command prompt by typing exit and pressing enter. Choose the Turn off your PC option from the blue menu and then start it back up again. Remove your USB flash drive so the computer boots from the internal hard drive.
2. Perform Your Repairs
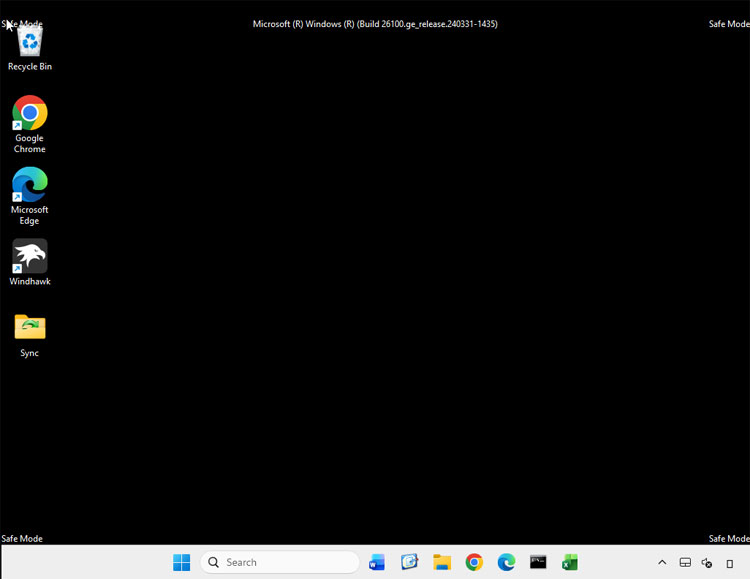
Then when it starts up, you will be running in Safe Mode. You can then perform the required steps needed to get your computer fixed so you can use it as you normally would. You can easily uninstall bad drivers or remove malware from this isolated environment.
3. Remove the Safe Mode Boot Lock
Once you are ready to reboot normally, you will need to run another command from within Safe Mode. Otherwise if you restart your PC, it will boot back into Safe Mode again in a continuous loop. To get it to boot normally, open a command prompt from within Safe Mode and type in the following command.
4. Execute the Delete Value Command
Type bcdedit /deletevalue {default} safeboot and press enter. This command removes the Safe Mode setting from the default Windows boot entry. It allows Windows to start normally instead of booting back into Safe Mode on the next restart.
For additional training resources, check out our online IT training courses.
Check out our extensive IT book series.