Last Updated on June 11, 2026
If you have been using Windows 11 for just about any length of time, you have probably noticed how the interface and even the available apps have changed through the years. Many of these Windows changes are not widely accepted, and many people are always looking for workaround to tweak and customize Windows to make it their own.
One recent change that people are not happy about is the redesign of the Windows 11 Start menu starting with the 25H2 update. Windows has now combined your apps into groups that appear when you click the Start button. They also removed the All apps button at the upper right in favor of showing you your apps at the bottom of the Start menu itself.
To tweak the Windows 11 Start menu to make it work better for you, we will be doing a combination of adjusting some of the Windows settings as well as using the Windhawk Windows customization app.

Disabling the Clutter Natively
1. View the Updated Interface
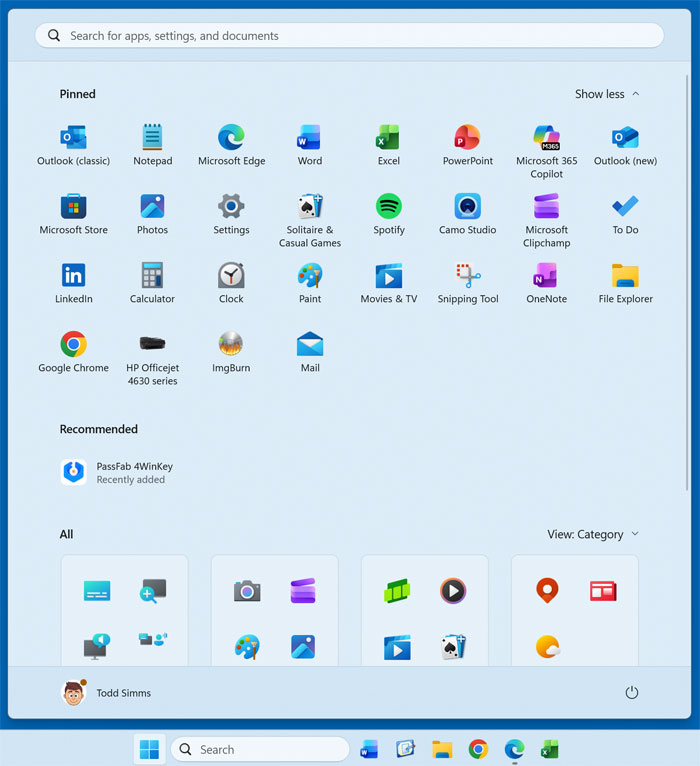
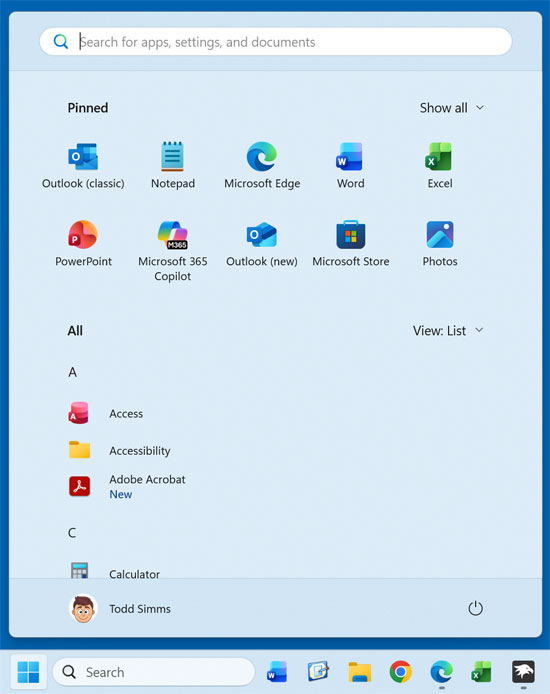
Even though the hack to revert back to the older style Windows 11 Start menu from 24H2 no longer works, there is a way to customize your Windows 11 Start menu to get it looking a bit closer to the style that many of us prefer. As you can see in the image below, the current Windows 11 Start menu is wide and sort of cluttered with app icons and grouped icons you may not need or want to look at every time you click the Start button.
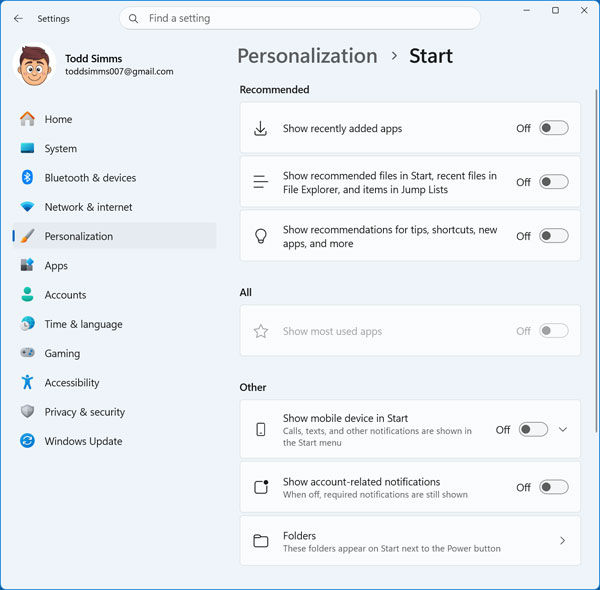
2. Navigate to Personalization Settings
To tweak the Windows 11 Start menu to make it work better for you, we will be doing a combination of adjusting some of the Windows settings as well as using the Windhawk Windows customization app. Once you open the Windows settings app you will need to navigate to Personalization > Start.
3. Turn Off Annoying Recommendations
From there, you can disable certain items from showing up on the Start menu entirely. Turn off the toggle switches for recently added apps, recommended files, and recommendations for tips and other apps. This immediately reclaims a massive amount of visual space.
4. Remove the Phone Link Integration
If you have the Windows Phone Link section off to the right side of your Start Menu and do not use it, you can disable that by turning off the Show mobile device in Start slider. The Folders option is interesting because it allows you to add commonly used folders to the Start Menu itself.
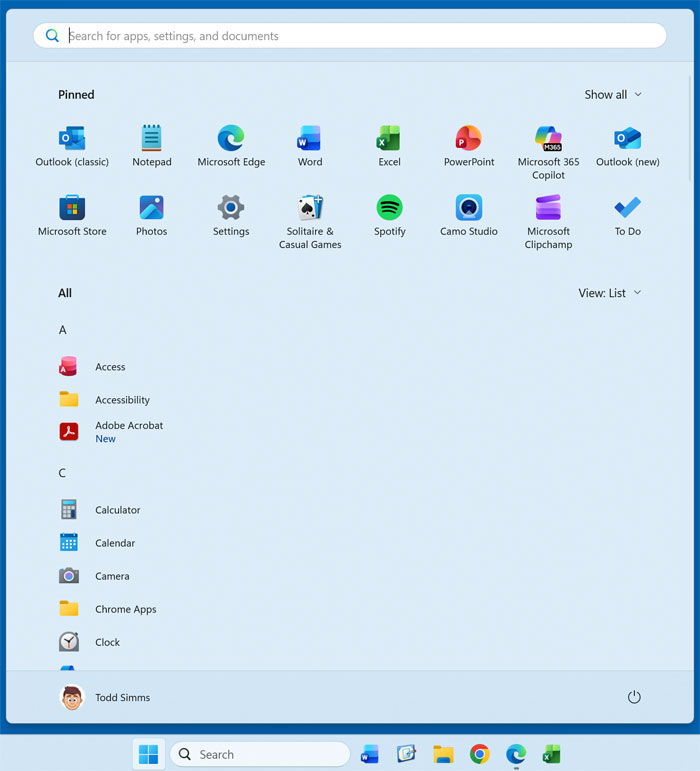
5. Change the App Layout View
The image below shows how our start menu looks after disabling these features in the settings and also after changing the view from grid to list. At the top right where it says Show all, you can also change that to Show less to have less pinned apps shown. It looks much cleaner already.
Tweaking the Start Menu Using Windhawk
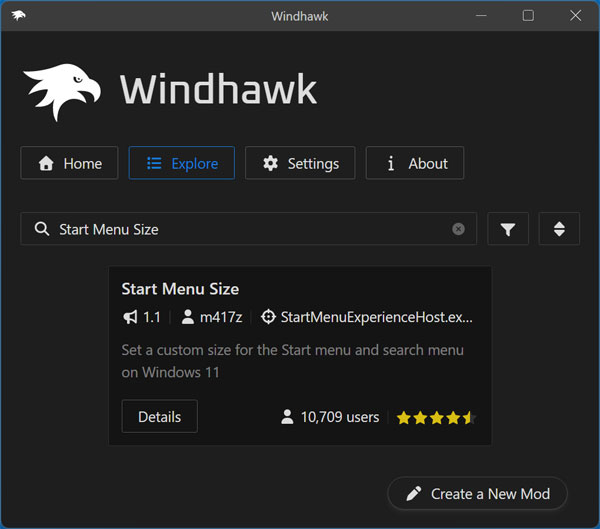
1. Search for the Start Menu Mod
Now that we have our Start Menu looking a little cleaner, we will customize it even more using the free Windhawk app. Windhawk works by installing mods into the app and these mods can change the way Windows looks and functions on a system level. Once you download and install Windhawk, you will need to search for the Start Menu Size mod in the search box in the Explore section. You can check out our playlist of the best Windhawk mods here.
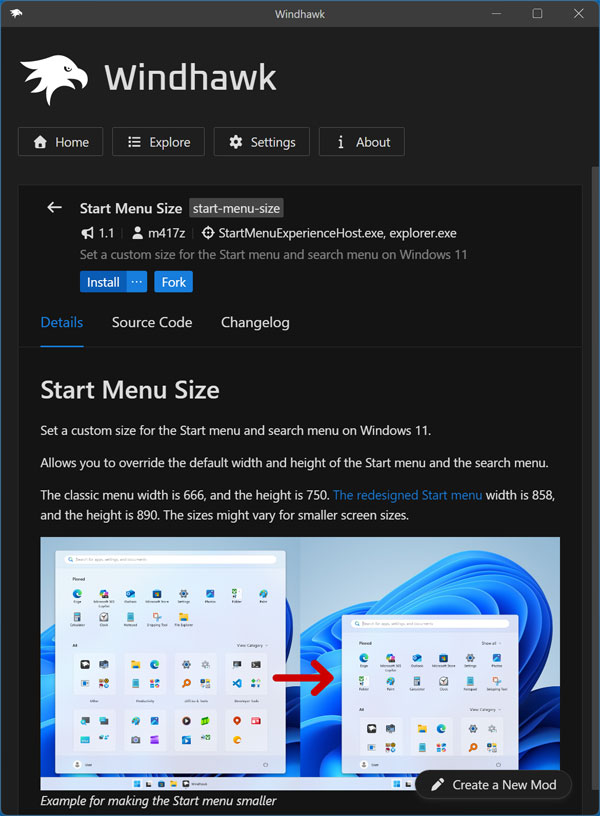
2. Install the Sizing Mod
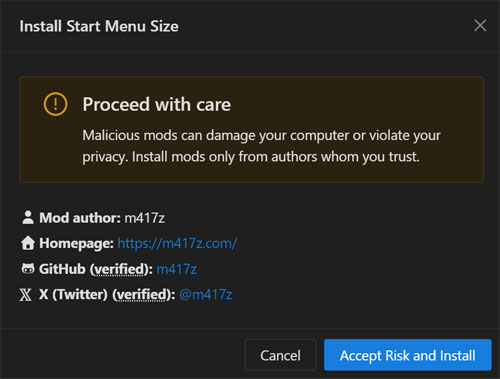
Then once you find it, simply click on the Details button to read the developer notes. Click on the Install button to add it to your active Windhawk library. You will then see a warning saying proceed with care which is what you will see when installing any mod in Windhawk. You can then click the Accept Risk and Install button to continue.
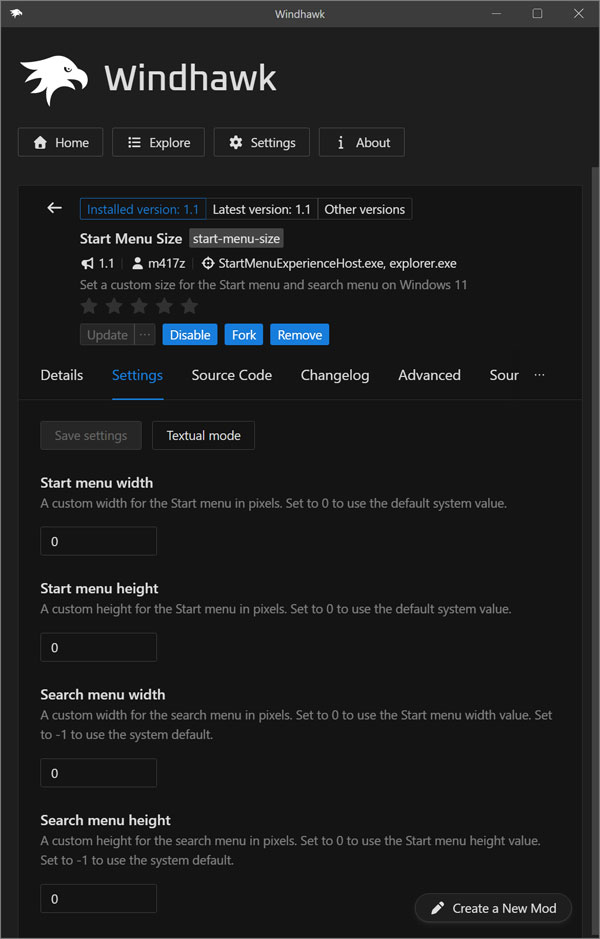
3. Configure the Mod Settings
Once the mod is installed, you can go to the Settings tab to configure the mod itself. There you will find settings for the Start Menu width and height as well as the search box width and height. You can play around with the settings by typing in a number and clicking the Save settings button.
4. Adjust the Menu Pixel Dimensions
The image below shows the Start Menu with 600 for the width and 700 for the height. This forces the menu to look much more like the classic Windows 10 version. It removes the massive blank spaces left behind after we disabled the native recommendations earlier.
5. Widen the Search Box Interface
When it comes to adjusting the search box width and height, this does not actually change the size of the search box in the Start Menu itself, but rather when you start typing something in the search box. The image below shows the search box width set to 1000. This gives you much more room to read file paths and web search results.

6. Revert Changes if Needed
If you decide to try Windhawk to adjust your Start Menu size, you will most likely need to try out some numbers until you get things looking the way you want. And if you change your mind, you can go back to the mod and then disable it or even remove it from Windhawk itself. Your system will immediately revert to the default 25H2 dimensions.
For additional training resources, check out our online IT training courses.
Check out our extensive IT book series.