Last Updated on May 20, 2026
You can ask just about anyone who runs Windows on their PC if they have had some type of issue such as a crash, freeze up or total system failure and they will most likely say yes! Computer issues are just part of life but that doesn’t mean you shouldn’t have the basic knowledge required to try and fix them, so you don’t end up paying someone else to fix your computer for you.
There are many tools available that can be used to diagnose and repair your computer from built in Windows tools such as Event Viewer, Startup Repair, and even the newer Quick Machine Recovery feature that is supposed to fix your computer for you when it crashes.
When it comes to repairing Windows issues, most people use a standard set of command line tools that can fix many types of problems. But when it comes to using these tools, the order and how you use them are very important. In this article, we will be discussing the CHKDSK, DISM and SFC commands and how to use them and in what order to use them.

CHKDSK, DISM, and SFC are all commonly referred to as Windows repair tools. They are run from the same command prompt and often suggested together, which leads many users to assume they do the same job. In reality, each tool targets a different layer of Windows. Running them blindly often fixes symptoms instead of the underlying cause. If you have ever opened Command Prompt and fired off CHKDSK, DISM, and SFC back to back, you are not alone. These three commands get lumped together as “repair tools,” they run from the same place, and they all look like they are doing similar work. The problem is that they do not fix the same thing and running them blindly often clears a symptom while the real cause stays put.
Windows repairs are layered. When you repair the wrong layer first, you can end up in a loop where files keep breaking, SFC reports issues again, or repairs only “stick” for a short time. The right order fixes the root cause, so you stop repeating the same troubleshooting steps. Here is the trap: CHKDSK, DISM, and SFC are all called “repair tools,” they are all run in a command window, and they all sound like they repair Windows. In reality, each one targets a completely different layer of the system. When you run them without a plan, you can temporarily improve stability while leaving the underlying corruption untouched. The fix is not “run everything,” the fix is “run the right tool for the right layer, in the right order.”
Understanding the Windows Repair Stack
A reliable way to remember the correct order is to picture Windows repairs as a stack you fix from the bottom up. Each tool works in only one layer. If the lower layer is unstable, repairs you do above it can fail or keep undoing themselves.
1. Disk and File System Integrity
This is physical storage health plus the file system metadata that tells Windows where everything lives. Bad sectors on a physical drive instantly corrupt the data sitting directly on top of them. You must repair this hardware foundation before addressing software problems.
2. Windows Image and Component Store
This is the internal blueprint that defines what should exist, plus the clean, known good components Windows uses for repairs and updates. Operating system files pull their baseline configurations directly from this hidden repository. A corrupted image guarantees future file repair failures.
3. Active System Files
These are protected files currently in use that must match the clean versions stored in the component store. System files manage your daily operations and user interface. They break down frequently due to forced updates and rogue software installations.
CHKDSK: What It Really Fixes
CHKDSK (Check Disk) focuses on the disk’s file system and metadata. It scans how data is stored and accessed, detects logical corruption and bad sectors, and repairs file system issues so repaired files are less likely to corrupt again. Use the command that fits what you are trying to verify or repair. These are example commands commonly used when checking a system drive, with options that can fix file system errors or scan for bad sectors depending on what you run. When CHKDSK matters most: If the file system is unhealthy, Windows files can keep getting damaged, which makes higher level repairs feel pointless because the same corruption returns.
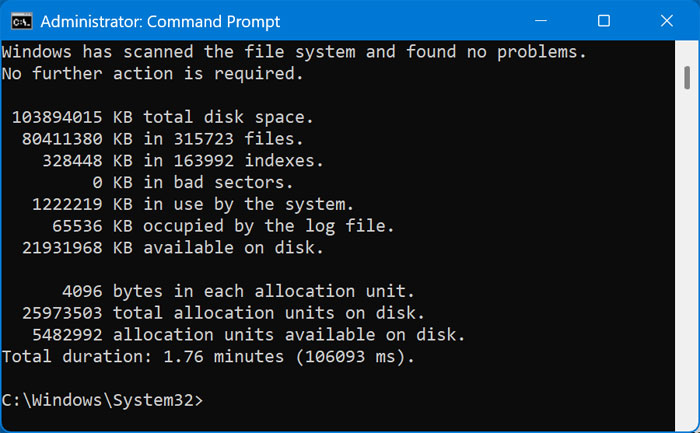
1. Run a Read-Only Check
Execute the chkdsk C: command in your terminal. This runs a read-only check of the file system on the C: drive. It looks for file system inconsistencies and reports problems but does not make any changes or repairs. The output provides a rapid snapshot of overall drive health.
2. Scan While Windows Runs
Execute the chkdsk C: /scan command. This scans the disk for file system errors while Windows is running, without taking the drive offline. It reports problems but does not fix them automatically. You avoid system downtime using this specific parameter.
3. Fix Logical Errors
Execute the chkdsk C: /f command. This checks the file system for logical errors and fixes them. If the drive is in use, Windows will schedule the repair for the next reboot. You must restart the machine to complete the actual file system repair.
4. Scan for Bad Sectors
Execute the chkdsk C: /r command. This performs everything /f does plus scans for bad sectors on the physical disk. It attempts to recover readable data and marks damaged sectors, so they are not used again. This is the most thorough and time-consuming option.
DISM: What It Repairs
DISM (Deployment Image Servicing and Management) repairs the Windows image, which is the OS blueprint that defines which components should exist and be valid. It also repairs the component store, the place Windows keeps clean, known good components that are used by Windows Update, optional features, and repairs. If the store is corrupted, Windows can struggle to repair itself properly.
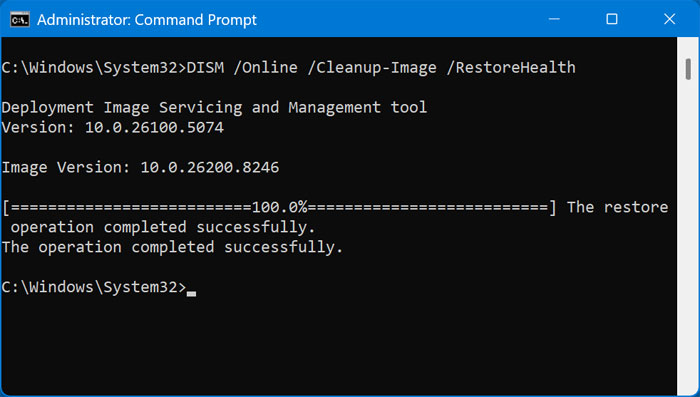
1. Restore Image Health
Execute the DISM /Online /Cleanup-Image /RestoreHealth command. This checks the Windows image and component store for corruption and repairs it using clean files from Windows Update or a local source. This is the standard “repair the online image” command used to restore health to the Windows image and component store.
2. Check Health Status
Execute the DISM /Online /Cleanup-Image /CheckHealth command. This quickly checks whether the Windows image has been flagged as corrupted. This command does not perform a scan or make repairs; it only reports if corruption is already known. Use this string for a rapid diagnostic check.
3. Perform a Thorough Health Scan
Execute the DISM /Online /Cleanup-Image /ScanHealth command. This performs a thorough scan of the Windows image to detect corruption. It does not repair anything but provides a detailed assessment of image health. This scan can take several minutes.
4. Analyze the Component Store
Execute the DISM /Online /Cleanup-Image /AnalyzeComponentStore command. This analyzes the size and health of the component store and determines whether cleanup is recommended. This is extremely useful for diagnosing excessive disk usage related to Windows updates. The resulting data dictates your next cleanup steps.
5. Clean Up System Components
Execute the DISM /Online /Cleanup-Image /StartComponentCleanup command. This removes outdated and unused system components from the component store. This can free disk space and improve update reliability but does not repair corruption. Running this command keeps your internal file repository lean.
SFC: What It Repairs
SFC (System File Checker) scans protected system files currently in use, compares them to clean versions in the component store, replaces missing or corrupted files, and logs what it fixed or could not fix.
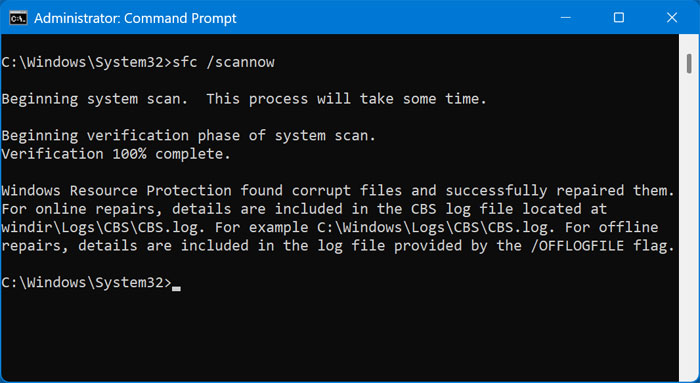
6. Run the System File Checker
Execute the sfc /scannow command. That is the standard SFC scan and repair command. The key detail many people miss is that SFC depends on the component store as its clean source. If the component store is corrupted, SFC can fail or only partially fix what it finds.
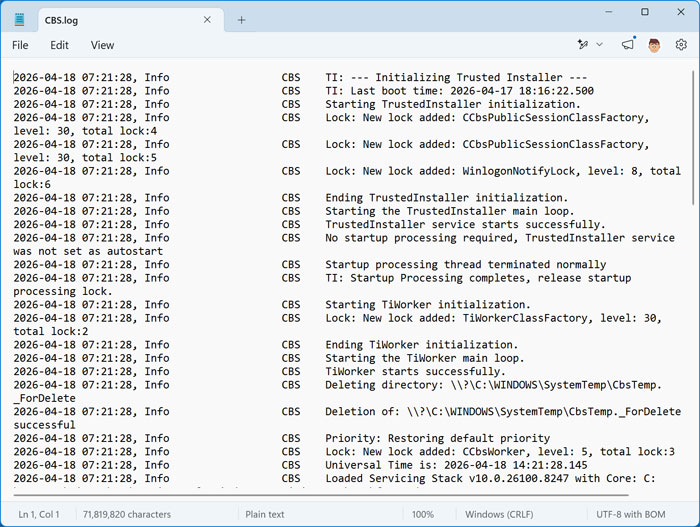
7. Review the CBS Log File
If the System File Checker does find errors, it will give you some details after the scan is complete as well as a location for a log file you can view for more information. This CBS.log file is usually located in the C:\Windows\Logs\CBS directory. The CBS.log file can be quite large in size and will not be easy to read unless you know what you are looking for.
The Correct Order for Windows Problems
This is where most “Windows repair routines” go wrong. If the disk and file system have corruption, files can keep breaking even after you replace them. If the Windows image and component store are corrupted, SFC may not have a healthy source to pull from, so it can fail or only fix part of the problem. If you run SFC first, it may appear to fix things, but it can be a temporary win if the underlying image or disk issues remain. Correct order is not about doing more work, it is about fixing the foundation so the next layer can actually stay repaired.
1. DISM First for Standard Issues
For most Windows 11 update issues and OS level corruption, start with DISM. This repairs the Windows image and component store first. Fixing the baseline blueprint ensures downstream processes have healthy source files.
2. SFC Second for Standard Issues
Run SFC to repair protected system files using that now healthy source. This combination resolves most cases where system files are damaged and Windows Update or features are acting strange. The clean component store allows SFC to operate flawlessly.
3. CHKDSK First for Disk Suspicions
Sometimes the standard DISM then SFC flow is not enough, because the real issue is lower in the stack. If you suspect disk or file system corruption, run CHKDSK first to stabilize the disk and file system. Address the physical storage issues before launching software scans.
4. DISM Second for Disk Suspicions
After the drive is stable, run DISM to repair the Windows image and component store. The image servicing tool requires a structurally sound hard drive to write its files. You rebuild the blueprint on top of the fixed sectors.
5. SFC Last for Disk Suspicions
Finally, run SFC to repair protected system files last. This order helps prevent the endless repair loop where you “fix” system files and then they corrupt again because the underlying storage layer is still unreliable.
Common Mistakes That Break Troubleshooting
If you want faster, lasting fixes, avoid these common habits. Troubleshooting requires absolute precision.
1. Running SFC First Every Time
This can be a symptom fix, not a cause fix. You waste time replacing active files when the core repository contains identical corruption. Address the source layer before treating the visible files.
2. Ignoring Disk Corruption
If the file system is unstable, repairs above it can keep failing. Writing healthy system files onto a dying hard drive accomplishes nothing. Test the physical media layer continuously.
3. Assuming One Tool Fixes Everything
Each tool repairs only one layer. No single command line utility scans the hardware, restores the image, and verifies the user files simultaneously. Compartmentalize your troubleshooting steps.
4. Repeating Commands Without Verification
Shortcuts often lead to recurring failures instead of a clean resolution. Blindly typing commands generates false confidence. Always read the command prompt output messages to confirm success.
Frequently Asked Questions
1. Should I run SFC first?
It is usually better to ensure the Windows image and component store are healthy first, because SFC compares active files to clean versions stored there. If the store is corrupted, SFC can fail or only partially work. Secure the foundation before touching active files.
2. Does DISM replace system files?
DISM repairs the Windows image and the component store, which provides the clean source Windows uses for repairs and updates. SFC is the tool that scans protected system files currently in use and replaces corrupted or missing ones. The two utilities perform entirely separate functions.
3. When do I use CHKDSK in the process?
Use CHKDSK first when disk or file system issues are suspected, then follow with DISM and SFC so you do not end up repairing files that get corrupted again. A failing hard drive dictates immediate CHKDSK intervention.
For additional training resources, check out our online IT training courses.
Check out our extensive IT book series.