Last Updated on May 30, 2026
Most people like to personalize their computer to some degree to make it more “their own” to give it that custom look. Sure, you can do things such as add custom Windows themes or desktop backgrounds. Or maybe even an animated desktop wallpaper.
One way to personalize your computer and make it more efficient at the same time is to add a calendar to your desktop. This way you can enjoy your custom desktop wallpaper and have a current view of the days of the month all in one place. This comes in especially handy if you like to hide the date and time in the Windows system tray.

One easy way to add a customizable calendar to your Windows desktop is to use the free Windhawk app. Windhawk works by adding what are known as mods into the app which can then be used to tweak and customize how Windows looks and functions. Windhawk can be downloaded from their website here.
Installing the Calendar Live Overlay Mod
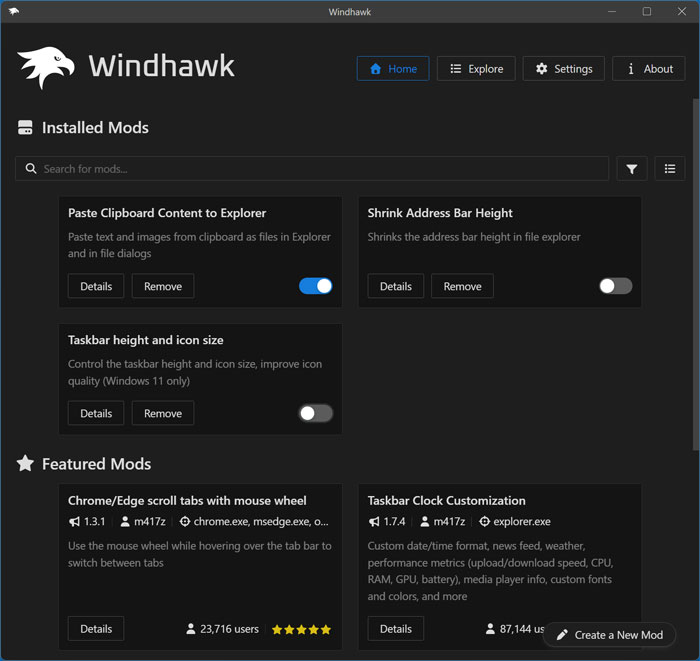
1. Open the Windhawk Home Screen
Once you have Windhawk installed you will see your Home section that will show any installed mods. It also displays some suggested or featured modifications. This interface acts as your main dashboard for customizing the operating system.
2. Search for the Calendar Tool
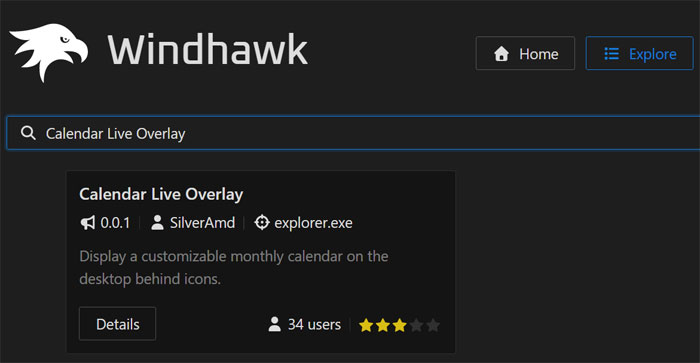
The mod we will be installing is called Calendar Live Overlay. You can find it easily by searching for it in the search box located in the Explore section. Once you find the correct mod, you can then click on the Details button to learn more.
3. Accept the Installation Risk
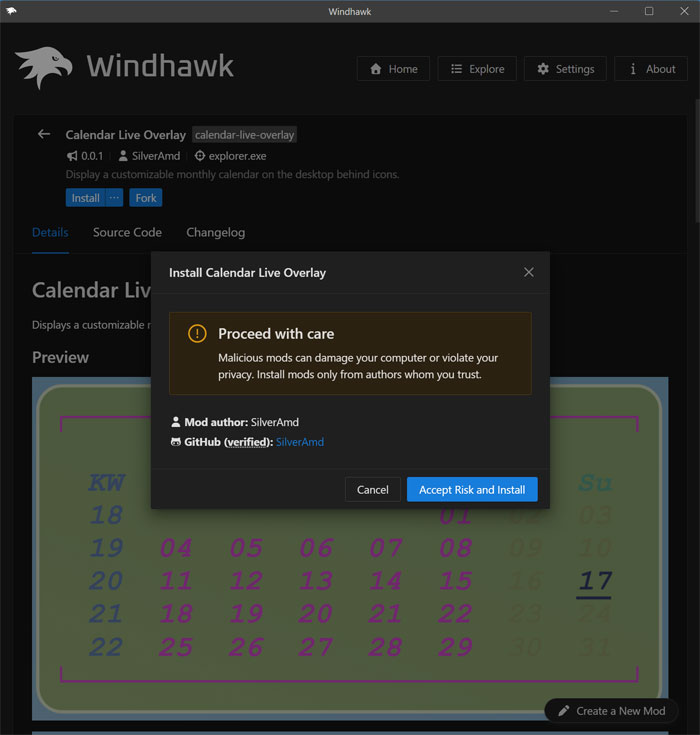
From there you will need to click the Install button. You will then see a warning telling you to proceed with care when installing mods. This is completely normal and you will see this specific warning when installing any modification script in Windhawk.
Configuring Your Calendar Settings
1. Access the Mod Settings Menu
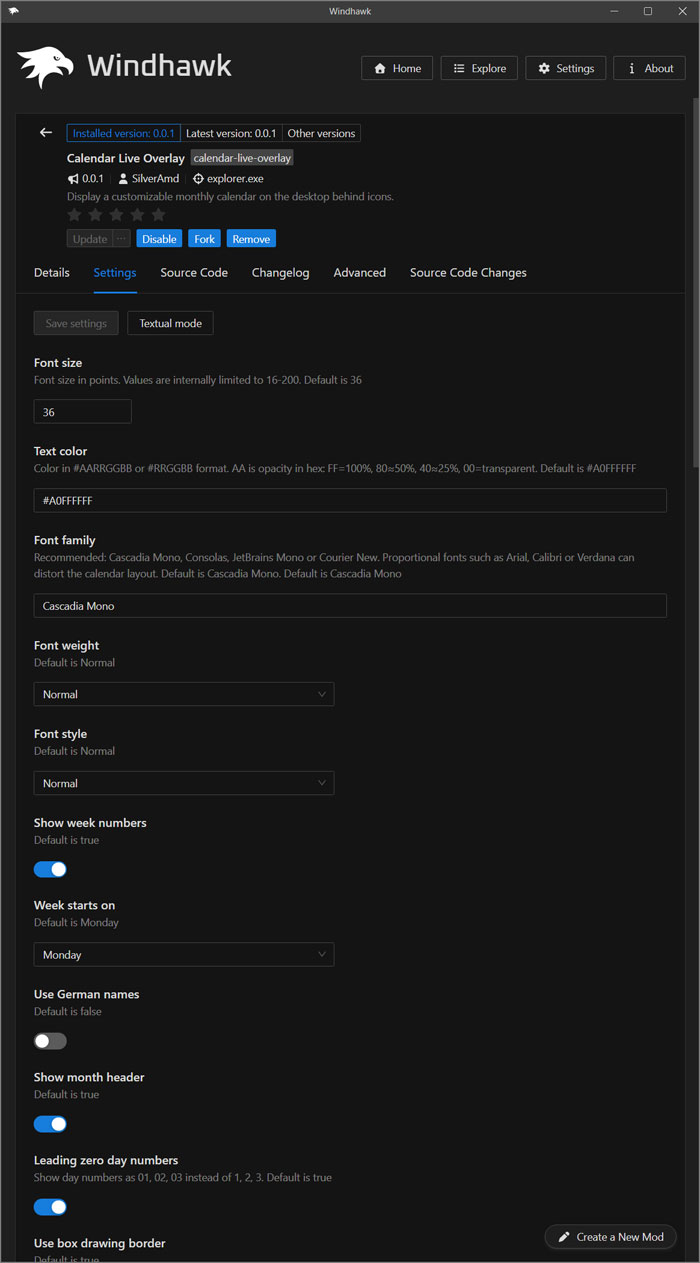
Once the mod is installed, you will be able to enable or disable it instantly as needed. You can also remove it permanently if you no longer wish to use it. You can then go to the Settings tab where you can configure exactly how the calendar is displayed on your desktop.
2. Save Your Customizations
There are many settings you can choose from to tweak the visual layout. Each time you make a change, you will need to click the Save settings button to have them applied. The desktop will refresh automatically to reflect your new parameters.
Customizing the Calendar Visuals and Layout
1. Integrate with Your Desktop System
This tool operates seamlessly behind your desktop icons utilizing the Desktop Live Overlay approach. It automatically updates its display a few moments after every single minute passes. The script is crafted to aesthetically complement the main Desktop Live Overlay Mod perfectly.
2. Adjust the Display and Layout
The app displays the current month as a sleek, unobstructed desktop overlay. It offers highly flexible placement via specific absolute coordinates or percentage-based positioning. You can restructure the grid easily with adjustable spacing between the rows and columns. It even accommodates complex multi-display setups with comprehensive multi-monitor support.
3. Modify Typography and Styling
You get full control over the specific typography. This includes the font family, font size, visual weight, and overall style. It supports personalized text coloring complete with granular alpha transparency levels. It also features an optional month header that can be aligned perfectly to the left, center, or right.
Formatting Dates, Highlights, and Borders
1. Change Calendar and Date Rules
The tool lets you toggle between a Monday or Sunday start for the consecutive weeks. It includes localized naming options for days and months in either English or German. It also provides fast toggles for displaying week numbers and leading zeros on single-digit days.
2. Setup Highlighting and Accents
You can emphasize the current date using distinct colors, heavy underlines, or bold text. It identifies weekend days with customizable opacity levels and totally unique colors. You can easily color-coordinate specific visual elements by assigning custom hues to week numbers and weekday names.
3. Add Borders and Background Effects
The customization engine includes an optional box-drawing border with adjustable content spacing. It features a completely customizable backdrop with settings for color, padding, and rounded corners. You can even apply blur effects and change the overall border thickness.
4. Review Your Final Applied Overlay
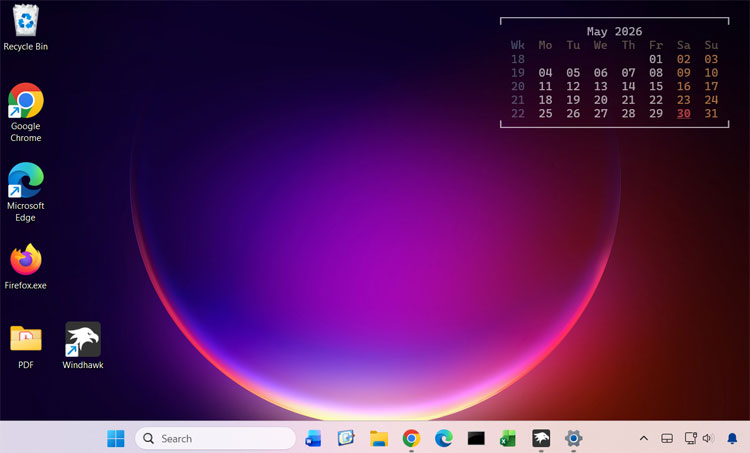
Once you enable and configure your calendar settings, you will see it at the upper right corner of your desktop. You can also move it to other specific locations or remove the week numbers entirely. Change which days are highlighted or displayed with a different color and much more.
5. Add Final Custom Backgrounds
You can also add backgrounds and borders to your calendar to fit your specific aesthetic. Change the core font to further customize the exact way it looks against your wallpaper. It integrates directly with your active Windows environment.
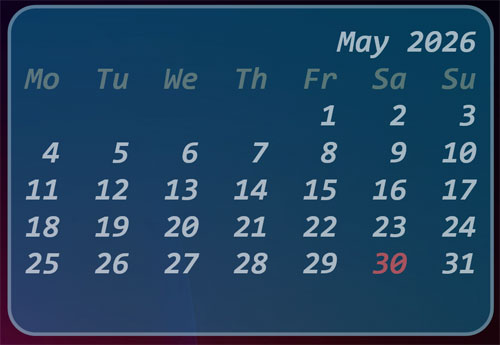
As you can see, it’s pretty easy to add a bit of customization to your desktop while making it more efficient at the same time using Windhawk. Here are some videos showing how many of the other Windhawk mods work.
For additional training resources, check out our online IT training courses.
Check out our extensive IT book series.