
Last Updated on May 19, 2026
As you probably know, the hard drive in your computer is what stores things like your operating system (Windows, Linux, macOS etc.), your personal files and your programs. Many times, you will want to upgrade your hard drive to a faster or larger one. You may even have a situation where your drive is failing, and you want to copy your data to a new one before it fails. Or you may be building a new computer and want to copy your drive configuration to a new drive for your new PC.
There are many disk cloning apps available to use for this task. Macrium Reflect is one of the more popular versions and used to be free. Now they want you to pay to use the app and it’s the type of charge where you need to pay yearly for a subscription. In this article, we will be showing you how to download, install and use the free version of Macrium Reflect to clone a Windows drive to a new disk.

Downloading and Installing Macrium Reflect Free
1. Download the Legacy Installer
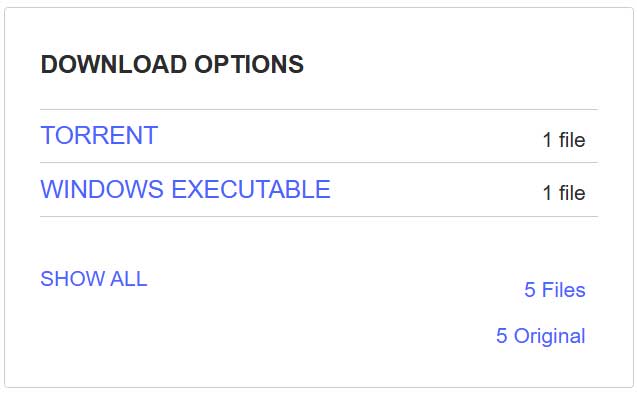
The first thing you will need to do in order to use the free version of Macrium Reflect to clone your Windows drive is to download the app. Of course, you will not be able to get it from the Macrium website so you will need to download it from the archive.org website here. When you get to the website, look for the download option section and download the Windows executable version.
2. Start the Installation Process
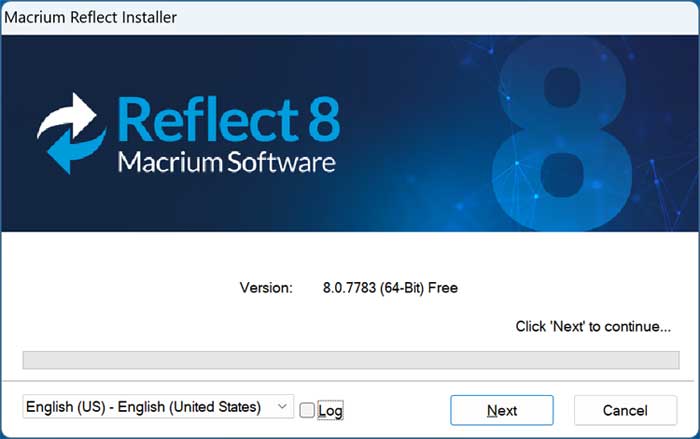
The installation of Macrium Reflect version 8 is fairly straightforward. You can watch the video at the top of the page to see the entire process. You can probably uncheck the Log box on the first screen and click the Next button to continue.
3. Accept the Personal Use Agreement
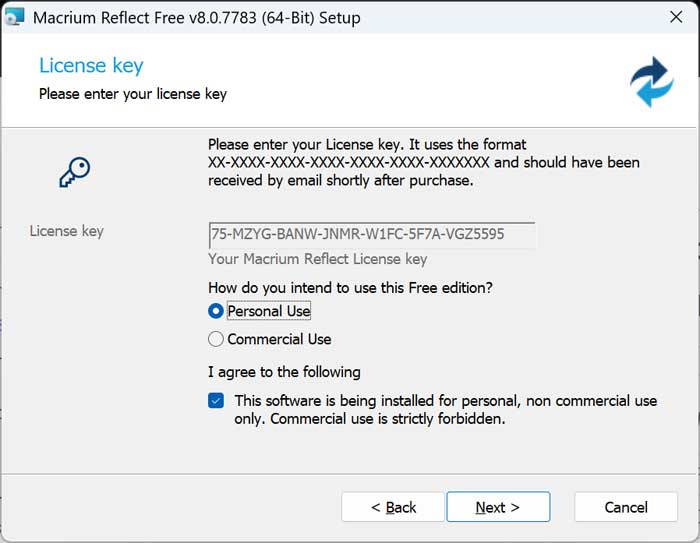
You will then need to accept the license agreement to continue with the installation. On the screen that says license key, you will need to choose the option for Personal use and check the box that says This software is being installed for personal, non commercial use only. Commercial use is strictly forbidden for this free legacy build.
4. Skip the Software Registration
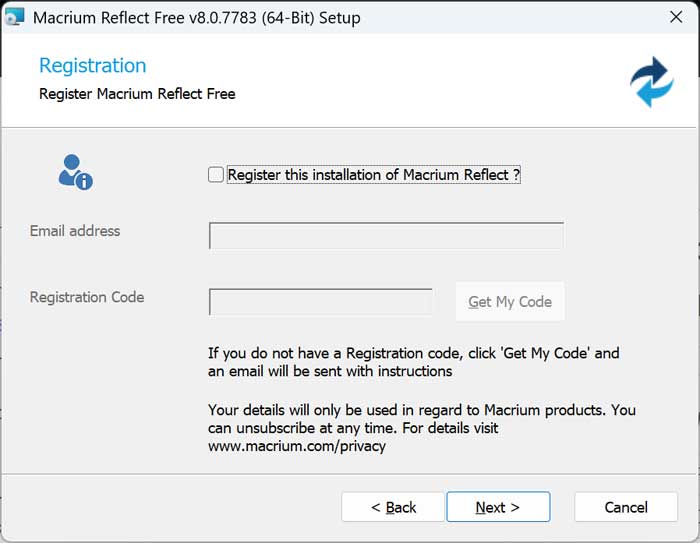
On the registration screen, uncheck the box that says Register this installation of Macrium Reflect. You do not need to provide an email address to use this cloning utility. Skipping this step prevents promotional emails from cluttering your inbox later.
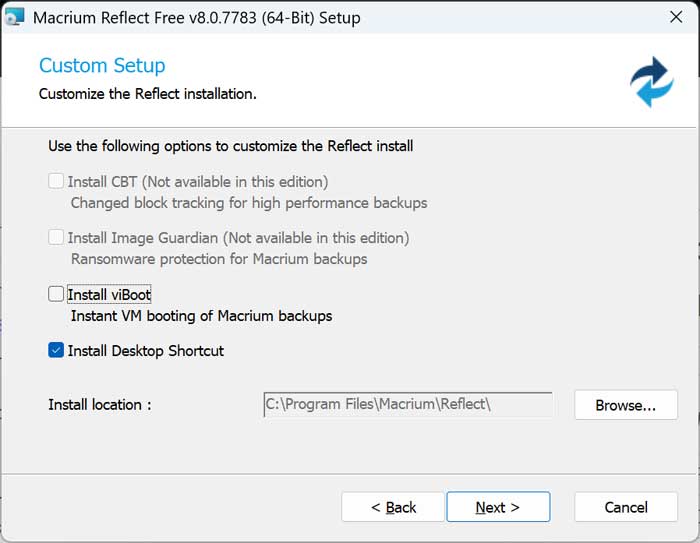
5. Finalize the Custom Setup
For the custom setup screen, you don’t need to change any of the options unless you don’t want a desktop shortcut or want to change the installation location. You can easily change the target directory here if your primary C drive lacks free space. Leave the default settings alone and click next to complete the setup wizard.
6. Ignore the Update Prompt
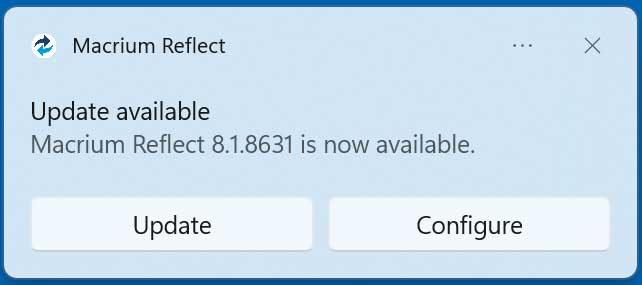
When you first run Macrium Reflect, you may get a Windows notification telling you that there is an update available. If you click the Update button, the program will most likely not get updated so you can ignore this notification. The software developer shut down the automatic patching servers for this specific free version long ago.
7. Disable Future Update Checks
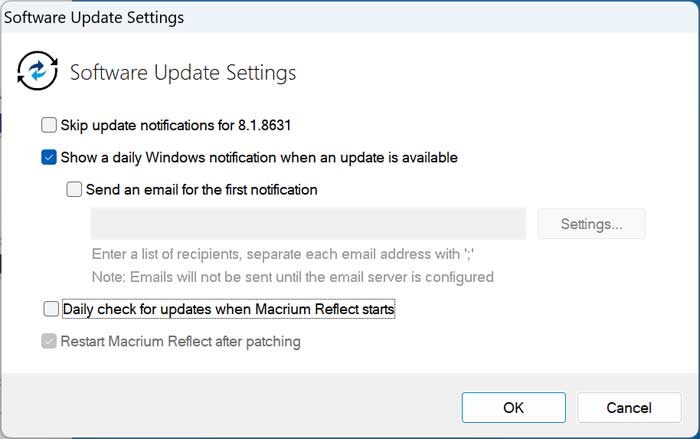
If you click the Configure button instead, it will open the software update settings where you can make any changes such as disabling the daily update check. Uncheck the box to disable the recurring notifications permanently. This prevents the software from throwing an annoying error message every time you launch the application.
Cloning a Windows Drive to a New Disk Process
1. Review Your Disk Management Layout
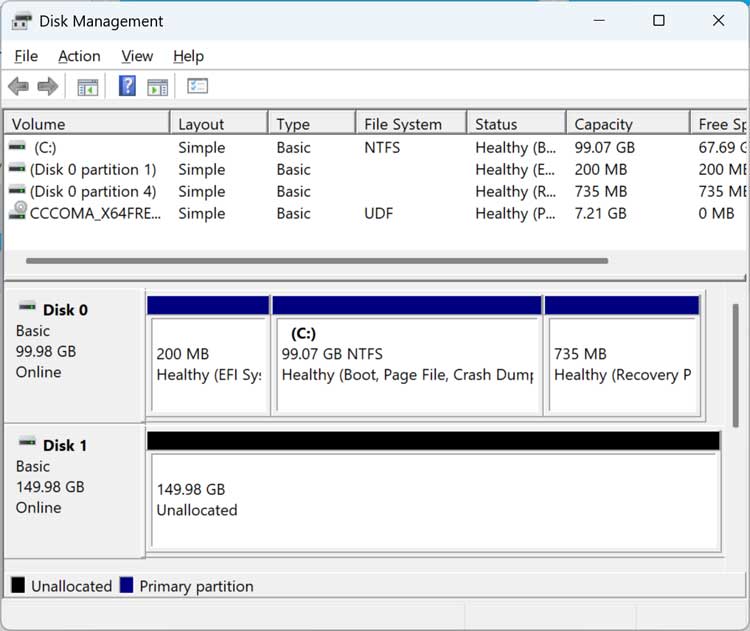
Before we begin the disk cloning process, we will open the Windows Disk Management tool so you can see our hard drive configuration. As you can see, Disk 0 is our 100 GB Windows drive and Disk 1 is our blank 150 GB drive with no volumes or partitions configured on it. Verifying your layout here prevents you from accidentally overwriting the wrong disk.
2. Select the Source Windows Drive
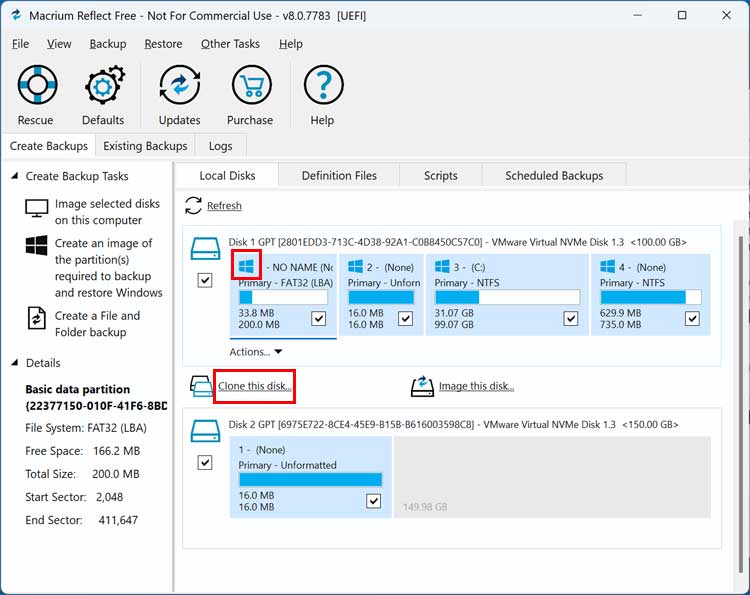
We will now open Macrium Reflect to start the disk cloning process. The app should show you all the drives configured on your computer just like Disk Management does. We will now click the Clone this disk link under our Windows drive. You will also see that the Windows drive has a Windows logo over each partition which is an indicator that it is the Windows drive.
3. Choose Your Blank Destination Disk
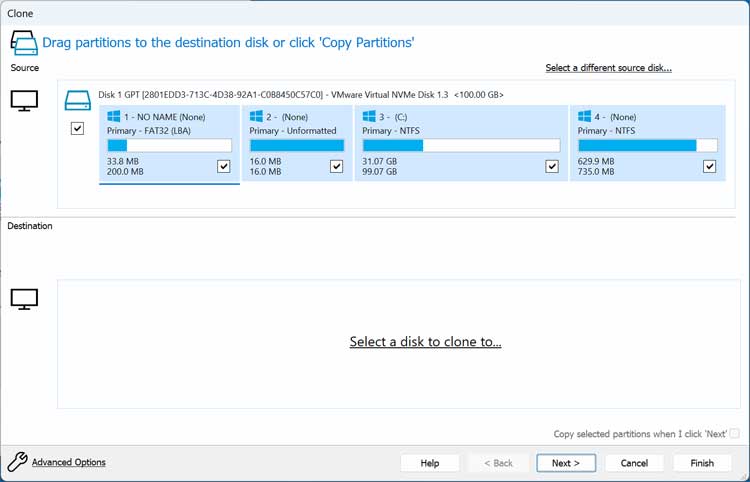
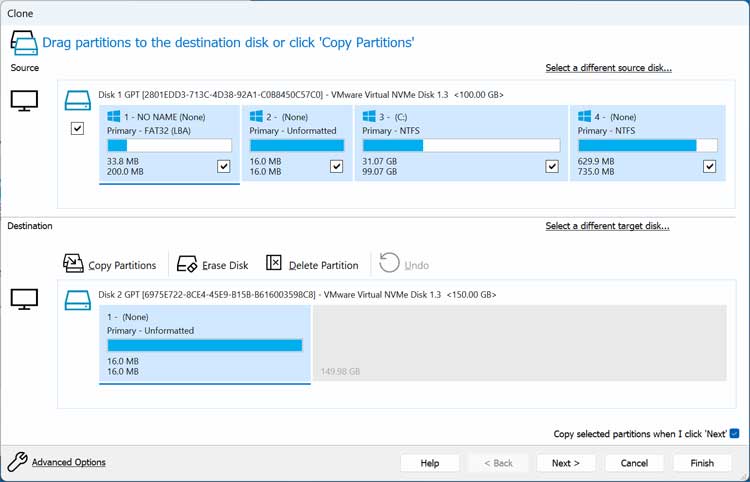
We will then click the link that says Select a disk to clone to and choose our 150 GB blank hard drive. You must carefully select the correct destination drive from the provided hardware list. Picking the wrong target drive will permanently wipe out all existing data on that disk.
4. Configure the Advanced Cloning Options
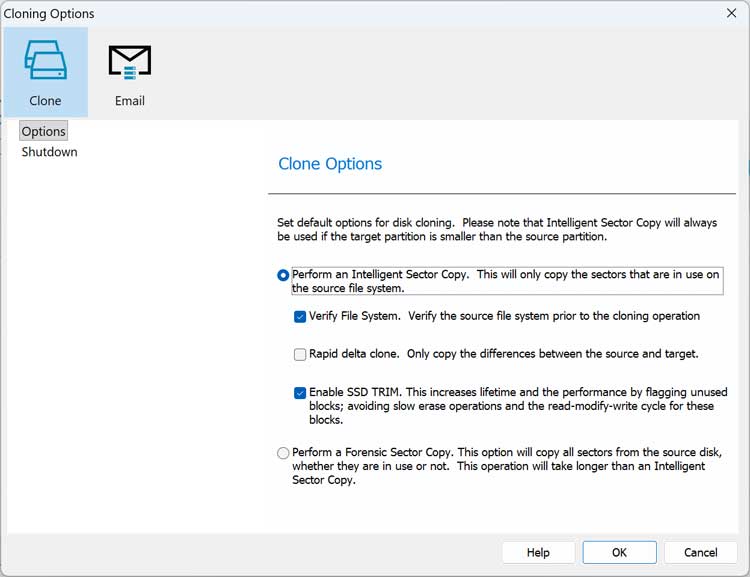
If you click on the Advanced Options link, you will be able to change some of the cloning options such as having it verify the file system prior to cloning the disk. This smart sector check prevents catastrophic data corruption from transferring directly to the new drive.
5. Skip the XML Backup Definition
Once you click the Finish button, you will be able to run the backup\clone job right away. The option for Save as a Backup Definition File can be used if you want to run this same job again which is used more for backup jobs rather than cloning jobs. Uncheck the box since we are only doing a one time hardware swap today.

6. Execute the Cloning Procedure
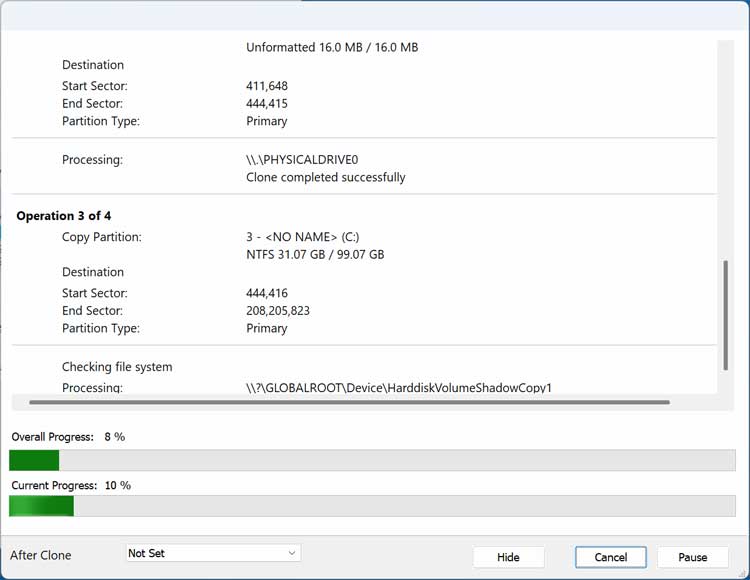
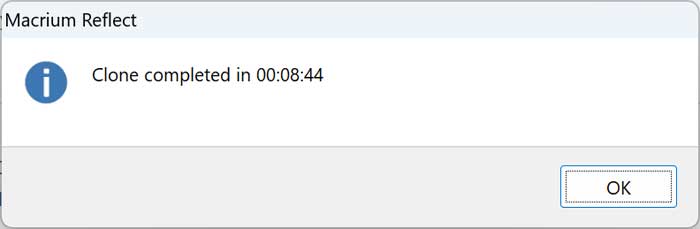
Once you click the OK button, the cloning procedure will begin and will take several minutes to complete. The exact timeframe depends heavily on your specific hardware speed. Fast NVMe solid state drives will finish this raw data transfer much faster than old mechanical platters.
Extending the C Drive to Use the Extra Space from the New Drive
1. Check the Unallocated Storage Space
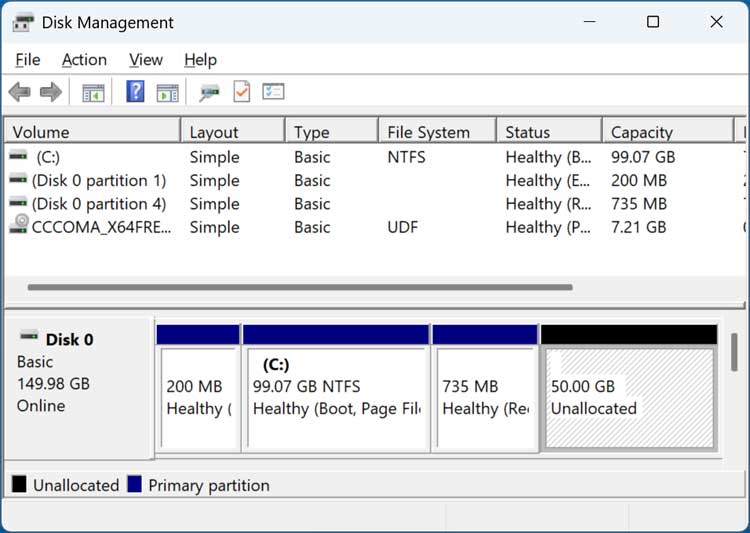
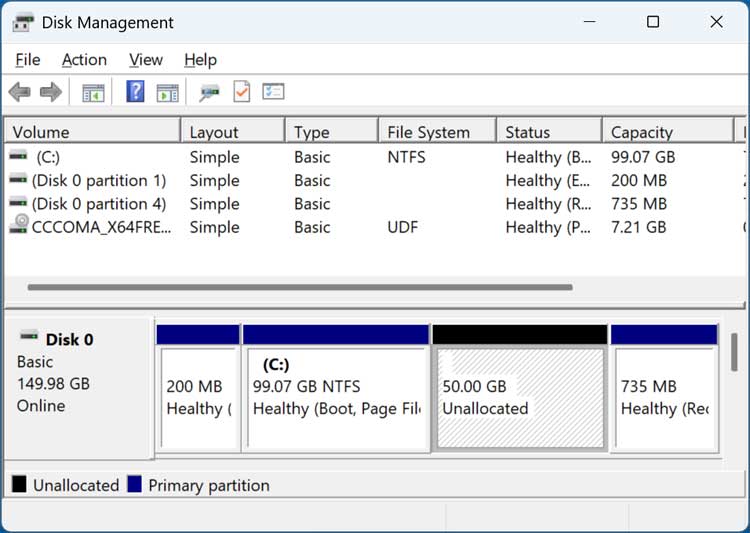
We will now remove the old 100 GB drive and boot the computer with the new 150 GB drive. Now when we open Disk Management, you will notice that the extra 50 GB from the new larger disk is shown as unallocated. You can also see that the 735 MB recovery partition is in between the C drive and the unallocated space so we will not be able to right click the C drive to extend it because the option will be greyed out.
2. Download the NIUBI Partition Editor
To move this recover partition out of the way so we can extend our C drive, we will be using a free app called NIUBI Partition Editor which can be downloaded here. They have an installable version or a portable version that doesn’t require anything to be installed. Grab the portable zip file to save time and extract it directly to your desktop.
3. Select the Stubborn Recovery Partition
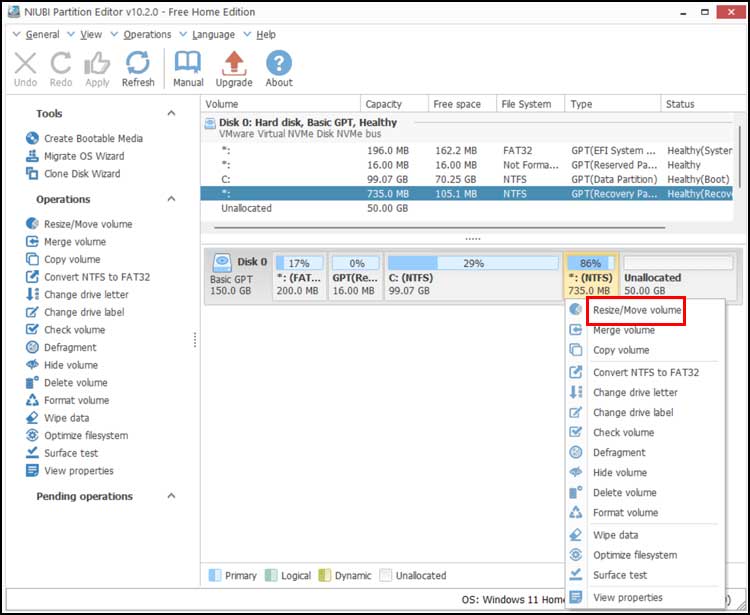
Once you open NIUBI Partition Editor, you will see a similar looking interface to Disk Management but with many more options. What we will now do is right click on the 735 MB recovery partition that is in the way and choose Resize/Move volume. This allows us to manually shift the stubborn system files without breaking the boot record.
4. Move the Partition to the Right
A new window will pop up showing a visual representation of your storage blocks. Next, we will drag this volume all the way over to the right, so it is to the right of the unallocated space and then click the OK button. This pushes the empty space directly next to your primary operating system partition.

5. Apply the Pending Disk Changes
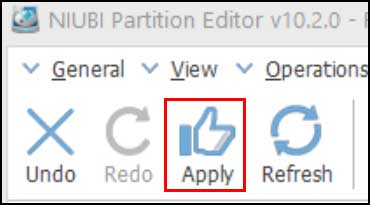
Now we will need to click the Apply button to have the changes take effect. You should have File Explorer closed before applying the changes to make sure there are no conflicts. The software requires this manual confirmation before it modifies the raw disk sectors.
6. Extend the C Drive Volume
Now when we go back to Disk Management, we can see that the C drive and the unallocated space are next to each other which will then allow us to extend the C drive and use the extra space for Windows. You can also extend the C drive using NIUBI if you want.
7. Verify the Final Storage Capacity
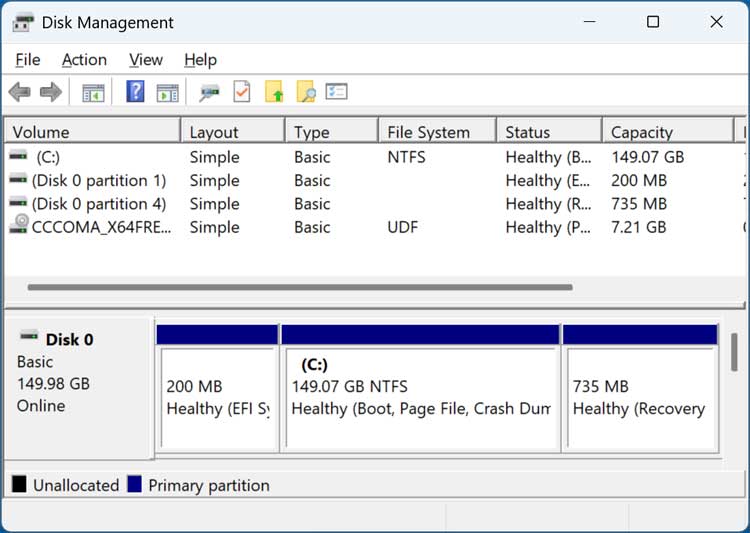
The image below shows our hard drive after extending the C drive and now we are using the entire 150 GB of space for Windows. Your operating system will instantly recognize the massive storage upgrade. You can now safely delete the portable NIUBI software from your desktop.
For additional training resources, check out our online IT training courses.
Check out our extensive IT book series.






