Last Updated on May 14, 2026
As you probably know, Windows 11 is a more secure operating system that Windows 10 and has some stricter requirements such as having a TPM (Trusted Platform Module), Secure Boot and UEFI rather than BIOS.
Sure, there are ways to get around these requirements such as creating your own custom Windows ISO image file or using a tool like Rufus to bypass the requirements.
One security feature of Windows is the process of encrypting your hard drive so that if your computer or drive itself is ever stolen, your data will remain secure. One issue with this is that Windows will often encrypt your drive without you knowing and if your computer has an issue that affects a security component, you may find yourself locked out of your PC and not able to access your data.

Windows 11 Pro uses BitLocker to do this while Windows 11 Home uses Device Encryption which is a simplified version of BitLocker with a different level of control and visibility. BitLocker is not applied to the computer automatically for Windows 11 Pro, but Device Encryption usually is when you first setup your computer.
If you have BitLocker or Device Encryption enabled and your computer has an issue that affects them such as a power outage during a major Windows update, hardware change or a motherboard UEFI/BIOS update that fails, then there is a good chance you will be prompted to enter your BitLocker key on startup to get back into your computer.
1. Understand where your key is stored
If you have your BitLocker or Device Encryption key, then this shouldn’t be a problem. But if you don’t know it or didn’t even realize that you had one, then this can be a problem. Many people have no idea this feature is turned on. If you were to set up BitLocker manually, you would be prompted to save your key to your Microsoft account, save to a text file, or print it out. When you enable Device Encryption, the key is automatically saved to your Microsoft account online.
2. Log into your Microsoft account
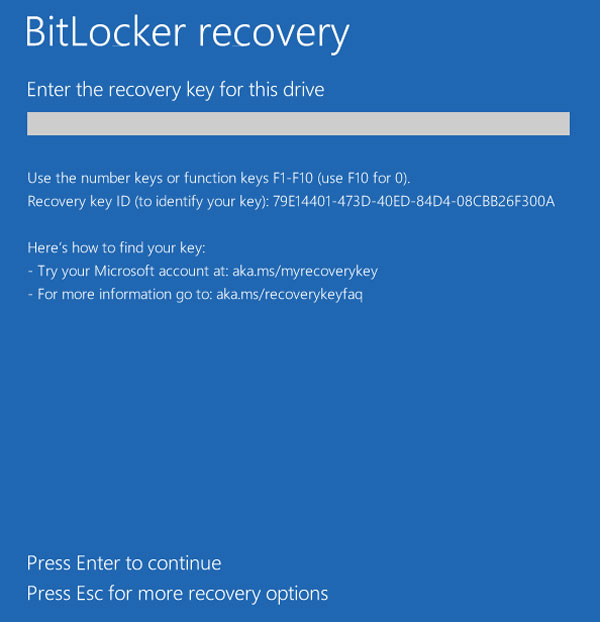
So if you start your computer and see the blue BitLocker recovery key, you will need to type in your key otherwise you will not be able to get into your computer or even recover your files from the drive in general. If you don’t have a copy saved or printed, you can log into your Microsoft account with the email address tied to the user account you log into Windows with. You will need to do this on another computer since you will not be able to use the computer with the BitLocker issue. Grab your phone or a spare laptop to do this.
3. Locate your computer under Devices
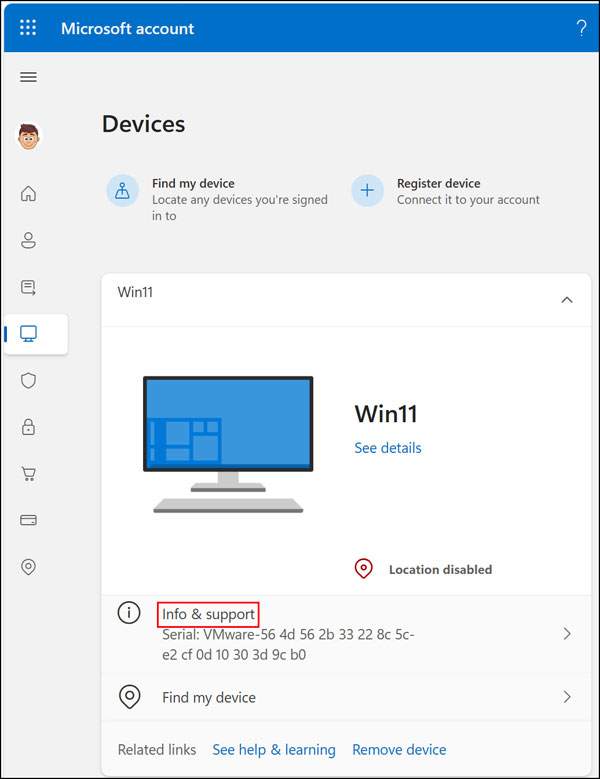
Once you log into your Microsoft account, you will need to click on Devices and find the computer that has the BitLocker issue if you have more than one computer tied to your account. Click on the picture of the computer to expand the menu options. Then you can click on Info & support.
4. Manage your recovery keys
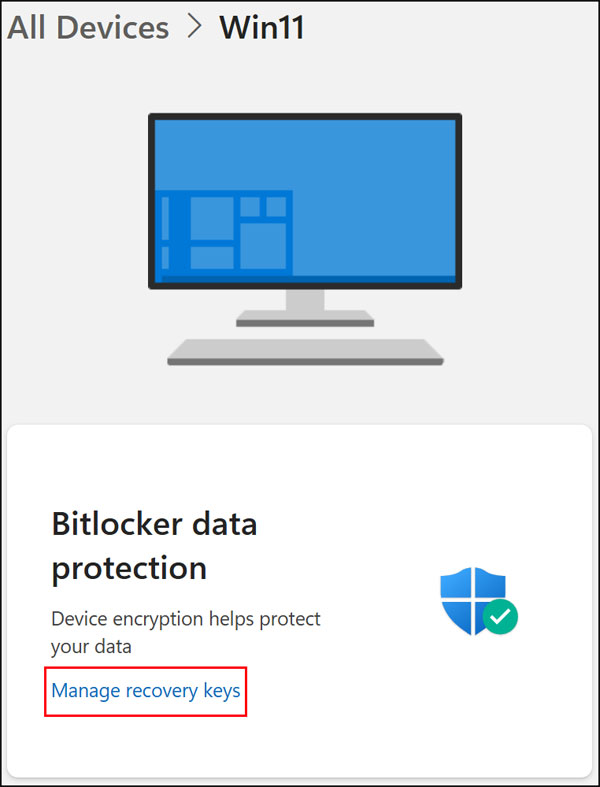
This support page loads all of your hardware details and warranty status. Scroll down until you spot the BitLocker data protection section. Then in the BitLocker data protection section, click on Manage recovery keys. This pulls up the master list of encryption numbers stored on the Microsoft servers.
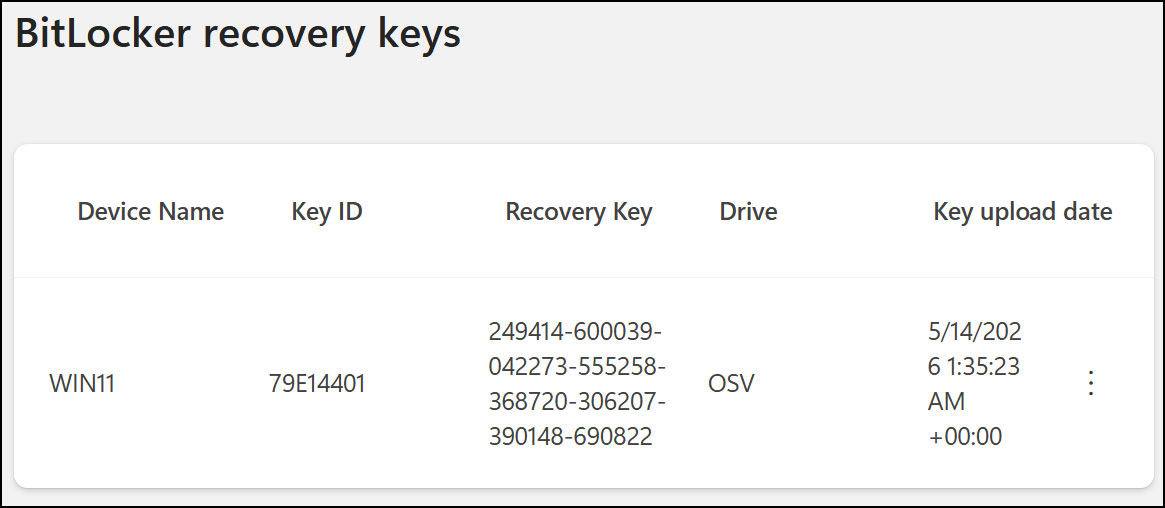
5. Find the correct recovery key
You will then be shown your BitLocker recovery key and its upload date. If you have more than one here, then there is a chance you have disabled and enabled BitLocker or Device Encryption again on this computer or have more than one encrypted drive. You can also click on three vertical dots to delete any keys that are no longer valid. Just be sure you no longer need them or back them up first
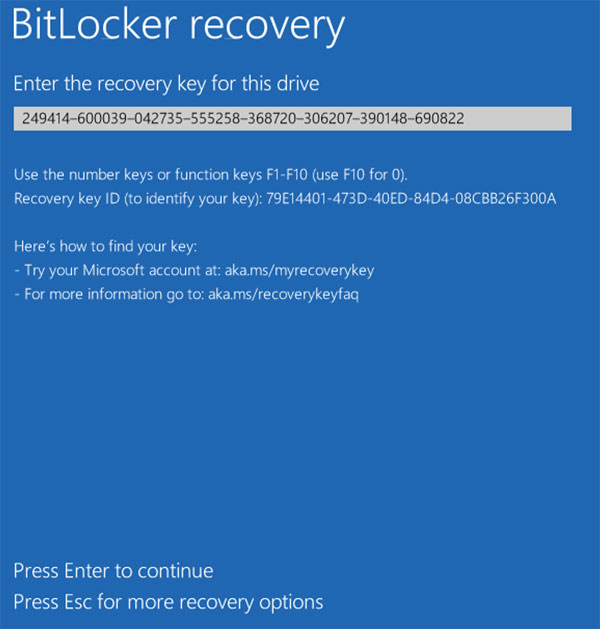
6. Type in your BitLocker recovery key
Look at the numbers on your phone screen and turn back to your locked computer. You can then type in your BitLocker recovery key and press Enter to continue. Take your time pressing the numbers on your keyboard. Typing the wrong number multiple times can lock the system up completely.
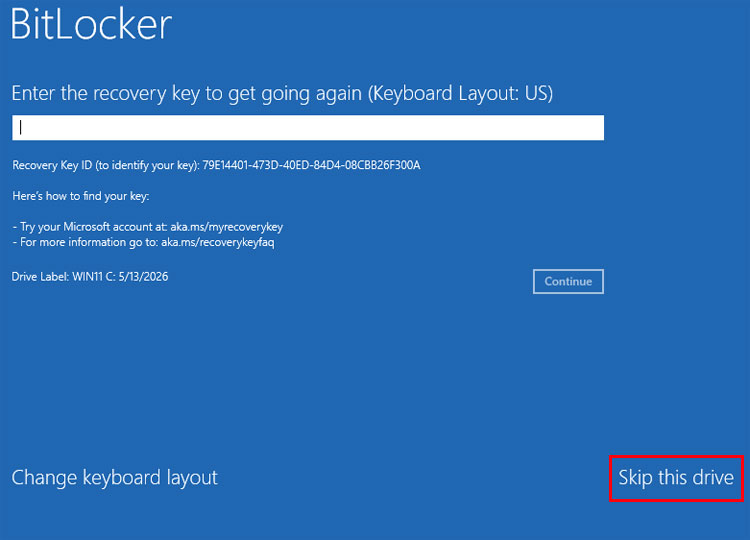
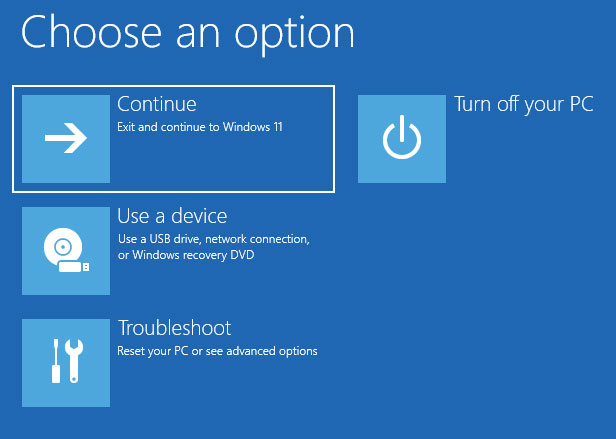
7. Check Windows Recovery options
If you press Esc, you will be taken to a similar screen where you can type in the key once again or change your keyboard layout. If you click on Skip this drive it will take you into the Windows Recovery Environment (WinRE) where you will see additional options to help get you back into your computer. But if you do not have your key, these options will most likely not help you.
8. Setup your login PIN again if needed
Once you enter the correct BitLocker recovery key, Windows should then boot back up to your desktop. Depending on the cause of the BitLocker error, you may have to reset your Windows Hello PIN before you can see your desktop. Security components resetting in the background usually cause this to happen.

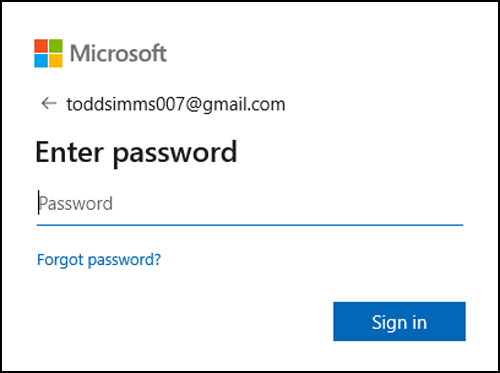
9. Enter your Microsoft account password
Resetting your PIN requires you to enter the password for the Microsoft account you are using to log in with. Microsoft uses this step to prove your identity. It will then email you a code that you will need to type into the next screen. Check your phone for that code to move forward
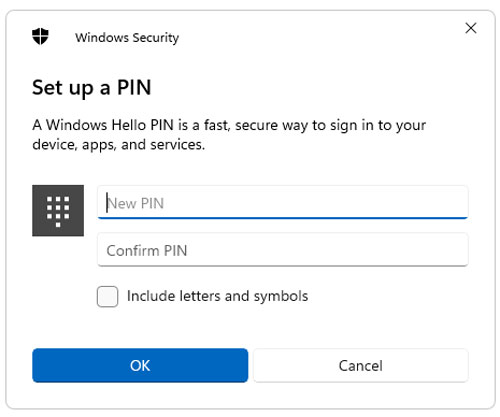
10. Create a new Windows Hello PIN
After that, you can reconfigure your login PIN and can use the same one you were using before this issue started. You can also type a brand new number into the boxes if you want a fresh code. Click OK to finish the process and finally see your desktop files.
Checking your BitLocker or Device Encryption status
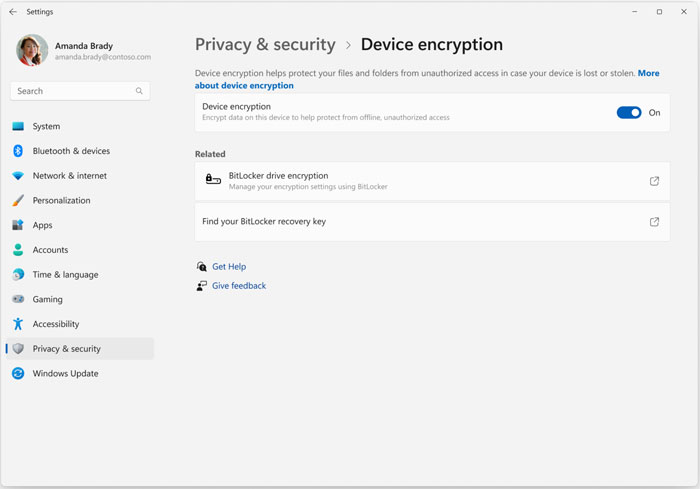
11. Turn off Device Encryption in Windows Home
If you do not want to use BitLocker or Device Encryption to protect your files, you can easily turn it off so you won’t have to worry about seeing the BitLocker recovery screen again. For Windows Home users, you can go to the Windows Settings app. Navigate to Privacy & security > Device Encryption and turn it off. This decrypts your hard drive in the background.
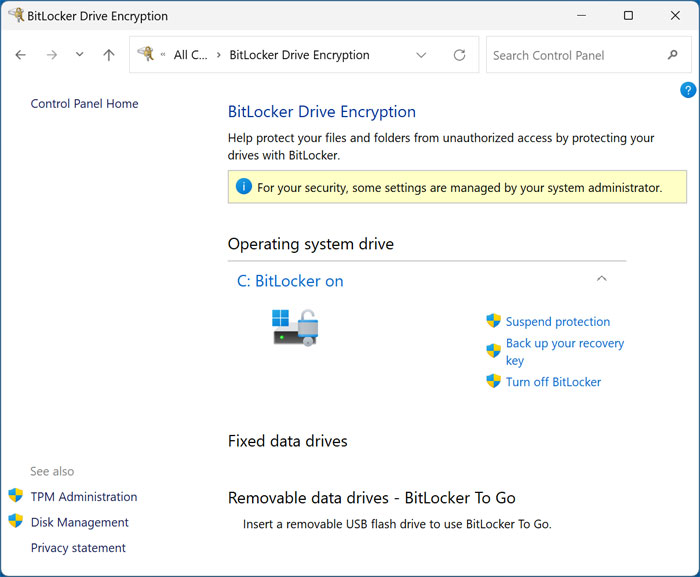
12. Turn off BitLocker in Windows Pro
For Windows Pro users, you can open Control Panel, and you will find the BitLocker Drive Encryption settings. Look for your operating system drive in the menu list. Then all you need to do is click on Turn off BitLocker and it will decrypt your hard drive. You can keep using your computer normally while the drive finishes the process.
Then all you need to do is click on Turn off BitLocker and it will decrypt your hard drive.
For additional training resources, check out our online IT training courses.
Check out our extensive IT book series.