
Last Updated on June 13, 2026
With personal computers getting more advanced and more complex at the same time, it makes sense that anyone who likes to work on or repair their own computers has the proper tools to do so. There are many free and pay for apps out there which are designed to help you troubleshoot and fix common and not so common computer issues such as errors and BSODs.
If you are a Microsoft Windows user, then you have most likely had your share of PC issues. Many times, these problems can be so severe that you will need to completely reinstall Windows from scratch. Fortunately, there are tools you can use to try and repair Windows rather than have to resort to a complete reinstall. In this article, we will be showing you how to create the ultimate PC repair USB with NHV BOOT.

NHV BOOT is an incredible all-in-one software solution that contains multiple professional tools you can use to rescue a failing computer. It allows you to confidently do things such as system recovery and repair, backup restoration and data management, disk and storage adjustments, deep diagnostics and hardware testing, networking and remote access, and general security tasks.
1. Download the NHV BOOT Zip File
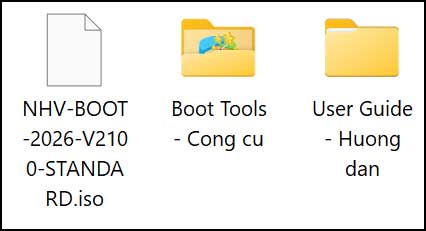
The very first thing you will need to do is download the massive NHV BOOT zip file directly from their official website linked here. Once the large download is complete and you extract the zip file, you will have the core NHV BOOT ISO file, a folder with additional portable tools, and another folder that contains helpful documentation about the NHV BOOT utilities. The main ISO file will be over 3GB in size, so make absolutely sure you have plenty of room on your hard drive to successfully extract it.
2. Choose Your Flash Drive Creation Tool
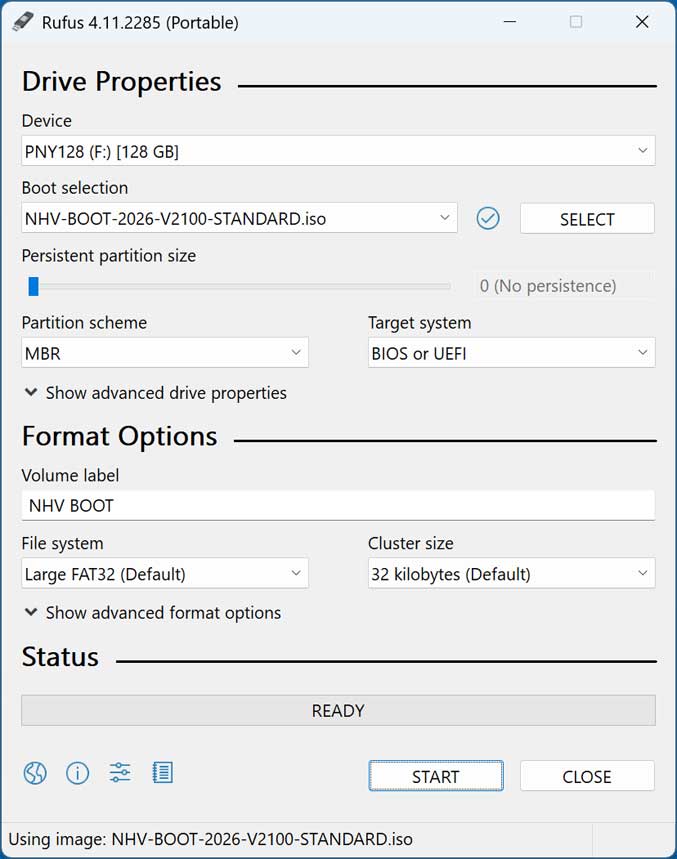
To successfully create the NHV BOOT flash drive and properly make it bootable, you will need to use your favorite bootable flash drive creation tool. We will be using the incredibly popular Rufus utility to create our flash drive for this specific tutorial. You can easily find a portable copy of the Rufus software sitting right in the extracted Boot Tools folder, or you can download it yourself directly from the official Rufus website.
3. Select the Correct Target Flash Drive
Once you have the Rufus application running on your desktop, all you need to do is carefully select the flash drive you wish to use from the Device dropdown list at the top. If you happen to have more than one flash drive plugged in, make absolutely sure you choose the correct one from the list. Everything currently sitting on that selected drive will be permanently wiped and erased during the bootable creation process.
4. Browse for the NHV BOOT ISO File
Then, looking closely at the Boot selection section, click on the “Select” button on the right side to manually browse to the exact location of your extracted NHV BOOT ISO file. You should be perfectly fine simply leaving the default settings for the rest of the configuration selections provided by Rufus. Then you can confidently click the Start button at the bottom of the window to begin aggressively writing files to create your repair flash drive.
5. Wait for the Drive Creation to Finish
The creation process will take several minutes to complete as Rufus unpacks the 3GB ISO file and transfers it to the removable media. You will know the entire process is officially complete when you have a solid green progress bar at the bottom with the word “Ready” displayed prominently in the middle of it. Once it says ready, you can safely close the Rufus application and prepare to test your new drive.
6. Boot Your Computer from the USB Drive
Once you have your rescue flash drive completely created, you can then configure your computer’s BIOS or UEFI settings to boot directly to the flash drive itself to start the NHV BOOT tool. When you successfully boot to your NHV BOOT flash drive, you will actually see a familiar Windows 11 loading logo appear on your screen. Do not panic, as it is just loading the custom repair environment and is not actually booting into your broken internal Windows installation.
7. Navigate the Custom Desktop Interface
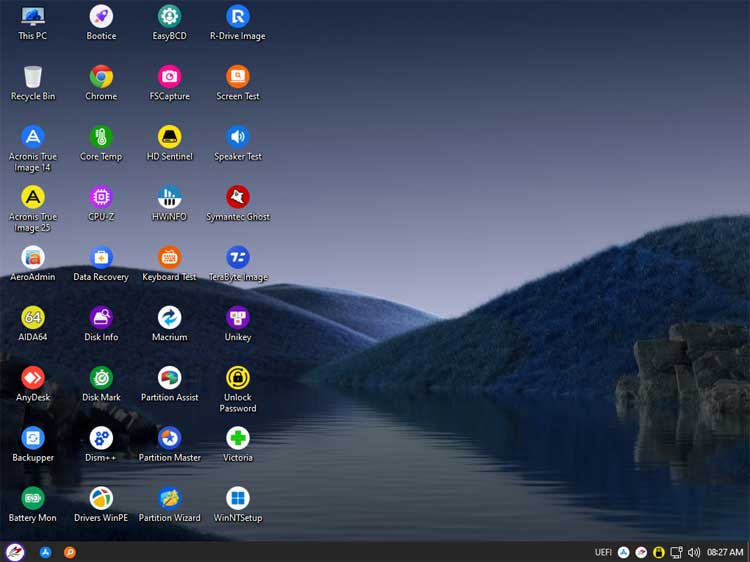
After the loading screen finishes, you will then be presented with a customized Graphical User Interface (GUI) that feels incredibly familiar. It contains a standard desktop background, a bottom “taskbar”, a functional “start menu”, and various helpful software icons scattered across the screen. This allows you to comfortably troubleshoot the broken computer in an environment that operates exactly like a normal Windows desktop.
8. Explore the Start Menu and Search Features
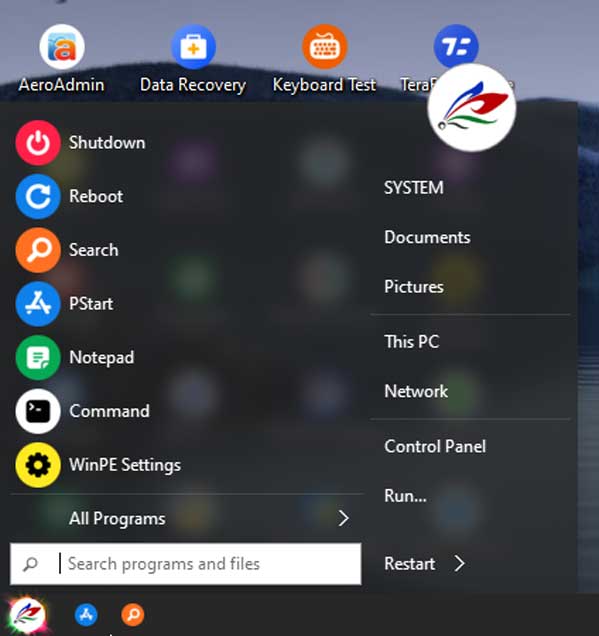
Clicking on the familiar start button in the bottom corner will bring up standard power options such as shutdown, reboot, a search box, and the ability to quickly open a command prompt. If you were to click on the bright orange Search icon located there, that would automatically open the powerful “Everything” app. This lightning-fast indexing utility will allow you to instantly search for missing or hidden files scattered across your connected hard drives.
9. Open the PStart Utilities Menu
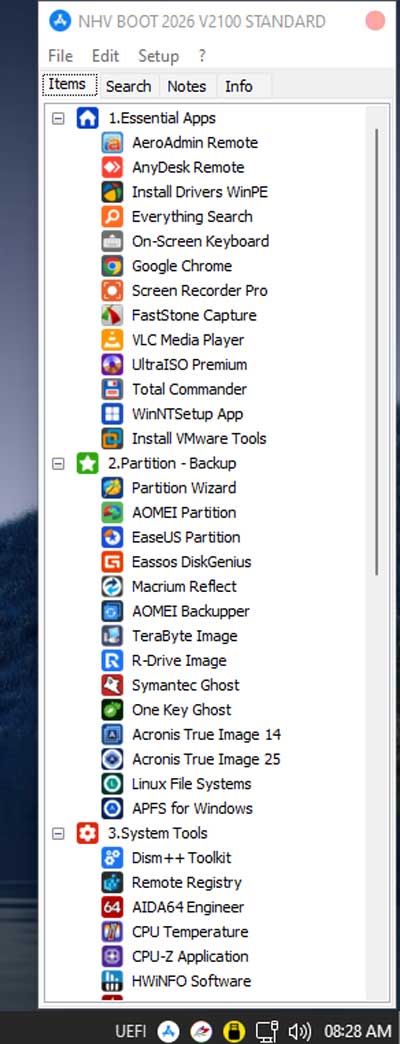
For the actual repair process, clicking the PStart icon on the desktop will open a massive list of the professional tools and utilities you can use to repair and configure your computer. It will conveniently show them to you grouped into a highly organized, categorized list so you can find exactly what you need. Keep in mind that this might not be a completely exhaustive list, and you may find other standalone tools sitting on the desktop that are not currently featured on this menu.
10. Access Essential Troubleshooting Apps
The very first folder you will see in the PStart menu is the Essential Apps category. This section contains the basic, everyday utilities that most technicians reach for first when diagnosing a machine. It includes lightweight web browsers to search for solutions online, remote desktop software to allow another technician to assist you, and basic file explorers to safely move your data around.
11. Utilize Partitioning and Backup Tools
The next major category is dedicated heavily to Partitioning and backup tools for your storage drives. Here you will find industry-standard software designed to clone failing hard drives, securely resize existing partitions without losing data, and create full system image backups. Running these tools is highly recommended before you attempt any aggressive fixes that could potentially corrupt your remaining files.
12. Explore Advanced System Tools
If you need to make deep modifications to the operating system, you can open the System tools folder. This area provides direct access to offline registry editors, system temperature monitors, and deep hardware information utilities like CPU-Z. These tools allow you to carefully edit the broken Windows registry from the outside or verify that your processor isn’t severely overheating.
13. Run Hardware Diagnostic Tools
When a computer is randomly crashing or experiencing blue screens, the Diagnostic tools category is your absolute best friend. It contains memory testing software to check your RAM sticks for physical defects and hard drive health scanners to read S.M.A.R.T. data. Running these specific tests will quickly tell you if your computer is suffering from a physical hardware failure rather than just a simple Windows software glitch.
14. Perform Deep Data Recovery
If the absolute worst has happened and your files are missing, you can navigate to the Data recovery folder. This section provides powerful undelete tools and partition recovery software designed to scrape your drive for lost data. Even if a hard drive has been accidentally formatted, the tools located in this specific menu can often pull your family photos and important documents back from the dead.
15. Use Included Office Applications
Finally, the PStart menu also includes a folder dedicated to standard Office applications. You may not find some of these tools particularly useful for hardcore computer troubleshooting, as they are mostly basic spreadsheet and presentation apps. However, they can be incredibly helpful if you simply need to open, read, or quickly edit a recovered document while running entirely from the flash drive.
Since there are so many incredibly robust tools you can use with NHV BOOT, you will definitely need to do some independent research on your part to find out exactly what the not-so-obvious ones can do for you.
For additional training resources, check out our online IT training courses.
Check out our extensive IT book series.






