Last Updated on June 11, 2026
One of the biggest complaints when it comes to Windows 11 is the lack of customization compared to Windows 10, especially when it comes to the taskbar and Start Menu. Microsoft is always pushing new updates and features but many times they are not what end users are looking for. And we have also found that they have removed features that many of us still use such as WordPad for example, but fortunately there is a way to add WordPad back to Windows 11 if needed.
It seems as though Microsoft has finally listened to its users and decided to add the ability to move the Windows taskbar position from the bottom to the top and also the side of our screen. Prior to this update, we would need to use a third-party tool such as Windhawk to move the Windows 11 taskbar to other parts of the screen.

Moving the Windows 11 Taskbar Natively
1. Recognize the Default Layout
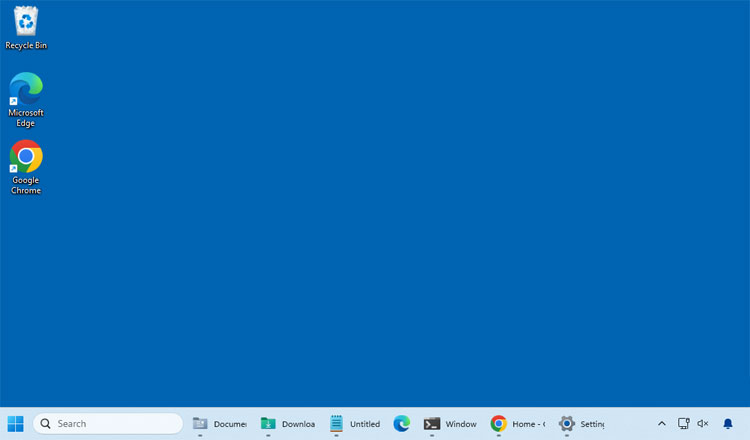
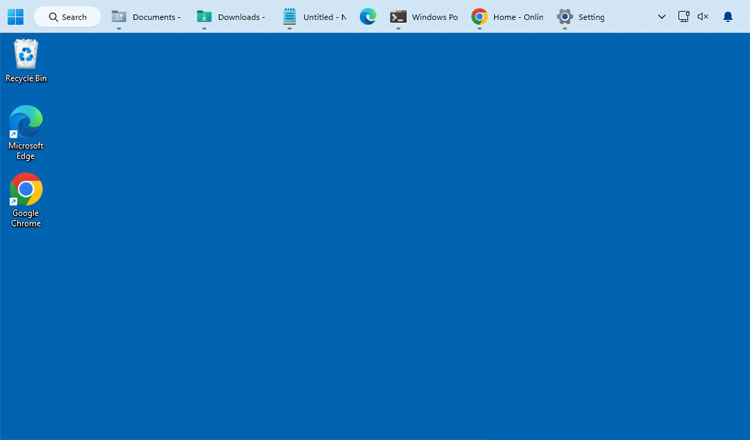
The image below shows a typical Windows 11 desktop with the taskbar firmly locked at the bottom of the screen. Back in Windows 10, you could simply drag the taskbar to the side or top of the screen with your mouse to move it as needed. Up until recently, we were stuck with this rigid bottom placement without any official alternatives.
2. Open Personalization Settings
To move the taskbar to the side or top of the screen in Windows 11, you will need to open the main system settings. Go to the Windows settings app and click on the Personalization category on the left sidebar. Then select the Taskbar menu to reveal your customization options.
3. Change the Taskbar Position
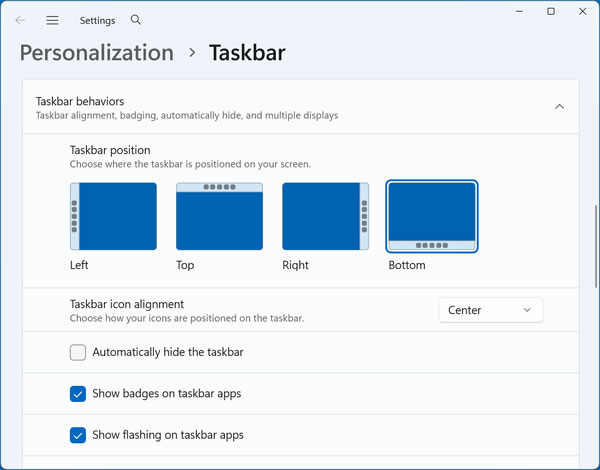
Scroll down until you find the dropdown menu labeled Taskbar behaviors and click it to expand the options. You will see a section called Taskbar position near the top of this list. From here you can simply choose where you want your taskbar to be moved to using the provided visual layout buttons.
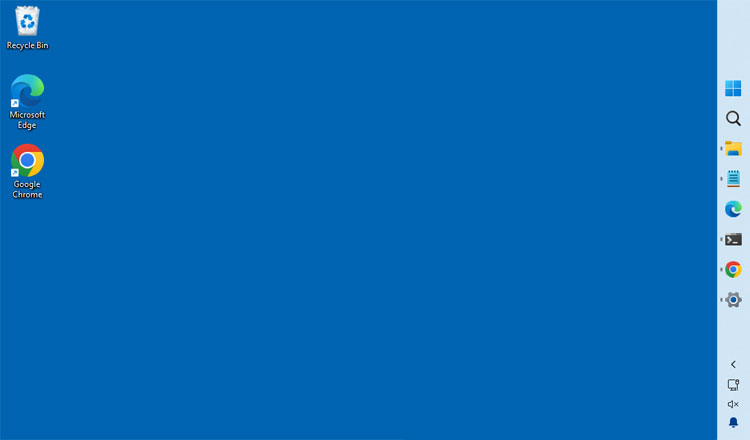
4. Review the Left Side Orientation
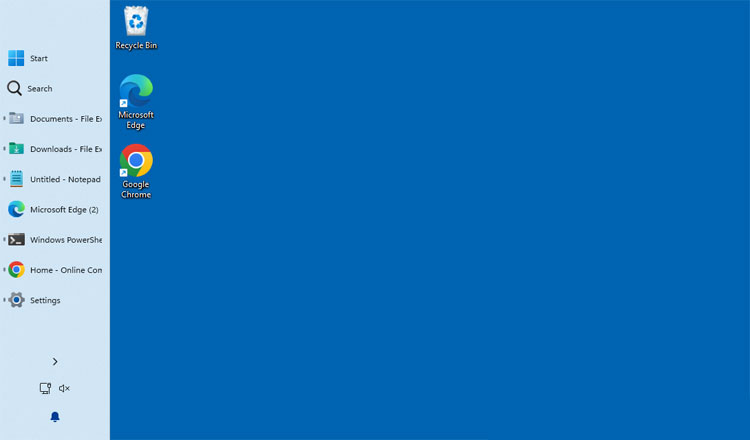
The image below shows the Windows 11 taskbar successfully moved to the left side of the screen. As you can see, it changes the orientation of the taskbar buttons to match the new vertical position. This specific layout adjustment makes the taskbar much wider than you might be used to.
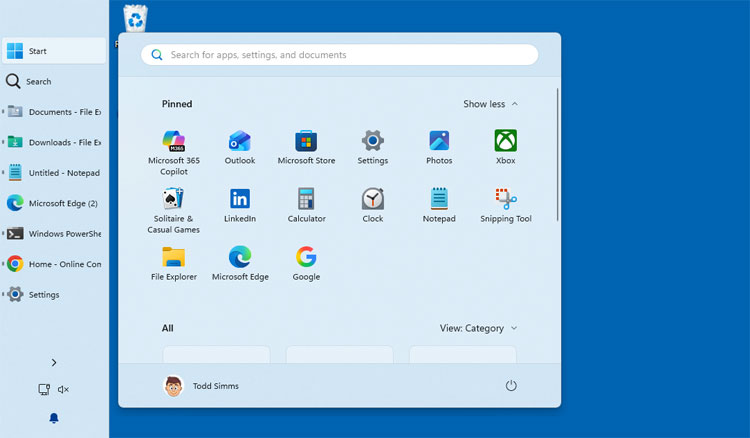
5. Test the Start Menu Popout
You should test your new layout to see how the system interfaces react to the change. When you click the Start button, the Start Menu will now pop out directly from the side. It no longer floats up from the bottom center of your monitor.
6. Try the Top Screen Placement
You might prefer a horizontal layout over a vertical one for your daily workflow. If you move the taskbar to the top of the screen, then the taskbar buttons will appear the exact same way they do when on the bottom of the screen. The icons remain centered or left-aligned based on your previous preferences.
Optimizing the Side Taskbar Appearance
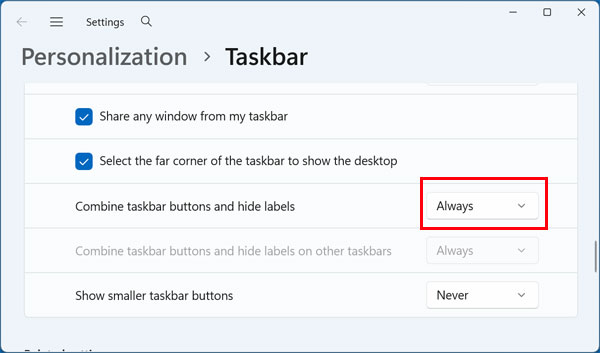
1. Adjust Taskbar Button Combinations
The default vertical taskbar can look a bit cluttered if you keep the text labels visible. If you go back to the taskbar settings, look for the Combine taskbar buttons and hide labels setting. Change this specific dropdown option from Never to Always.
2. Improve the Vertical Layout View
You may find that this configuration works much better when you have the taskbar pinned on the left or right side of the screen. Hiding the text labels shrinks the application icons down to a manageable square. This prevents the vertical bar from eating up too much horizontal screen real estate.
3. Enjoy the Reclaimed Desktop Space
After changing this setting, you will immediately have more room on your desktop workspace. The side taskbar will be shown in its regular compact size rather than the expanded wide view. This makes organizing your open application windows much easier.
4. Tweak the Icon Alignment
You can also go back to the taskbar settings to make one final visual adjustment. Change the taskbar alignment settings from center to top or to left depending on exactly where you have your taskbar positioned. This simple tweak will permanently change the location of your Start button, search box and pinned icons next to it.
For additional training resources, check out our online IT training courses.
Check out our extensive IT book series.