Last Updated on August 3, 2026
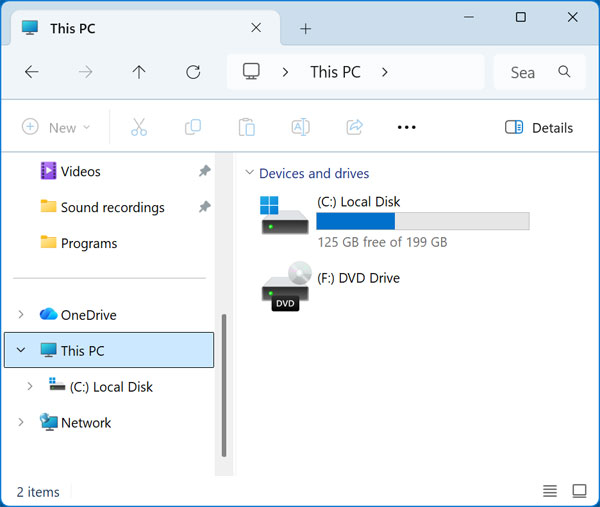
For most Microsoft Windows users, they use the built in File Explorer app to manage the files and folders on their computer. When you open File Explorer and go to This PC, you should see all the configured drives on your computer. If you only have one drive, then it will most likely have drive letter C assigned to it since that is the standard letter used for the Windows OS drive.
If you still have a CD/DVD drive, then it may be assigned the letter D or maybe even E or F depending on whether you have any other drives installed. Plus, of course any flash drives you have connected will have their own letters assigned to them.

There may come a time where you run into the problem of not seeing your hard drive in File Explorer even though you know its configured properly and your computer is recognizing it. This can be frustrating since you may find yourself not being able to do your work because you are unable to access your files.
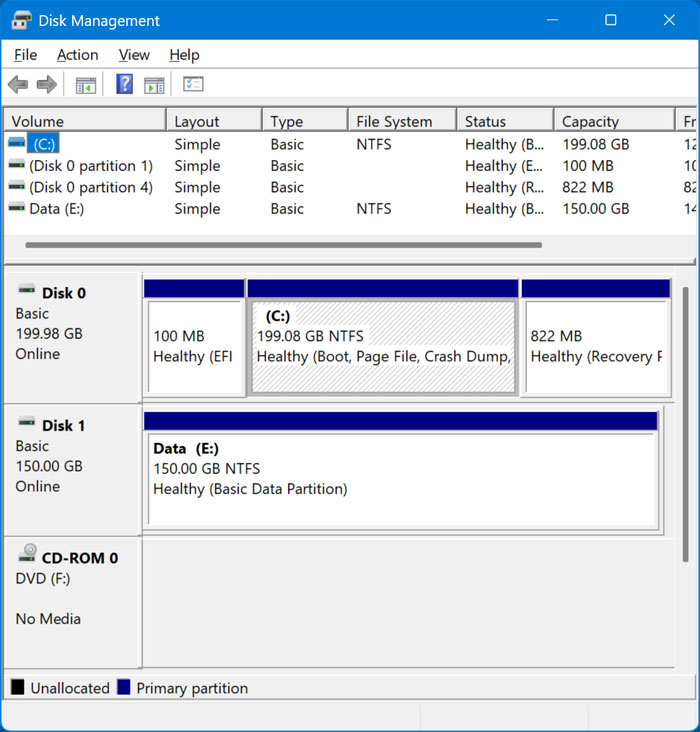
When this happens, you can open the Windows Disk Management tool to see if it shows up there. If it does, then that is a good sign and shows that its more of a Windows configuration issue than a problem with your hard drive itself.
The following two images show our E drive missing in File Explorer yet showing up in Disk Management. We will now discuss several troubleshooting methods you can use to see why your hard drive is not showing up in File Explorer and then show you some ways to unhide the drive. Since there can be more than one reason that your hard drive is hidden from view in File Explorer, you will need to do some troubleshooting on your end and may have to try multiple methods to figure it out and fix it.
Changing the Drive Letter Associated with the Drive
1. Open Disk Management to Change the Letter
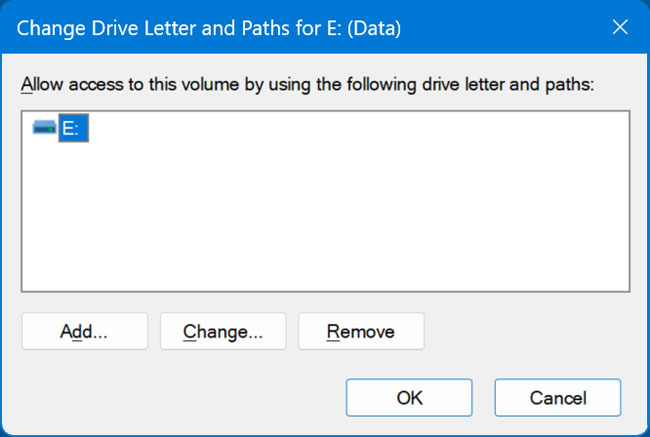
One easy method you can try as a test is to change the drive letter assigned to your drive. You can do this from Disk Management by finding the drive, right clicking on it and choosing Change Drive Letter and Paths. Then you can choose a different letter for your drive from the available list.
2. Accept the Drive Letter Warning
When you do this, you will get a warning saying “Some programs that rely on drive letters might not run correctly. Do you want to continue?” If this is the case, you can still do this for a test because you will be changing it back to the original drive letter after you see if it makes your drive visible or not after changing the letter.
3. Verify the Drive Appears in File Explorer
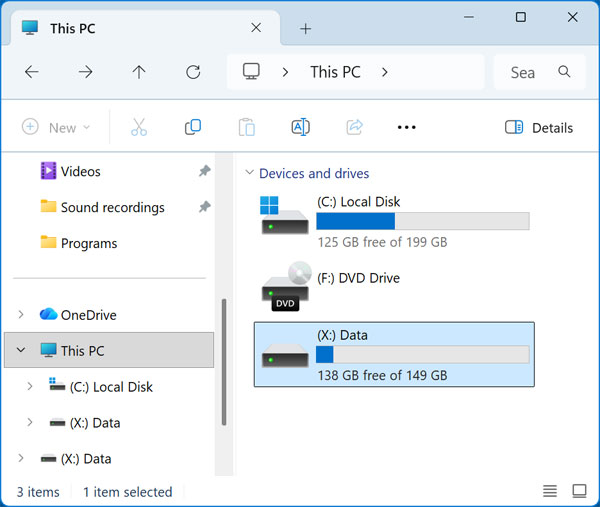
We will change the letter for our drive from E to X as a test and then go back into File Explorer and see if we can then access the drive. As you can see in the image below, we can now see our missing drive under This PC. But if we go back and change the drive letter to E and the drive disappears again, then that does not fix our problem, and we will have to try something else.
Trying to Access the Drive Using the Run Dialog Box
1. Open the Windows Run Dialog
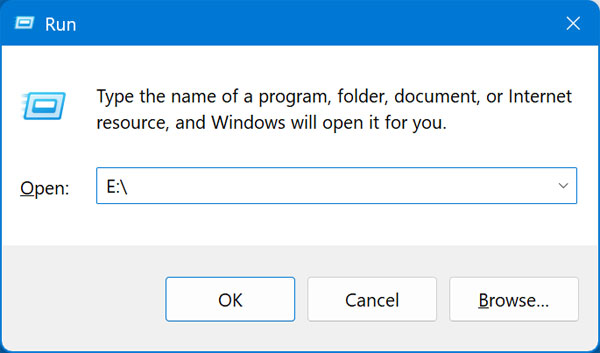
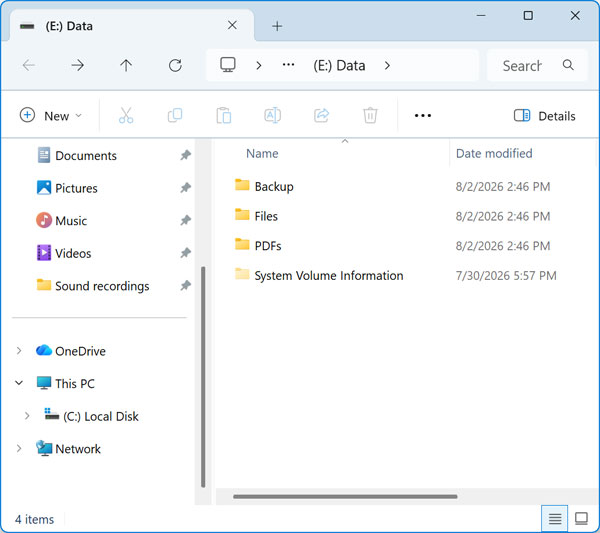
For our next troubleshooting step, we will see if we can access our drive using the letter E by using the Windows Run dialog box. To do so, we will type Win + R in the Windows taskbar search box. Then we will type E:\ in the box and click on Enter and see if the drive shows up.
2. Check for File Explorer Access
If it does show up as seen in the image below, that tells us that it is still accessible using the drive letter E. The graphical interface is just failing to display it properly. We can move on to our next troubleshooting step to fix the visual bug.
Use the DiskPart Command to Enable Automount
1. Understand the Automount Feature
In Windows, Automount is a feature that automatically detects newly connected storage devices (such as internal hard drives, SSDs, USB drives, or external disks) and assigns them a drive letter or mount point, so they become accessible in File Explorer. This usually does not become disabled on its own, but it can when doing things such as cloning a hard drive, using disk repair tools, editing the registry and so on.
2. Launch Command Prompt as Administrator
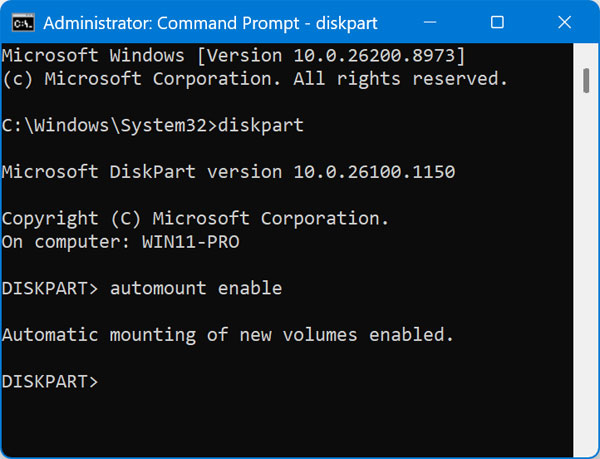
You can try to enable Automount as a test to see if it makes a difference. If Automount is already enabled, it won’t hurt anything to enable it again. To do so, we will use the DiskPart command which is commonly used to configure and manage hard drives directly from the command line.
3. Execute the Automount Commands
To enable Automount you will need to open a command prompt as an administrator and type in the following commands. Type diskpart and press Enter. Type automount enable and press Enter. Finally, type exit and press Enter before you reboot your PC.
Use DiskPart to Clear nodefaultdriveletter
1. Identify the No Default Drive Letter Attribute
A volume can have an attribute called No Default Drive Letter. When this attribute is set, Windows does not automatically assign a drive letter to that volume, even if Automount is enabled. It is possible to have this enabled when using things such as storage provisioning tools or cloning a drive.
2. Clear the Hidden Attributes
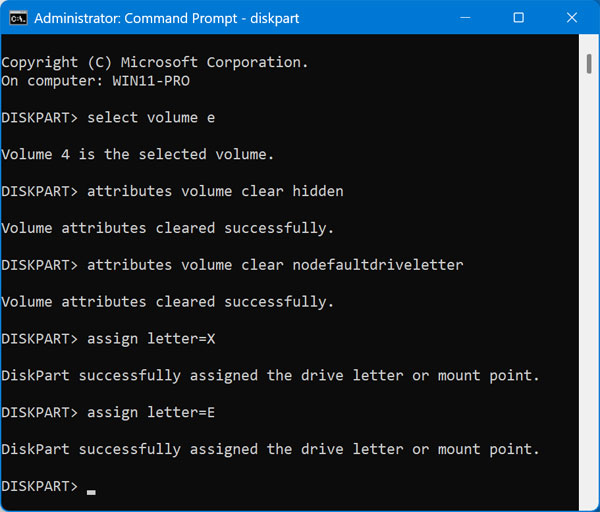
To clear this attribute, once again we will be using the DiskPart command. Open your command prompt and type diskpart to launch the utility. Type select volume E (change this to your specific drive letter) and press Enter. Then type attributes volume clear hidden and hit Enter to remove the hidden status.
3. Reassign the Drive Letter
Next you need to type attributes volume clear nodefaultdriveletter and press Enter. You will then reset the letter by typing assign letter=X followed by assign letter=E to force Windows to mount it. This sequence completely refreshes the volume configuration.
Remove the NoDrives Value from the Registry
1. Understand the NoDrives Registry Setting
The NoDrives registry value is a Windows Explorer setting that hides drive letters from File Explorer and standard Open/Save dialogs. It does not actually unmount the drive, remove its drive letter, or block access to the drive. The NoDrives registry setting is not something Windows would normally enable on its own for a standard home user account.
2. Identify What Created the Value
If it becomes active, it is usually because a local policy, software installation, system utility, script, profile migration, or another application modified the user’s Explorer settings and created the value. When this happens, the affected drive letters may be hidden from File Explorer, even though the drives themselves are still present and accessible through other methods.
3. Check for NoDrives via Command Prompt
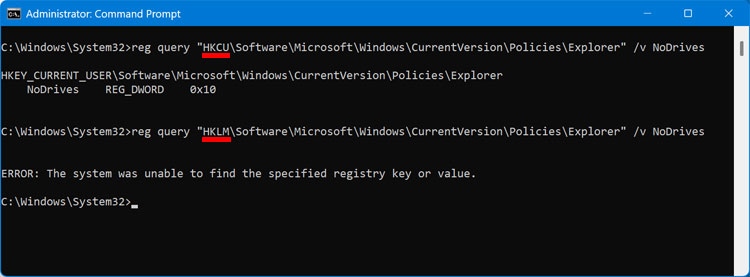
There are a couple of ways that you can check to see if NoDrives value is configured on your computer. It may also be configured for the current user or all users depending on your situation. You can run the following commands from an administrative command prompt to see if NoDrives is configured in the Windows registry.
For the currently logged on account, type
reg query “HKCU\Software\Microsoft\Windows\CurrentVersion\Policies\Explorer” /v NoDrives and press Enter.
For all user accounts, type
reg query “HKLM\Software\Microsoft\Windows\CurrentVersion\Policies\Explorer” /v NoDrives and press Enter. The image below shows that the NoDrives value is configured for the logged in account and that it is not configured for all users.
4. Locate the Value in Registry Editor
You can also look for the NoDrives value in the registry for the current user and all users manually. To do so, type regedit in the Windows taskbar search box to open the Windows registry editor.
For the current user, navigate to HKCU\Software\Microsoft\Windows\CurrentVersion\Policies\Explorer.
For all users, navigate to HKEY_LOCAL_MACHINE\Software\Microsoft\Windows\CurrentVersion\Policies\Explorer.
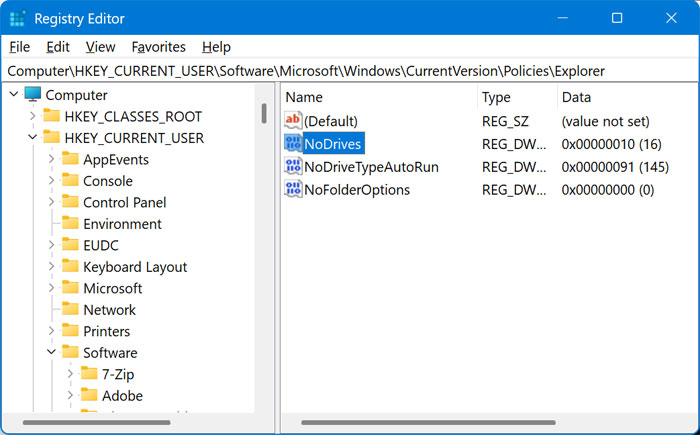
As you can see from the image above, we have the NoDrives value configured for the currently logged in user. The number 16 from this value tells us that it is set to hide the drive letter E. You can actually use this registry value to hide drives on your computer and prevent them from showing up in File Explorer.
5. Find Your Specific Drive Number
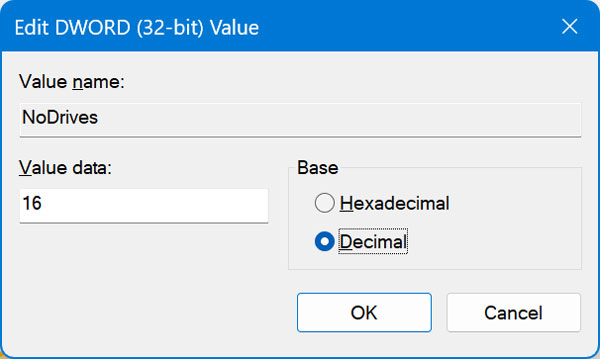
Drive letters use a doubling sequence starting with A as 1, B as 2, C as 4, and D as 8. This means E is 16, F is 32, G is 64, and the pattern continues all the way to Z which is 33554432. If you wanted to hide another drive letter, you could double click the DWORD value to edit it, change it to Decimal, and type in the corresponding number to hide that drive.
Removing the NoDrives Value from the Registry
1. Choose Your Removal Method
There are a couple of ways to remove the NoDrives value to get your missing drive letter back. You can either find it in the Windows registry and delete the DWORD value manually. You can also remove it via the command line to save time.
2. Run the Delete Commands
Below you will find the commands you will need to run in order to remove the NoDrives value from the registry for the currently logged in use and for all users.
For the current user, type
reg delete “HKCU\Software\Microsoft\Windows\CurrentVersion\Policies\Explorer” /v NoDrives /f and hit Enter.
For all users (Must be run as admin), type
reg delete “HKLM\SOFTWARE\Microsoft\Windows\CurrentVersion\Policies\Explorer” /v NoDrives /f and hit Enter.
3. Verify the Drive in File Explorer
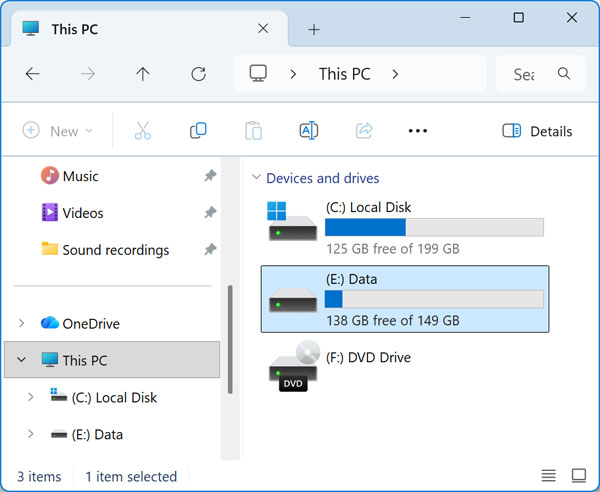
Once the NoDrives value is removed from the registry, we can go back to File Explorer and see that our E drive now shows up under This PC. Of course, this might not be the solution for your particular situation. You can try these methods and hopefully one of them will get your drive letter back in File Explorer.
For additional training resources, check out our online IT training courses.
Check out our extensive IT book series.