If you have finally decided to take the plunge and switch from Windows 10 to Windows 11, you need to first make sure your computer is ready to run Windows 11. Microsoft has some much stricter hardware requirements for Windows 11 compared to Windows 10. And for those who are not ready to switch to Windows 11, Microsoft has extended their support for Windows 10 until October 2026 and offers you three ways to configure this on your computer.
If you are using an existing hard drive from your Windows 10 installation to install Windows 11 on, you may come across an error when trying to configure the disk during the Windows installation process. The error that you may come across is as follows:
Windows 11 can’t be installed on Disk 0. The selected disk has an MBR partition table. On EFI systems, the operating system can only be installed to GPT disks.

This will happen if you are trying to install Windows 11 on a drive that has been configured using the MBR partition table rather than GPT. In this article, we will be showing you how to convert your hard drive from MBR to GPT during the Windows 11 installation process.
MBR (Master Boot Record) and GPT (GUID Partition Table) are two ways of organizing partitions on a hard drive. MBR is older and works with drives up to 2TB, supporting up to four primary partitions. It’s compatible with most older systems but has limitations. GPT is newer, supports much larger drives (over 2TB), and allows for many more partitions. It’s more reliable because it stores multiple copies of partition data and includes error-checking. GPT is required for modern systems using UEFI instead of BIOS. And since Windows 11 requires UEFI, therefore your disk needs to be configured at GPT.
If you would like to read up on MBR, GPT, partitioning, basic disks and dynamic disks, then check out this article. And if you would like to see how you can convert your MBR drive to GPT without losing data, then check out this article.
There are two methods you can use to convert your hard drive from MBR to GPT during the Windows 11 installation process. Both of these methods will wipe the contents of the drive so be sure to backup any data you need to keep from the drive before performing either of these procedures.
Method 1 – Convert your Hard Drive from MBR to GPT Using DiskPart
The first method we will use for our MBR to GPT conversion is by using the Microsoft DiskPart command line tool. DiskPart is a utility in Windows that allows you to create, delete, format, and resize partitions, manage disk volumes, and assign or remove drive letters for advanced storage configuration and troubleshooting.
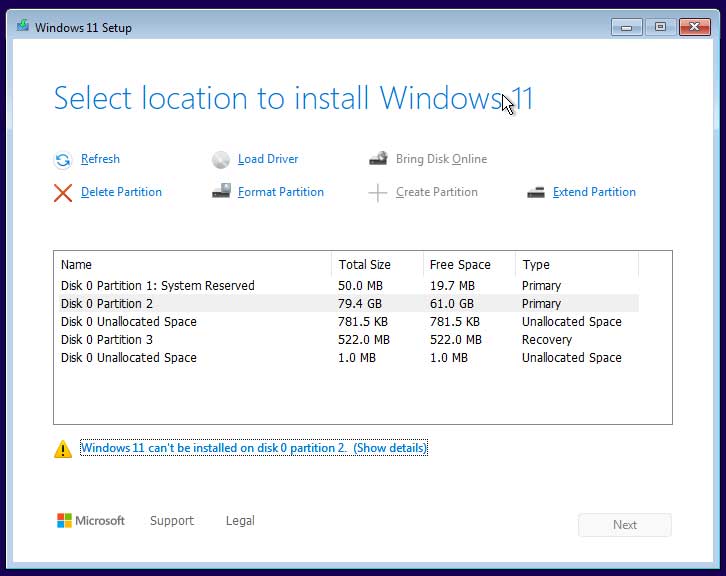
As you can see in the image below, we are unable to continue with the Windows 11 installation, and the Next button is even greyed out. We also have existing partitions from the previous Windows 10 installation. You will also notice that there is only one hard drive configure in this computer since we only have Disk 0 shown and not other drives like Disk 1 or Disk 2. You can have multiple partitions on a hard drive so that is why you see the five entries for Disk 0.
To use the DiskPart tool, we will need to open a command prompt to type in the commands. To do so, we will hold down the Shift key and press the F10 key at the same time to open a command prompt.
We will now type in the following commands one at a time and press enter after each one.
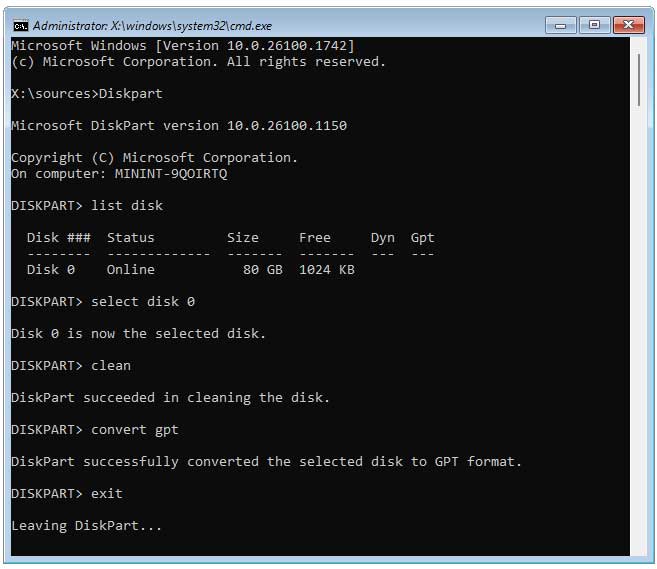
Diskpart – Loads the DiskPart tool.
List disk – Shows the hard disks configured on your system.
Select Disk 0 – Used to set the focus of DiskPart to the drive you want to work with.
Clean – Removes all partitions and volume information from the selected disk
Convert gpt – Changes the partition style of the selected disk to GPT.
Exit – Exits the DiskPart tool.
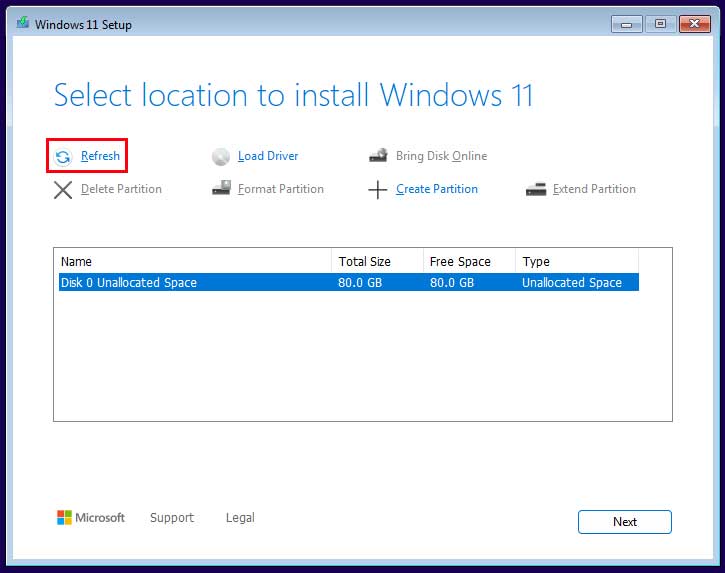
Now we can go back to the setup screen and click on the Refresh button to see that the hard drive has been wiped and now shows as blank, unallocated space with no partitions or volumes.
We can now click the Next button and continue with the Windows 11 installation procedure.
Method 2 – Convert your Hard Drive from MBR to GPT by Manually Deleting the Existing Partitions.
When you install Windows 11 on a blank hard drive, it will automatically configure the disk as GPT during the installation process. So, if you were to manually remove all the existing partitions on a MBR configured disk and allow Windows to create new ones, you will be all set to install Windows 11 on the drive.
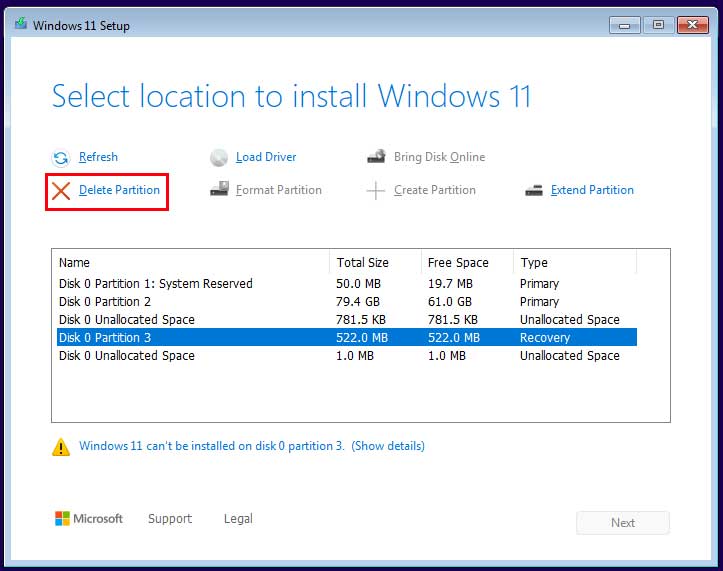
To manually delete the partitions, you need to figure out which disk is the one that has Windows 10 installed on it. If you only have one hard drive on your computer, then you will only see one disk number. The image below shows Disk 0 with three partitions and two unallocated regions with no data.
To delete the partitions with data on them, you can select them one at a time and then click the Delete Partition button. You do not need to do this for the unallocated space.
Once you have deleted all the partitions, you will have the disk shown as unallocated space. You can then create your own partitions or simply click the Next button to have Windows use all the space on the drive for Windows 11. It will create its own partitions as needed during the process.
For additional training resources, check out our online IT training courses.
Check out our extensive IT book series.