Last Updated on May 25, 2026
Formatting a drive in Microsoft Windows is the process of preparing its storage by creating a fresh file system, clearing old data structures, and organizing the space so files can be written, stored, and accessed reliably. This is often done when you want to wipe the drive so there is no data left on it. It is not the same as securely wiping a drive so the data cannot be recovered so keep that in mind.
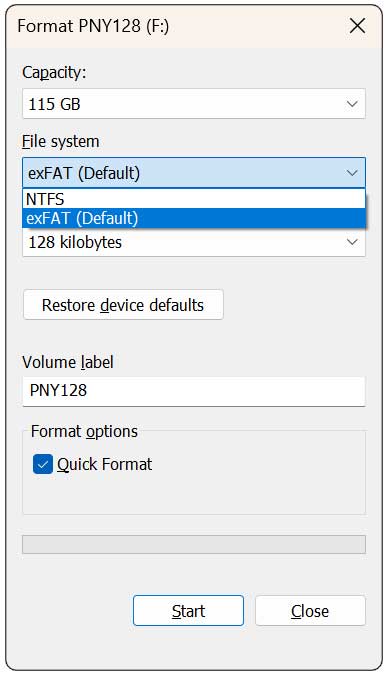
Many times, your flash drive will need to be formatted as FAT32 when used in devices such as smart TVs, game consoles, car stereos, projectors and older computers. If you have a USB flash drive that is larger than 32GB, Windows will not give you the option to format it as FAT32. When you right click on it and choose Format, you will only have the option to use exFAT which is the default and NTFS. In this article, we will be showing you how to format large USB flash drives as FAT32 in Windows.

Using the FAT32 Format GUI Tool
1. Download and Extract the Software
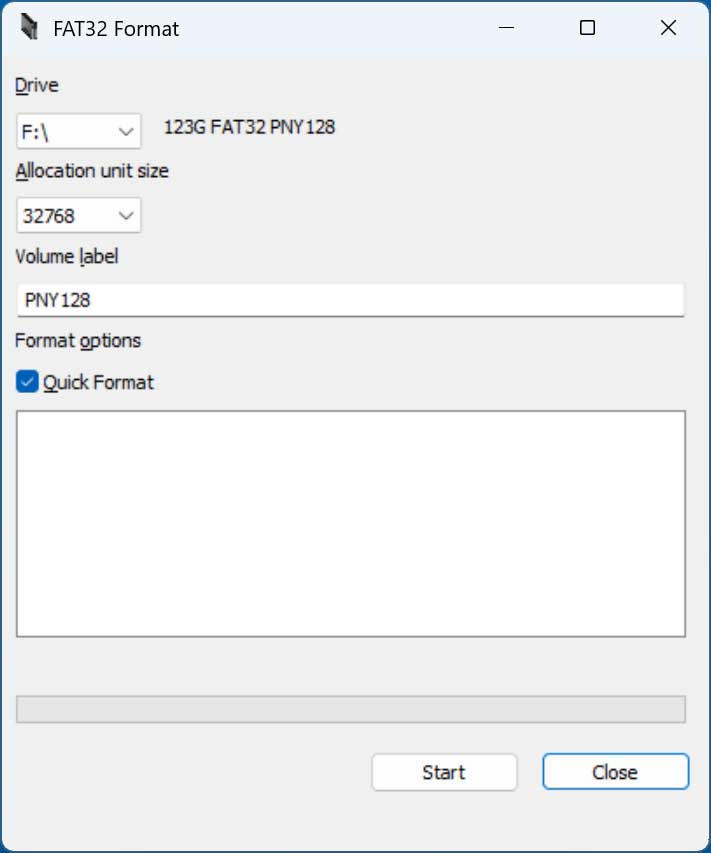
To be able to format a large flash drive as FAT32, we will be using a free app called FAT32 Format GUI (GUIFormat) which can be downloaded here. It will arrive as a compressed zip file. You must extract this archive to a local folder on your computer. You will then see a folder for the macOS version and the Windows version. Double click the file called guiformat-x64.exe to start the process.
2. Select the Correct Target Drive
You will then need to select your flash drive from the Drive drop down list. Be sure to choose the correct drive. You do not want to accidentally format the wrong drive. All data on the target drive will be erased instantly. You can also change the volume label to give your drive a custom name.
3. Configure the Allocation Unit Size
You should be fine using the quick format option. Uncheck this box only if you want to perform a deep scan for bad sectors. You might also run a full format to ensure the previous structure is fully removed if switching from exFAT. Select the 32768 allocation unit size choice from the dropdown menu. This equals exactly 32k.
4. Close Active Background Windows
Before clicking anything else, check your open windows. Make sure that all File Explorer windows are completely closed. Verify that you do not have any files or documents currently open on the flash drive itself. Active background files will lock the drive and trigger a format failure error.
5. Execute the Format Command
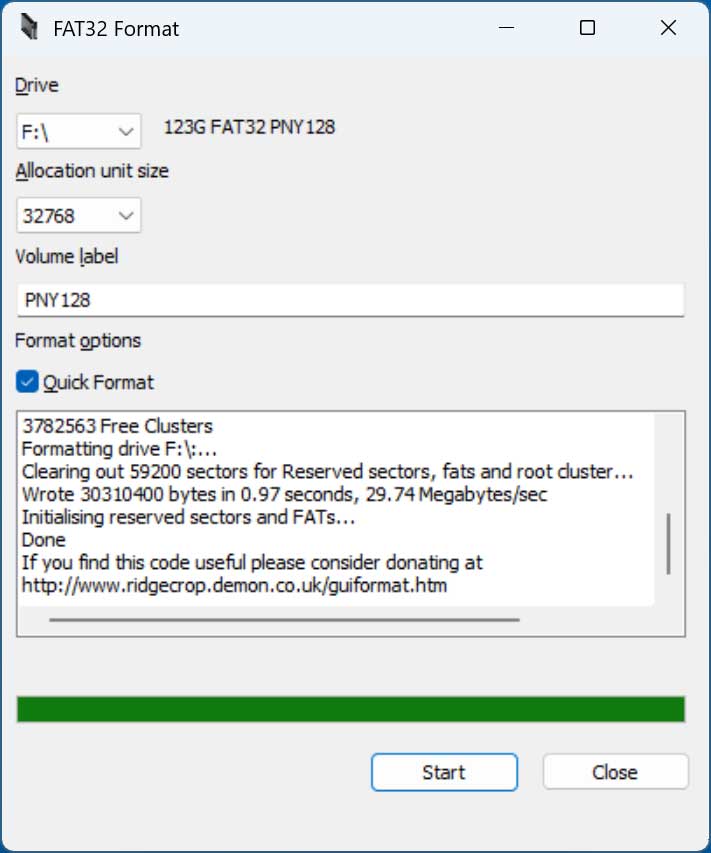
Once you are ready, simply click the Start button to begin. A warning prompt appears on your screen. You will be warned that all the data on the drive will be lost permanently. Click the OK button to proceed. The format will only take a few seconds. You will be shown a status summary in the text box when it is complete.
6. Verify the New File System
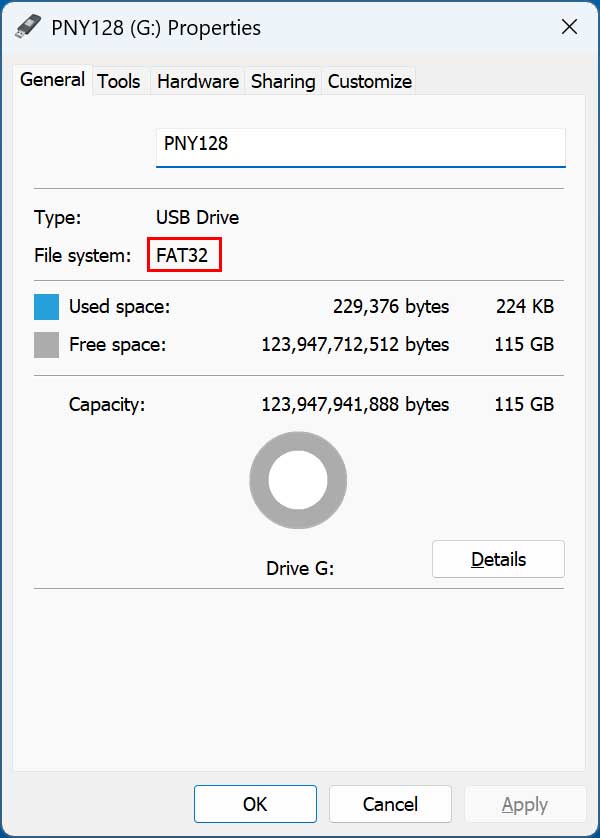
You must verify the changes applied correctly. Open File Explorer from your taskbar. Right click on the newly formatted flash drive and choose Properties. Look at the File system field. You will see that it is now using the FAT32 filesystem.
Now you can use your newly formatted FAT32 USB flash drive in your device that requires it.
Here is another way you can format your USB flash drive as FAT32 using Rufus.
For additional training resources, check out our online IT training courses.
Check out our extensive IT book series.