Last Updated on October 7, 2026
With hard drives getting larger and faster all the time, it makes sense that you might want to upgrade your drive to gain some additional performance from your computer. Or you may be building your own computer and want to get the largest and fastest drive you can afford.
When you replace a hard drive or add a new drive to your computer, you will need to configure it before Windows will be able to recognize it and allow you to use it to store your files and folders. To configure your new hard drive, you can use the Windows Disk Management tool if you want to go the GUI route. But if you are into the command line, we will be showing you how to configure a new hard rive using the Windows DiskPart command.

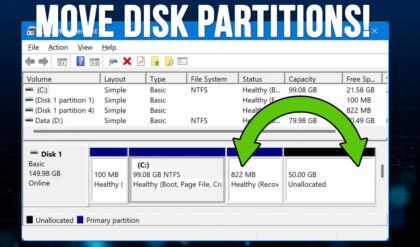
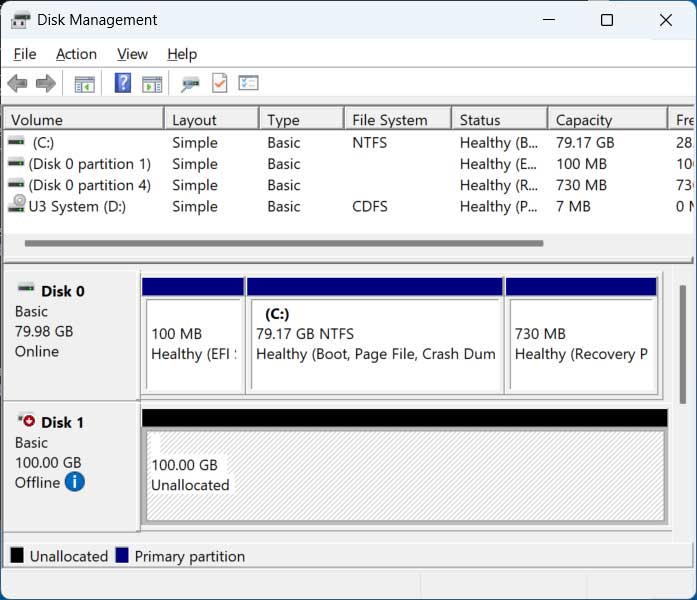
The image below shows our newly installed hard drive (Disk 1) in the Windows Disk Management tool. As you can see, the drive is offline and does not have any volumes\partitions created on it.
Initialize and Clean the Hard Drive
1. Open an Administrative Command Prompt
To use the DiskPart command line tool to configure our new hard drive, we will first need to open an administrative command prompt. Simply type cmd in the Windows taskbar search box. Choose the Run as administrator option to the right or right-click the Command prompt icon itself and choose Run as administrator. This elevated permission level is strictly required to modify physical disks.
2. Launch the DiskPart Utility
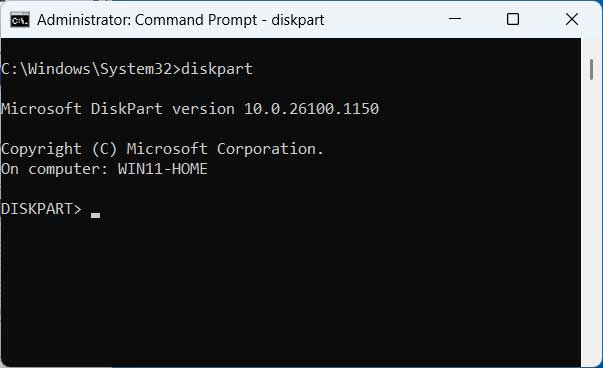
Next, we will need to type in diskpart and press enter. This drops you directly into the active DISKPART> prompt. You are now running the native Windows disk configuration tool.
3. List and Select Your Target Disk
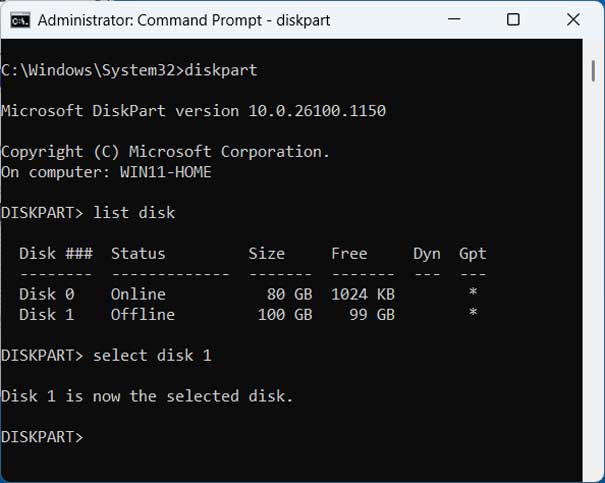
The first thing we need to do is type in list disk which will show the hard drives installed on the computer. Once we figure out which disk we want to work with, we can type select disk X to target that specific drive. You will need to substitute X with the actual number of the disk you want to work with. In our specific example, we want to work with Disk 1.
4. Bring the Disk Online and Wipe It
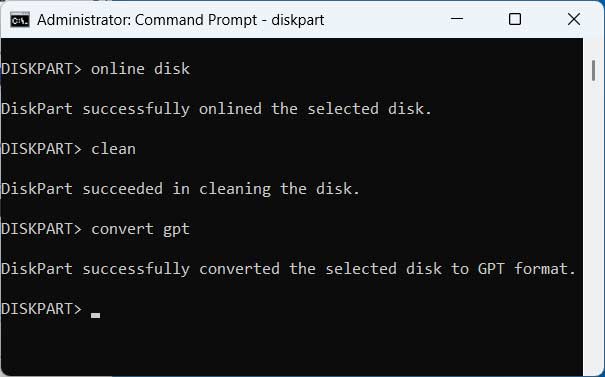
Now that Disk 1 is selected we can type online disk to bring the disk online. Next, we will type in clean to wipe all the existing partitions on the drive. This step is not necessary if it is a brand-new drive with absolutely nothing on it. If it is a disk from another computer, the clean command is a fast way to securely wipe all the old data on the drive.
5. Convert the Disk to GPT or MBR
If you plan on installing Windows 11 on your drive or if you plan on having partitions larger than 2TB, you must use the convert gpt command. This converts the drive to the modern GPT (GUID Partition Table) standard. You can also type convert mbr to convert it to the legacy MBR (Master Boot Record) format for older hardware. You can check out this article which discusses the differences between GPT and MBR.
Create and Format Partitions
1. Create a Custom Primary Partition
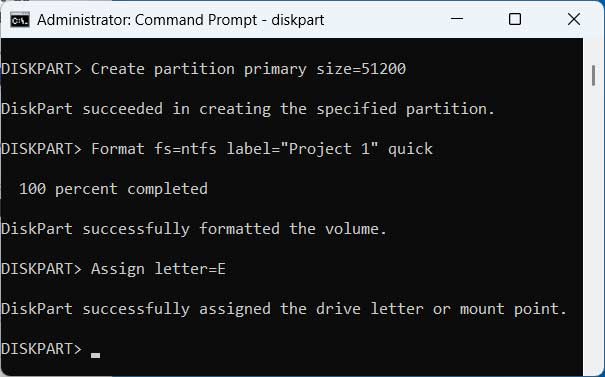
Next, we will need to create any partitions you want to configure for the new drive. If you use the create partition primary command by itself, DiskPart will use the entire available disk space for the new partition. If you want to create more than one partition, you can use the exact same command but add size=X to the end. You replace X with the specific size in megabytes you want to use for the partition.
2. Format the Drive and Assign a Letter
For example, we want to split our 100GB disk into two equal partitions. Our first command will be create partition primary size=51200 which will create the first 50GB partition. Then we will use format fs=ntfs label=”Project 1″ quick which will format the new partition using NTFS with a disk label of “Project 1”. Then we will use the assign letter=E command which will mount it as drive letter E on your system.
3. Setup the Remaining Disk Space
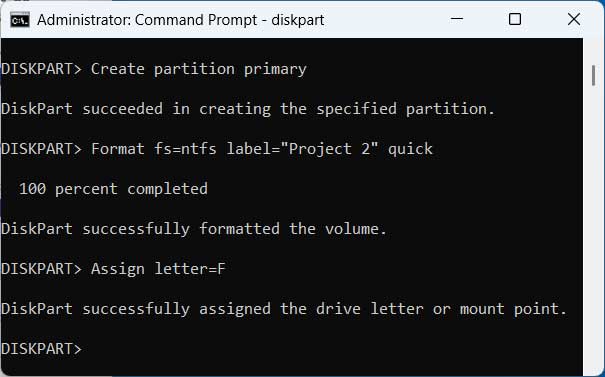
Since we want to use the rest of the disk space for our second partition, we will use the create partition primary command without a size parameter. This tells Windows to consume the remaining 50GB of space automatically. Then we will format the drive, give it a label of Project 2, and assign it the drive letter F. You execute format fs=ntfs label=”Project 2″ quick followed by assign letter=F to finish the job.
4. Convert to a Dynamic Disk
If you want to use a dynamic disk instead of a basic disk, you can use the convert dynamic command. This is not available in Home editions of Windows so keep that strict limitation in mind. Dynamic disks are used to enable advanced storage configurations like spanned, striped (RAID 0), mirrored (RAID 1), and RAID-5 volumes across one or more physical drives. They allow for flexible volume management, including resizing and combining disks without repartitioning.
5. Verify the Final Configuration
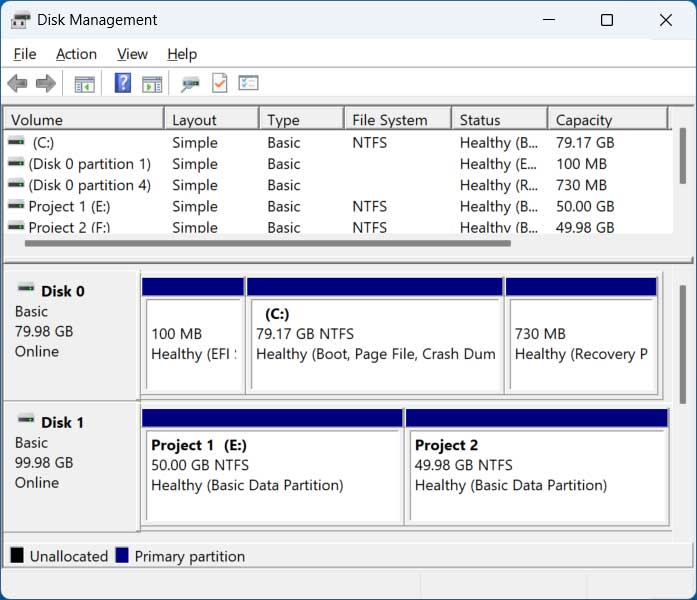
Once we are done configuring the drive, we will type exit to close DiskPart safely. Now if we open Disk Management again, we will clearly see our newly configured hard drive. It displays all its new partitions, volume labels, and assigned drive letters perfectly.
For additional training resources, check out our online IT training courses.
Check out our extensive IT book series.