
Last Updated on July 15, 2026
Ever since Windows 11 was released, many people have been complaining about how it’s not as customizable as Windows 10 and how Microsoft has taken away some of the functionality that made Windows a great operating system. And now it seems as though many Windows users are switching to Linux for their main operating system.
But if you are not ready to give up on Windows just yet and still want to give Linux a try, you can actually run them both on your computer. In this video we will be showing you how to dual boot Windows and Install Linux on a secondary hard drive. If you only have one hard drive, you can still dual boot Windows and Linux but the process is a little different. You can check out this video for details on how to do it this way.
For our example, we will be dual booting Windows 11 and Ubuntu Linux since it is one of the more popular and easier to use versions of Linux. There are many other Linux “flavors” you can check out as well. No matter what method you use, always be sure to do a backup of your personal files first!
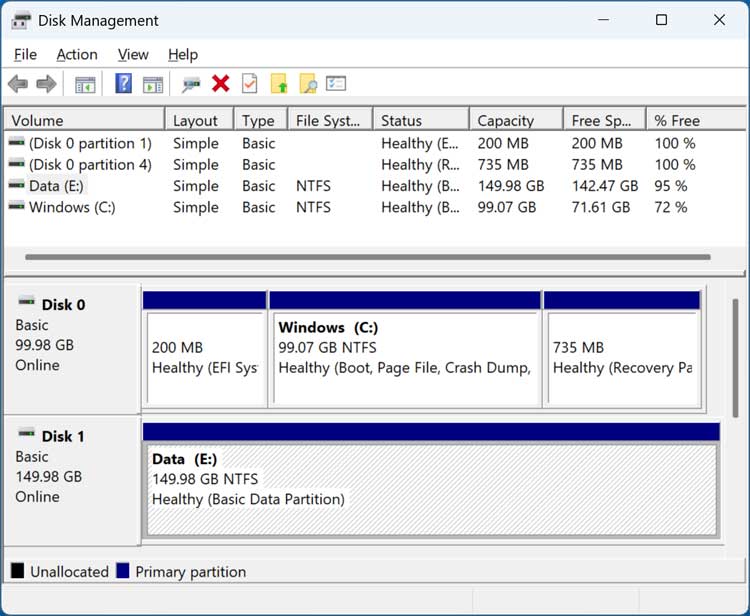
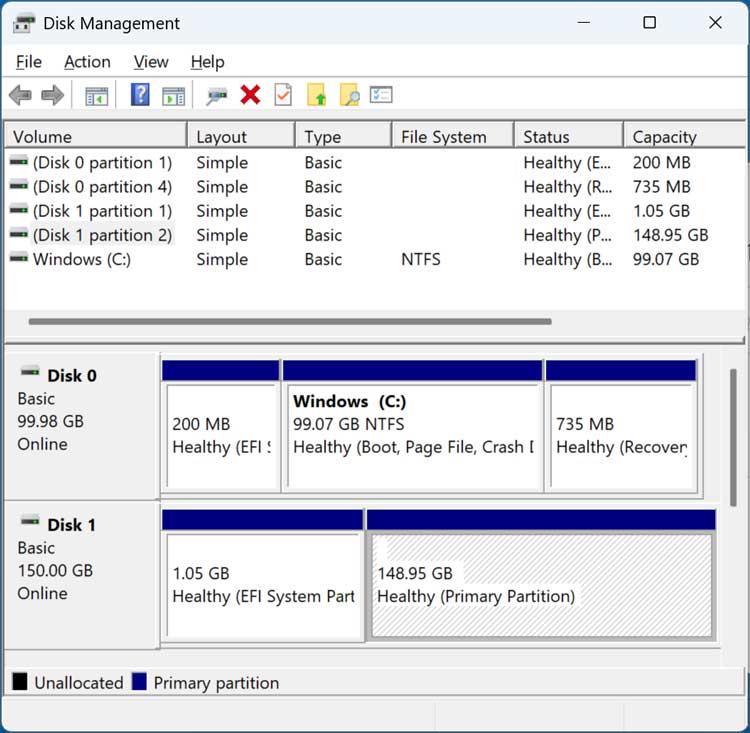
The image below shows the Windows Disk Management tool and you can see we have our main 100 GB Windows drive and also a 150GB secondary drive called Data. We will first be installing Linux on this secondary drive and keeping the files and folders that are on it. Then we will show you how to install Linux on this drive and wipe the existing contents.
Preparing the Ubuntu Linux Installation
1. Create the Bootable Media
To begin, you will need to download Linux and create a bootable flash drive. You can easily do this using a free tool such as Rufus, Ventoy, or WinToUSB. Then we will boot our computer using the newly created Ubuntu flash drive. The next steps will vary slightly if you are not using Ubuntu for your specific version of Linux.
2. Boot into the Live Environment
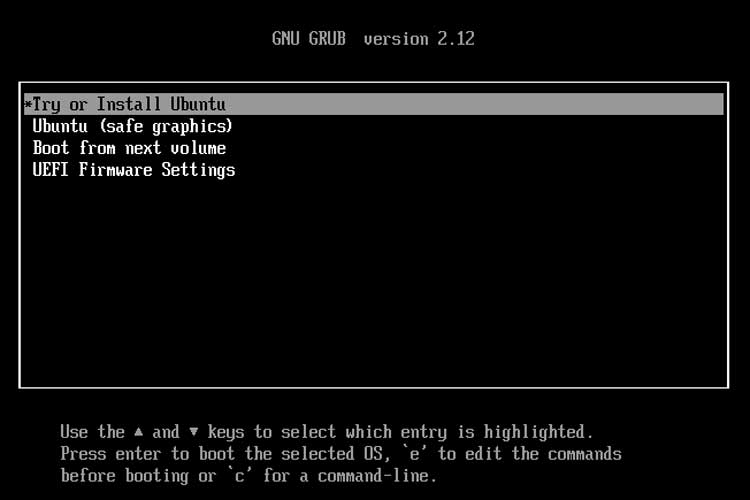
We will first see the Linux boot screen where we will choose the option to try or install Ubuntu. This will load Linux directly into your system memory and not actually install it yet. You can use the OS to try it out and see if you like the interface before making permanent changes.
3. Access the Live Desktop
When the Ubuntu desktop first loads, it may prompt you to start installing Linux immediately. You can simply click on the X at the upper right corner to cancel the installation prompt. This drops you straight to the active Ubuntu desktop environment so you can explore the system.
4. Verify Your Existing Drives
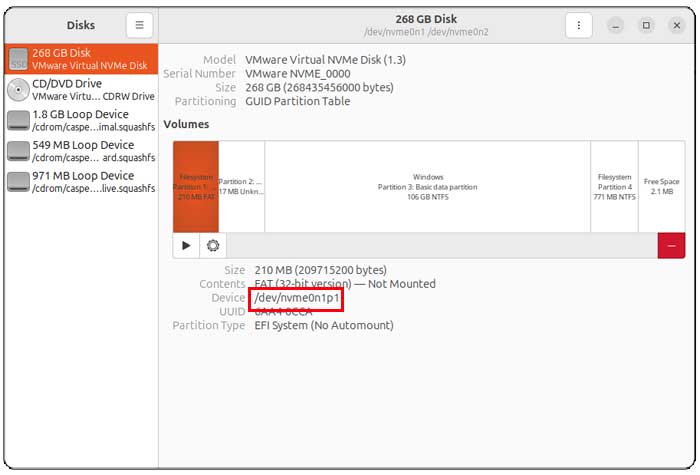
Now we will use the built-in Linux Disks tool to see that our Windows drive is recognized. You may find that the total size is a little off when using this tool since it shows it as 106 GB when it’s really 100 GB. This is just a difference in how Linux calculates storage capacity compared to Windows.
5. Check Your Secondary Data
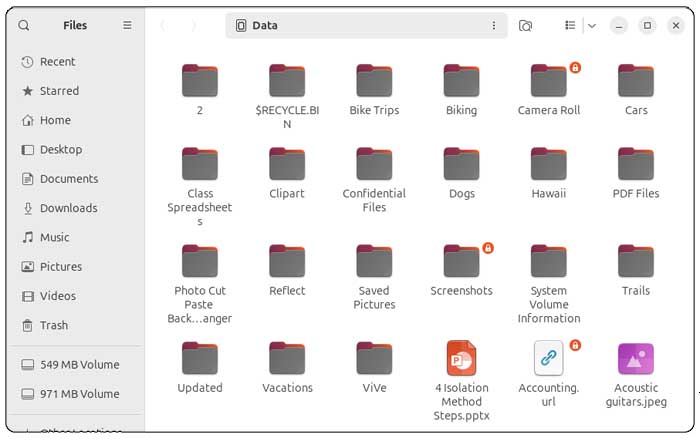
We can also open the Data drive that acts as our E drive in Windows. This allows us to see the files currently contained on it. You want to verify your data is intact before proceeding with the partition changes.
Installing Linux on a Secondary Drive – Option 1
1. Launch the Installer
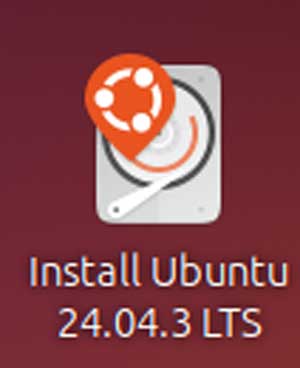
When you are ready to install Linux on your hard drive, you can double click the Install Ubuntu icon right on the desktop. This launches the graphical setup wizard. Follow the initial prompts to get your basic system preferences configured.
2. Configure Basic Settings
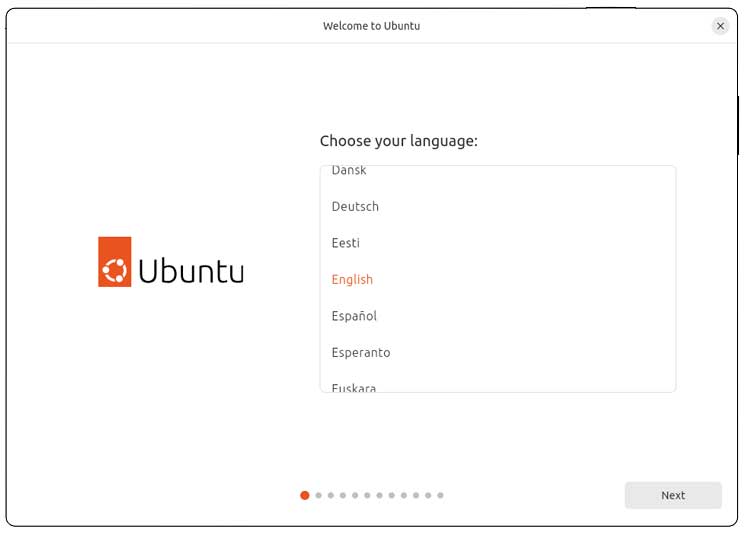
Then you will be prompted to do things such as choose your language and enable any accessibility options. You will also need to select a keyboard layout and configure your network or internet connection. Having an active internet connection allows the installer to grab the latest system updates during the setup.
3. Choose the Interactive Setup
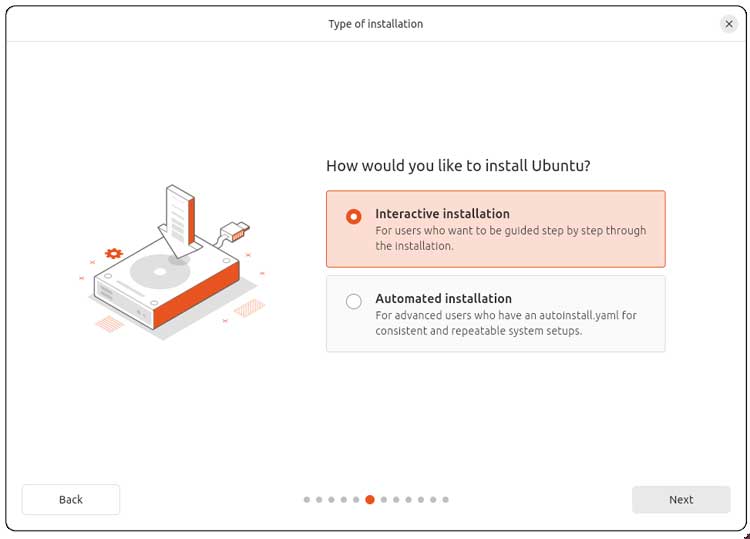
You will then get to a screen asking you how you would like to install Ubuntu. You will most likely use the interactive installation option. The automated installation option is used for those who have an autoinstall.yaml configuration file for unattended installs.
4. Select Your Application Bundle
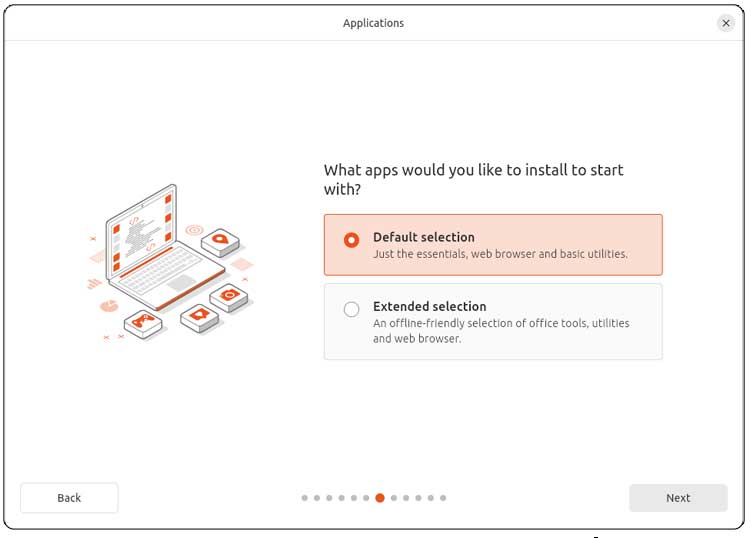
You can then choose between the default selection of apps or use the extended selection. The extended selection of apps will install more programs such as office tools and a web browser. The default selection keeps your system lightweight and free of unnecessary bloatware.
5. Include Proprietary Drivers
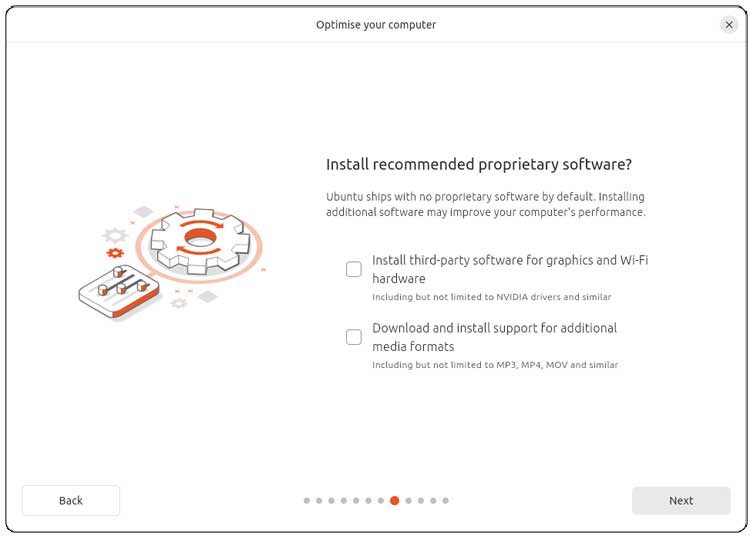
You may also see a screen asking if you want to install any extra software for things such as video and Wi-Fi adapters as well as extra fonts. You will most likely want to select these options. They ensure your graphics card and wireless network function flawlessly right out of the box.
6. Install Alongside Windows
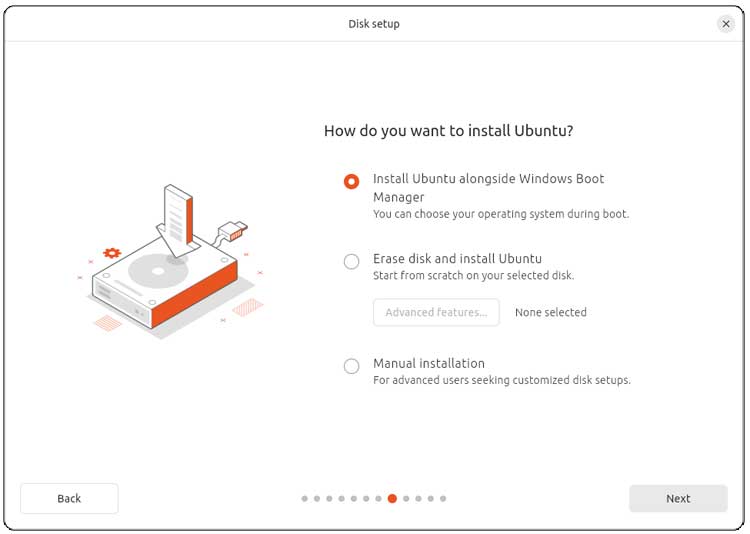
The next screen is where you need to be absolutely sure to make the right selection. The option for installing Ubuntu alongside the Windows boot manager will allow us to keep our existing files on the Data drive. This is the exact option we will be using for our first example.
7. Allocate Drive Space
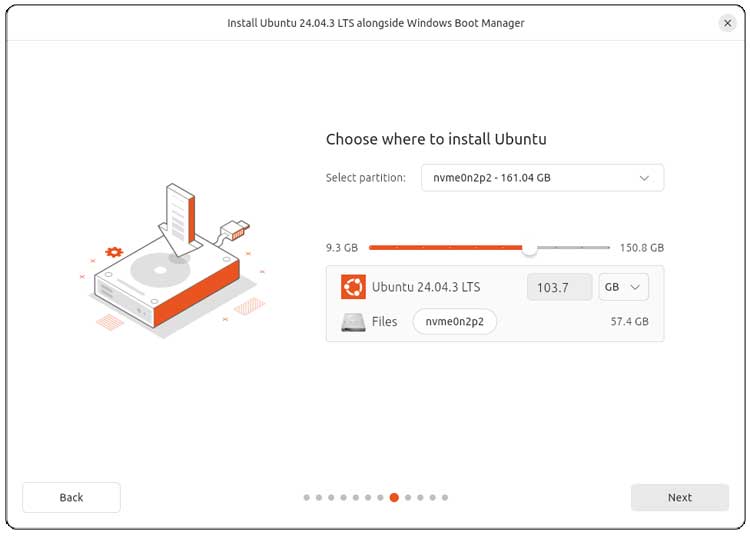
You will need to be sure you choose the correct drive from the dropdown, so you don’t install Linux on your Windows drive itself. It will give you a recommended size to use for Linux. We will move the slider all the way to the right to use the entire remaining free space on that secondary drive.
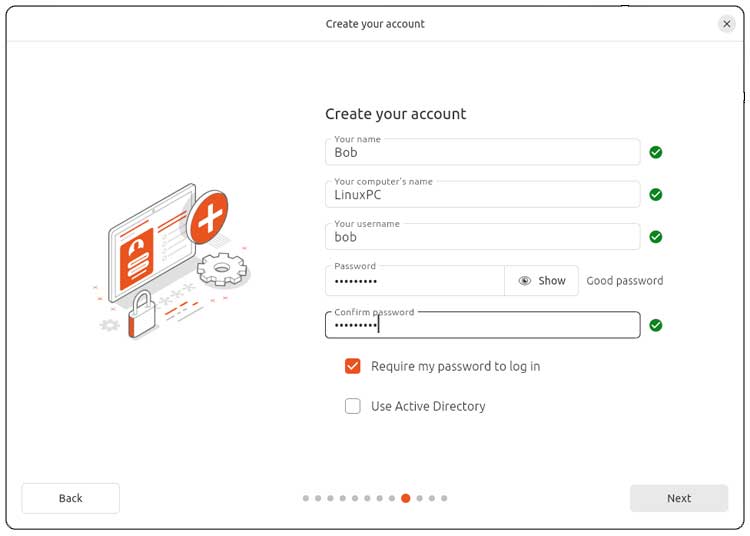
8. Create Your User Profile
Next, you will need to create a user account by entering your name, username, computer name and a secure password. This creates your local administrator account for the Linux environment. Keep this password safe as you will need it for future software installations.
9. Review the Bootloader
Then you will need to choose your time zone and will then be shown a summary screen. If everything looks good, you can click on the Install button to begin the Linux installation. Once the installation is complete, you will be prompted to restart your computer so you can begin using Linux from your hard drive.
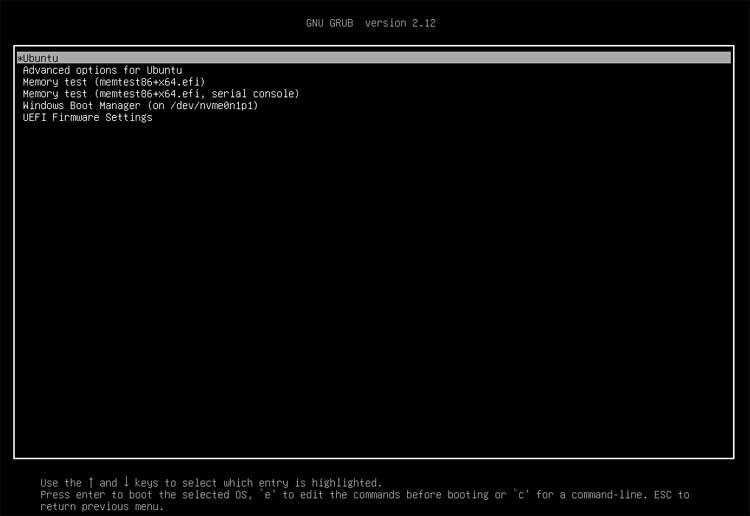
10. Use the GRUB Menu
You will then be shown the GRUB bootloader where you can choose the first option to start Ubuntu. You can also choose the Windows Boot Manager option to boot straight into Windows. If you choose the Ubuntu option, you will be
11. Verify Windows Drive Changes
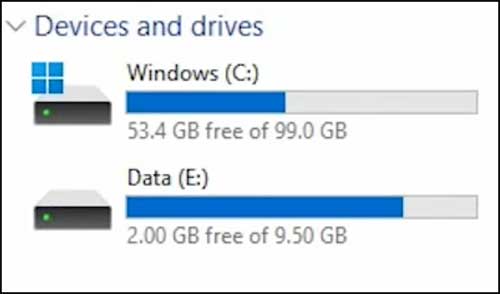
If we boot into Windows and open File Explorer, we will see that our Data drive is still there. It has just been shrunk down to 10GB which is enough space to keep our files that we had on the drive. Linux successfully claimed the rest of the available free space.
12. Check Disk Management
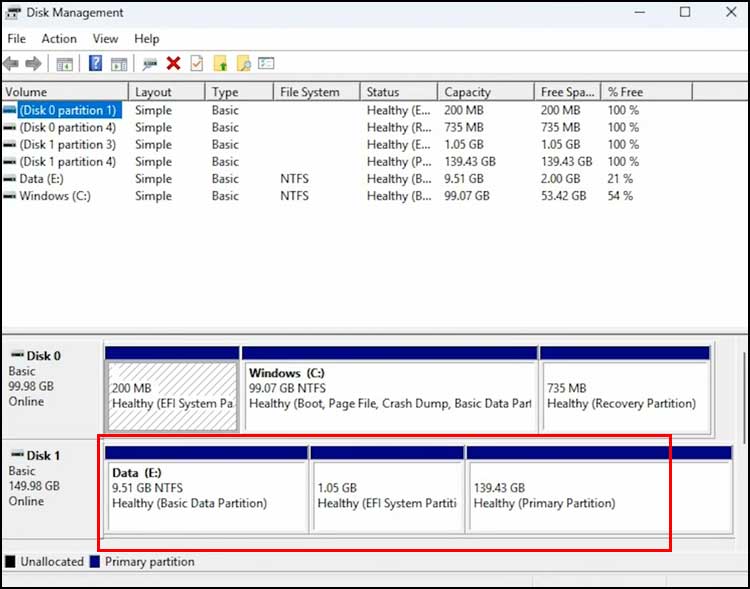
If we look at Disk Management, we will see that Disk 1 has a 10 GB Data partition. Right next to it is a brand new 139 GB partition for Ubuntu. Windows cannot read this Linux file system natively so it appears as a blank volume.
Installing Linux on a Secondary Drive – Option 2
1. Erase the Entire Disk
Now we will go through the installation process again but this time we will use the option that says Erase entire disk and install Ubuntu. Just be aware that every single file on this hard drive will be permanently erased. Make absolutely sure you selected your secondary drive and not your primary Windows disk.
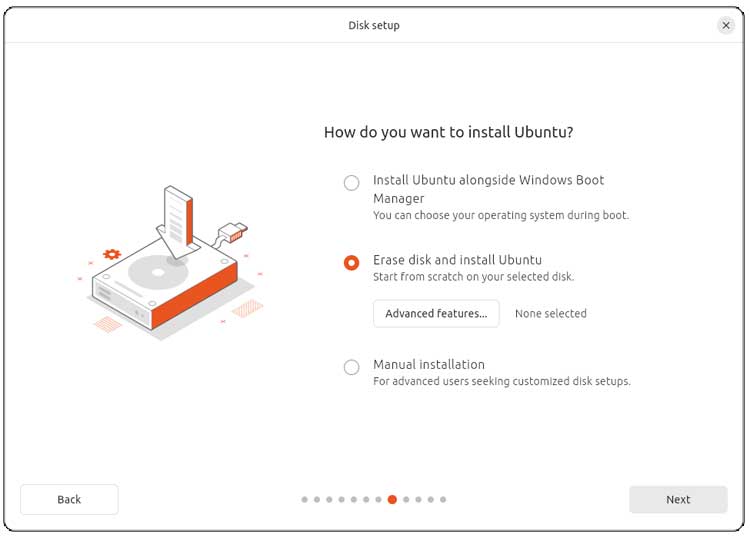
2. Configure Advanced Features
If you were to click on the Advanced features button, you would be able to configure things such as disk encryption. You could also use Logical Volume Management (LVM) instead of traditional partitions. These are great options for enterprise environments requiring strict data security.
3. Confirm the Target Drive
As you can see, this time we do not get prompted to configure the size of the hard drive. The entire disk will be used exclusively for Linux. Verify the dropdown menu shows your secondary drive before proceeding to the next step.
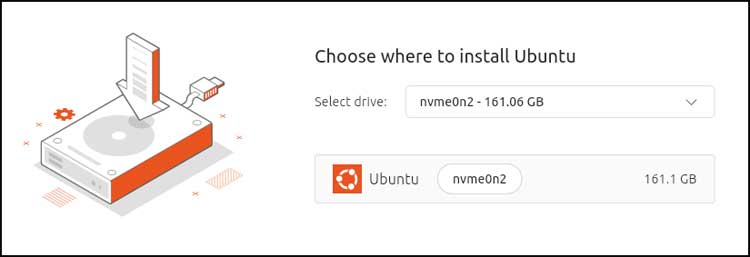
4. Finalize the Installation
Then you will need to configure the username, computer name and password once again. Then you will see the summary screen with the disk that Ubuntu will be installed on and the partitions that will be created. Click the Install button to begin the complete disk overwrite.
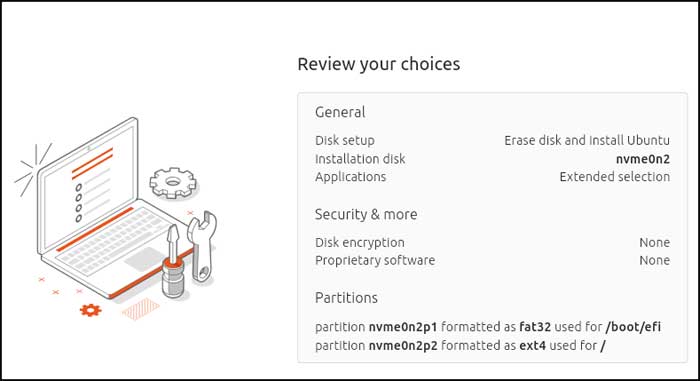
5. Check Windows File Explorer
Once you restart the computer, you will have the same GRUB boot manager screen where you can load the Ubuntu desktop or go back into Windows. Now when we go back into Windows and open File Explorer, we can see that our Data (E:) drive is no longer there. The drive has been completely taken over by the Linux file system.
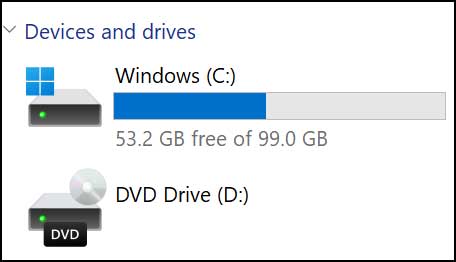
6. Verify the Dedicated Linux Disk
And when we go into Disk Management, we can see that Disk 1 is used exclusively for Linux. Windows sees the partitions but cannot assign them a drive letter. You now have a perfectly isolated dual boot system running on two separate physical drives.
For additional training resources, check out our online IT training courses.
Check out our extensive IT book series.






