
Last Updated on May 7, 2026
**Update – If you want to see the status of the ESU availability on your computer, check out this video. And if you want a quick way to enroll your computer in the Extended Security Update program, check out this page showing you how to enroll your PC in ESU instantly.
If you are still running Windows 10 on your computer and are not ready to upgrade to Windows 11 or your computer cannot run Windows 11, then you need to be aware that support as officially ended on October 14th, 2025.
With this in mind, don’t get too upset just yet, because Microsoft has announced that you can actually extend your Windows 10 support for an additional year (up to October 2026). You have several different options as to how you can extend your Windows 10 support for that extra time period. You should have no problems choosing one of these simple options to extend your support and keep your machine perfectly safe from vulnerabilities.

1. Check Your Windows Update Settings
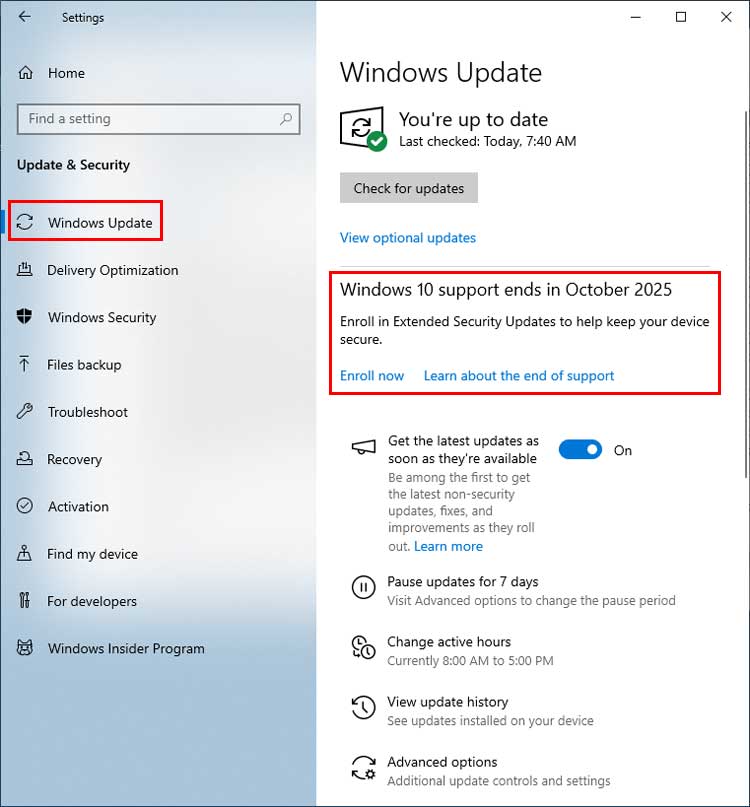
If you go to your primary Windows 10 settings and then navigate to the Windows Update section, you may see a prominent warning message at the very top. This alert will usually say that Windows 10 support ends in October 2025. Right below that warning text, you should then see an actionable option that says “Enroll in Extended Security Updates to help keep your device secure.”
2. Begin the Enrollment Process
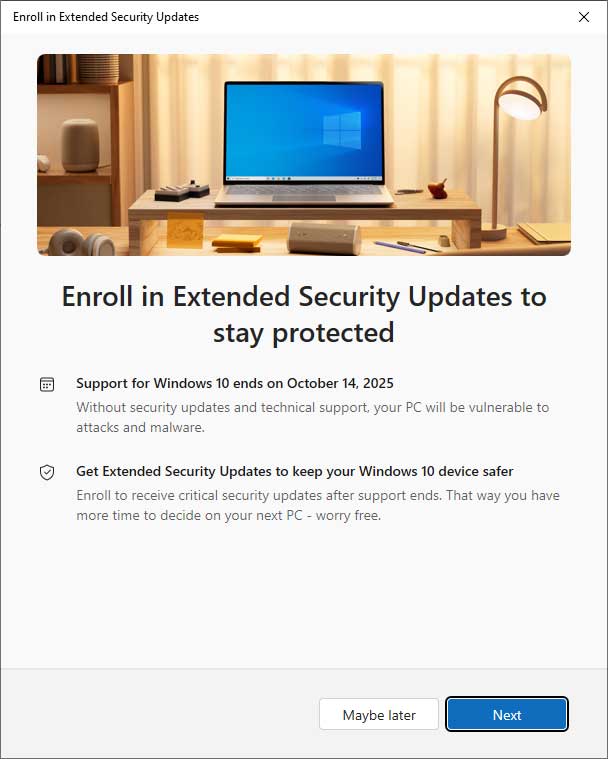
When you locate and click on the specific text link that says “Enroll now,” the system will launch a brand new setup wizard. You should immediately see a window pop up asking if you want to officially enroll your machine in the Extended Security Update (ESU) program. This is the very first step to securing your computer for an additional twelve months of critical system patches.
3. Verify Your Account Prerequisites
After clicking the Next button on the introductory screen, you should see one or more enrollment options depending on exactly how your computer and account are currently configured. Please note that you will absolutely need to be logged in with a valid Microsoft account to proceed with this screen. You must also be using a fully activated, legitimate version of Windows 10 to successfully do this procedure.
4. Check for Automatic Eligibility
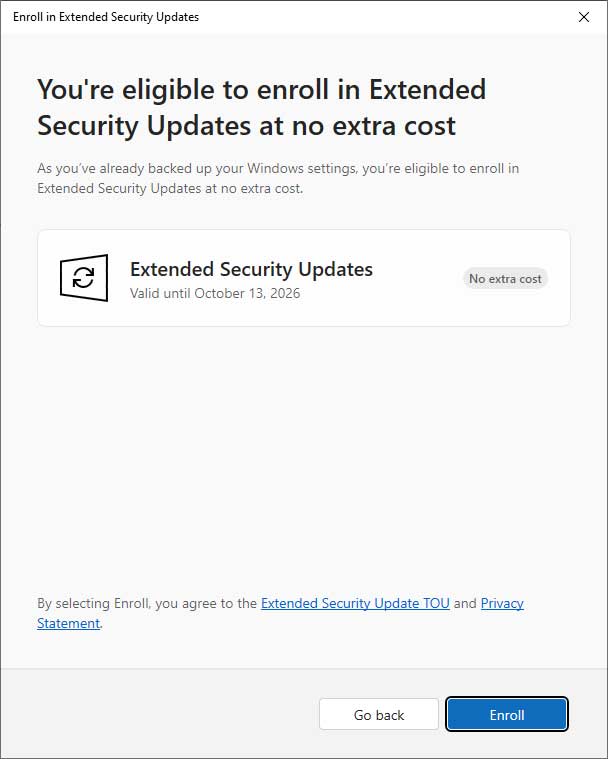
Depending on your previous system configuration, you might already be completely covered without realizing it. The image below is from a Windows 10 computer that has previously been configured to actively back up its Windows settings to the cloud. Having this automated backup feature turned on automatically makes the computer qualify for the extended support without any extra hassle.
5. Review the Alternative Enrollment Options
If you do not have the system backup option already configured on your machine, you will most likely see a different selection screen like the one shown below. You will be presented with three distinct options to choose from to formally enroll your computer in the extended support program. Take a moment to carefully review these choices so you can pick the one that works best for your situation.

6. Option 1: Back Up Your PC Settings
The first and most popular choice allows you to seamlessly sync your PC settings and user folders directly to OneDrive using the built-in Windows Backup feature. To execute this, simply go to Settings, click on Update & Security, and then select Windows Update to click the Enroll now button if it is available. From there, choose “Back up your PC settings,” carefully sign in with your Microsoft account, and closely follow the on-screen prompts to enable the cloud backup service.
7. Option 2: Redeem 1,000 Microsoft Rewards Points
The second option allows you to brilliantly use points you have already earned from routine Bing searches, Xbox gaming activity, or previous Microsoft Store purchases. To use this specific method, sign in with your Microsoft account and navigate back to the Windows Update settings menu to click the Enroll now link. Once you choose the “Redeem Rewards points” option, simply confirm your point redemption to immediately complete your system enrollment.
8. Option 3: Make a One-Time Purchase
If you do not want to use cloud backups or simply do not have enough rewards points, you can choose to pay a flat fee of $30 USD for exactly one full year of ESU coverage. To buy the extension, navigate back to the Windows Update menu within your system settings and click the Enroll now button once again. Choose the “Purchase ESU” option from the list and complete the secure payment transaction using the payment method currently tied to your Microsoft account.
9. Confirm Your Successful Enrollment
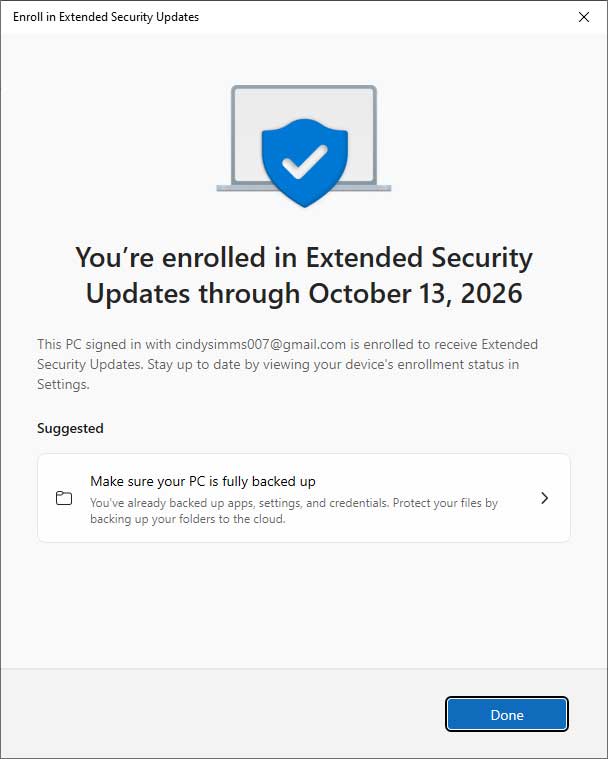
Once you have carefully chosen your preferred option and taken the proper steps to secure it, the system will process your request in the background. You should then see a final confirmation message proudly saying, “You’re enrolled in Extended Security Updates through October 13, 2026.” Your computer is now completely secure and ready to receive ongoing software patches for another full year.
10. Verify Your Current Windows Build
In order for these new security updates to actually install properly moving forward, you will also need to make absolutely sure that Windows is running the most current build version. Specifically, you need to verify that you are currently running the 22H2 build of the operating system. If you are somehow on an older version, you must update your system through the standard Windows Update menu first.
11. Troubleshoot Missing Enrollment Options
If you look in your settings and simply do not have the option to enroll in extended support, there are a few technical workarounds you can try. You can manually join the Windows Insider Program using the Release Preview Channel, but that might frankly be more trouble than it’s worth for average users. You should also double-check your update history to be absolutely sure you have the required KB5062649 update already installed on your machine.
12. Enable Required Telemetry Services
Another strong suggestion to fix a missing enrollment button would be to make sure the “Connected User Experiences and Telemetry” service is actively turned on. You will need to open your Windows Services app and set this specific background service to “Automatic” and ensure it is currently running. Microsoft strictly requires this diagnostic data connection to verify your system eligibility for the extended support program.
13. Perform a Telemetry Registry Edit
If the service change doesn’t trigger the update option, you can forcefully enable the telemetry requirement by opening the Windows registry editor (regedit). You will need to carefully navigate to:
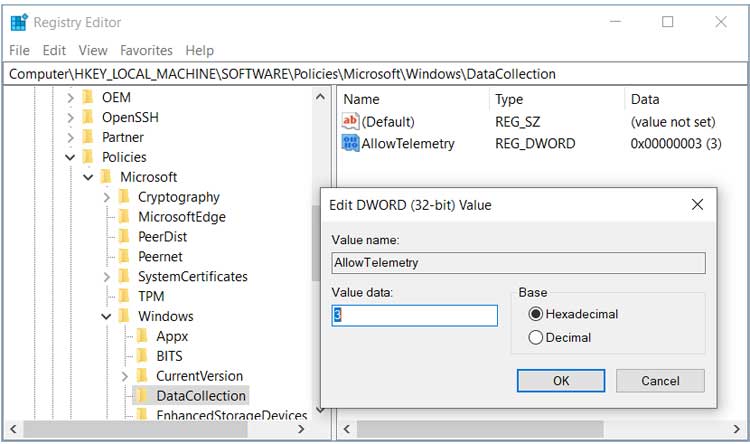
Computer\HKEY_LOCAL_MACHINE\SOFTWARE\Policies\Microsoft\Windows\DataCollection
to check your internal system settings. If you do not already have the DataCollection key or folder, then you will need to right-click and make a brand new key for it directly under the Windows folder.
14. Adjust the AllowTelemetry Value
Once you are safely inside the DataCollection folder, look at the right side of the window for a specific entry to modify. You need to make sure you have the AllowTelemetry DWORD value present, and verify that its numerical data value is set to exactly 3. You can easily right-click the empty white space and add a brand new DWORD (32-bit) value named AllowTelemetry if you do not already have it listed in the directory.
For additional training resources, check out our online IT training courses.
Check out our extensive IT book series.


