Last Updated on October 25, 2026
Hard drives have been around as long as computers themselves. They continue to evolve along with the other components that make up a modern computer. You should always get the highest performing hardware you can afford whether you buy a pre-built PC or are building your own computer.
You probably do not worry about hard drive partitioning if your PC already has an OS installed. You absolutely must know the basics if you are installing your own hard drive or adding a secondary storage device. We will discuss hard drive partitioning, MBR vs. GPT and basic vs. dynamic disks so you configure everything properly.

MBR (Master Boot Record) vs. GPT (GUID Partition Table)
1. Initializing a New Hard Drive
You must decide between MBR or GPT when adding a new hard drive in Microsoft Windows. You make this choice the very first time you initialize the disk. The Windows Disk Management tool prompts you to select a partition style immediately upon opening the utility.

2. Understanding the Master Boot Record
The Master Boot Record stores vital information directly in the first physical sector of a hard disk. It identifies exactly how and where the operating system is located so the computer can boot properly. The MBR holds the tiny bootloader program responsible for initiating the entire operating system boot process.
3. MBR Partition Tables and Signatures
The MBR dedicates a specific portion of its space to a rigid partition table. This table defines exactly how the hard drive’s storage divides into logical sections. The MBR also contains a unique disk signature that helps your BIOS or UEFI firmware distinguish between different storage devices.
4. Master Boot Record Limitations
The MBR scheme carries severe limitations for modern computers. It only supports up to four primary partitions on a single drive. The 32-bit addressing scheme also means MBR struggles with disks exceeding 2.2 TB in total size. The single location of boot information makes the drive highly vulnerable to catastrophic data loss from sector corruption.
5. Exploring the GUID Partition Table
The GUID Partition Table (GPT) serves as a much more modern disk partitioning scheme. It uses globally unique identifiers to define partitions across your storage devices. This advanced system supports vastly larger disk sizes and significantly more partitions than the older MBR standard.
6. Benefits of GPT Over MBR
GPT supports up to 128 primary partitions on a single disk by default. It utilizes 64-bit addressing to handle massive disks with sizes up to 9.4 zettabytes. GPT also stores multiple copies of partition and boot information across the disk to ensure robust data redundancy and easy recovery.
7. GPT Integration and Data Integrity
GPT integrates seamlessly with modern UEFI firmware to unlock faster boot times and secure boot capabilities. It incorporates CRC32 checksums to proactively verify the integrity of your partition table entries. Each partition receives a unique identifier to prevent system conflicts and simplify your overall disk management.
Hard Disk Partitions
1. Understanding Disk Partitions
Hard disk partitioning divides a physical hard disk drive into separate logical sections. Each partition acts as a completely independent storage unit. These partitions appear to the operating system as distinct disks with their own dedicated file systems.
2. Primary and Extended Partitions
You must create a partition after initializing your disk in Disk Management. MBR drives allow you to create both primary and extended partitions. You can create an extended partition to hold an unlimited number of logical drives if you need more than four standard partitions.

3. Create a New Simple Volume
You must format a volume before you can assign it a drive letter. Right click directly on the unallocated space in Disk Management. Choose the New Simple Volume option from the context menu to launch the configuration wizard.

4. Choose Your Volume Size
You can decide to use the entire disk or just a small part of it. You can easily create another separate partition later if you leave some space unallocated. Enter your desired volume size in megabytes and click the next button.

5. Assign a Drive Letter
Next you will need to assign an available drive letter to your brand new partition. You can choose from any letter that has not been assigned to another drive already. Pick a letter from the dropdown menu and proceed to the next step.

6. Format the New Partition
Finally you must format the partition to actually use it for file storage. You should select the NTFS file system unless you have a highly specific reason not to. Type a custom name into the Volume label field so you can easily identify the drive in File Explorer when managing your files.

7. Verify the Disk Management Layout
The system takes a few seconds to format the drive. You will then see your new partition listed directly in Disk Management along

Basic vs. Dynamic Disks
1. Understanding Basic Disks
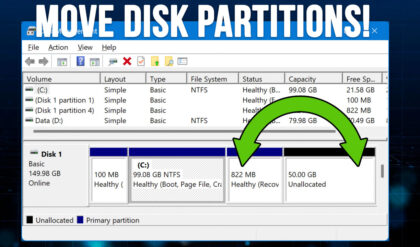
You probably noticed the word Basic listed next to your disk number. This serves as the default type of disk used in Windows. Basic disks use fixed partitions to divide the available disk space. You cannot dynamically resize or move these sections without using special third-party tools.
2. Exploring Dynamic Disks
You can also convert a standard disk to Dynamic if needed. Dynamic disks employ flexible volumes instead of rigid partitions. These volumes are not limited to defined physical sections on the platter. You can dynamically extend, shrink, or move these volumes directly within Windows.
3. Advanced Dynamic Features
Dynamic disks support several advanced features designed for enterprise environments. Disk spanning lets you combine free space from multiple physical disks into a single massive volume. You can also utilize mirroring to create a redundant copy of a volume for strict data protection. Striping divides data across multiple disks to massively improve read and write performance.
4. Converting Disk Types
You can easily convert a basic disk to a dynamic disk right inside Windows Disk Management. This specific process is completely irreversible. You must back up your data before attempting to convert a dynamic disk back to a basic disk. That reverse process requires deleting all volumes and effectively erasing all your data.
For additional training resources, check out our online IT training courses.
Check out our extensive IT book series.