
Last Updated on August 1, 2026
As you probably know, Windows 10 reached its official end of support lifecycle for standard security updates after October 2025. Microsoft introduced the Extended Security Update (ESU) Program to give PC owners continued access to critical updates/patches. However, many users do not see the native ESU enrollment prompt inside their system settings application.
Some devices show the ESU enrollment banner immediately while identical systems never display the update prompt. This inconsistency causes plenty of confusion for people who want to keep using their existing PCs securely without purchasing a new computer. Microsoft allows alternative enrollment methods even if the official prompt fails to show up on your machine.

How to Check Your Current Windows 10 ESU Enrollment Status
1. Open Windows Update inside System Settings
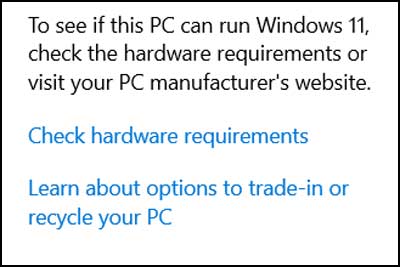
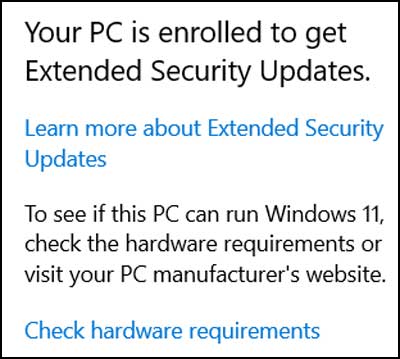
Navigate to the Windows Update control panel within your system settings menu to review your patch status. Check the top right corner of the window to see if your system displays active enrollment confirmation. If the panel displays standard Windows 11 upgrade alerts instead, your machine is not currently enrolled in the ESU program.
How to Manually Enroll Windows 10 in ESU Using Flyoobe
1. Download and Extract the Flyoobe Utility
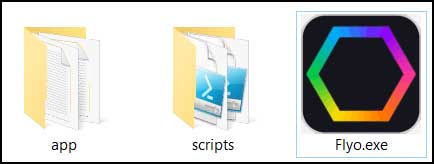
Download the free Flyoobe application version 1.4 or newer to access the necessary ESU enrollment tools. Extract the zip file contents to a folder on your local drive. Right-click the Flyo.exe file and select Run as administrator to launch the utility with elevated system permissions.
2. Select the Windows 11 Upgrade Menu Option
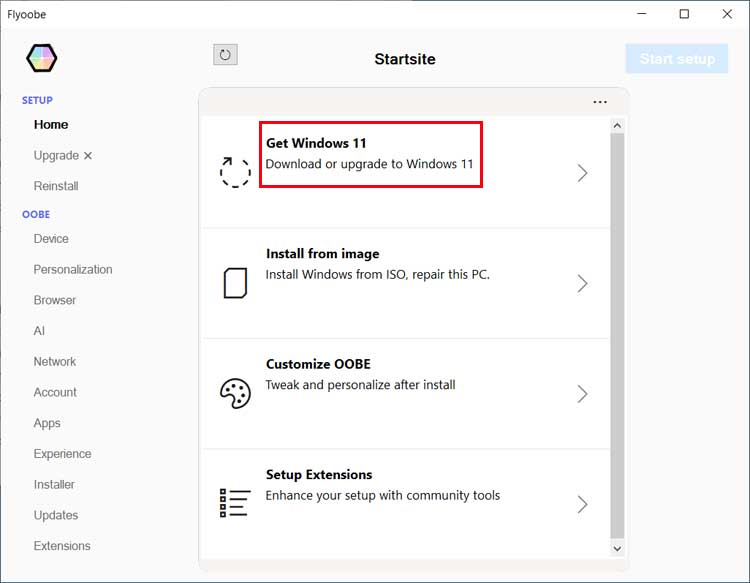
Locate the navigation menu inside the main Flyoobe application window once the app opens. Click on the section labeled Get Windows 11, Download or upgrade to Windows 11. This menu houses advanced configuration scripts including extended support options for Windows 10.
3. Choose the ESU Enrollment Dropdown Option
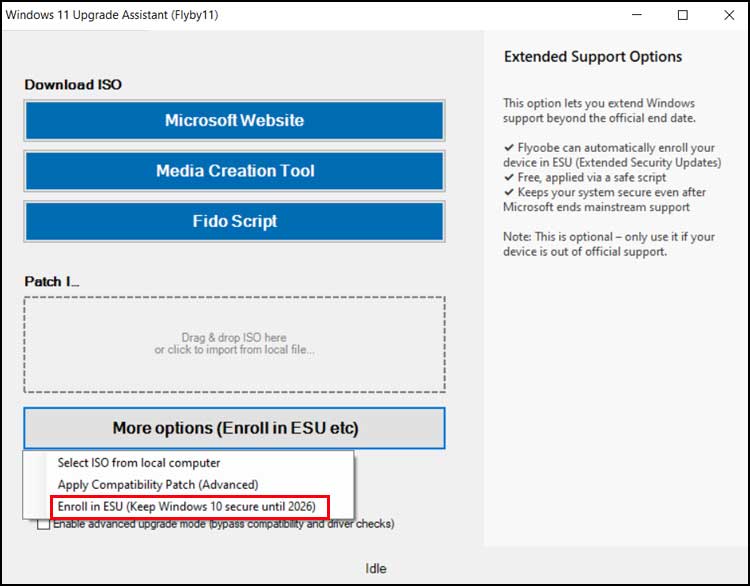
Click on the button labeled More options (Enroll in ESU etc.) inside the script window. Open the dropdown selector menu and select Enroll in ESU (Keep Windows 10 secure until 2026). Selecting this parameter configures the script to register your hardware with Microsoft security servers.
4. Download Required GitHub ESU Registration Scripts
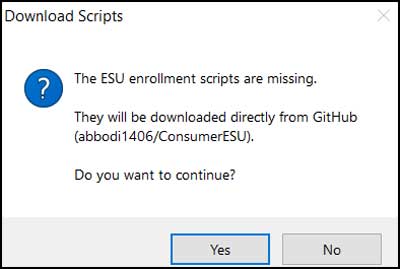
Click Yes when the application displays a prompt regarding missing enrollment scripts. Flyoobe automatically connects to GitHub to fetch official script components needed for activation. Wait a few seconds for the network download process to finish cleanly on your machine.
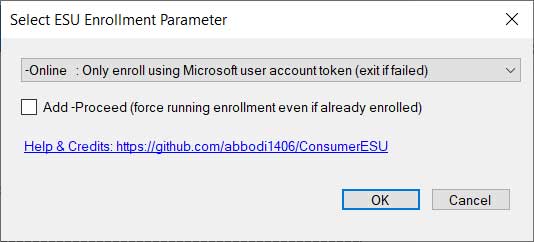
5. Select the Online Enrollment Token Parameter
Review the list of parameter options displayed in the ESU Enrollment window. Keep the default selection labeled Online: Only enroll using Microsoft user account token for standard consumer activation. Click the OK button to confirm your enrollment selection and proceed to final script execution.
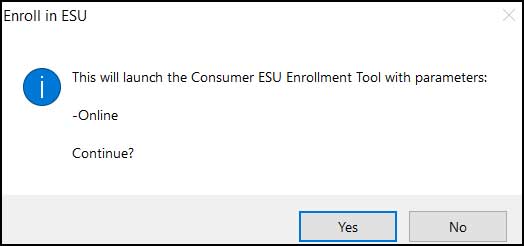
6. Launch the Consumer ESU Enrollment Tool
Confirm the final execution prompt by clicking the Yes button on the confirmation dialog screen. This action launches the underlying Consumer ESU Enrollment Tool with your selected online account token parameters. Do not close background applications while the activation process runs.
How to Verify Windows 10 Extended Support Status
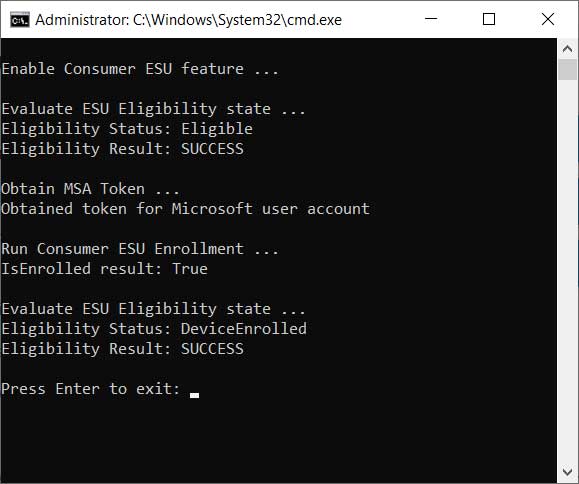
1. Confirm Success inside Command Prompt
Watch the automated Command Prompt console window as the script executes its registration commands. The script connects to update servers, evaluates system eligibility, and applies your account token. Verify that the final line displays Eligibility Result: SUCCESS before pressing Enter to exit the console.
2. Verify Active Support in Windows Update Settings
Reopen your standard Windows Update panel inside system settings to verify the new enrollment status. The settings banner should now state Your PC is enrolled to get Extended Security Updates. You can also use Flyoobe to upgrade unsupported hardware to Windows 11.
If you need to reinstall Windows 10, here is a trick you can use to download the Windows 10 ISO file from the Microsoft website.
For additional training resources, check out our online IT training courses.
Check out our extensive IT book series.






