
Last Updated on September 7, 2026
If you’ve ever found yourself deep in a Windows Command Prompt session, you know the frustration of typing out a long, complex string of characters only to realize you need to run it again ten minutes later. While many users are familiar with the basic “up arrow” trick, cycling through fifty commands one by one is a recipe for a headache.
Knowing how to efficiently manage your command history isn’t just for “power users”, it’s a massive time-saver for anyone who touches the terminal. Whether you’re troubleshooting network issues or automating tasks, these two methods will help you navigate your recent activity like a pro.
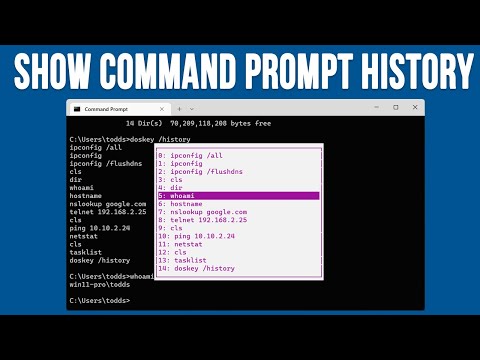
The Basic Up-Arrow Method
Before we dive into the advanced tricks, let’s acknowledge the baseline. Most of us start by pressing the Up Arrow key on our keyboards. Windows stores your recent commands in a temporary buffer, and the arrow keys let you cycle through them chronologically.
This works great if you just need the command you typed thirty seconds ago. If you have been working all day and need to find a specific line from two hours ago, the arrow key marathon becomes highly inefficient. That’s where the following two methods come into play.
Method 1: The F7 Graphical Menu
1. Launch the Hidden Pop-Up
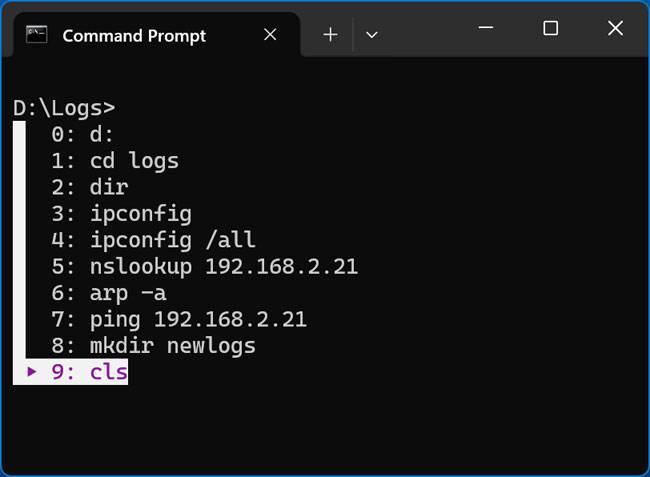
The most visual and intuitive way to see what you have been up to is by using a hidden keyboard shortcut. When you are inside the Command Prompt window, simply press F7 on your keyboard. A small graphical pop-up menu appears directly in the center of the terminal.
2. Review the Numbered List
This specific window lists every single command you have entered during the current session. The history is numbered and organized sequentially. Instead of scrolling blindly, you can see a clear list and quickly identify the exact command you need.
3. Execute Commands Instantly
Use your arrow keys to highlight the desired command from the popup list and press Enter. The terminal will instantly re-run that specific command for you. It is a simple, one-button solution that doesn’t require you to remember any complex syntax.
Method 2: The Doskey Command
1. Execute the Doskey Parameter
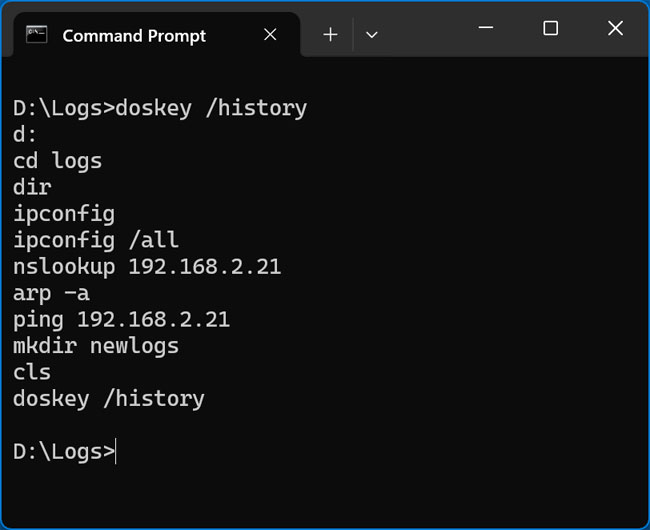
If you prefer keeping your hands on the home row or need a text-based list of your history, the Doskey command is your best friend. Type doskey /history into the prompt and press Enter. The Command Prompt will print a clean list of every command you have used in that session directly into the window.
2. Document Your Workflow
If you are following a series of steps and want to save them for later, you can run this command. You can then copy and paste the entire list directly into a Notepad file or a technical document. This creates an instant audit trail of your work.
3. Export to Log Files
Because it outputs text directly to the console, it is a great way to verify what a script has done. You can also export your workflow directly to a log file. Some users find the F7 menu distracting, so doskey keeps everything inline and consistent with the terminal experience.
Which Method Should You Use?
1. Choose F7 for Speed
The right choice depends entirely on your specific goal. If you simply want to find an old command and run it again quickly, F7 is undeniably the absolute winner. It is incredibly fast, highly visual, and requires the least amount of effort.
2. Choose Doskey for Archiving
On the other hand, if you are a developer or a system admin who needs to keep a strict record of the commands you used to fix a server, doskey is the superior choice. It allows for easy copying and archiving for your technical documentation.
3. Improve Your Terminal Efficiency
Mastering the Command Prompt is all about reducing friction. By moving beyond the simple up-arrow and utilizing the F7 menu or the Doskey command, you can significantly speed up your workflow. You will also drastically reduce the likelihood of typos when repeating complex network commands
For additional training resources, check out our online IT training courses.
Check out our extensive IT book series.






