
Last Updated on July 13, 2026
With Windows 10 support ending soon, you do have the option to enroll your computer in the Extended Security Updates (ESU) program to have it supported until October 2026. But if you want to upgrade from Windows 10 to Windows 11 and your computer does not meet the Windows 11 requirements, you can still do so using a free tool called Flyoobe. Microsoft makes it incredibly difficult to bypass these strict hardware checks natively.
If your computer does not meet the requirements for Windows 11, you will need to do some type of tweaking or even build a custom ISO file. But in this article, we will be showing you how to upgrade from Windows 10 to Windows 11 on unsupported hardware and then tweak and debloat your computer after the installation is complete. This method saves you from having to buy a completely new machine just to run the latest operating system.
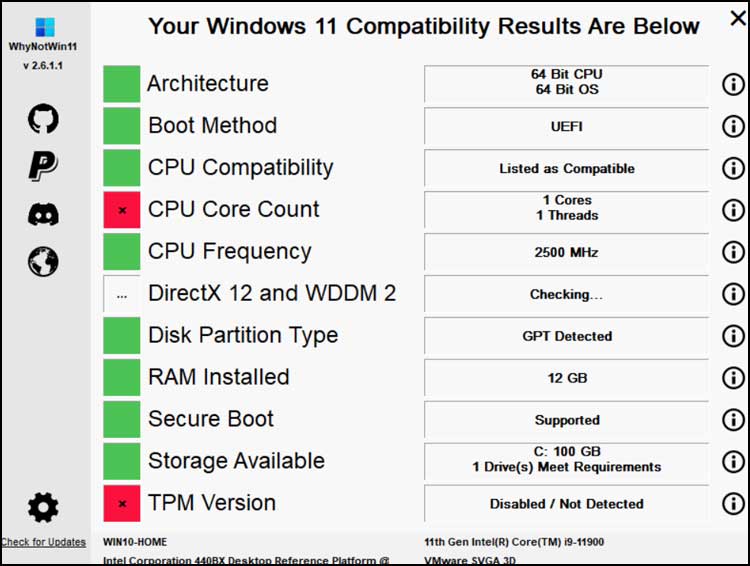
The image below shows the results of the hardware compatibility check using the free WhyNotWin11 app. As you can see, the CPU core count and not having a TPM are the exact causes for this specific computer not to be compatible with Windows 11. Flyoobe will completely bypass these specific hardware roadblocks during the setup process.
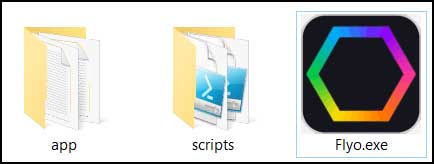
To upgrade our computer from Windows 10 to Windows 11, we will first download the Flyoobe app from the Github website here. Once you extract the zip file, you will have a file called Flyo.exe that you can right click on and choose Run as administrator.
Running the Flyoobe Upgrade Tool
1. Download and Extract Flyoobe
To upgrade our computer from Windows 10 to Windows 11, we will first download the Flyoobe app from the official Github website here. Once you extract the zip file, you will have a file called Flyo.exe that you need to access. You must right-click on this executable file and choose Run as administrator to grant it the proper system permissions.
2. Launch the Windows 11 Setup
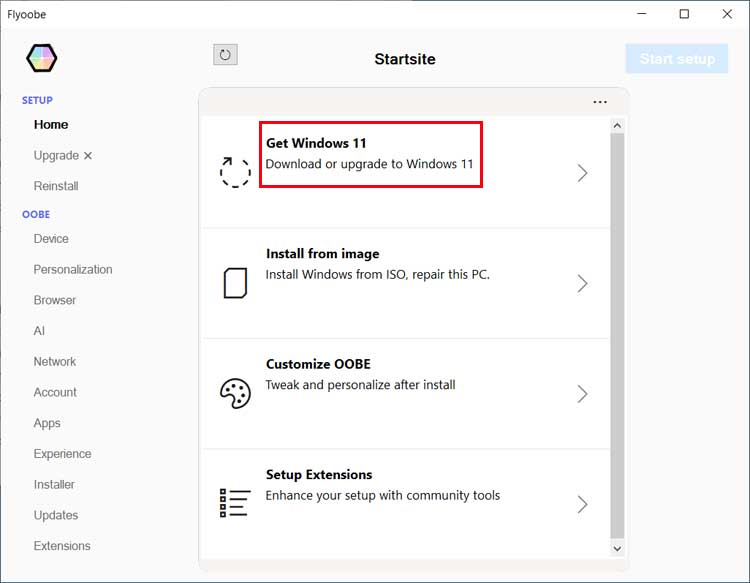
Once the app opens, you will see a clean user interface with several different configuration tabs. You will want to click on the Get Windows 11 option located directly under the Setup section. This initiates the specific module required for downloading and patching the operating system files.
3. Patch the Installation ISO
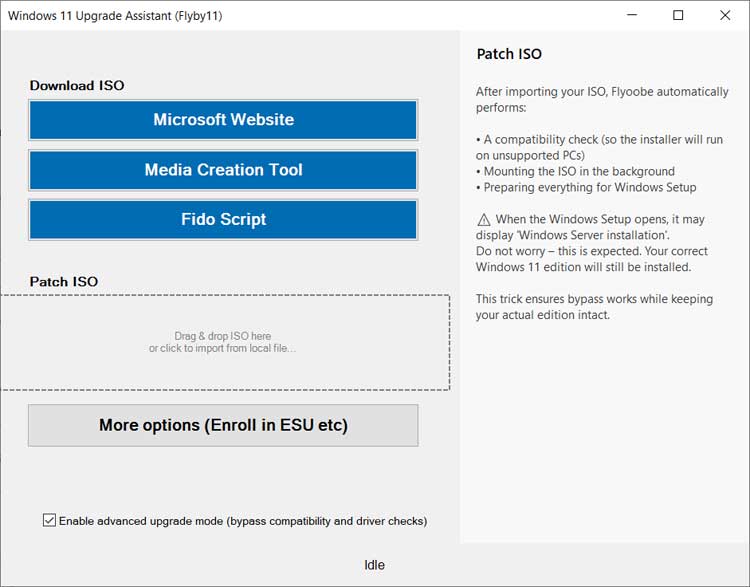
Here you will have some options as to where you will get the Windows 11 installation media. You can download it from the Microsoft website, use the Media Creation Tool, use a Fido script, or use your own ISO file if you happen to have one. We have already downloaded the Windows 11 ISO file so we will drag and drop it right into the Patch ISO box. We will also check the box that says Enable advanced upgrade mode (bypass compatibility and driver checks) to ensure the hardware restrictions are ignored.
Installing the Windows 11 Operating System
1. Ignore the Server Installation Warning
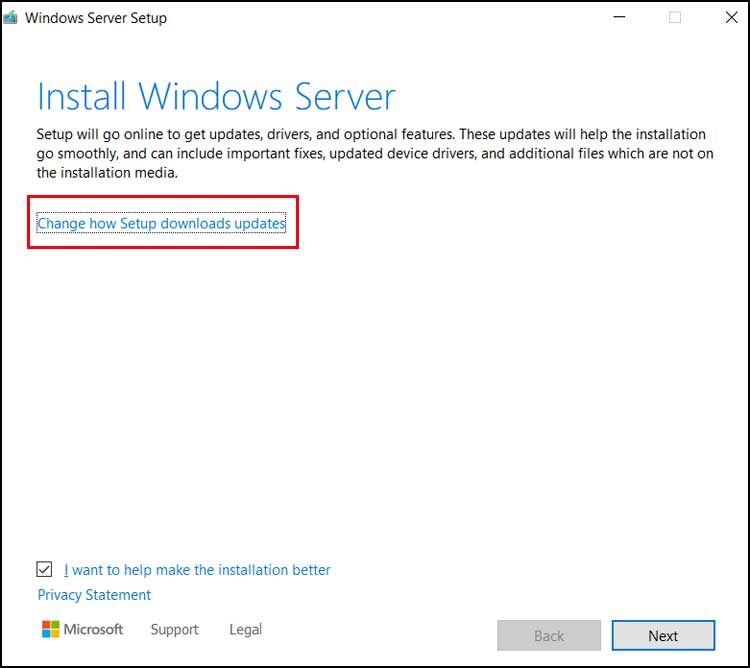
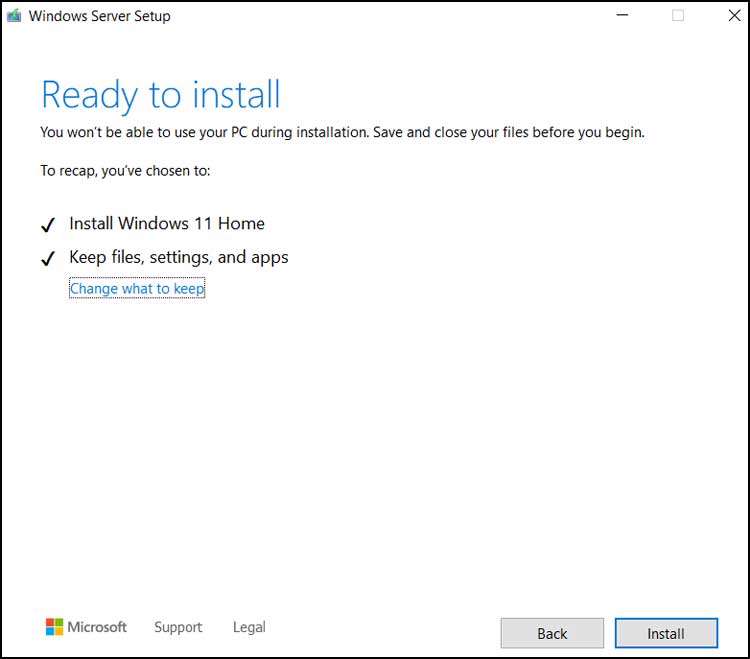
You will then see a window open saying it is going to be installing Windows Server. You can safely ignore this because it is only used to trick the installer into bypassing the Windows 11 requirements. You can also click the link that says Change how Setup downloads updates if you want to download any updates now or wait until after Windows is fully installed.
2. Configure the Update Options
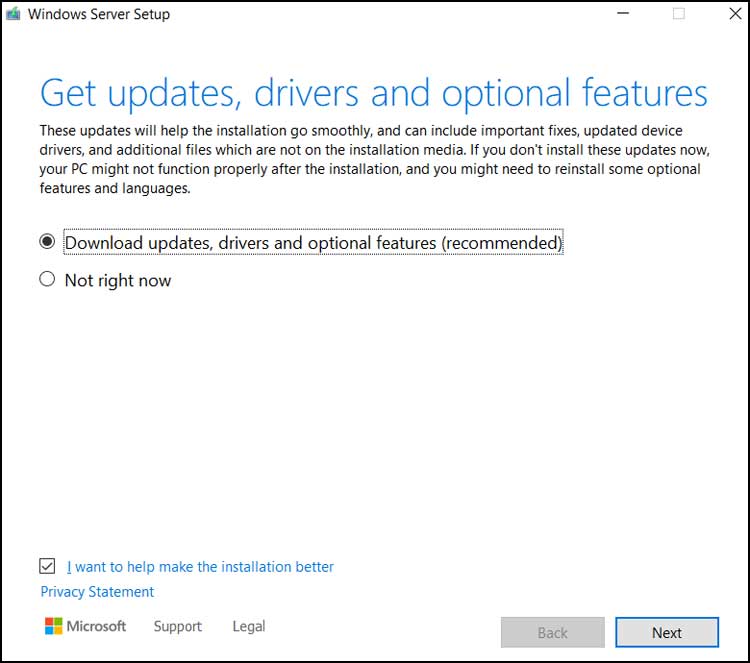
You probably want to keep the option to download updates, drivers, and optional features checked. Do this unless you do not want to wait the extra time required to process them or if you do not have an active internet connection. Pulling the updates now saves you from dealing with missing drivers during the first boot.
3. Choose Your Data Retention Settings
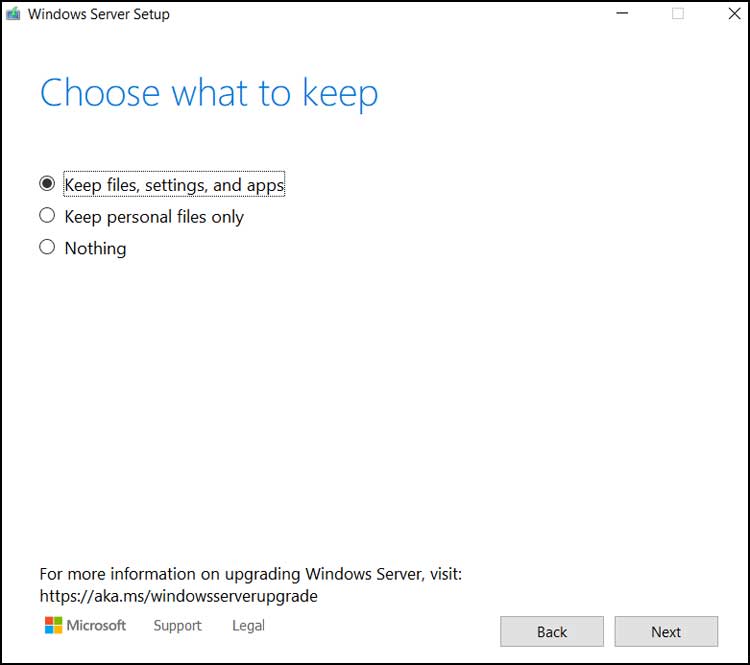
Then you will need to click on the Accept button to accept the official software license agreement. Then you can choose to keep files, settings and apps or just your personal files. If you choose Nothing then Windows will not keep any of your installed apps or personal files, resulting in a completely clean slate.
4. Begin the Upgrade Process
Setup will then run a couple of automated tests to make sure your computer is ready to upgrade to Windows 11 and has enough disk space to do so. Then you can click the Install button to officially start the Windows 11 upgrade process. Your computer will lock the screen and begin copying the core files.
5. Wait for the Installation to Finish
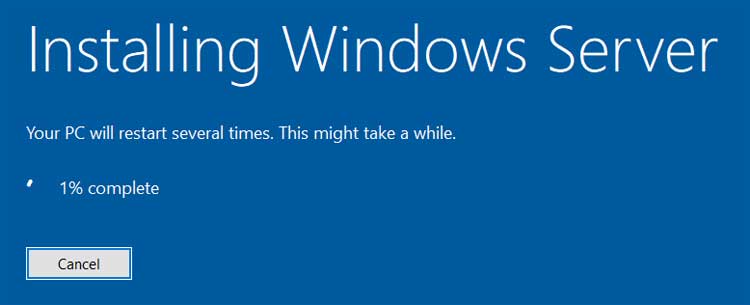
Once again, the screen will explicitly say Installing Windows Server. You can ignore this visual bug and wait for the installation to be completed, which can take quite a bit of time depending on your hard drive speed. Your computer will reboot several times during this phase.
6. Complete the Profile Setup
Then you will be shown the login screen with any users that you had configured from Windows 10. Once you choose a user account and login, Windows will need to do its initial profile setup process which can take several minutes. Do not turn off your PC while this blue screen is active.

7. Verify the New Desktop
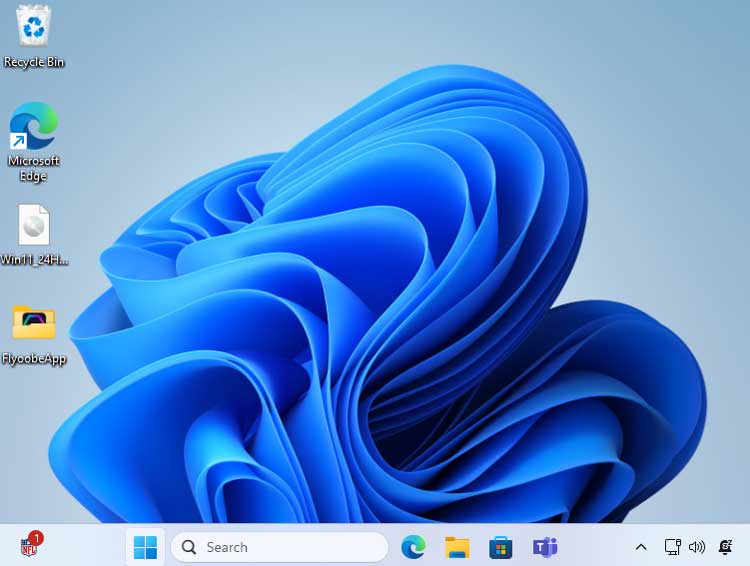
Then you will be taken directly to your new Windows 11 desktop and the upgrade process will be totally complete. You now have a fully functional modern operating system running on previously unsupported hardware. The start menu and taskbar will reflect the new centered design out of the box.
Tweaking and Debloating Windows 11
1. Access the OOBE Tweaking Menu
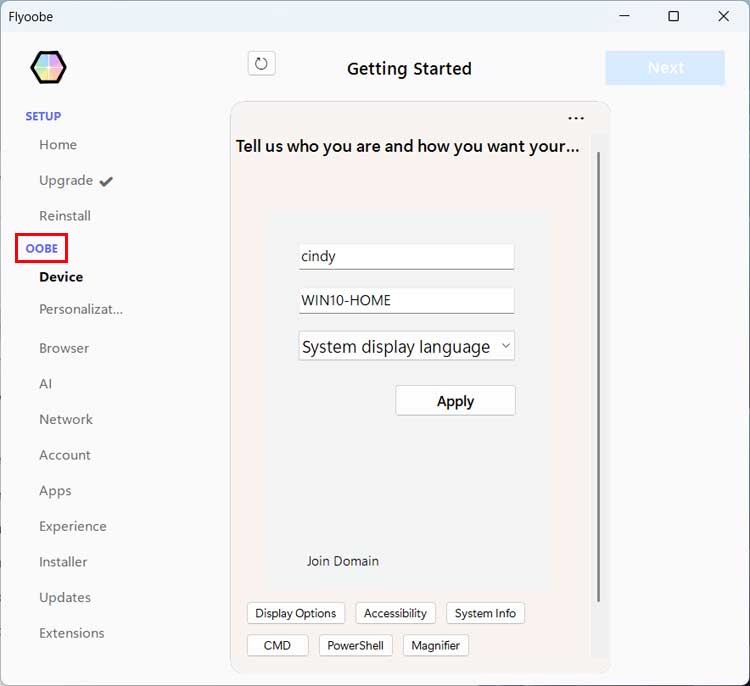
You can now open the Flyoobe app again as an administrator to tweak and debloat your new Windows installation. To do so, go to the OOBE section on the left sidebar. You can then go through all the available configuration sections to customize your machine. We will now give you a brief description of what you can do from each of the sections under OOBE. To see these changes in action, refer to the video at the top of this page.
2. Configure Device and Personalization Settings
Inside the Device tab, you can change your display name, computer name, and system language. The Personalization tab allows you to switch from light to dark mode instantly. You can also use this area to move the Start button back to the left side of the taskbar like older Windows versions.
3. Manage Browsers and AI Features
If you have more than one web browser installed, you can use the Browser section to choose which one will be the system default. The AI section will let you see any Copilot features installed on your system. You can easily remove these AI integrations entirely if you prefer a cleaner workspace.
4. Adjust Network and Account Preferences
The Network tab can be used to quickly switch between a wired Ethernet connection or a Wi-Fi network connection. Inside the Account section, you can manage your user profiles. If you want to create a new local or Microsoft user account, you can quickly do so right from here.
5. Uninstall Apps and Modify the Experience
The Apps menu lets you view and completely uninstall default Windows applications if you do not need them taking up space on your computer. The Experience section has a wide variety of different tools to customize your Windows installation behavior. This helps strip away unnecessary background telemetry.
6. Install Third-Party Software and Updates
The Installer tab can be used to silently install a variety of popular third-party apps such as 7-Zip and Notepad++. The Updates menu allows you to check for pending Windows updates. You can specifically choose which ones to install and which ones to block from this interface.
7. Apply Advanced System Extensions
The Extensions section has a variety of powerful Windows tweaking tools built right in. You can run Chris Titus Tech’s Windows utility directly from this menu. This provides even more granular options to tweak your computer’s core system settings for maximum performance.
For additional training resources, check out our online IT training courses.
Check out our extensive IT book series.






