Last Updated on August 28, 2026
When it comes to repairing your PC, you really need to have the right tools at your disposal to make sure you have everything you need to get the job done. There are many all-in-one system rescue toolkits out there such as Hiren’s Boot CD and Lazesoft Recovery Suite. The key is finding the toolkit that works the best for you.
Even though you have many options, there is a unique repair toolkit that you might want to check out that can actually repair both Windows and Linux environments. It is called the AiO (All-in-One) System Rescue Toolkit. It is completely free to use even though you have some other advanced professional options available.

The AiO System Rescue Toolkit Community Edition is the free version intended for home technicians. There is also a Supported and Professional edition built for enterprise environments. You can check these out as well as download the core ISO file directly from their official website here.
Configuring Your Flash Drive and Loading AiO
1. Download the Rufus USB Tool
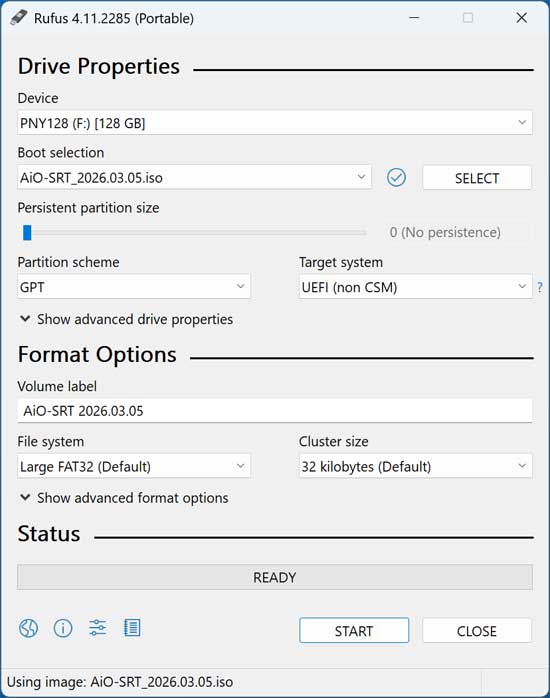
Once you download the AiO ISO file, you will need to make a bootable USB flash drive using your favorite USB creator tool. For our example, we will be using the popular Rufus USB app to create our flash drive. Download the latest version of Rufus to ensure maximum compatibility with modern motherboards.
2. Configure the Partition Scheme
Depending on the specs of the computer you are going to be using AiO on will determine what settings you will use in Rufus. For newer computers and modern operating systems, you should be fine with the GPT partition scheme. Pair this with the standard FAT32 file system to prevent boot errors.
3. Boot into the GRUB Loader
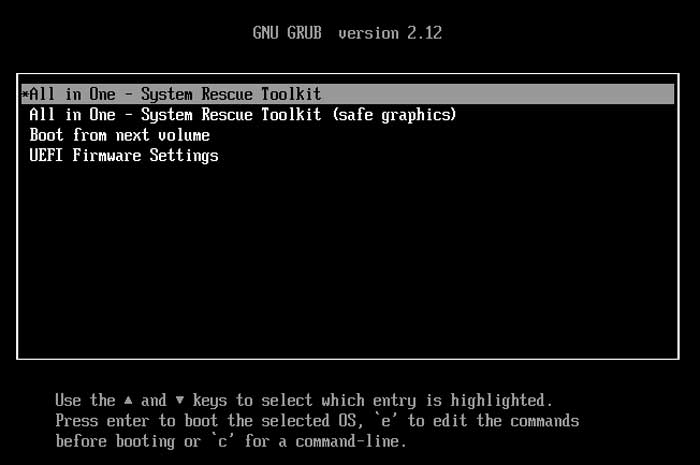
Once you boot to your USB flash drive, you will see the AiO Linux GRUB bootloader screen. You will have exactly 30 seconds to change the option before it chooses the first one for you automatically. If you press one of the arrow keys on the keyboard, it will stop the countdown timer immediately.
4. Select the Primary Boot Option
We will now choose the first option on the list and press enter. This loads the core operating system into your system memory. Wait a few moments for the background scripts to initialize the hardware drivers.
5. Accept the License Agreement
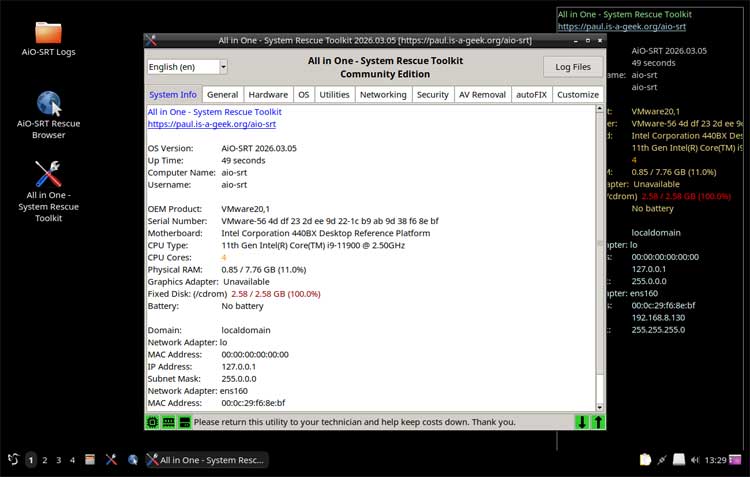
You will then see a Linux style desktop appear on your monitor. You need to click on the Accept button to get past the standard license agreement. The toolkit will not function until you explicitly approve these terms.
6. Review the System Information
The All in One System Rescue Toolkit will automatically open on the screen directly to the System Info tab. Here you can find highly detailed information about your computer hardware. If you close AiO, you can open it again using the desktop icon on the left side of the screen.
7. Access the Built-in Web Browser
There is also a built-in web browser that you can use if you need to get on the internet to research a specific error code. Look for the AiO-SRT Rescue Browser shortcut on your desktop. This provides immediate internet access without needing a functional Windows installation.
AiO System Rescue Toolkit Tabs
1. Explore the General Tab
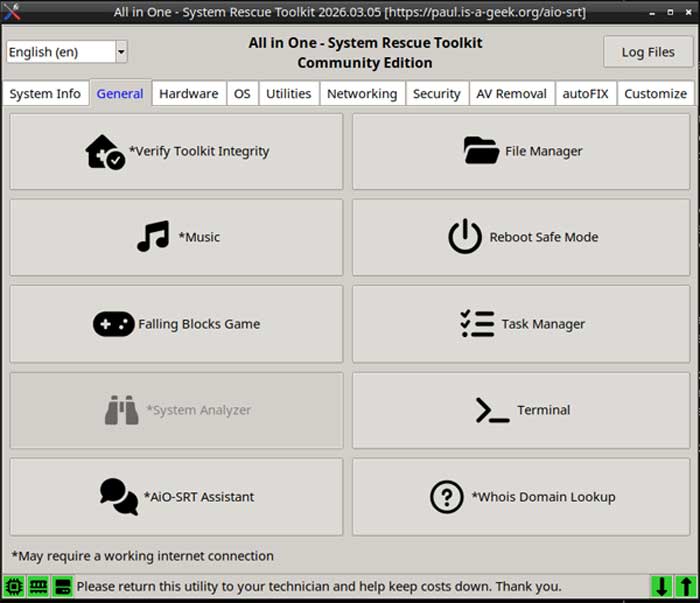
There are many tabs with various tools within each one. The General tab has miscellaneous tools you can use to do things such as view your files with Double Commander. You can also open a Linux style terminal to run manual commands and use the built-in task manager to see exactly what is running on the computer.
2. Utilize the Hardware Tab
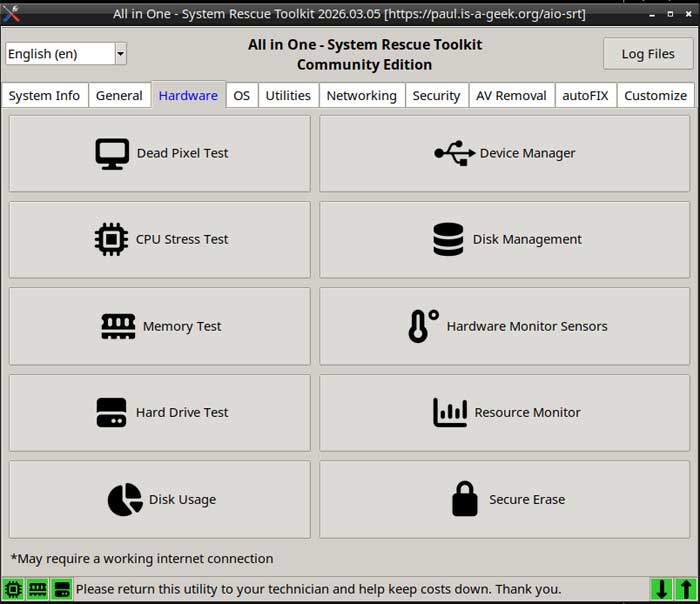
The Hardware tab has tools you can use to manage your physical components. This includes dedicated CPU, hard drive, and memory test apps. As you can see, there is a Device Manager and Disk Management app. These will open Linux versions while booted with the flash drive. You can also use the Secure Erase app to wipe a drive completely if needed.
3. Access the OS Tab
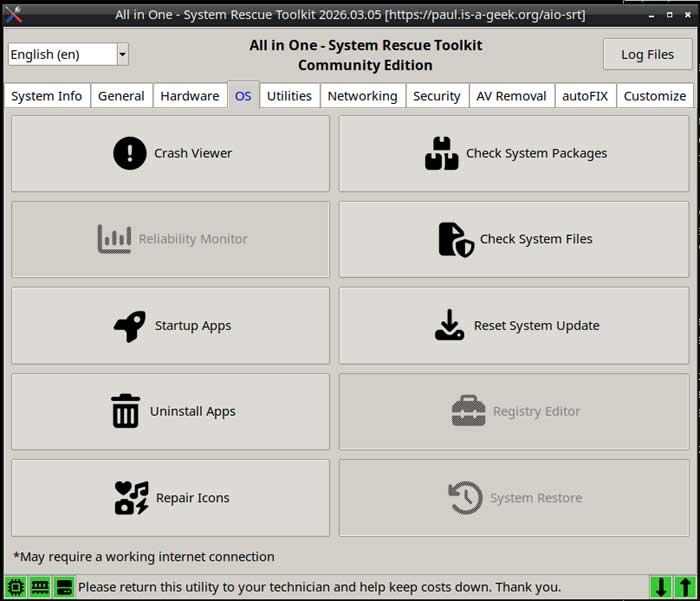
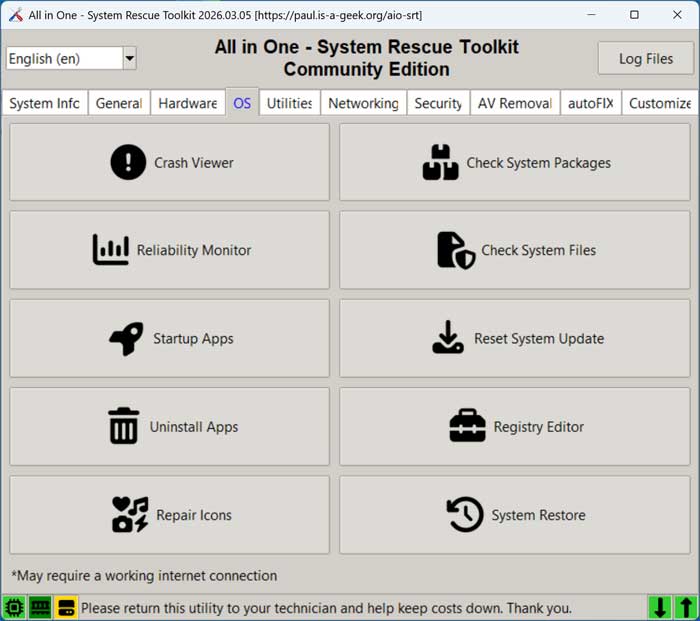
The OS tab has tools you can use to do things such as check system files, view startup apps, and view crash reports. Once again, some of these will open different Linux-based tools when used from the bootable media. They adapt to the environment you are currently running.
4. Run Utilities and Data Recovery
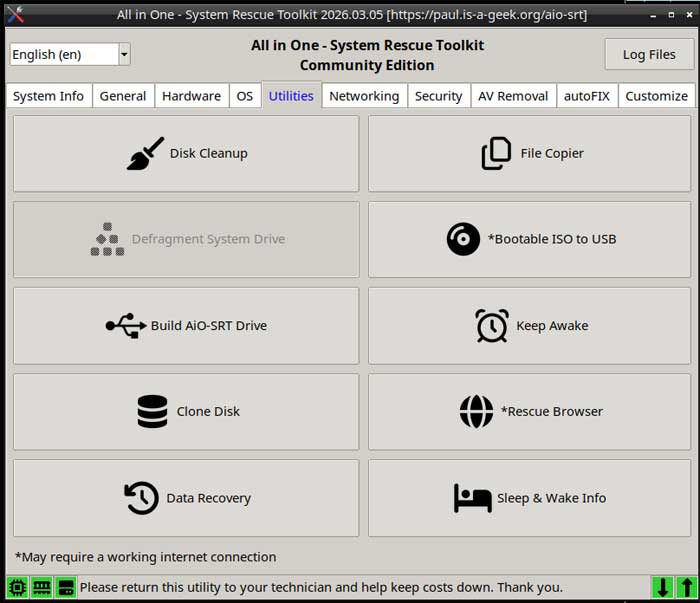
The Utilities tab contains tools that can do things such as cleanup your hard drives, clone drives, and copy files. There is also a powerful data recovery tool located here. You can use this utility to try and recover deleted files from a corrupted partition.
5. Manage the Networking Tab
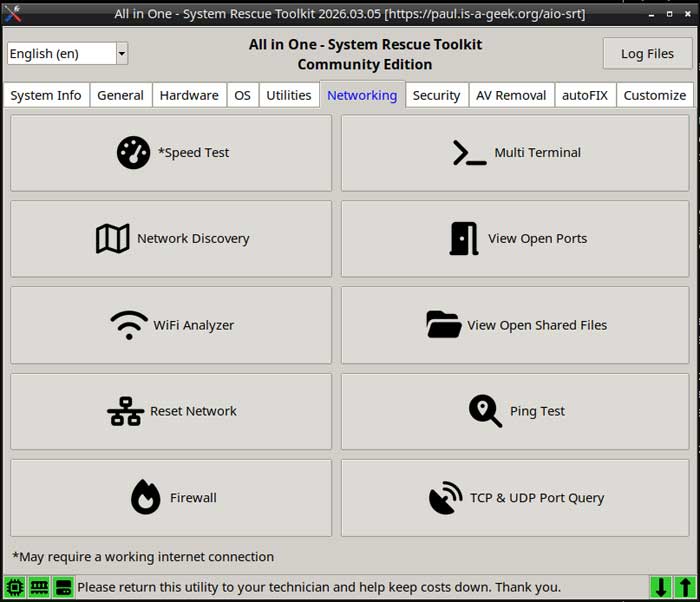
The Networking tab allows you to do things such as run an internet speed test, view open ports, and run a ping test. It will also open the firewall app if there is one currently configured on the computer. This helps isolate severe connectivity issues quickly.
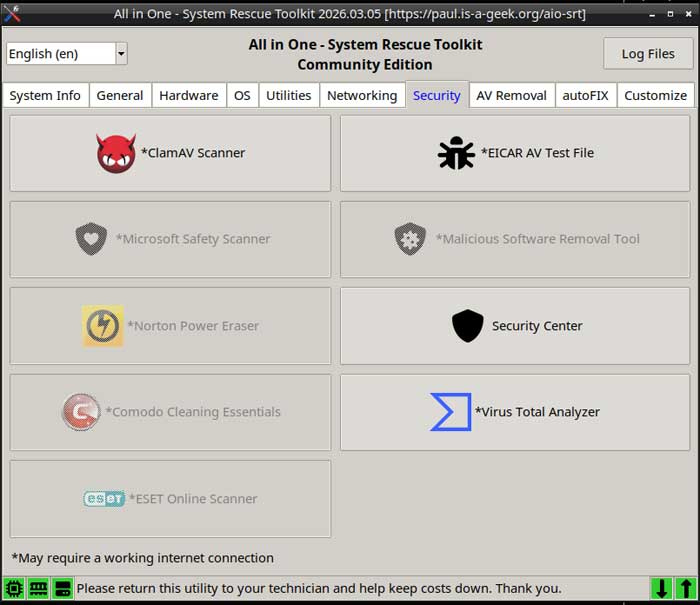
6. Review the Security Tab
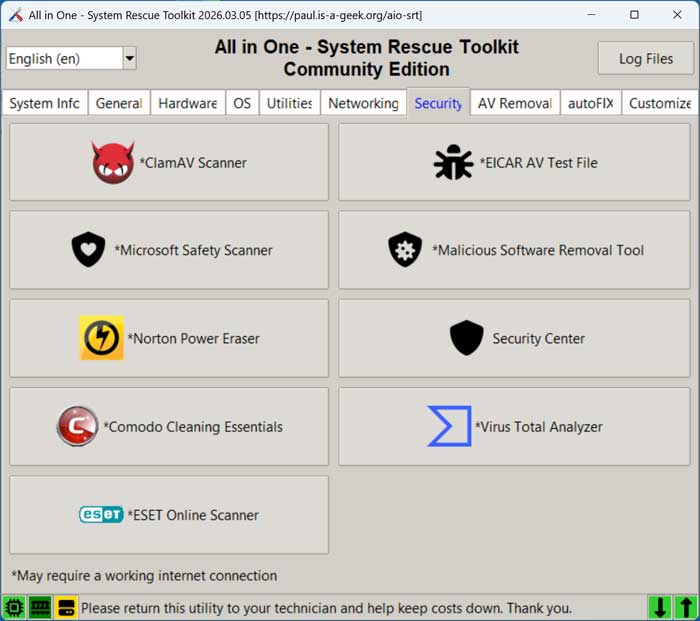
The Security tab has several tools you can use to scan your computer for active threats. As you can see, many of them are greyed out because they cannot be run directly from the live boot disk. They require the native Windows environment to function properly.
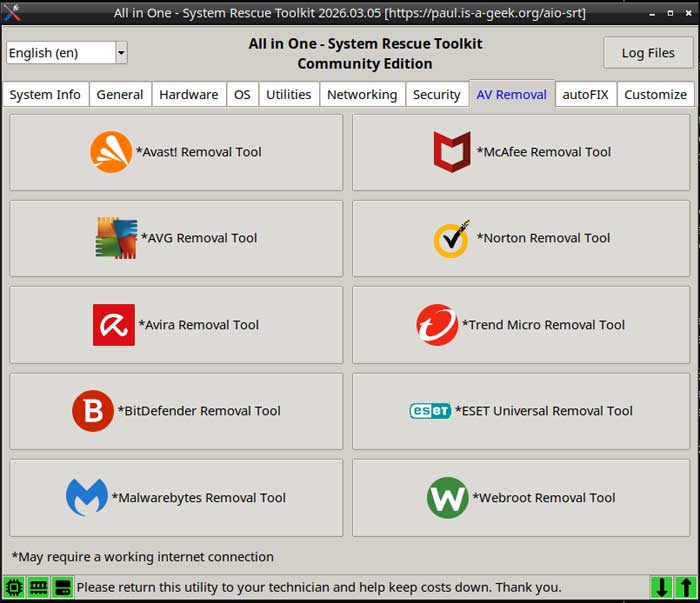
7. Execute AV Removal Tools
The AV Removal tab has other antivirus removal tools you can run from the boot disk. These dedicated scripts completely strip away broken antivirus installations that refuse to uninstall normally. You can run these from the live disk as well as from within Windows itself.
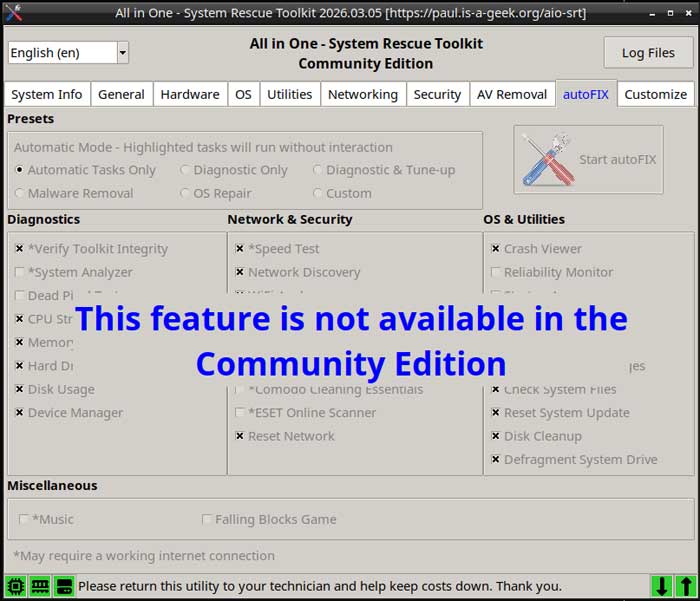
8. Understand the autoFIX Tab
The autoFIX tab has many more automated repair options available. As you can see, it is not available with the free Community version. You must upgrade to the paid professional tier to unlock these one-click repair scripts.
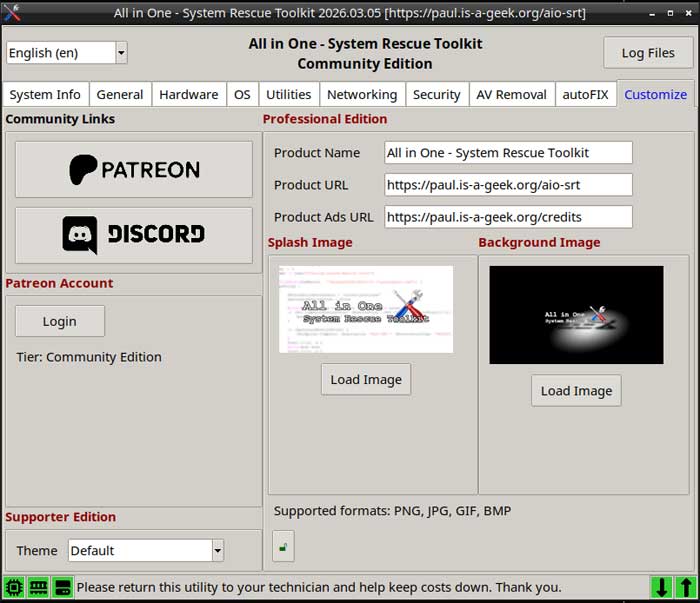
9. Check the Customize Tab
The Customize tab has some basic options to alter the visual presentation of the toolkit. You can customize the product name, URL, and the specific splash image used with the AiO app. This is highly useful for IT shops wanting to brand the toolkit for their own technicians.
10. Reboot or Shutdown the System
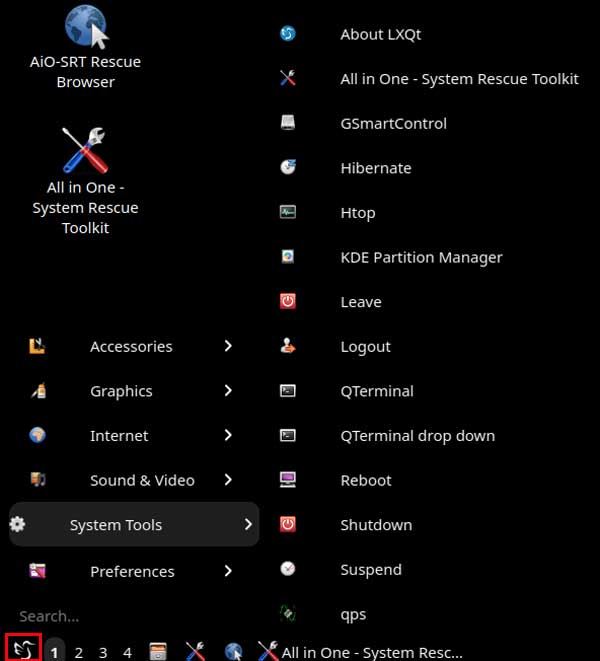
Once you are done hopefully fixing your computer, you need to exit the environment safely. You can click on the bird icon at the lower left corner of the taskbar. Go to System Tools and then select either Reboot or Shutdown.
Running the AiO System Rescue Toolkit from Windows
1. Locate the Executable File
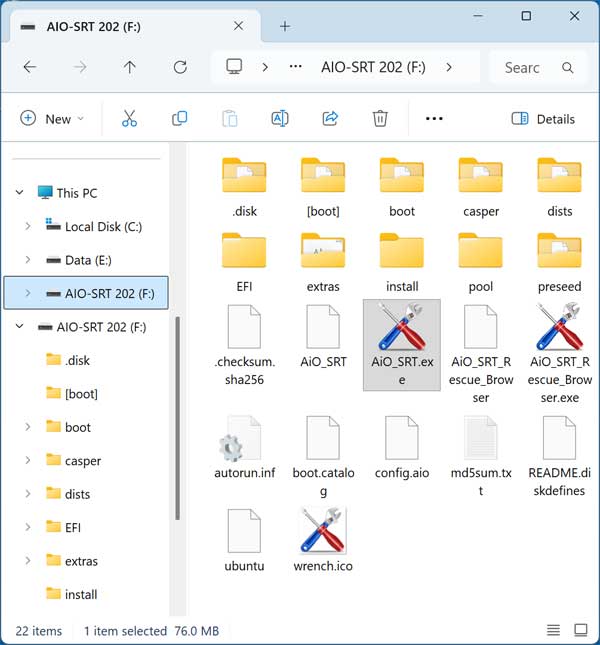
You do not always have to boot from the USB drive to utilize these tools. To use AiO directly in Windows, you can simply browse to your flash drive in File Explorer. Open the AiO_SRT.exe file to run the exact same tool within your active Windows session.
2. Accept the UAC Prompt
You can even run the Rescue Browser from here if needed. Once again, you will need to click on Yes at the User Account Control prompt. Then click on the Accept button to accept the standard software license agreement.
3. Run Windows-Specific Tools
As you can see in the images below, the options such as Registry Editor, System Restore, and the rest of the Security tools are no longer greyed out. You can now run these native tools while booted into Windows. Test them out to see if they can help fix your specific operating system issue.
For additional training resources, check out our online IT training courses.
Check out our extensive IT book series.