Last Updated on November 14, 2026
Upgrading your hard drive is one of the most common Windows PC upgrades that people do. It’s a great way to give yourself more space or faster performance by upgrading to a fast NVMe or SSD drive. Its one of the cheaper upgrades you can do to get more performance out of your computer.
You may find that you are forced into upgrading your computer because of a failing Windows drive and want to save all your data before it’s too late. Or maybe you cloned your Windows drive to a newer or faster drive.

Regardless of the reason, you might find yourself with a leftover Windows drive that would be perfectly fine to use as extra storage on your new computer. Or it might even serve well as a backup drive for your regular file and folder backup routine. But one issue you might run into when trying to reconfigure an old Windows drive to use as extra storage is that you have an EFI system partition or recovery partition on the drive that you cannot remove. Sure, it is ok to leave them there but if you want the extra space back and want a cleaner setup, you will want to delete these leftover partitions.
Identifying Stubborn Partitions in Disk Management
1. Locate the Leftover Windows Drive
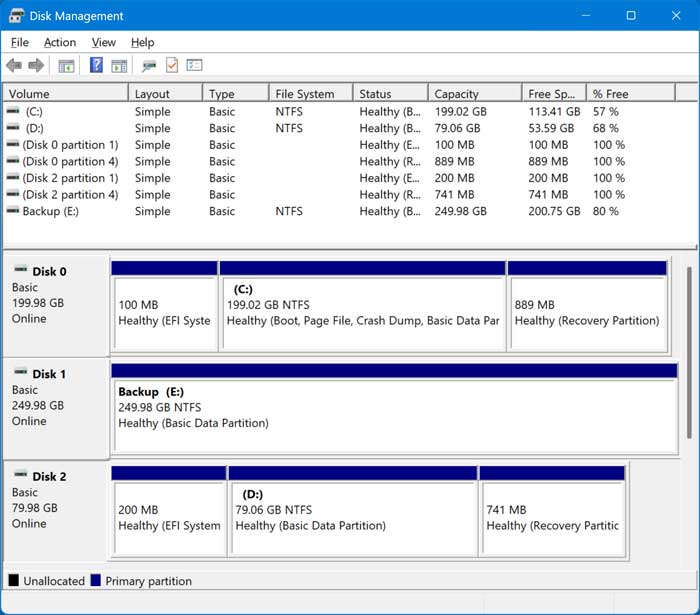
The image below shows an attached Windows drive as disk 2 with the assigned drive letter of D. It also has a 200MB EFI system partition before the D drive and a 741MB recovery partition after the D drive. These system partitions take up valuable space.
2. Attempt to Delete the EFI System Partition
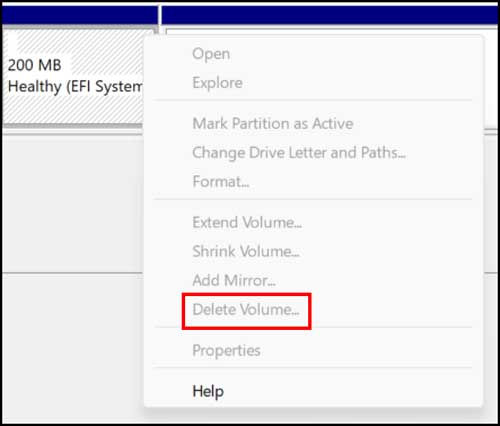
If we were to right click on the EFI system partition, we would see that the Delete Volume option is greyed out. The partition was labeled an EFI System Partition when Windows was originally installed on that drive, and that label travels with the drive. Because Disk Management still sees it as a boot partition, it disables Delete Volume even when the drive is now only a secondary drive.
3. Check the Recovery Partition Options
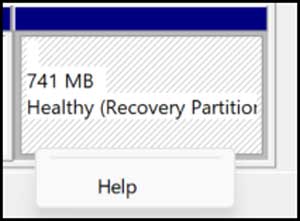
You will not have a delete volume option for a recovery partition either. Disk Management builds the right click menu from the actions allowed for that specific partition type. Deleting a Recovery partition is never allowed in Disk Management. Delete Volume is filtered out completely instead of merely being greyed out, leaving only Help.
4. Delete the Standard NTFS Volume
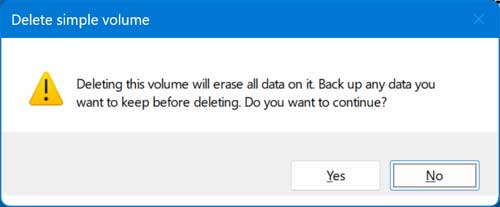
You can however delete the old Windows NTFS volume that contains Windows and your files by right clicking it and choose Delete Volume. This will remove any files from the volume as well so keep that in mind. Make absolutely sure you backed up your data first.
5. Observe the Remaining Unallocated Space
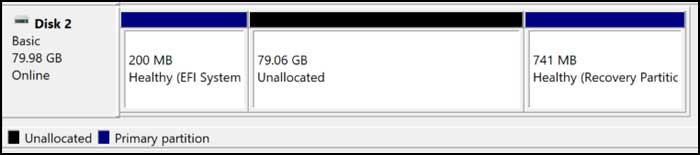
You will notice however that you will still have the EFI system partition and recovery partition intact and now just have some unallocated space between them. You can create a new volume here but that will not solve the problem of removing these extra leftover partitions. The drive remains heavily fragmented.
Understanding the DiskPart Clean Commands
1. Introduce the DiskPart Utility
To fix this issue, we will use the Windows DiskPart command to clean the drive and remove the leftover partitions. DiskPart is Windows’ built-in command-line tool for viewing and managing disks, partitions, and volumes. It includes some powerful operations that Disk Management strictly does not allow.
2. The Standard Clean Command Explained
We will be using the clean command in DiskPart to clean the entire drives and remove all the partitions at the same time. The standard clean command removes the partition table only. Every single partition disappears at once, including EFI and recovery partitions. The entire process takes just a few seconds to finish.
3. Data Recovery After a Standard Clean
Your files are NOT actually erased when using the basic clean command. Only the logical map pointing to them is gone. Data can still be recovered with specialized data recovery tools. If you are using this drive for yourself then the clean command by itself is perfectly fine.
4. The Clean All Command Explained
You can also use the clean all command to remove everything and securely wipe the data from the drive at the same time. This removes the partition table and writes zeros over every single sector. It completely overwrites the entire drive, including hidden areas outside the standard partitions.
5. Expectations During a Clean All Wipe
This secure wipe takes a long time because it writes across the full size of the drive. No progress bar is shown in the command prompt window. It may look completely frozen, but it is actively working in the background. Data cannot be recovered with software afterwards.
6. Spinning Hard Drives vs SSDs
For a spinning mechanical hard drive, this is a complete wipe. Every sector is overwritten in place, and absolutely nothing is recoverable. For an SSD, it stops all software recovery, but wear leveling can leave old data in spare blocks this command cannot reach. For a guaranteed SSD wipe, use the manufacturer’s Secure Erase tool instead.
Erasing the Drive Using DiskPart
1. Open an Administrative Command Prompt
To begin, we will open an administrative command prompt. Type cmd in the taskbar search box. Right click the result and choose Run as administrator. You must have admin rights to modify disk partitions.
2. Launch the DiskPart Tool
Then we will type diskpart and press enter. This will bring us to the DISKPART prompt telling us that we are now using DiskPart to manage our disks. The prompt changes to show you are inside the utility.
3. List the Available Disks
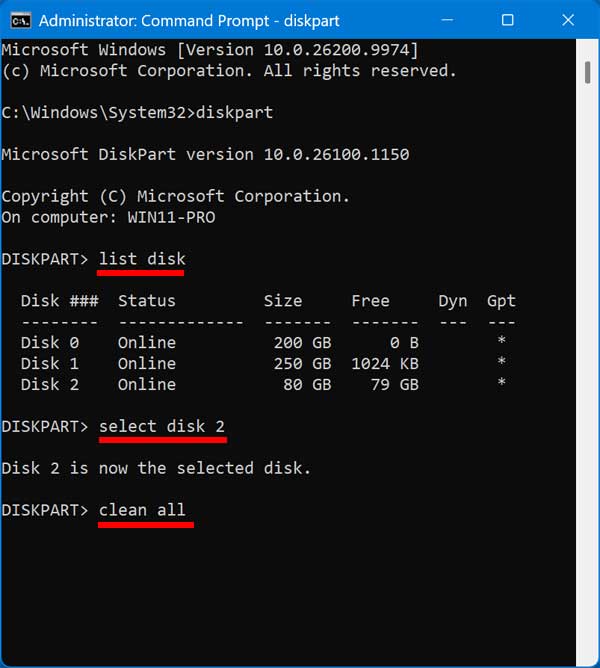
Next, we will type list disk to show the installed hard drives on the computer. As you can see in the image below, Disk 2 matches what we saw earlier in Disk Management. It also correctly shows as 80GB in total size.
4. Select the Target Disk
Now we need to choose disk 2 by typing select disk 2 at the prompt. Now everything we do will be performed on disk 2. Make absolutely sure you have the right disk selected to avoid wiping your main system drive.
5. Execute the Clean Command
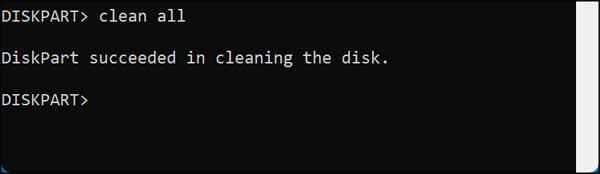
Finally, we will type clean all and press enter. The clean command is instant while the clean all command can take several minutes to complete. Do not close the window while it is processing.
6. Verify the Wiped Drive in Disk Management
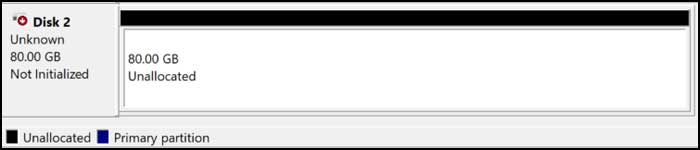
Right when you press enter on the clean or clean all command, Disk Management will immediately show the drive wiped with no partitions. It will show the entire drive as unallocated space. It will also show the disk as unknown and not initialized.
7. Exit the DiskPart Utility
When the cleaning process is complete, you will see a message that says succeeded in cleaning the disk. You will be brought back to the DISKPART prompt. You can now type exit to close it out safely.
Setting Up the Cleaned Drive
1. Initialize the Unknown Disk
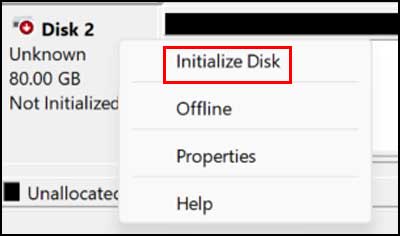
Now you can simply right click on the grey area where it says unknown. Choose Initialize Disk from the context menu. This prepares the drive for a brand new file system.
2. Choose the GPT Partition Style
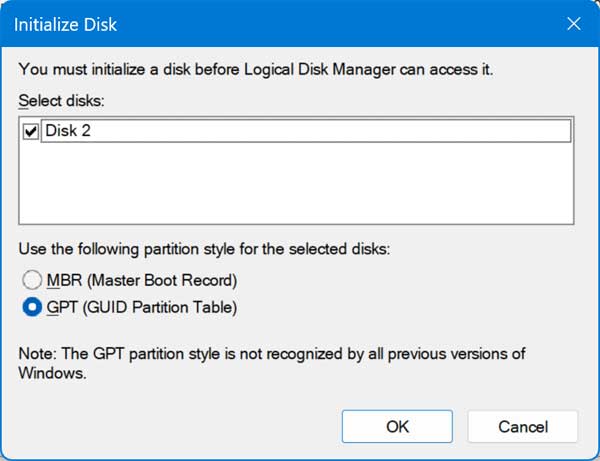
You will see that it matches the disk number that was in use before. You will most likely want to choose GPT. Use MBR only if you are using this disk in a computer with a much older version of Windows.
3. Create a New Simple Volume
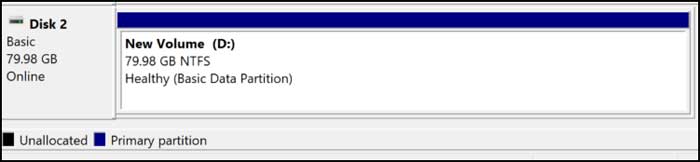
Then you can right click the unallocated space and choose New Simple Volume. Go through the standard Windows wizard to create your new drive. You now have a perfectly clean storage drive ready for your files.
For additional training resources, check out our online IT training courses.
Check out our extensive IT book series.