Last Updated on June 18, 2026
If you have been using Microsoft Windows for any amount of time, you have most likely experienced some type of crash or error that stopped you in your tracks. Many times, you can recover by restarting your computer or maybe even going back to an older system restore point.
But sometimes you might have a complete system crash where Windows is not recoverable or maybe even a hardware issue such as a failed hard drive. There are many bootable recovery tools you can use to fix your computer such as Hirens Boot CD or ANHDV Boot. But these require you to have a decent knowledge of what it takes to fix a computer and to have a good idea what is wrong with your computer in the first place.

One relatively easy want to get your computer back up and running to restore it from a backup. There are several types of backups you can do such as a file level backup, clone and the one we will be discussing which is a system image backup.
To restore a backup, you first need to create one. Windows has its own built in backup tool you can use to do this, but it can be a bit limited. For our example, we will be using a free third-party backup app called Hasleo Backup Suite which can be downloaded from their website here.
You can use this program to create Windows system image backups and then restore them while Windows is running or restore them by booting up with the emergency USB flash drive and then restoring the backup to the same drive, new drive or even a different computer.
Creating the System Image Backup
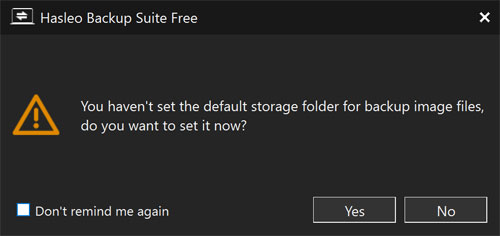
1. Skip the Default Storage Prompt
When you first run Hasleo Backup Suite, you will be prompted to choose a default storage folder for backup and image files. This is not necessary to set up right now. You can safely ignore this step if you are only going to use the program for system image backups.
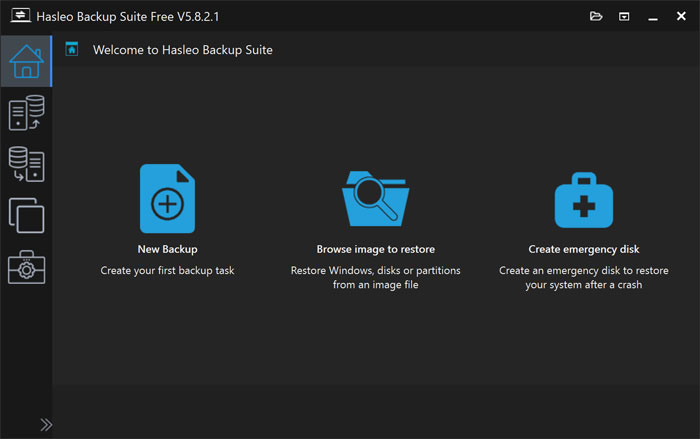
2. Start a New Backup Job
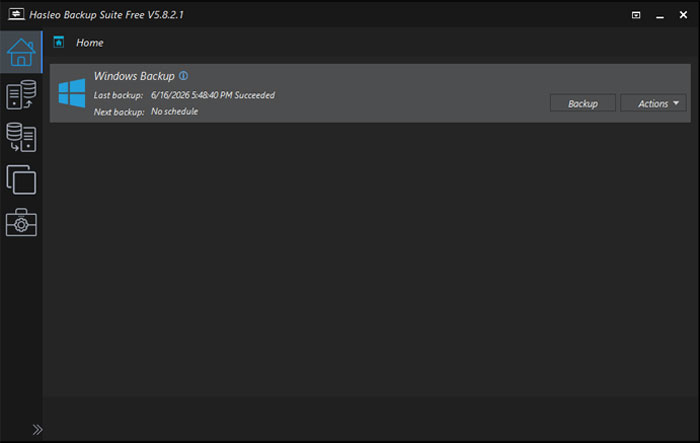
You will then be taken straight to the Home tab inside the application. Look for the large blue icon on the main screen. Click on the New Backup icon to get started with your image creation.
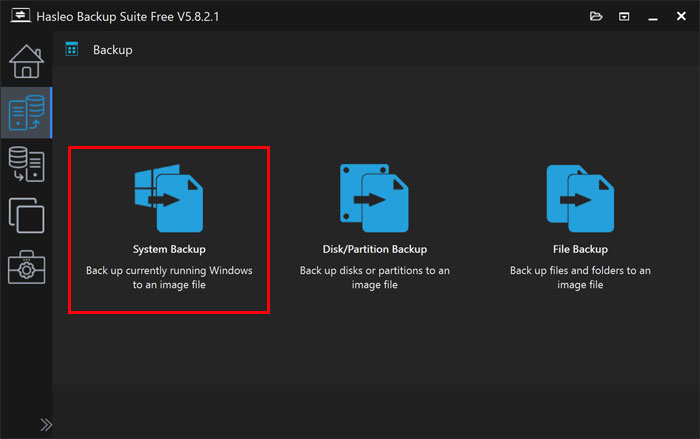
3. Select the System Backup Option
Next, you will need to click on System Backup to start the backup process. You will also see the other backup options available in the menu. These include choices like disk/partition backup and file backup.
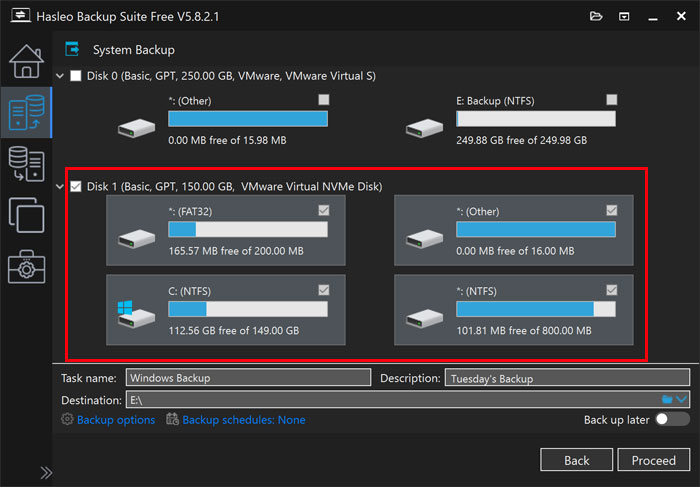
4. Choose Your Windows Drive
Now you will need to choose the hard drive that currently has Windows installed on it. If you click the box next to the disk name, it will automatically select all the required partitions for you. Windows is usually labeled as Disk 0 unlike the graphic shown below.
5. Name and Save Your Backup File
You can then name the backup job and backup file before choosing a location for the data to be stored. This destination will need to be a different drive besides your main Windows drive. A secondary internal drive or an external USB hard drive works perfectly for this task.
6. Run the Backup Process
Once you have the backup job configured, you can click the Proceed button to start the backup. It will take several minutes to finish the entire operation. The exact length of time will be determined by how much data you have on your drive and the read/write speed of your storage devices.

Creating the Hasleo Emergency Disk
In order to boot your computer into a mode where you can restore your system image backup outside of Windows, you will need to create an emergency disk. This special disk is used to start your computer in a Windows Preinstallation Environment (WinPE). WinPE is a lightweight version of Windows used specifically for deployment, recovery, and troubleshooting tasks.
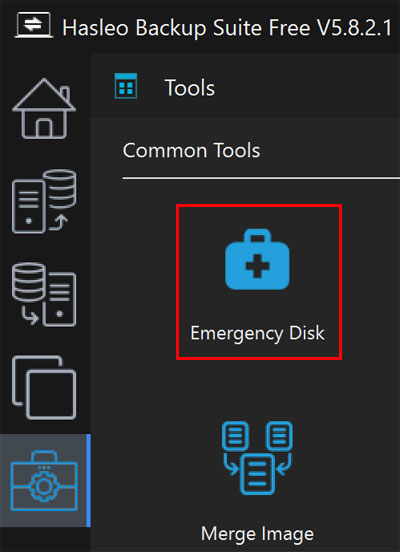
1. Open the Emergency Disk Tool
To create the emergency disk, look at the left side menu of the application. Click on the toolbox icon to open the utilities section. Then click on the Emergency Disk icon to launch the creation wizard.
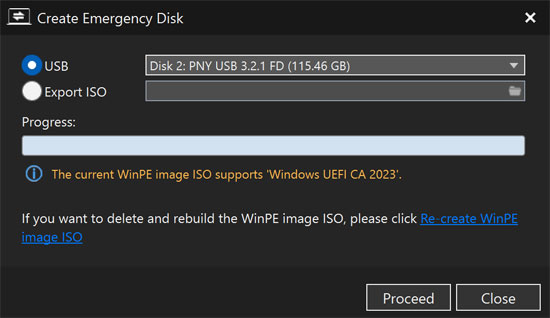
2. Select Your USB Flash Drive
You will need to have a USB flash drive connected to your computer to be used for the emergency disk. Just make sure there is nothing important you need to keep on it. Hasleo will completely wipe and format the drive during the emergency disk creation process.
3. Verify the Correct Drive
Always make absolutely sure you have selected the right flash drive if you have more than one connected to your PC. Selecting the wrong drive will result in permanent data loss. Click Proceed once you verify the correct USB drive is selected.
Restoring the System Image Backup
After you boot your PC with the emergency disk, you will load into the Hasleo recovery environment. You will then be able to see your system image backup on your backup drive. This assumes your external drive is connected to your computer and properly recognized by the recovery software
1. Select the Restore Action
Locate your specific backup job in the main list. You can then click on the Actions button on the right side of the screen. Choose Restore from the drop-down choices to begin the recovery wizard.
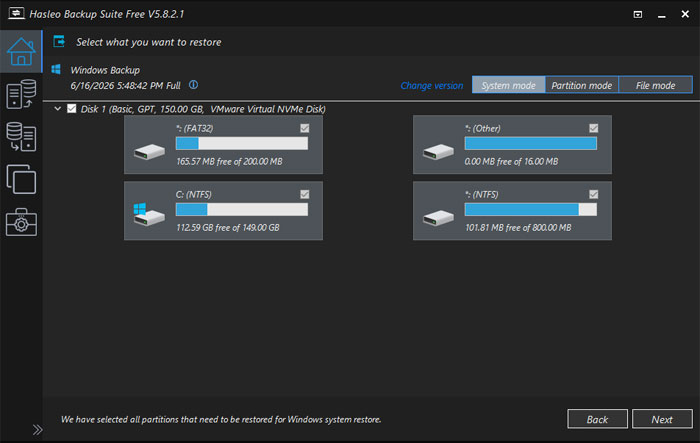
2. Choose the Partitions to Restore
You will then need to choose the Windows partitions from your backup file. Ensure all the checkboxes are ticked so the operating system boots correctly. This guarantees that all the needed data and boot records are restored.
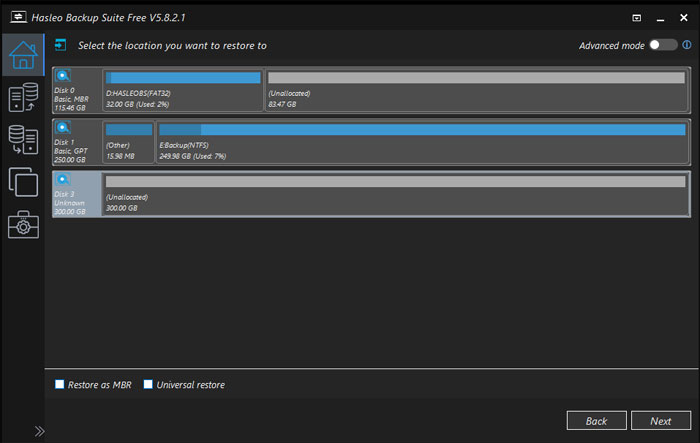
3. Pick the Destination Drive
Next, you will need to choose the destination for the system image restore job. You can restore it back to the exact same drive you were using for Windows. You can also deploy it to a brand new drive if you have upgraded or replaced the original hardware.
4. Configure Hardware Compatibility Options
The Restore as MBR checkbox is used for older versions of Windows that do not use the modern GPT partition style. The Universal restore checkbox is used when you are restoring your system image backup to a different computer with entirely different hardware. It is specifically designed to help with driver compatibility issues when doing this type of bare metal restore.
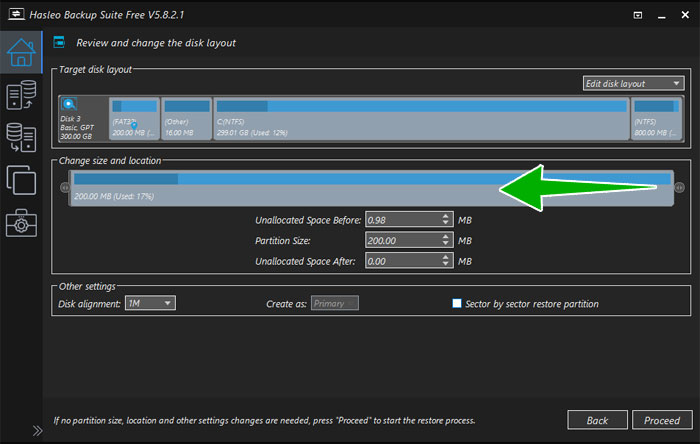
5. Resize Partitions for Larger Drives
If you are restoring your backup to a larger drive, you can either use the entire drive or use part of the drive and save the rest for an extra partition later. You can slide the bar for that drive to the left to shrink its size. This gives you total control over your new disk layout.
6. Start the Restoration Process
Review all of your settings one last time to ensure accuracy. Once you have everything configured exactly how you want it, simply click the Proceed button. The software will begin writing the system image to your target drive.

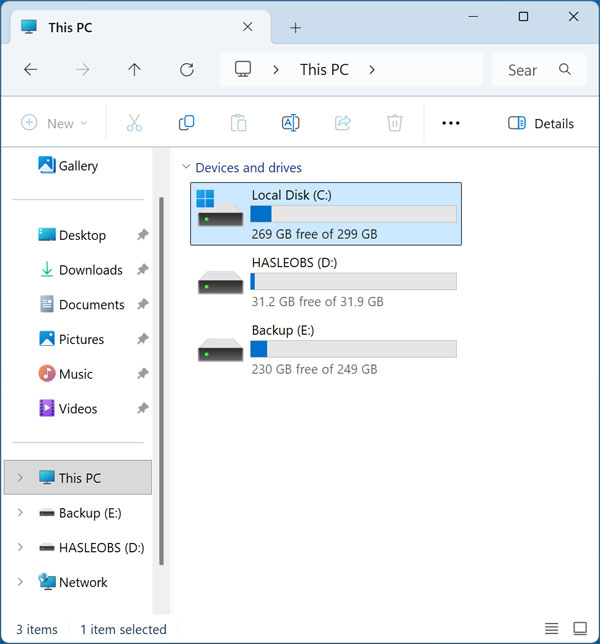
7. Reboot and Verify Your Files
When the restore job is complete, you can safely close the Hasleo program. The software should restart the computer and load Windows with your system image successfully restored. You can then open File Explorer and confirm that all your files are there and that everything looks correct.
For additional training resources, check out our online IT training courses.
Check out our extensive IT book series.