
Last Updated on July 12, 2026
The Microsoft Outlook for Windows app is the replacement for the Windows Mail app that has been part of Windows for many years. Microsoft decided to make the built in mail app look more like the Outlook program that comes with Microsoft Office 365. Many people are not a fan of this new version, but it looks like we are stuck with it.
One feature that the Outlook for Windows app has that is similar to the Outlook 365 program has is the ability to create rules that you can have applied to specific emails. Outlook email rules are automated actions applied to incoming or outgoing emails based on specified conditions. These rules help users manage their emails more efficiently by sorting, organizing, and handling messages automatically. In this article, we will be showing you how to configure rules in the Outlook for Windows email client.

Originally, you were not able to use rules in Outlook for Windows for all types of email accounts. For example, if you were using a Gmail email address with Outlook, you would not have the option to create email rules. But now it seems as though you can but they may not work as excepted for non Microsoft type accounts.
UPDATE – It seems as though you can now use rules with non Microsoft email accounts but they may not work too well.
Accessing the Rules Settings
1. Open the Outlook Settings Menu
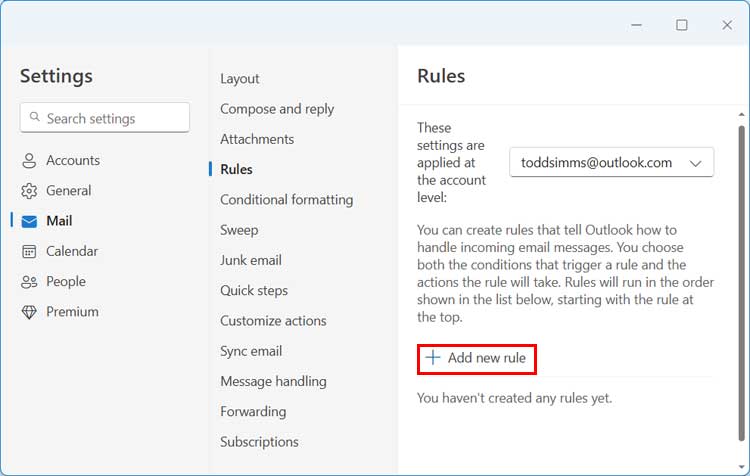
To get to the rules settings, click on the settings gear icon located in the upper right corner of the application window. This opens the main configuration panel. Then from the Mail section on the left sidebar, navigate directly to Rules.
2. Start the Rule Creation Process
From here, you will need to click on the Add new rule button to start the rule creation process. This opens a blank template for you to begin defining your automation parameters. Make sure you select the correct email account from the dropdown menu at the top if you have multiple inboxes configured.
Building the Email Automation Rule
1. Name Your New Rule
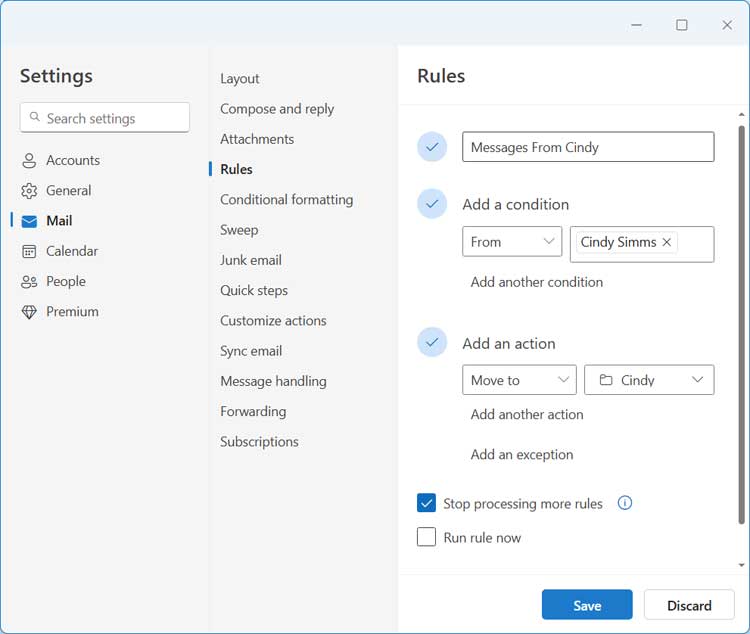
For our example, we are going to create a rule that moves any emails from Cindy Simms (cindysimms007@gmail.com) to a custom folder called Cindy. Since this rule involves moving email to a specific folder, we have already created the Cindy folder in the Outlook app. We will first give our rule a name by typing it in the Name your rule box.
2. Define the Trigger Condition
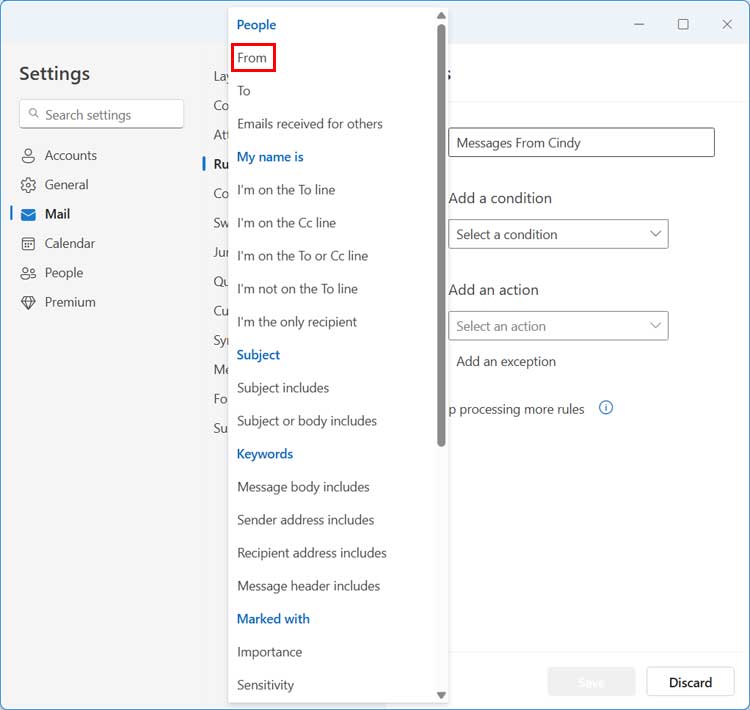
Then under the section labeled Add a condition, we will choose the option for From since we want to apply the rule to emails FROM Cindy. You can browse through a massive list of potential triggers ranging from specific sender addresses to keywords in the subject line. The system gives you total control over what activates the automation.
3. Specify the Target Email Address
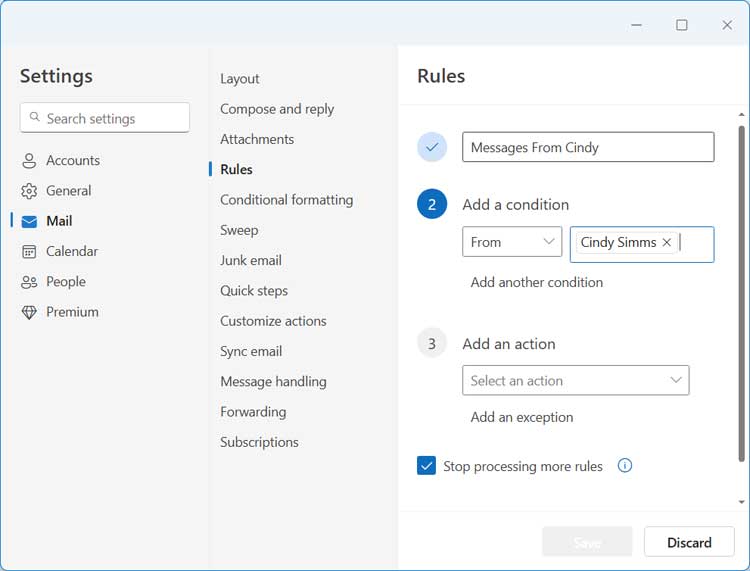
Now we will type Cindy’s exact email address in the box next to From. If you wanted to add another condition such as the subject line includes “Sales” for example, you can do so by clicking on Add another condition. You can stack multiple conditions together to create highly specific filters.
4. Choose the Automated Action
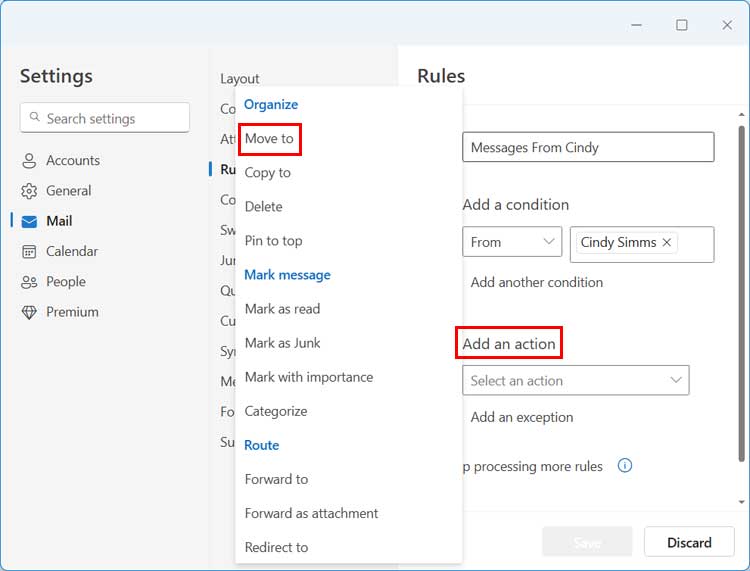
Now we need to apply an action to the emails that come in from Cindy. To do so, we will then click on Add an action and we will then choose the Move to option. Then we will choose the Cindy folder we created before making the rule from the dropdown list of available folders configured in the Outlook app.
Fine-Tuning and Saving Your Rule
1. Review the Configuration
The image below shows the final configuration of our new rule and should help it make more sense. You can clearly see the name, the condition trigger, and the resulting action all laid out in logical order. Take a moment to verify all the details before proceeding.
2. Add Rule Exceptions
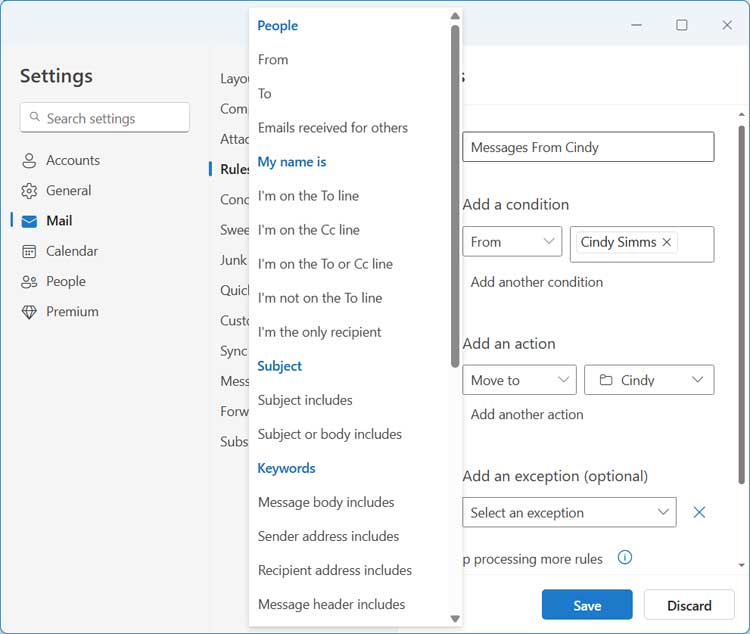
The option that says Add an exception can be used to fine-tune your rule to further customize how it works. For example, you can have the rule not apply to emails with “Sales Department” in the subject line. This prevents important cross-departmental communications from getting buried in a personal folder.
3. Stop Processing More Rules
By default, the checkbox that says Stop processing more rules is checked. What this will do is ensure that other subsequent rules are not applied to these messages to avoid conflicts or actions taken on emails that you do not want to occur. It forces the system to stop evaluating the email once this specific rule triggers.
4. Run the Rule on Existing Emails
The checkbox that says Run rule now can be used to have your new rule applied to existing emails currently sitting in your inbox. Check this box before hitting save to instantly organize your historical messages. Finally, click the blue Save button at the bottom.
5. Manage Your Active Rules
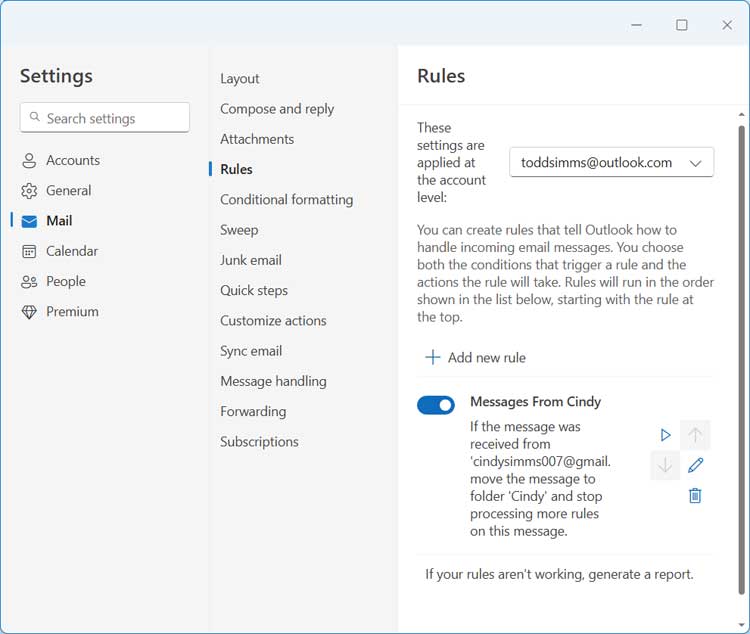
Now when you go back to the main Rules section, you will see your new rule listed there. You can then choose to delete the rule if needed as well as edit it. If you add other rules, you can then change the order in which they are applied using the up and down arrows.
Check out this article on how to configure email rules for the outlook.com webmail version of Outlook.
For additional training resources, check out our online IT training courses.
Check out our extensive IT book series.






