Last Updated on May 16, 2026
Computer virtualization has been around for many years and it’s very common for people to use desktop virtualization apps on their home PCs such as VMware Workstation, VirtualBox and Hyper-V for Windows 11 Pro. Even though there is a way to enable Hyper-V on Windows 11 Home Edition.
VMware Workstation is one of the most popular desktop virtualization platforms out there. And it used to cost money to use but now it’s free after being bought out by Broadcom.
When you run a virtual machine within the VMware Workstation software, it uses the hardware of the host computer including its CPU, RAM and storage etc. You can even have your VMs uses attached USB devices such as printers and hard drives.

When you install an operating system on a virtual machine, it’s done by mounting the DVD drive of the host computer or by mounting an ISO image file. But what if you want to boot your virtual machine using a USB flash drive that you have attached to your host computer? This is not a built in option of VMware Workstation but it is still possible to do.
1. Open the DiskPart Command Utility
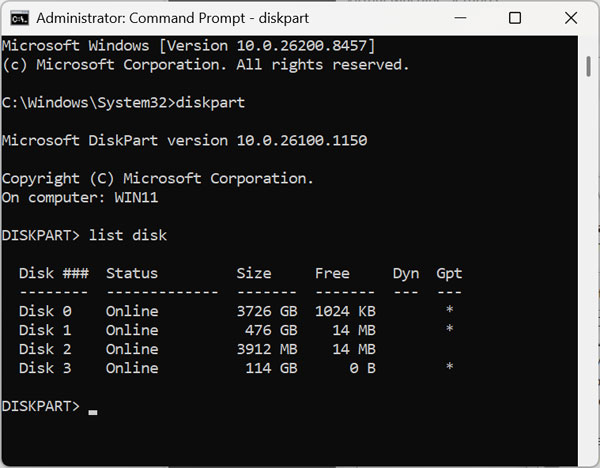
The first thing you need to do is use the DiskPart command to find the Disk number associated with your USB flash drive. To do so, you will have to open a command prompt as administrator and type diskpart and press enter. Be sure your flash drive is inserted before doing so. The utility needs to see the hardware actively connected to map the correct identifier.
2. List and Identify Your Disks
Then you will be at the DISKPART prompt where you will then need to type list disk to show all the configured drives on your computer. You should be able to tell which one is your flash drive based on its size. Plus, it’s usually the last disk in the list if you have just connected it. In our example, the flash drive is Disk 3.
3. Run VMware Workstation as Administrator
To connect your USB flash drive to your VM, you will need to run VMware Workstation as administrator. You can do this by holding down Shift and right clicking your VMware Workstation and choosing Run as administrator. Elevating these software permissions is an absolute requirement for the hypervisor to manipulate raw physical disks.
4. Add a New Hard Disk to the VM
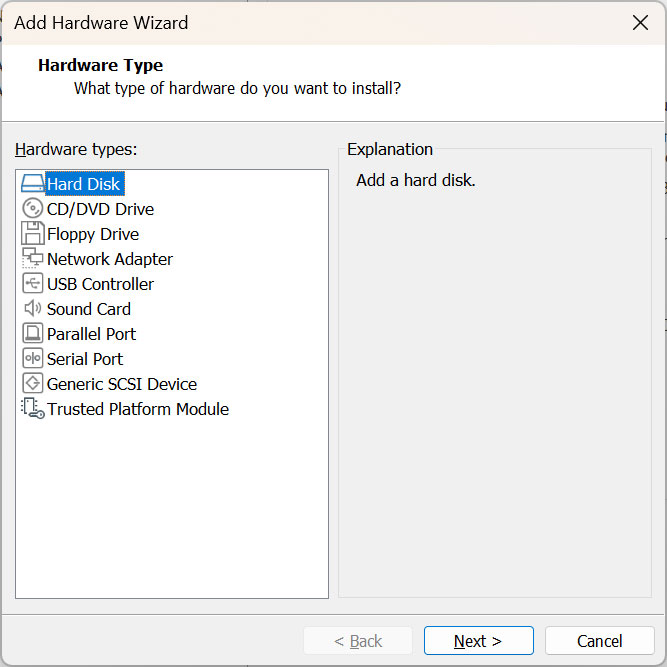
Then you will need to go to the settings for the VM you want to attach this flash drive to. Look near the bottom of the hardware list and click the Add button to open the setup wizard. Choose Hard Disk from the available hardware types and then click Next.
5. Select the SCSI Disk Type
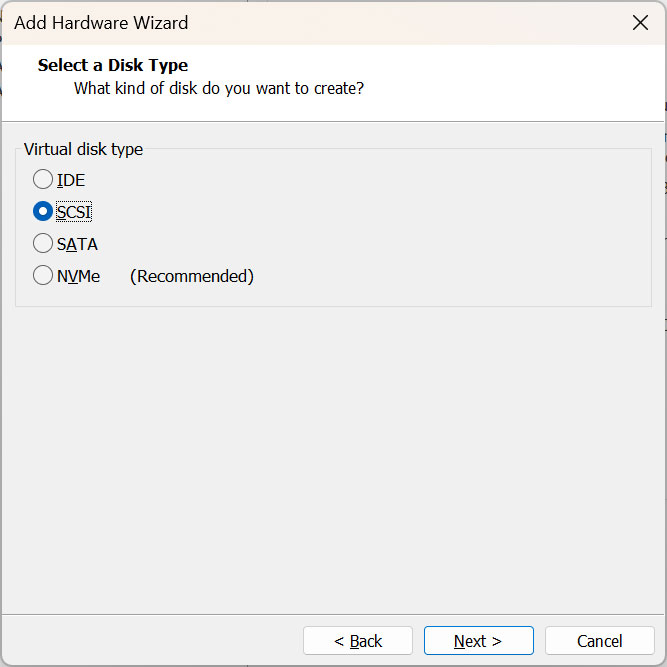
The hardware wizard will then ask you to select a specific virtual disk type for this new connection. For the disk type, you will need to choose SCSI from the list of radio buttons. Leaving it on the default recommended NVMe option will usually cause the raw USB passthrough to fail.
6. Choose the Physical Disk Option
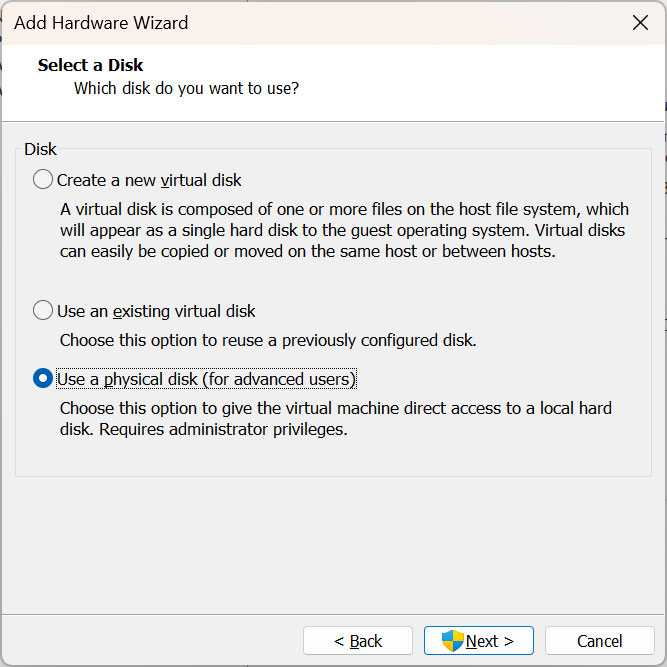
For the Select a Disk section, you want to bypass the standard virtual disk creation toggles. You will want to choose the Use a physical disk (for advanced users) option and click the Next button. This specific setting links the virtual machine directly to your hardware port.
7. Map the Correct Drive Number
From the Device drop down section, choose the drive number that matches what you saw from DiskPart. In our example, we will be using PhysicalDrive3 since it matches Disk 3 from DiskPart. Selecting the wrong drive number here could accidentally corrupt your actual Windows host drive.

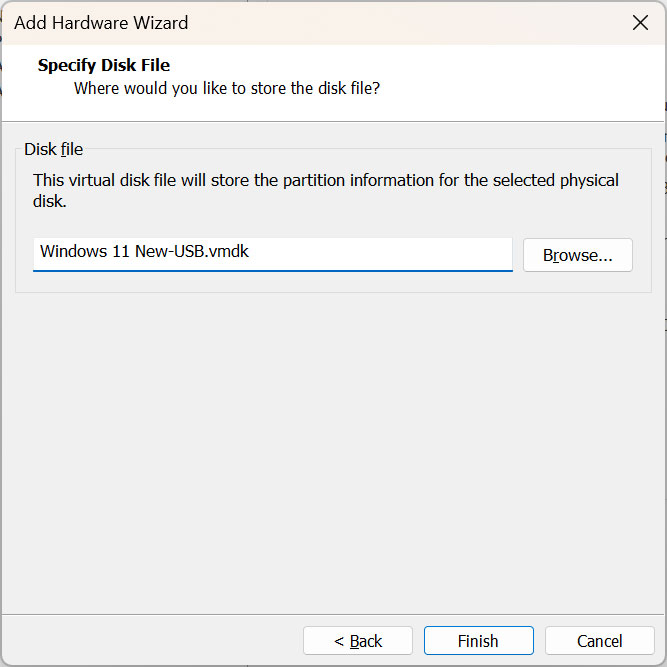
8. Name and Finish the Virtual Disk
VMware Workstation will create a new disk file for the flash drive, and you can use the suggested name or name the disk anything you like. This simply creates a tiny pointer file on your computer that references the USB stick. Then you can click the Finish button to complete the process.
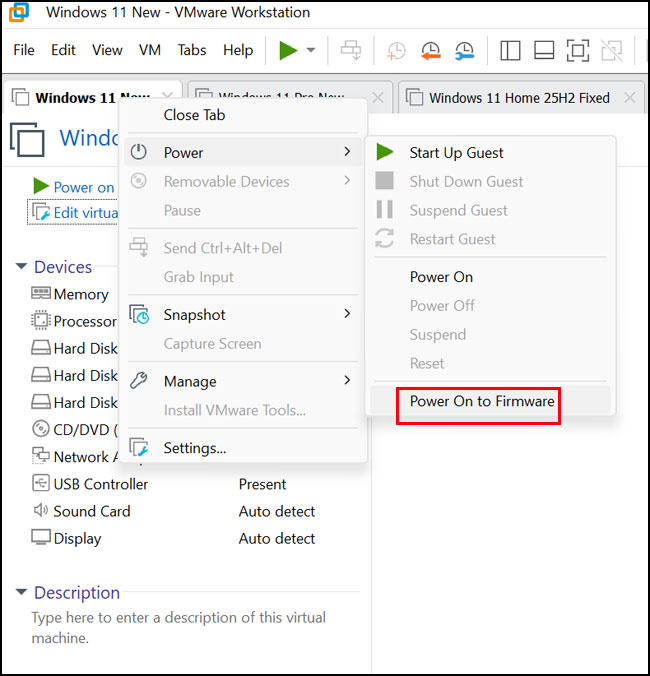
9. Power On to Firmware
To boot your virtual machine with the physically attached host flash drive, you cannot just use the standard green play button. You will need to right click the VM name tab and choose Power > Power On to Firmware. This specific command forces the virtual machine to intercept the boot process and load its internal BIOS screen.
10. Locate the Virtual SCSI Device
From the Boot Manager screen, you will then see a device that says EFI VMware Virtual SCSI Hard Drive (0.0) or something similar. This represents the virtual hard disk you made with the physical USB flash drive. The virtual machine now treats your thumb drive exactly like an internal hard drive.
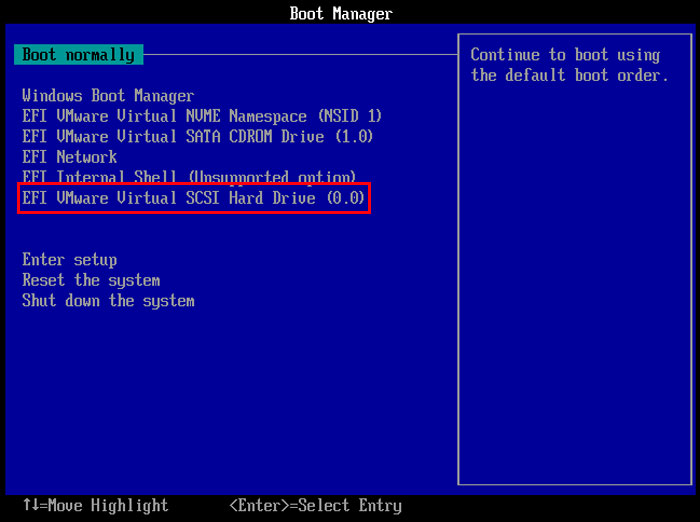
11. Boot from the USB Flash Drive
You can then use the arrow keys to select the SCSI drive from the boot menu. Press enter to have it boot from your USB flash drive. The installation media or live operating system on that stick will now load perfectly inside your VM window.
For additional training resources, check out our online IT training courses.
Check out our extensive IT book series.