Last Updated on March 26, 2026
Sending and receiving email is a fairly straightforward process and for the most part all of your incoming email will be sent directly to your inbox unless your email provider or your email app has the ability to filter out spam.
If you need to fine tune how your emails are handled, then you can setup email rules to do so. These rules can be used to take a specific action on an email when it arrives to your inbox. They can be based on criteria such as who the email is from, text in the subject line, text in the body of the email, whether or not the email has an attachment and so on. Once you start constructing a rule, you will see how the pieces come together to make the rule and how easy there are to create.
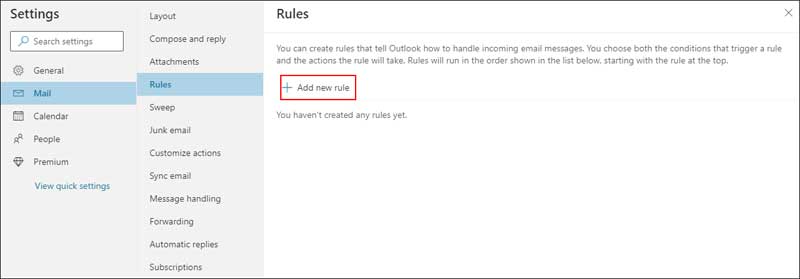
The first thing you need to do is to go to your Outlook setting by clicking on the settings gear icon at the top right of the page. From there you will need to click on the View all Outlook settings link at the bottom of the page. Next you will click on the Mail category and then the Rules subcategory.

Here you will see any rules that you have made in the past. Since I don’t have any previous rules, all I see is an option to add a new rule which I will need to click on.
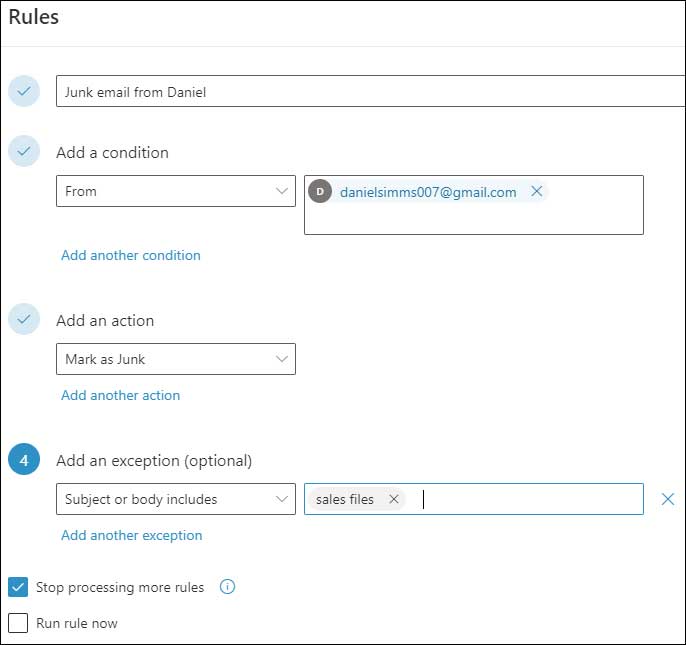
Step 1 involves naming the rule so its something that makes sense to you. For my rule, I am going to have Outlook send any emails from Daniel Simms to my Junk (spam) folder. So I will name my rule Junk email from Daniel.
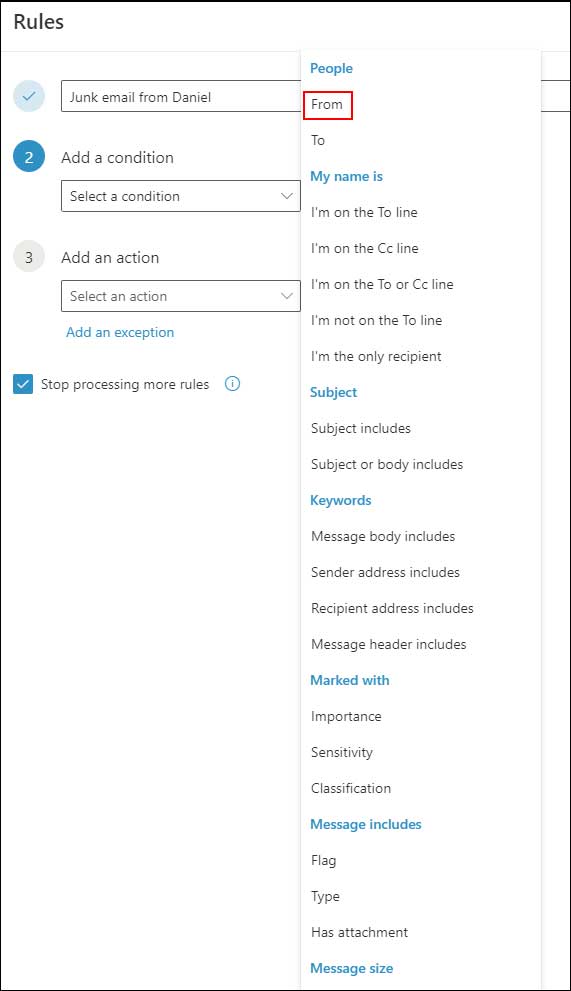
For step 2 I will need to add a condition by clicking on the dropdown list. I will choose the From condition which will allow me to then add the email address for the person I want this rule to apply to.
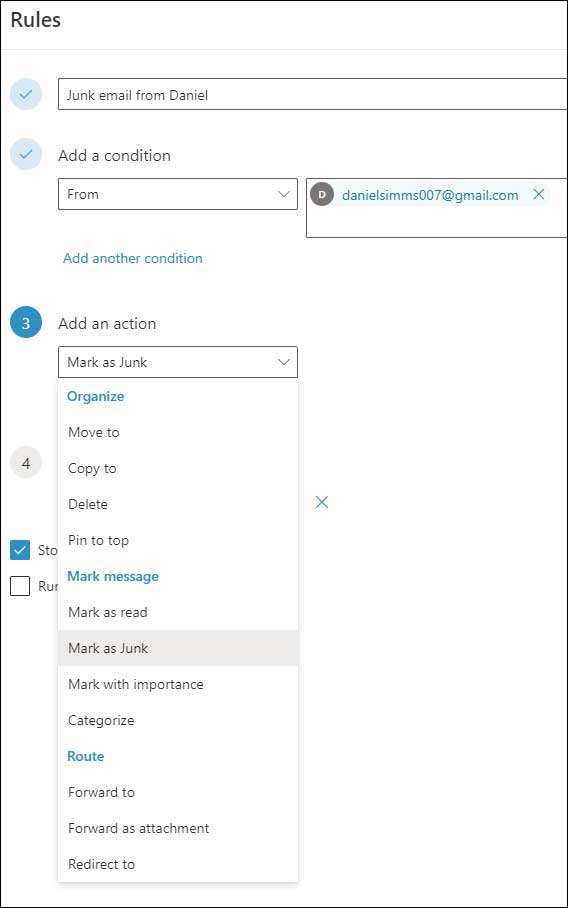
Now you can see that my condition of from applies to the email address that belongs to Daniel Simms. I can add additional email addresses to this list if I need to.
For step 3, I will need to assign an action from the Add an action section that I want to apply to emails from Daniel as they come into my inbox. For this rule I will be using the Mark as Junk option which will automatically send his emails to the Outlook Junk folder.
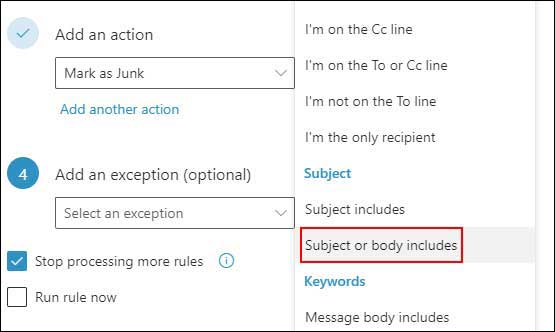
Next, I will be adding an optional exception in step 4. Exceptions are used to apply another rule which will make Outlook bypass the previous action and let the email go to the Inbox in this case.
For my exception I will us the Subject or body includes choice and use the term sales files as my exception value
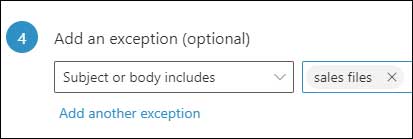
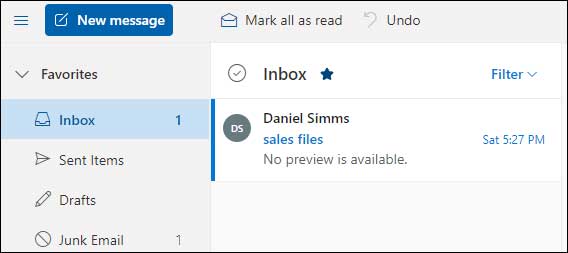
Now when an email comes in from Daniel Simms and has the term sales files in either the subject line of the body of the email, it will be allowed to go to my Inbox and not be sent to my Junk folder.
The image below shows my new rule now that all the parameters are in place. At the bottom of the rule there is a checkbox that says Stop processing more rules. When this box is checked, Outlook will stop apply rules to your email after this one is applied. If you only have one rule, then having this box checked or unchecked wont matter. The box that says Run rule now will apply this rule to existing emails that you have in your Outlook Inbox and folders.
Once everything is set the way you like, you can click the Save button at the bottom of the page and your rule will be in place and active. Then when you go to the main rules listing, you will see your new rule and it will be enabled. To disable the rule, simply move the slider next to the rule name to the left.
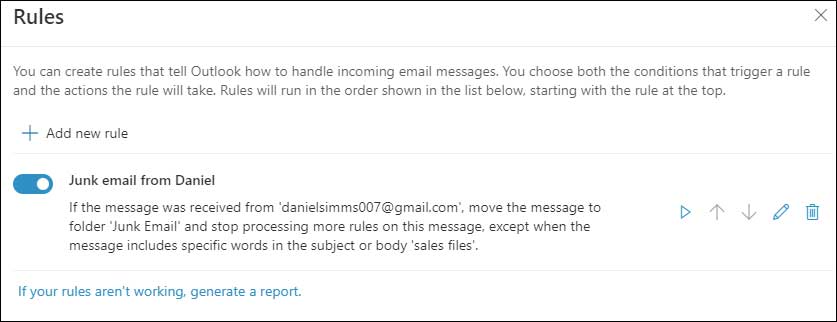
To the right of the rule description, you will have a play button which will do the same thing as the run rule now checkbox from the previous section. The up and down arrows let you move your rule above or below other rules so you can change the order of when each rule is run. To edit an existing rule, simply click on the pencil icon and you can change any of the rule attributes that were previously configured. Finally, to delete a rule, click on the trash can icon. If you think you might want to use a rule later but don’t want it to be active at the moment, you can disable it rather than delete it.
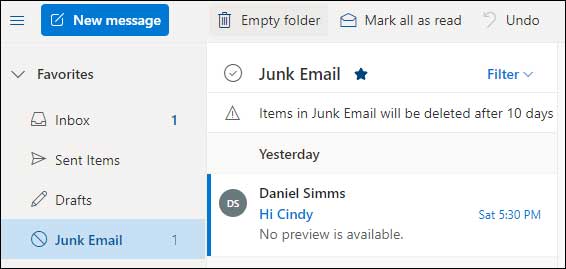
The image below shows what happened to the email that was sent to the email account that has the rule that was just created. As you can see, the email is from Daniel Simms and the subject line says Hi Cindy. When this email came in, it was automatically sent to the Junk Email folder.
The next image shows what happened when and email was sent to this account, but the subject line said sales files. As you can see, the email was sent to the Inbox just like a normal email would thanks to the exception that was added to the rule.