Last Updated on May 17, 2026
Data loss is one of those things that seems to be a part of life, no matter how hard we try to avoid it. Whether it’s on your personal computer or your smartphone, you will most likely lose some important files at some point.
If you are the type who makes regular backups, whether they are file level backups or system image backups, that may not be enough if your hard drive starts to fail. Because once the drive itself starts having problems, you may not be able to get current copies of your files or other data that was not backed up off the drive.
If you are experiencing drive failure, you can make a backup image of that drive to another hard drive so you will have a copy of your data saved before the drive completely fails. Then you can replace the failing drive, reinstall Windows and then recover any files that you are missing from your backup or are not current.

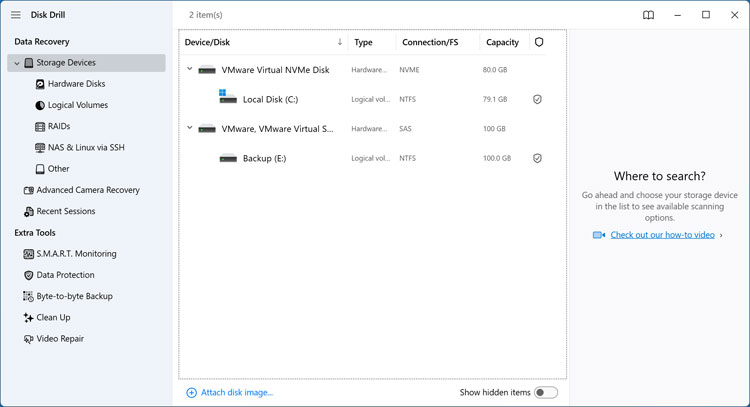
1. Install Disk Drill and Locate Storage Devices
You need a powerful data recovery tool like Disk Drill to handle this extraction process. Download the application directly from their official website and install it on your computer. Navigate straight to the Storage Devices section on the left menu. This screen displays every connected hard drive currently recognized by your system.
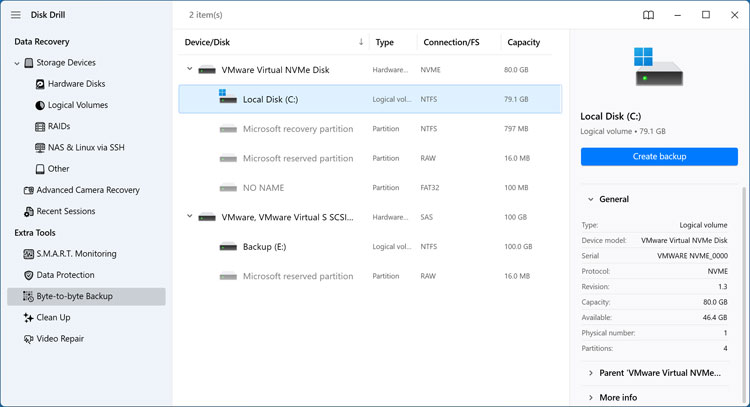
2. Select the Partition to Backup
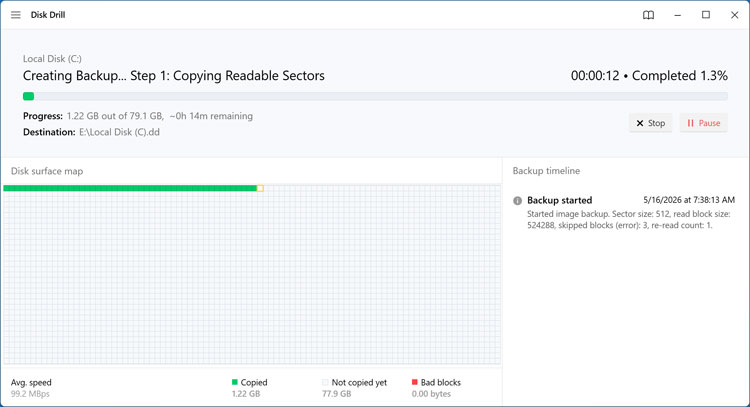
You must choose the exact partition you want to secure before the hardware fails completely. Selecting the entire physical drive is an option available to you. Most users backing up a standard Windows installation should select only the primary partition containing the operating system and user files. Click the blue Create backup button on the right side of the screen to begin the configuration phase.
3. Configure the DD Image Format
The software will prompt you to choose a file format and destination for your new disk image. Choose the standard dd file option from the dropdown menu. A .dd file serves as the universal industry standard for raw uncompressed disk images. Nearly any reputable data recovery tool on the market can open this file format.
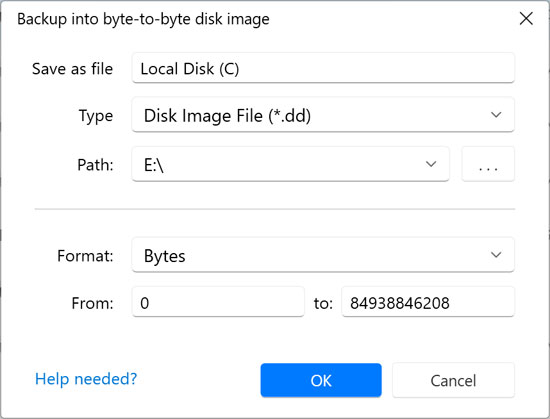
4. Use Byte Level Precision
Look closely at the Format setting and ensure it remains set to Bytes. This creates a raw data stream guaranteeing perfect precision down to the single digit. Disk Drill automatically calculates the exact boundaries of your partition from the absolute beginning to the very last byte without any rounding errors. Data recovery professionals only switch this to the Sectors view if a specific block is physically unreadable and needs to be skipped.
5. Attach the Saved Disk Image
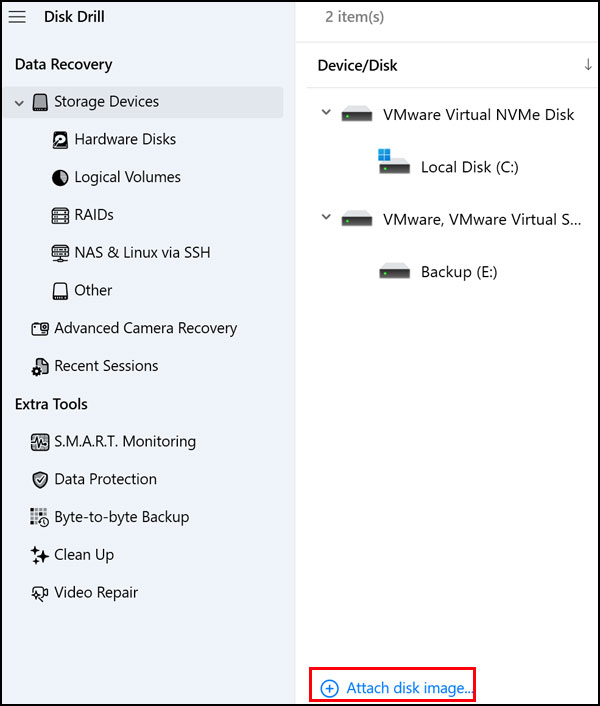
Put your computer back together with a brand new hard drive and install a fresh copy of Windows. Reinstall the Disk Drill application and open it back up. Navigate to the Storage Devices tab again. Click the link labeled Attach a disk image at the very bottom of the window.
6. Target the Specific Windows Partition
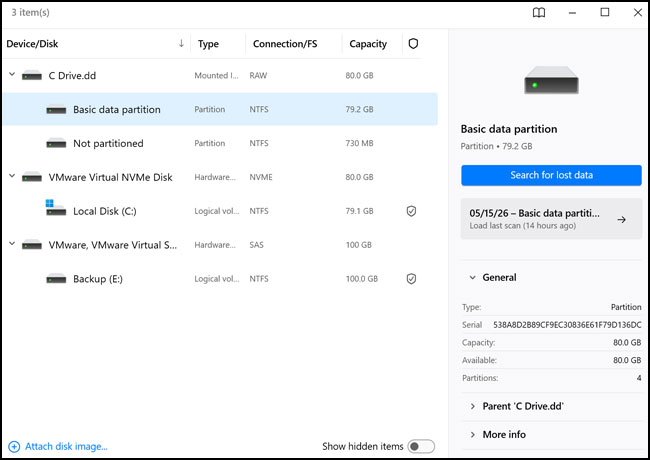
Browse your computer to locate the massive .dd file you generated earlier. Select the basic data partition sitting inside that mounted image instead of the entire parent drive. Targeting just the specific Windows partition dramatically cuts down the scan time. It forces the software to ignore unallocated space and hidden system recovery sectors. Click the Search for lost data button to proceed.
7. Choose the Universal Scan Method
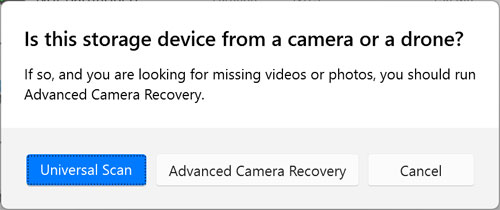
The application recognizes the NTFS file system and will begin reconstructing your original folder pathways. You will encounter a prompt asking you to select a specific scanning algorithm. Choose the Universal Scan option to find a wide variety of standard file types. Advanced Camera Recovery is strictly built for SD cards pulling files off drones or digital cameras.
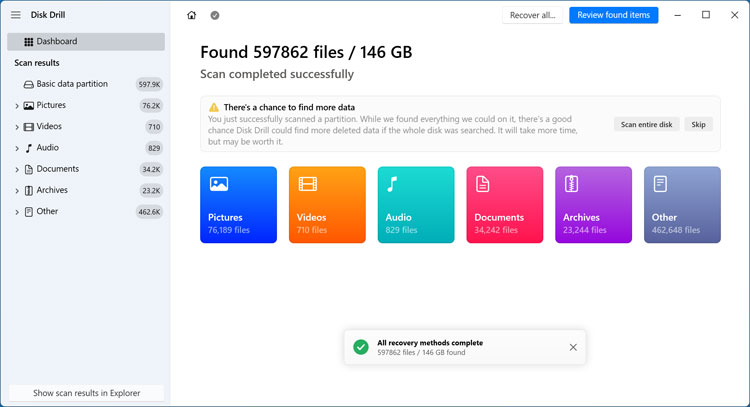
8. Review the Categorized Scan Results
The scanning process takes a significant amount of time depending on the size of your raw disk image. Disk Drill will eventually populate a dashboard breaking down your recovered files into clear categories. You will see specific groups for pictures, videos, audio, and documents.
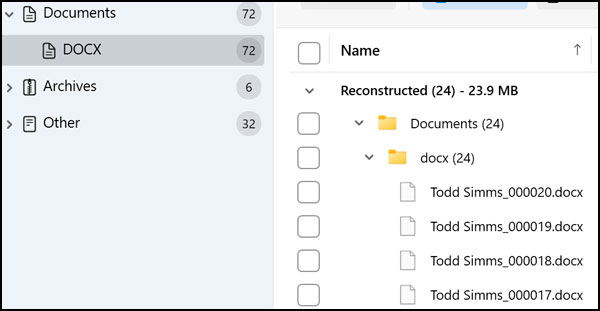
9. Open the File Category Folders
Clicking into any category reveals a detailed breakdown of the file types discovered. The interface separates everything into two distinct recovery methods. You will see a dedicated folder for Reconstructed files and another for Deleted or lost files.

10. Understand Deleted and Reconstructed Files
The Deleted or lost folder contains items Disk Drill found by reading the surviving pieces of the original index map. The software usually restores these specific files with their exact original filenames and folder structures completely intact. You should always check here first. The Reconstructed section operates using a deeper brute force method called file signature scanning. It bundles items into generic numbered groups with completely randomized file names because the original directory map is gone.
11. Identify Missing File Types
You might notice certain expected file formats missing from the default category lists. Clicking the Documents tab might completely omit standard Word documents from the immediate view. The software groups lesser known extensions under an ambiguous “Other” label. You have to manually intervene to pull them to the surface.

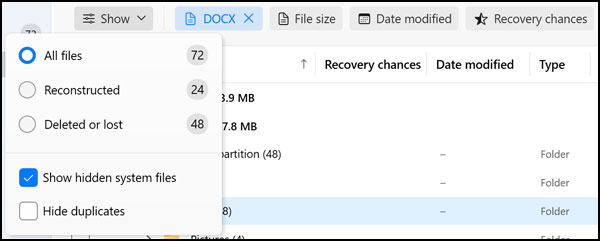
12. Search for Specific File Extensions
Sometimes the default view simply hides the exact document you need. Use the top search bar to type the exact file extension like .docx or the specific file name. Press enter to add it directly to the active category list. You will then see the updated results populate immediately in both the Reconstructed and Deleted sections.
13. Filter Out Duplicate File Records
Seeing duplicate files populating right next to each other is a very common occurrence during deep data recovery. The Windows Master File Table often contains multiple separate reference records pointing to the exact same fragmented file. Check the box labeled Hide duplicates at the top of the screen to clean up your view. The application will filter the list to only show the single file possessing the best quality and data integrity.
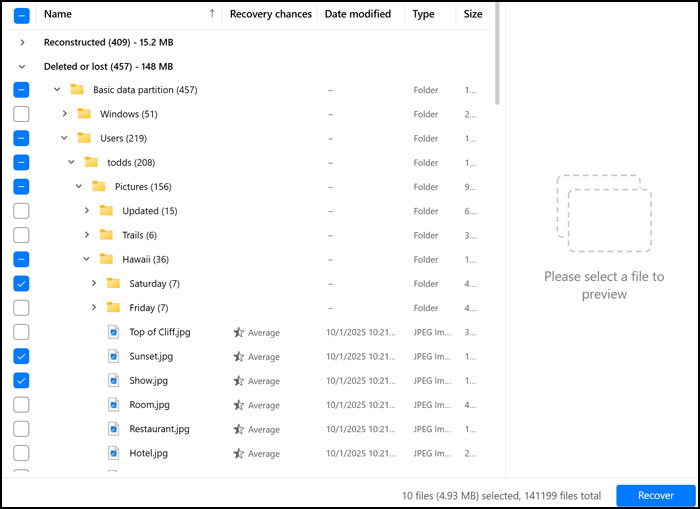
14. Select Your Files for Recovery
Navigate through the sorted directories to locate the specific items you want back. Check the small boxes next to their file names to mark them for extraction. The interface displays the entire original folder path taken to get to that file. Only the specific boxes containing blue checkmarks will actually undergo the restoration process. Click the blue Recover button to move to the final step.
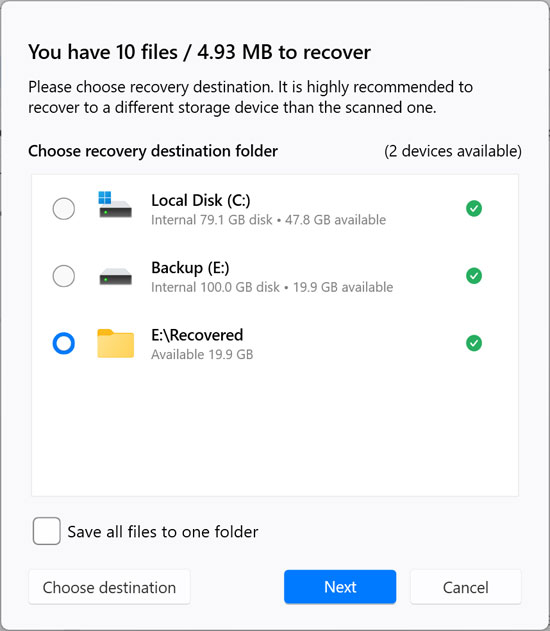
15. Choose a Safe Recovery Destination
You must now choose the physical hard drive destination for your extracted files. Never save recovered data back onto the exact same drive you are currently scanning. Select a safe directory on your new Windows installation. Checking the box that says Save all files to one folder forces the software to ignore the old file hierarchy and dump everything into a single location.
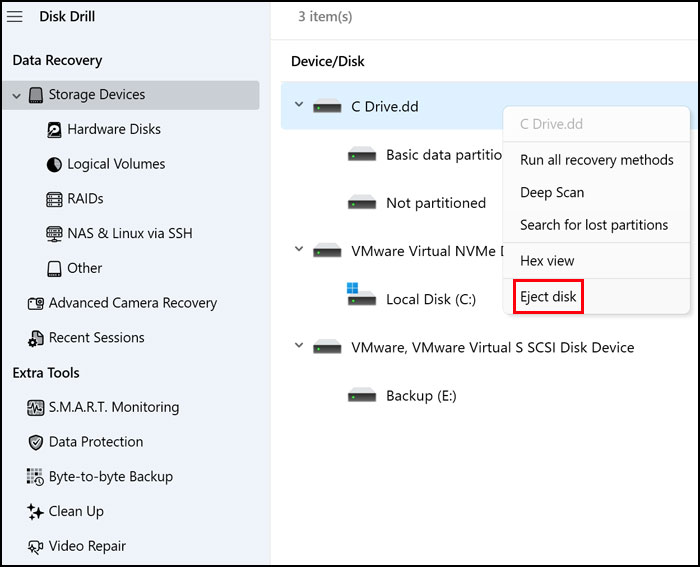
16. Unmount the Virtual Backup Image
Wait for the progress bar to finish writing your files to the new disk. Go back to the main interface located at the top left of the application to detach the file. Right click your mounted .dd image backup in the device list. Choose Eject disk to safely unmount the virtual drive from your system memory.
For additional training resources, check out our online IT training courses.
Check out our extensive IT book series.