
Last Updated on May 24, 2026
Microsoft is always coming out with new features for their Windows 11 operating system to try and keep things fresh and updated. Many of these features are helpful while at the same time many can be rather useless or feel like a downgrade. In this article, we will be discussing a new feature that can go either way depending on how you look at it or if you find it useful.
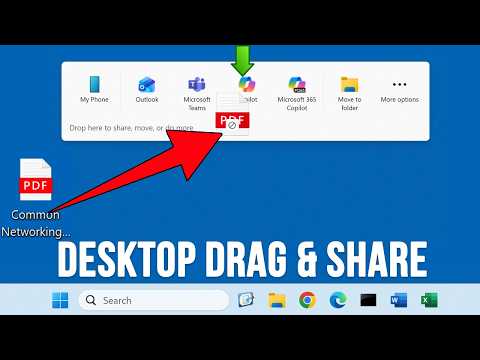
This new feature is called the desktop drag and drop tray or can also be referred to as the just the drop tray. It’s a way you can drag files to a part of our desktop to then do things such as share them or open them in other applications right on the spot. This way, you do not need to open the specific application first and then attach or open your file after that.
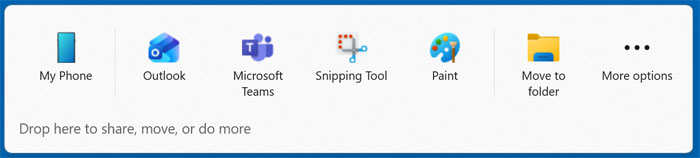
This tray appears at the top of your screen when you drag a file towards it. The options you have with the drag and drop tray will vary depending on what type of file you are dragging to it. Then there is a More options section at the end that will give you additional apps you can send your file to or share it with.
Sharing Documents with the Drop Tray
1. Drag Your File to the Screen Edge
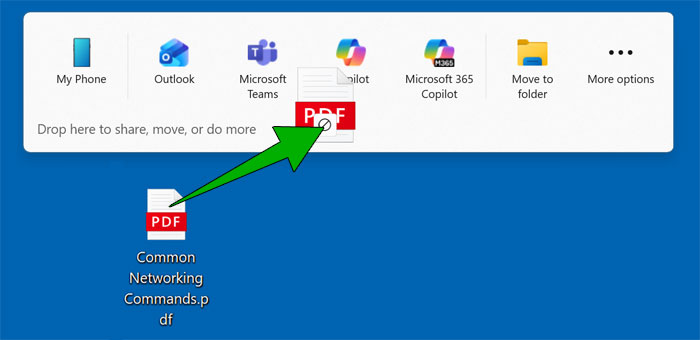
As you can see in the image below, we are dragging a PDF file to the top of the screen. Then the drop tray appears. We can choose which app to “send it to”. You can drag a file from your desktop or from an open folder in File Explorer. You can also drag more than one file at a time if needed.
2. Attach Files Instantly in Outlook
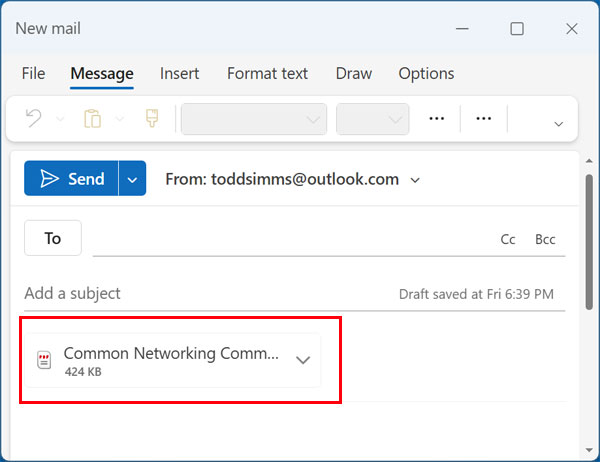
If we were to drag it to the Outlook icon, the PDF file would be automatically attached to a new email ready to send. You would need to have Outlook configured with an email account in order to use this feature.
3. Analyze Documents with Copilot
Or we could drag it to the Copilot icon to have it loaded in the Copilot app. We can then have Copilot analyze it for us immediately. Copilot can then do things with the document such as summarize the text. It can answer questions, rewrite or edit paragraphs, and extract specific information.

4. Move Files to Specific Folders
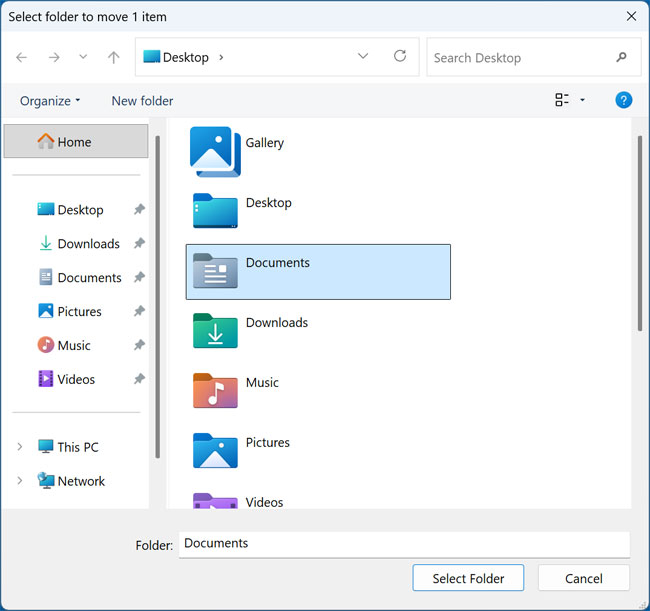
The Move to folder option will open a File Explorer type dialog box. From there you can then choose a folder on your computer to move the file to. Click the destination to relocate your data permanently.
Using the Drop Tray with Connected Devices and Images
1. Send Data to Connected Phones or Teams
You can also use the My Phone option to drag the file to your smartphone if you have the Phone Link feature of Windows configured. And if you are a Microsoft Teams user, you can drag a file to the Teams icon to have it added to your chat.
2. Reveal Image-Specific App Options
Depending on the type of file you are dragging, you will see different options. For example, if we were to drag an image file, we would have the option of opening it with the Windows Snipping Tool or Microsoft Paint.
3. Open Images Directly in MS Paint
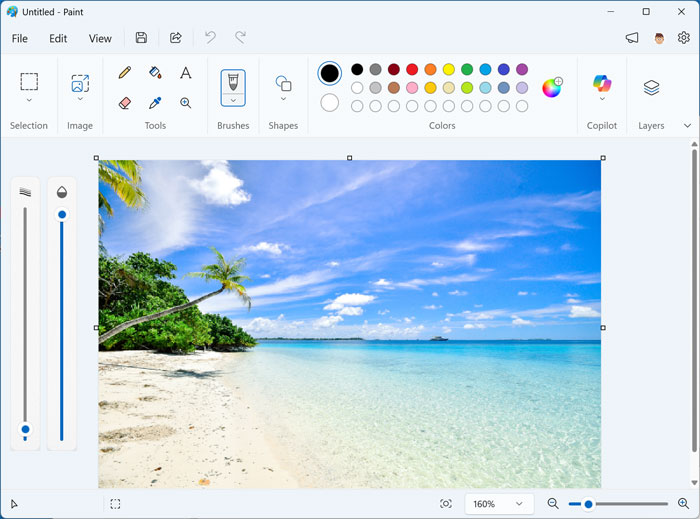
As you can see from the image below, when we choose the Paint option, it loads the file in the Paint app itself. It is instantly ready to edit. You save time by skipping the standard file open dialog.
Accessing Advanced Drop Tray Options
1. Open the More Options Menu
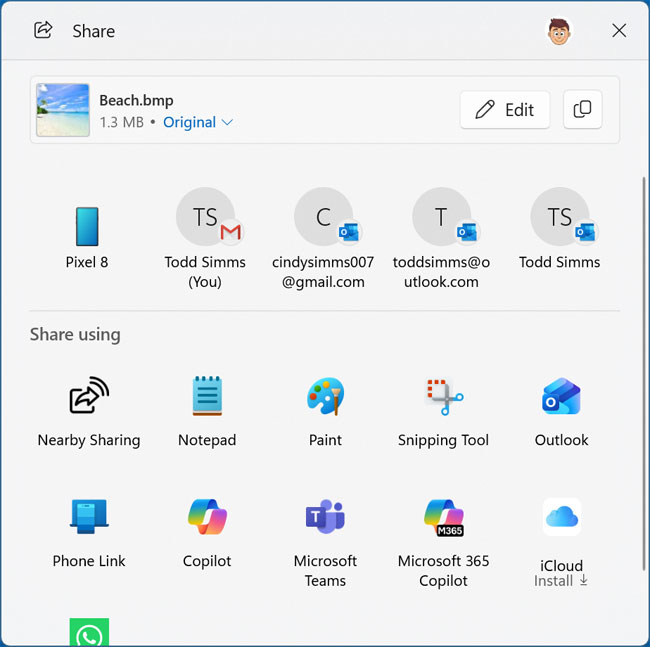
If you choose the More options section, it will then open up a separate window with man of the same options plus some additional choices such as other email addresses, Nearby Sharing and Notepad.
2. Install Missing App Integrations
You may see some other options for apps like iCloud and WhatsApp but you will need to install them if they are not already on your computer. If the icon has a down arrow next to it, that means you can click on it to have it installed on your computer.
3. Edit Photos Before Sharing
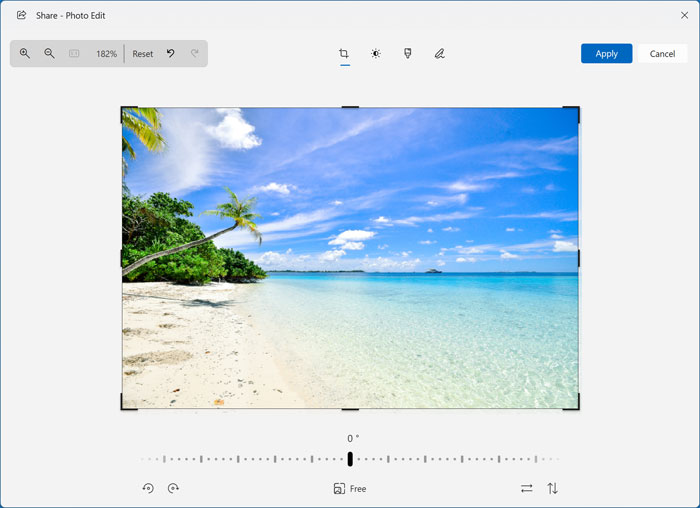
Depending on the type of file you are dragging, when you use the More options method, you will have additional choices. You can copy the file itself or edit the file before sharing or sending it. The image below shows the Photo Edit feature when dragging an image file. From here we can edit the photo and then when we click the Apply button, the edited version will be ready to share.
Overall, the desktop drag and drop tray is a useful feature but you may find that it gets in the way since every time you drag a file on your desktop or from a folder, you will see the tray drop down from the top of the screen. And if you want to drag a file to the top of your desktop, you may find that the tray gets in the way.
And if Microsoft decides to keep this feature, hopefully they will add some additional apps that can be used with it or the option to add your own. And most importantly give us the option to disable it!
For or additional training resources, check out our online IT training courses.
Check out our extensive IT book series.






