Last Updated on July 13, 2026
Computer virtualization is not a new concept. But when it was first introduced, it was designed for organizations with large budgets and high-powered computers. But now there are several desktop virtualization platforms you can use at home on your desktop PC. Some examples include VMware Workstation, Microsoft Hyper-V, Parallels Desktop for macOS and Oracle VirtualBox.
One benefit of using virtual machines is that you can do things such as test out new software or operating systems such as Linux without worrying about harming your main desktop computer. You can even create backups or snapshots of your virtual machines and roll back to them to continue where you left off.
Another benefit of virtual machines is the ability to boot them from ISO image files rather than needing to create a bootable flash drive with a tool such as Rufus or Ventoy. This comes in handy when you need to load diagnostic software or completely install new operating systems. If you are using VirtualBox as your desktop virtualization platform, you can easily mount ISO image files for operating systems or repair utilities and boot your virtual machine straight from that file.

Adding an Optical Drive to Your Virtual Machine
1. Open the Virtual Machine Settings
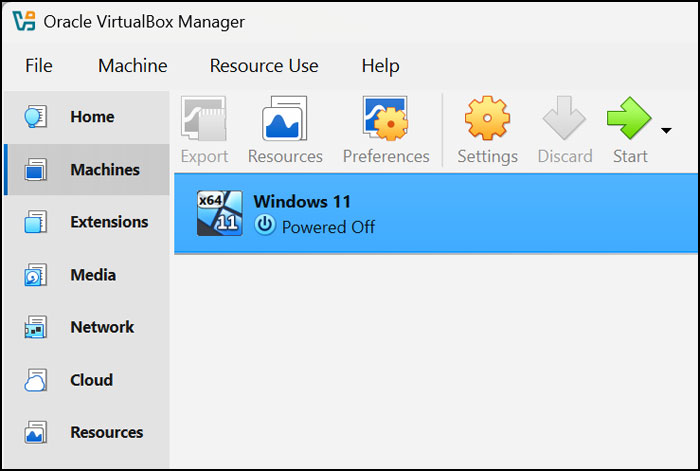
The process to boot a VM from an ISO file is very simple. To begin, locate the specific virtual machine you want to use inside the Oracle VM VirtualBox Manager window. Click on the machine name once to highlight it and then click the yellow Settings gear icon at the top.
2. Check Your Storage Configuration
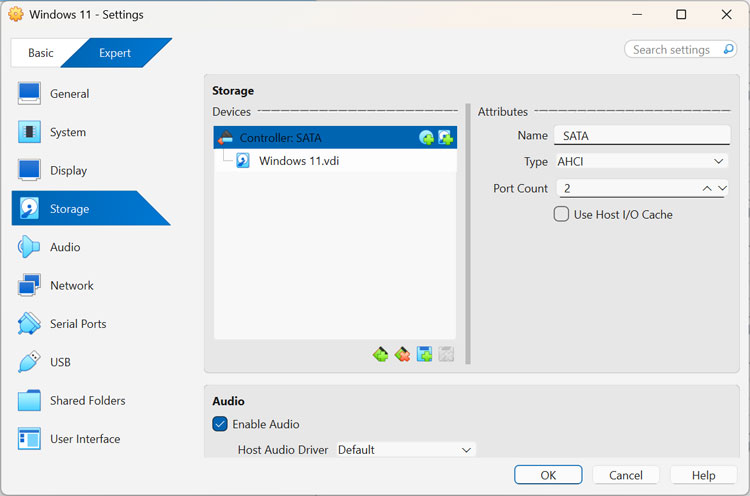
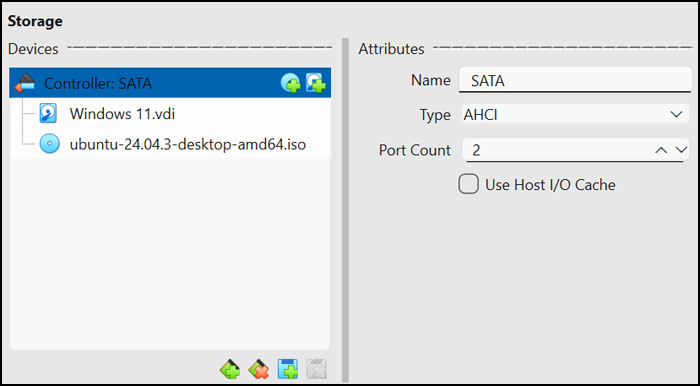
Next, navigate directly to the Storage settings tab on the left sidebar. Check to see if you have an optical drive already configured under your storage controller. The image below shows a virtual machine with only its VDI disk file attached and absolutely no optical drive present. If you need to add an optical drive, simply click on the small Add attachment button shaped like a CD.
3. Navigate the Medium Selector
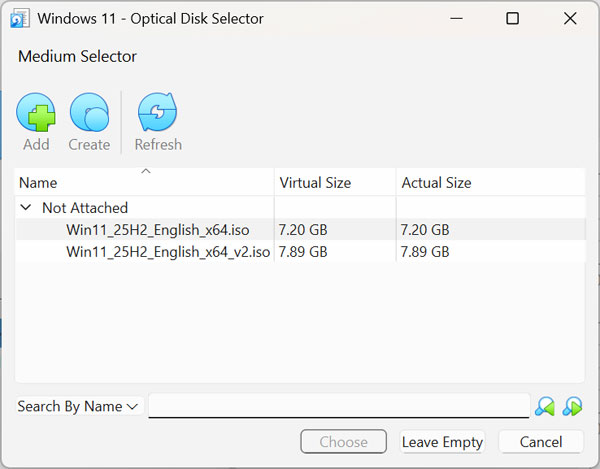
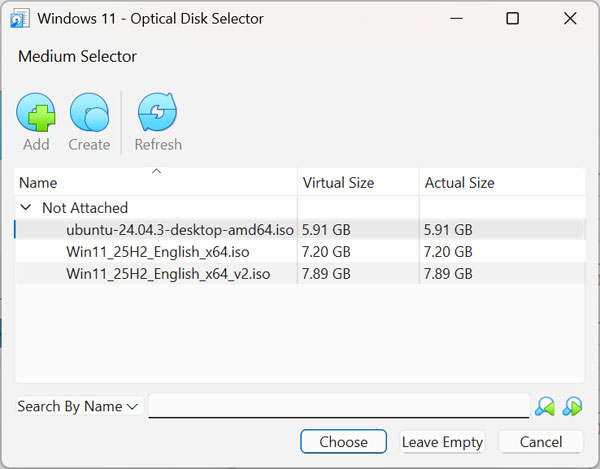
You will then be taken to the Medium Selector screen. Here you will see any ISO images you have attached in the past, regardless of whether they are actively mounted to a virtual machine right now. If they are listed under the Not Attached category, that means no virtual machine is currently using that specific file.
4. Attach Your ISO File
If you want to attach one of the ISO files already sitting in the Medium Selector, you can do so by selecting it and clicking the Choose button. To add a brand new one to the list of ISO files, click on the Add button. Browse your local hard drive to find the exact location of the ISO file you just downloaded.
5. Mount the ISO Image
We will now attach an Ubuntu Linux ISO file to our VM by adding it to the list. Select the new Ubuntu file so it highlights in blue. Click the Choose button at the bottom to finalize the mounting process.
6. Use the Global Media Manager
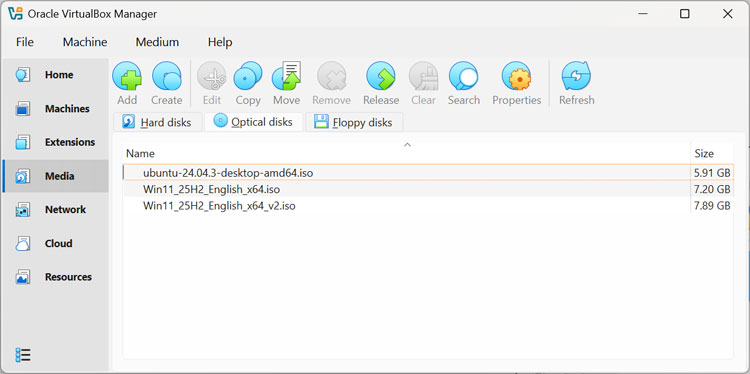
You can also go right to the main Media section from the primary VirtualBox dashboard. This global menu lets you configure ISO images, virtual hard drives, and even virtual floppy disk drives all in one place. It keeps your file paths perfectly organized across multiple different virtual machines.
Managing Mounted ISO Files
1. Verify the Mounted Image
Now when we go back to the virtual machine settings, we can see that the Ubuntu ISO image is successfully mounted in our virtual optical drive. We can now start the virtual machine and have it boot straight from the ISO file. This allows you to run a temporary version of Live Linux or permanently install Linux on the virtual hard drive.
2. Swap or Remove Images
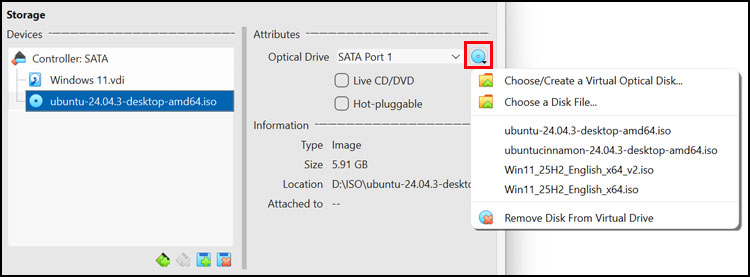
If we wanted to switch to a different ISO image file or remove the ISO from the VM altogether, we could easily do so right from this screen. Click on the tiny icon that looks like a CD located on the far right side of the optical drive attributes. Make your selection from the drop down menu to swap the disk on the fly.
3. Utilize the Quick Eject Feature
Once you have a virtual optical drive configured on a VM, you can use this CD icon exclusively to add or remove ISO images for your virtual machine. It acts exactly like a physical eject button on a real computer tower. You do not have to dig through the main storage menus every single time.
Configuring the Boot Order
1. Adjust BIOS Boot Settings
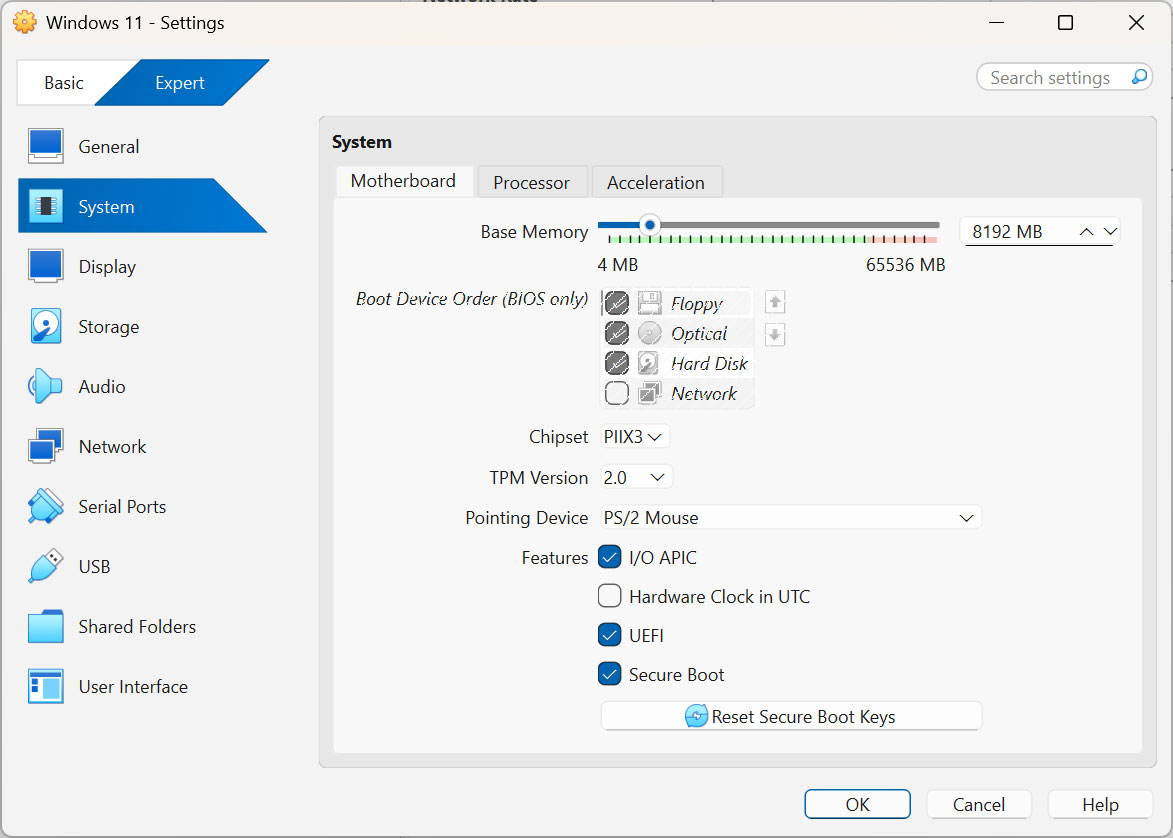
When it comes to booting your virtual machine with your ISO image file, you might need to manually change the boot priority. Go to the System settings and then click the Motherboard tab to change the boot order. Move the Optical drive to the very top of the list if you are using the older BIOS firmware style for your virtual machine.
2. Access the EFI Boot Manager
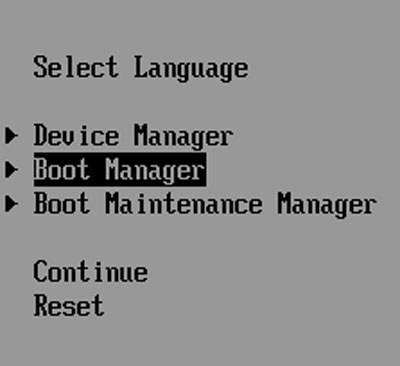
If you are using the modern EFI firmware setting, the process requires a quick keyboard shortcut during startup. Boot the virtual machine and keep tapping the Esc key on your keyboard repeatedly. This interrupts the normal boot sequence and lets you choose the Boot Manager menu from the black screen.
3. Select the CD-ROM Option
Then you can select the UEFI VBOX CD-ROM option using your arrow keys. Press Enter to have your virtual machine boot directly from the mounted ISO image file. If you are starting a VM that does not have an operating system installed yet, there is a very good chance it will automatically boot from the ISO without you having to change anything at all.
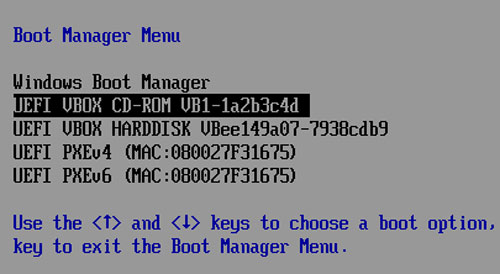
If you are starting a VM that does not have an operating system, there is also a good chance that it will automatically boot from the ISO without having to change anything.
For additional training resources, check out our online IT training courses.
Check out our extensive IT book series.