
Last Updated on October 7, 2026
Zip files have been around almost as long as Microsoft Windows itself. They are mainly used to combine multiple files (and folders) into a single file. They are also used to compress files to make them smaller, so it is easier to do things such as email them. You can create zip files in Windows without any additional software as well as extract (unzip) them.
When you’re dealing with larger archives or zip files that contain many nested folders, Windows also gives you a bit more flexibility in how you extract them. You can browse the contents of a zip file without extracting everything first, which is useful if you only need one or two specific items. By double‑clicking the zip file, Windows opens it like a regular folder, letting you drag individual files or folders out to another location. This approach can save time and disk space, especially when working with large downloads or shared project files.

Extracting a Single Zip File in Windows
1. Locate the Compressed File
Extracting a zip file is the process of taking the files out of a zip file so you can then work with those files and folders. If you have a single zip file, you can simply right click on it and choose Extract all. Then tell Windows exactly where you would like to have the files extracted to.
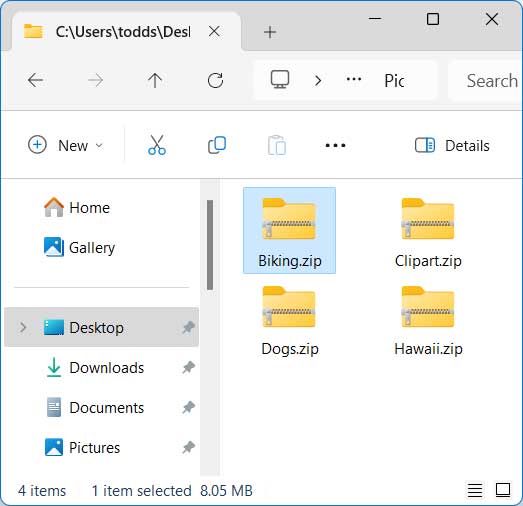
2. Choose the Extraction Destination
The default location will be the same folder that the zip file itself resides in. You can change it before clicking on the Extract button by typing in a new destination. You can also click the Browse button and then navigate to the specific target folder.
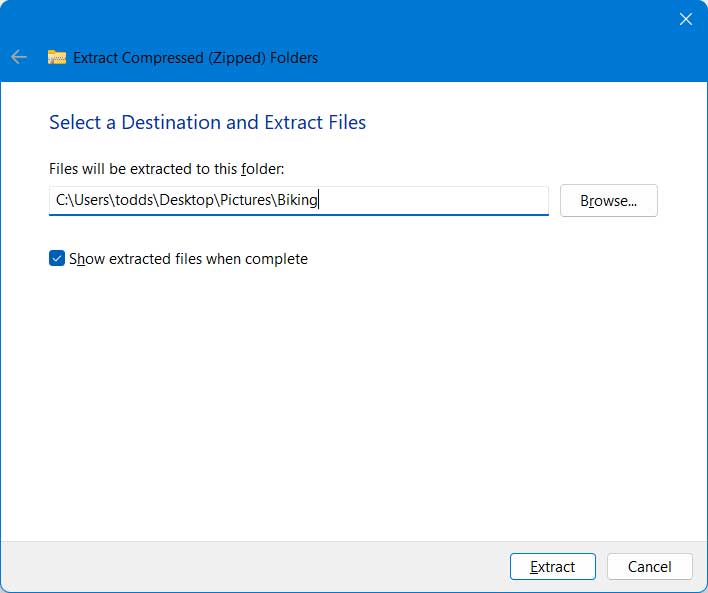
3. View the Extracted Folder
Then once the files are extracted, you will have a brand new uncompressed folder. It will have the exact same name as the zip file itself. You can easily change this name during the extraction process if you prefer a different label.
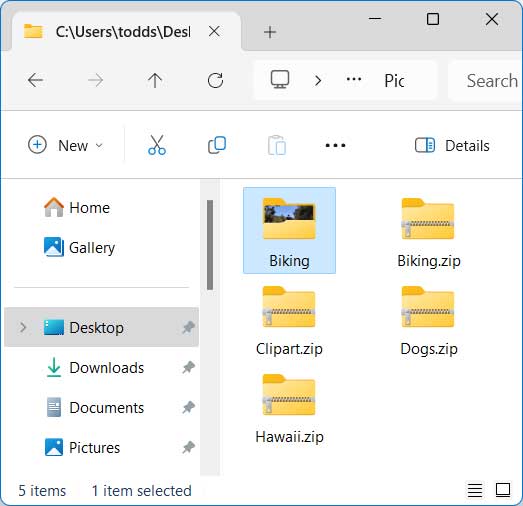
The Problem with Multiple Selections
1. Attempting a Bulk Extraction
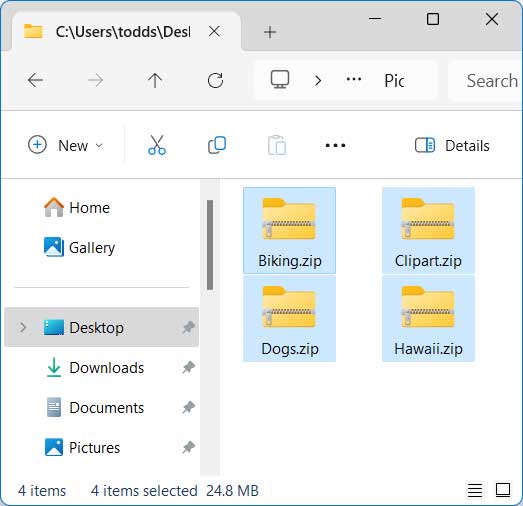
Now let’s say you had multiple zip files that you wanted to extract simultaneously. You can select them all in File Explorer and then right click on them and go through the same process. You will immediately encounter a massive problem with the native Windows tools.
2. Windows Limitations Revealed
The problem you will encounter will be that Windows will only extract one of the zip files no matter how many you select. The zip file that gets extracted will be the one you happened to right click on. This forces you to extract each file one by one which is incredibly tedious.
Using 7-Zip for Bulk Extractions
1. Install the 7-Zip Application
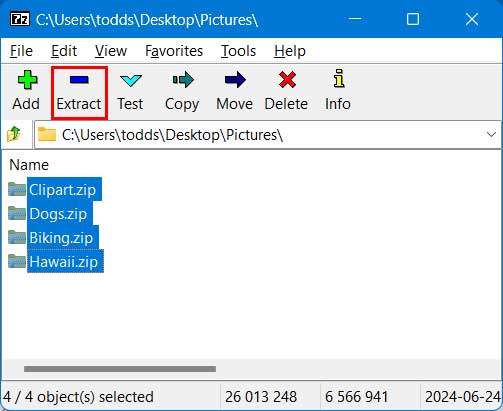
One easy and free way to extract multiple zip files is to use a program called 7-Zip. Once you download and install it, all you need to do is open it up. Browse to the specific folder that contains all your target zip files.
2. Select and Extract All Files
Then just select all the zip files that you want to unzip. Click on the Extract button located at the top of the toolbar. The software will process all the selected files in a single batch.
3. Confirm the Output Location
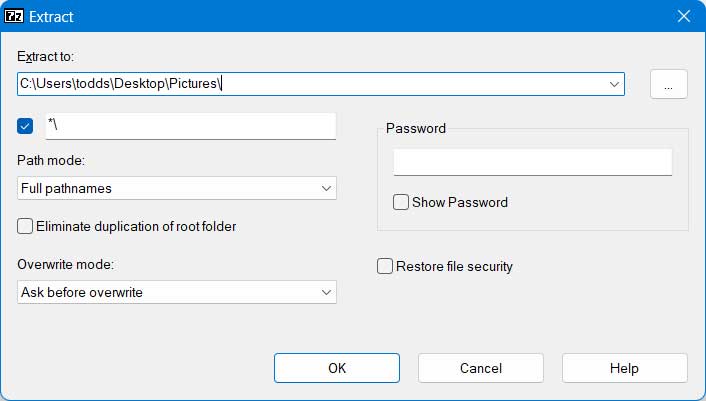
You will be asked where you would like to extract the files to. It will use the exact same folder as the zip files by default. You can also click on the ellipsis button to browse to a completely different location on your hard drive.
4. Verify the Extracted Folders
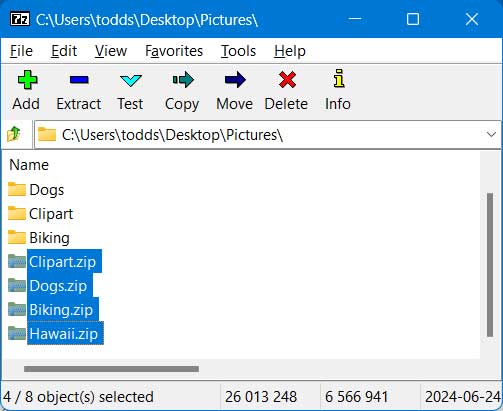
Once the zip files are completely extracted, you will see the final results. 7-Zip automatically placed the contents of each zip file in a separate folder. Each folder perfectly matches the name of its original zip file.
5. Check File Explorer
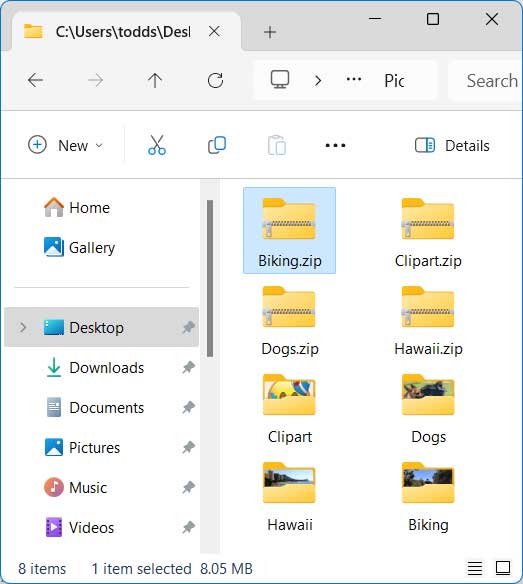
Now when you go back to the folder that has your zip files in File Explorer, you will see the extracted files. They sit right alongside the original compressed zip files. You can now safely delete the zip files to save hard drive space.
For additional training resources, check out our online IT training courses.
Check out our extensive IT book series.






