
Last Updated on June 7, 2026
If you are the type who still has your old music CDs and wants to convert them to digital audio files that you can backup or listen to on your computer, there is an easy way to do so. Assuming your PC still has a CDROM drive, you can easily rip your CD music collection to files such as MP3, FLAC, WAV and more using the free CDex CD ripper app.
CDex is a free tool you can use to not only convert your CDs to audio files but also pull in information such as album, artist and track names so you do not need to edit this metadata manually. That way, your music collection will have all the correct information with it so you will be able to easily organize and search for your music files as needed.

Reading and Editing CD Data
1. Load the Disk Information
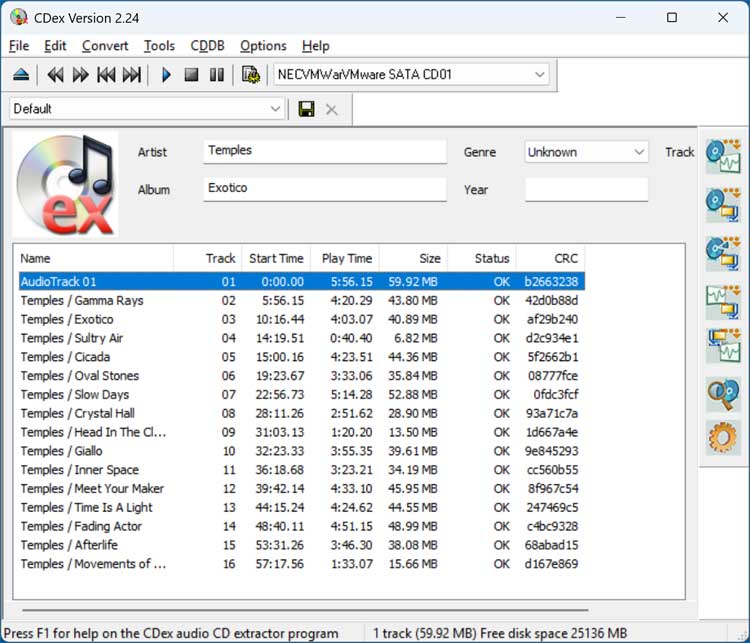
To begin, you will need to download and install the CDex software which can be found online. When you open CDex, it should read the CD information from the disk in your CDROM drive. It may or may not automatically populate the track information with the correct details. It often requires an active internet connection to pull the newest album data upon the first scan.
2. Manually Rename Incorrect Tracks
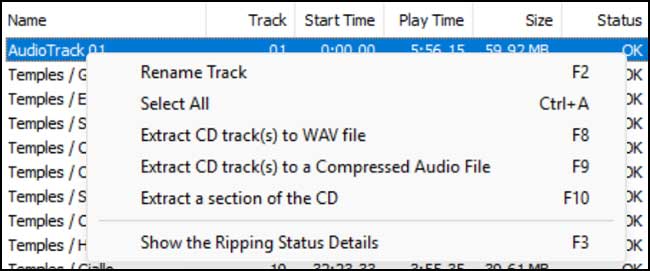
If the app does populate the tracks automatically, you may want to confirm that this was done correctly. As you can see in the image below, the name of the first song was not added correctly by the database. To fix the incorrect name for track 1, we can simply right click on it and choose Rename Track. You can also rip an individual song by right clicking on it as well. You can also manually edit the artist name, album name, genre and year as needed directly in the main interface.
3. Download Metadata from MusicBrainz
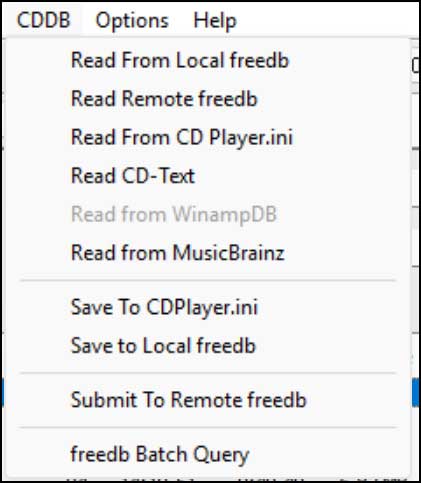
If you want CDex to try and load the metadata information for your CD, you can go to the CDDB menu. Choose Read from MusicBrainz to have it downloaded straight to the application. The option for Read Remote freedb will no longer work since the FreeDB database is no longer supported even though you can find older versions online if you look hard enough. You must use active 2026 servers for correct tagging.
Configuring Your Output Options
1. Adjust Output Directories
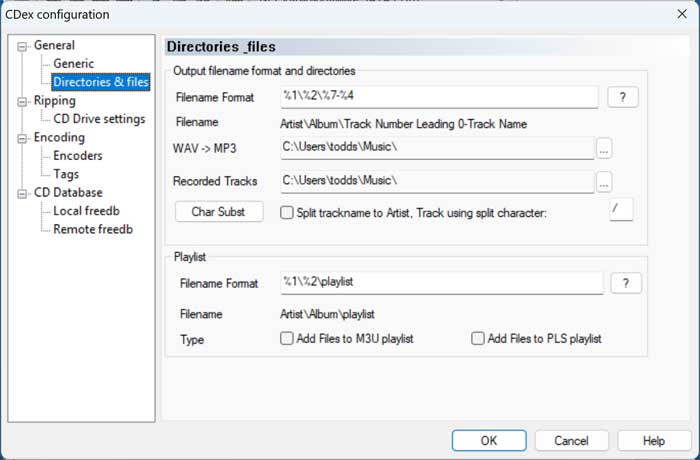
Before ripping your CD, there are a few settings you might want to check out from the Options menu or settings gear icon over at the right side of the app. The Directories & files setting will let you change the naming format and convention used for your converted files. You can also change the folder where the files will be extracted to. Set this to a dedicated music drive for easy access later
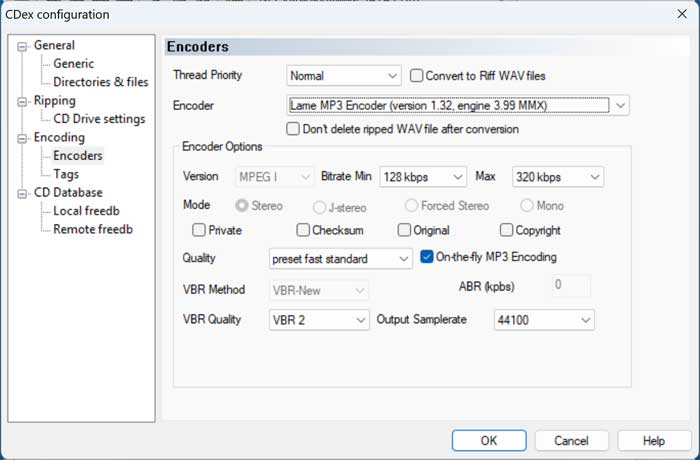
2. Select Your File Encoder
The Encoders setting is where you can choose what type of file you want to have your CD music tracks converted to. Once you choose the type, the options will change accordingly. For our example, we will be ripping our songs to MP3 files, and we can change things such as what encoder is uses as well as the minimum and maximum bitrate for the songs. Higher bitrates guarantee much better audio playback quality.
Ripping and Verifying the Audio
1. Extract the Audio Tracks
Once you have everything configured, you can either go to the Convert menu and choose what type of file conversion you are going to perform. Or you can click on the appropriate button at the right side of the app. For MP3 files, you will want to choose the Extract CD tracks to compressed audio files option. Just be sure that all the tracks are selected otherwise it will only convert the ones that are highlighted.

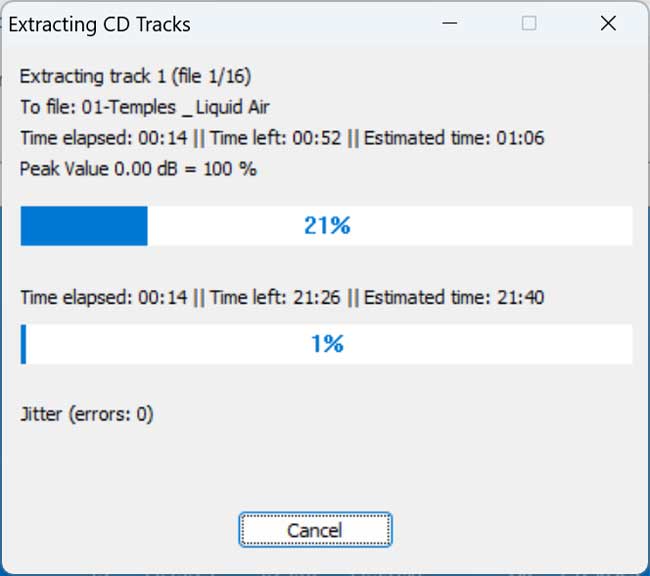
2. Monitor Ripping Progress
CDex will rip the audio tracks as WAV files first and then convert them to MP3 files. How long this takes will depend on the speed of your CDROM drive, how many songs are on the CD and what file type you are converting them to. The software displays a progress bar updating in real time. Do not eject the disk during this specific step.
3. Verify the Final Output
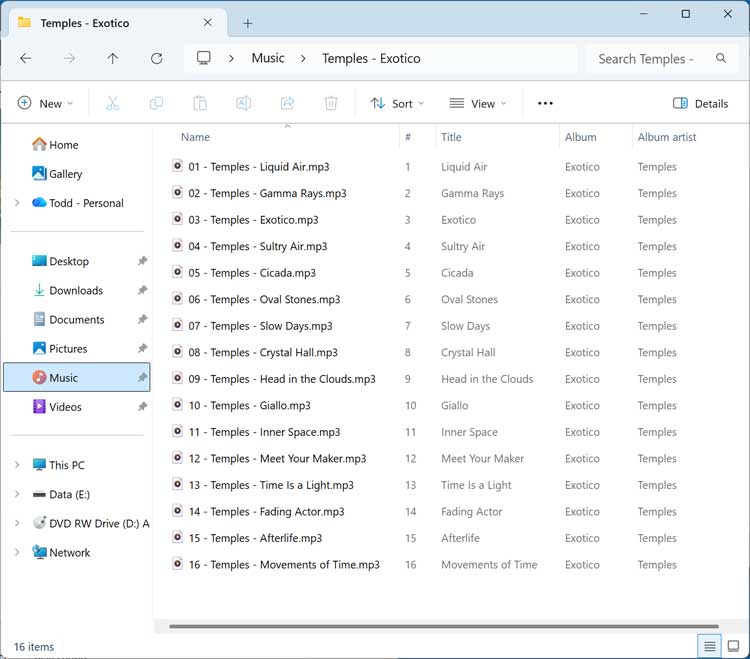
Now when we go to our Music folder, we can see the ripped MP3 files sitting on the hard drive. If we sort the folder by details, we can see the related metadata information applied beautifully to every song. Here are some other CD ripping apps you may want to check out if this software does not meet your needs. Play the new digital files to confirm the audio works perfectly.
Here are some other CD ripping apps you may want to check out.
For additional training resources, check out our online IT training courses.
Check out our extensive IT book series.


