
Last Updated on May 20, 2026
If you still happen to have music CDs and want to digitize them by converting them to audio files that you can then store on your computer, you can easily do so. But finding the right CD ripping app will make the process easier on you.
If you want to convert your CD music collection to digital audio files such as MP3, FLAC or WAV files, you can easily do so with the free MusicBee CD ripping software. There are other CD ripping apps such as Exact Audio Copy (EAC) which is a bit harder to use but at the same time may yield different results when it comes to supported file types and how well it downloads album art, song names, and artist names.

Getting Started with MusicBee
1. Download the Software
To use MusicBee to rip your music CDs to audio files, you will first need to download it from their website and install it.
2. Configure the Music Library
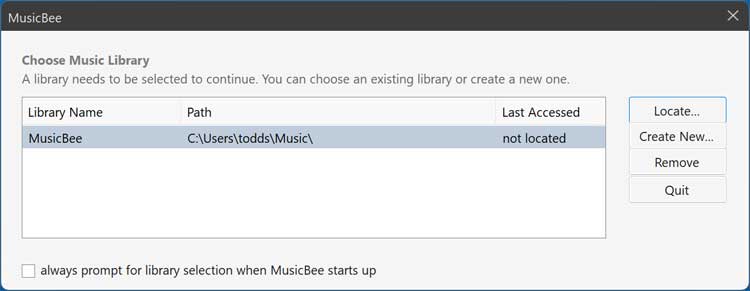
The first time you run MusicBee, you will need to configure a music library which can be done by clicking on the Create new button and choosing a folder on your computer. This dictates where the software stores its core database. Pick a drive with plenty of free storage space.
3. Name and Import Existing Files
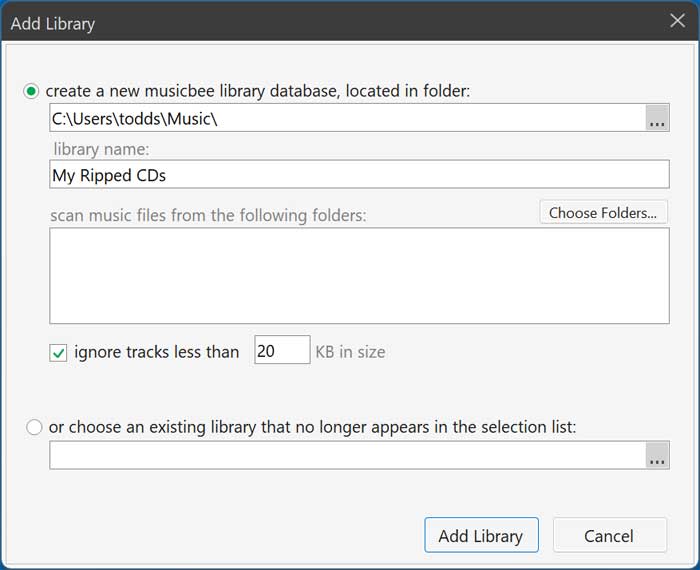
You can then give the library a name of your choosing and also import existing audio files that you might have on your computer located in other folders. Consolidating your files prevents fragmented storage. Type your preferred library name into the text field and confirm your changes.
Reading and Tagging Your CD
4. Load the CD Information
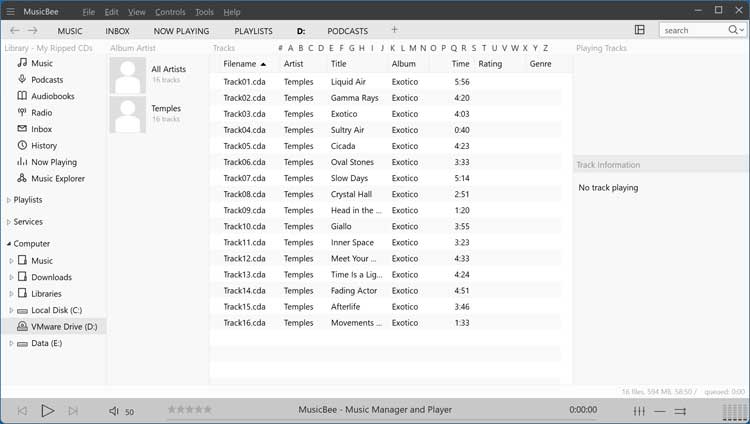
Once you are in the main MusicBee interface, it will read the CD that you have in your CD/DVD drive and try and load the CD information such as artist, title and album name. Wait a few moments for the software to scan the physical disc. The track list will populate directly inside the main viewing pan
5. Show the Left Sidebar
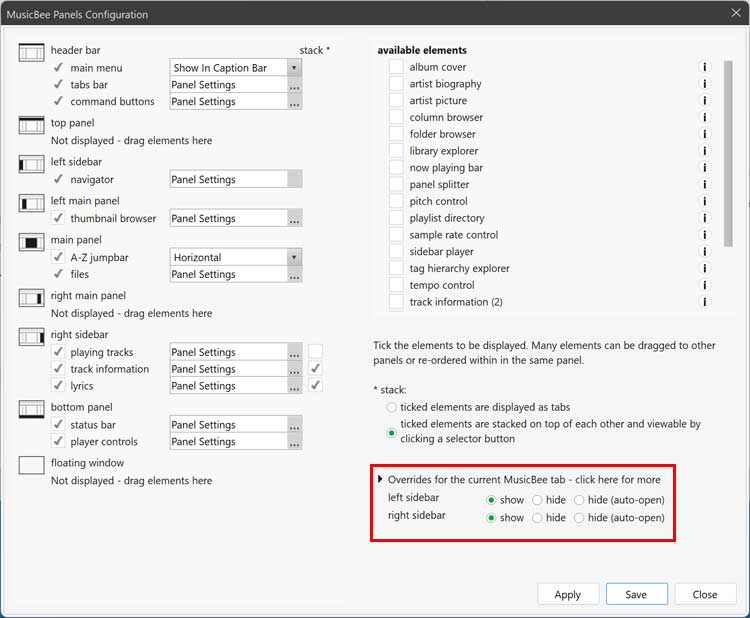
If you do not see your CD drive on the left side of the screen, you can go to the View menu and choose Arrange Panels. This opens a specific configuration window for the interface. Then you can choose the show option for the left sidebar choice on this screen.
6. Run the Auto-Tag Tool
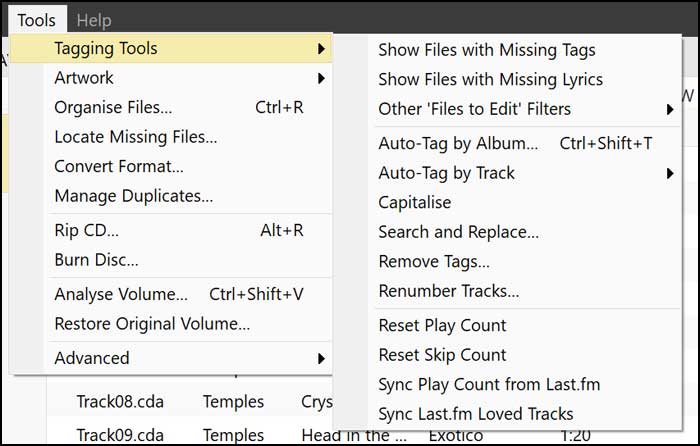
If MusicBee does not load the metadata information from your CD, you can go to the Tools menu and then to Tagging Tools and try one of the Auto-Tag options. You will need to select the songs you want to have this applied to first.
7. Download the Album Artwork
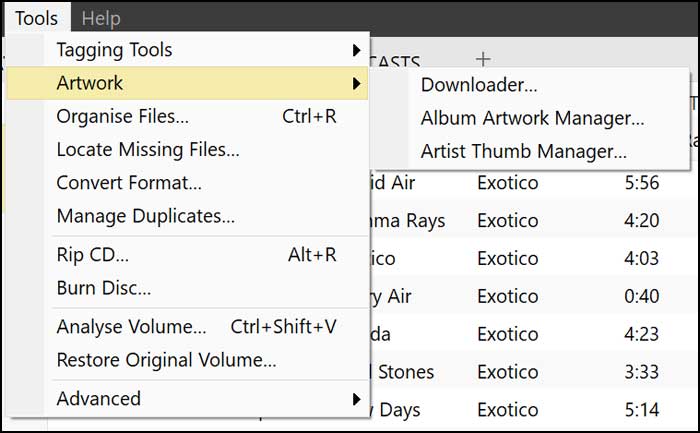
You can also go to the Artwork option and choose Downloader to see if it can find the album artwork to go along with your CD. High-quality cover art makes visual navigation easier. If you have a copy of the album cover image locally, you can add it here as well.
Configuring the Ripping Preferences
8. Access the CD Ripping Settings
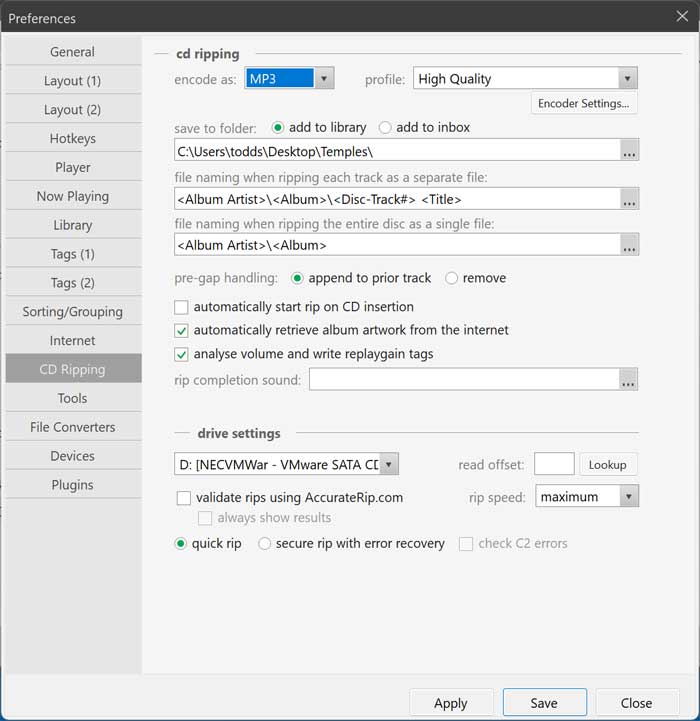
Before ripping your CD, you may want to check the conversion settings to make sure they will be converted to the format you want to use. To do so, go to the Edit menu and choose Preferences and then CD Ripping. Here you can choose between MP3, FLAC, WMA, Aiff and WAV.
9. Adjust Rip Speed and Naming Options
You can also change other options such as having the converted audio files be added to your library or change the naming convention for your music files. Specific naming tags keep your output directories highly organized. If you are receiving errors when ripping your CDs, you may want to change the rip speed from maximum to a lower value.
Executing the CD Rip
10. Open the Artist and Album Selector
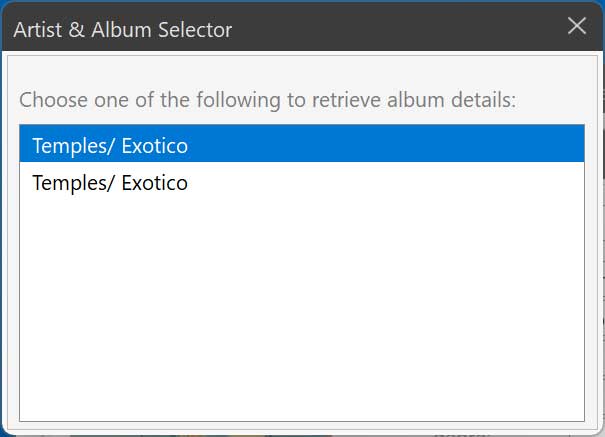
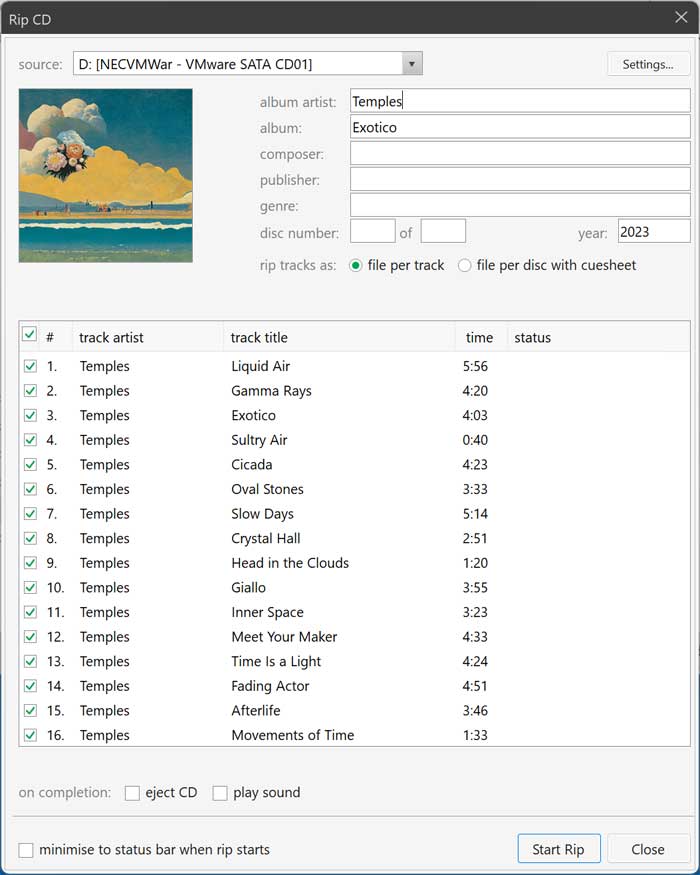
Once you are ready to begin the CD ripping process, go to the Tools menu and then choose Rip CD. You should then see an Artist & Album Selector popup screen with the artist and album name. Verify that the correct disc is highlighted in the menu. You can then double click it to continue.
11. Start the Conversion Process
Now you can click the Start Rip button to begin the conversion process. Watch the progress bar in the lower corner of the window. The conversion process will begin and how long this takes will depend on the speed of your CD burner, what type of files you are creating and how many songs are on the CD.
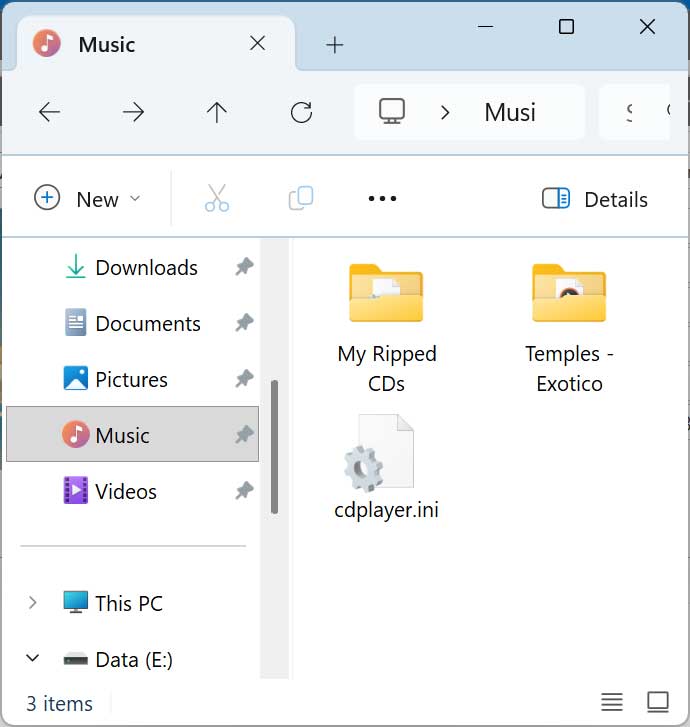
12. Locate the Converted Files
Once the process is complete, you can go to your library folder, and you should see a folder matching the name of your library that contains configuration and playlist information. Navigate through your operating system file explorer to locate this path. You should also see a folder that contains the newly ripped files.
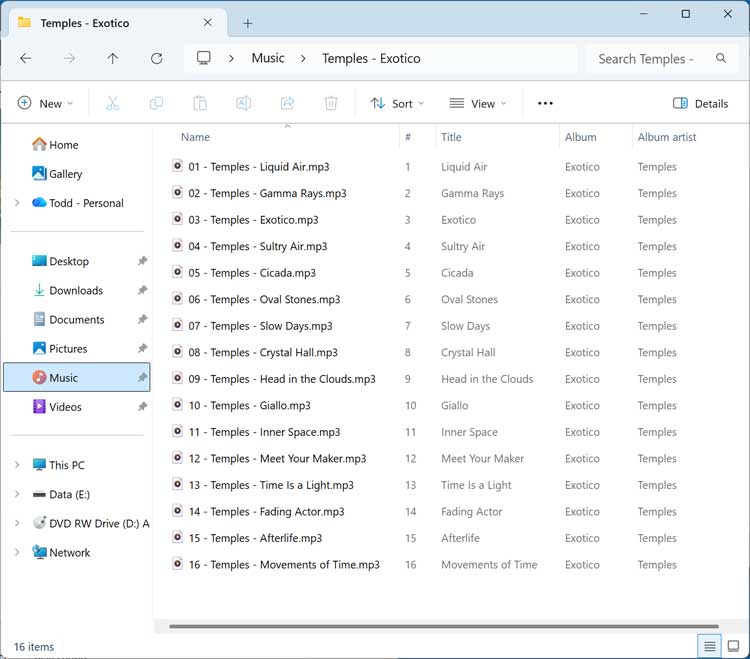
13. View the File Details
When viewing your files, you can choose to view them by details so that you can see things such as artist name, track name and album name. Right-click the folder background and switch the layout view. The raw audio files are now completely detached from the physical disc.
Here are some other CD ripping apps you may want to check out.
For additional training resources, check out our online IT training courses.
Check out our extensive IT book series.


