
Last Updated on October 8, 2026
FAT32 (File Allocation Table 32‑bit) is a file system commonly used on flash drives, microSD cards, external drives and very old computers. It can be used on Windows, macOS, Linux, game consoles, cameras, TVs, car systems, and more. Even though it’s an older file system, there are still many uses for it today.
If you need to use FAT32 on a USB flash drive, then it is still possible to format your flash drive as FAT32. If you are a Windows user, then you cannot format a flash drive larger than 32GB as FAT32 without using a third-party tool such as Rufus or the GUIFormat tool to do so. But if you are a Linux user or have access to a computer running Linux then you can do so natively from the Linux OS itself. We will be showing you exactly how to format a large capacity USB flash drive in Linux as FAT32.
Method 1 – Format the Flash Drive as FAT32 Using Disks App
1. Open the Linux Disks Application
If you are the type who prefers to use GUI tools over command line methods, you can use the built in Linux Disks app. This is also known as the GNOME Disk Utility on modern distributions. It allows you to format your flash drive as FAT32 or even NFTS or EXT4. If you are using a distribution of Linux that doesn’t have the Disks app, you should be able to use something like the KDE Partition Manager or even GParted.
2. Unmount the Target Drive
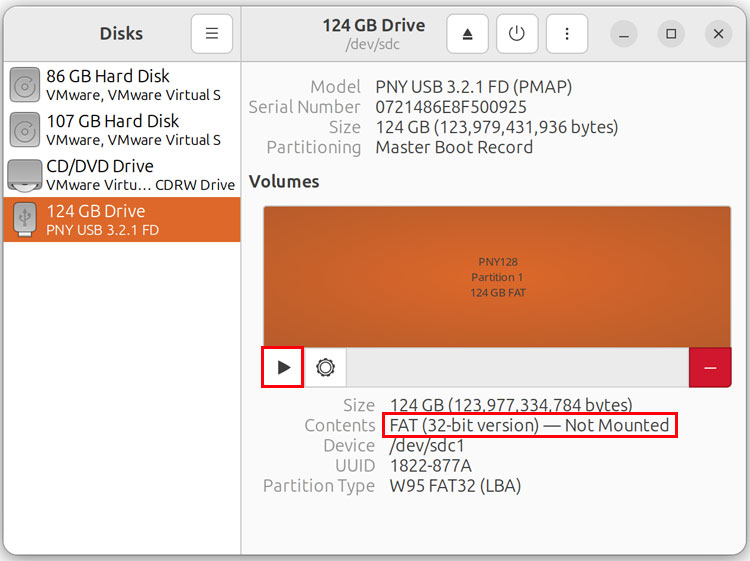
If you do have the Disks app, you can choose your USB flash drive from the disks on the left side of the screen. You should unmount the drive first to avoid any issues. Click the stop button to the left of the gear icon which will then change to a play button. Once it is unmounted, click the gear icon to get to the Format Partition option.
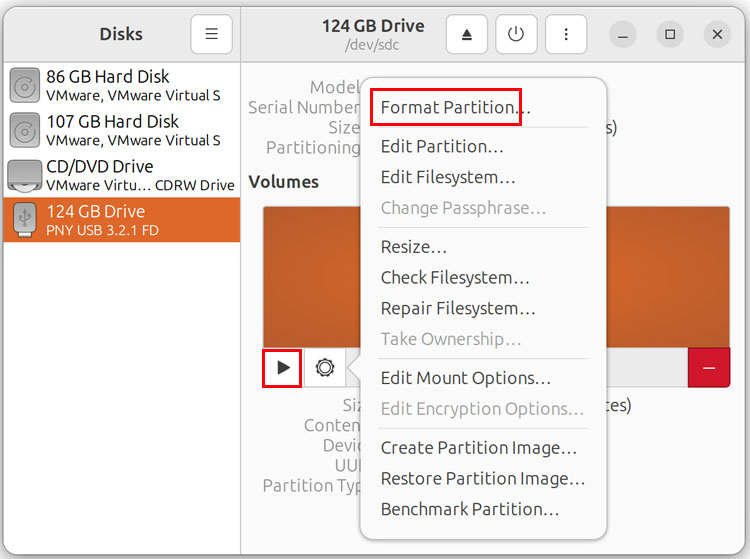
3. Select the FAT Format Option
From the Format Volume screen, you can configure the exact file system you need. Choose the radio button for For use with all systems and devices (FAT). Give the volume a recognizable name. Then click the Next button at the top right of the window.
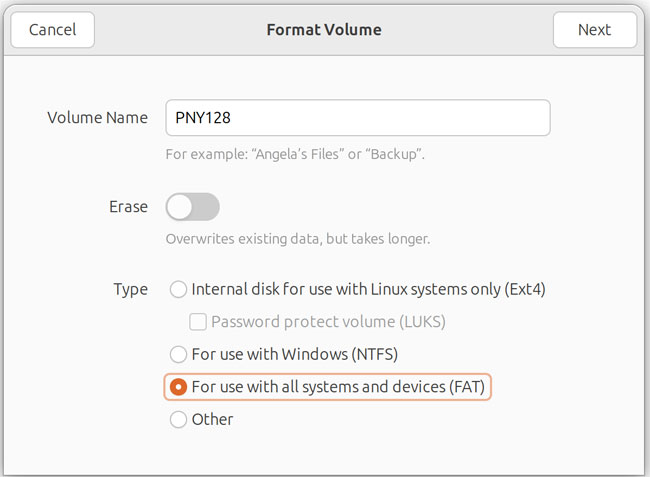
4. Accept the Erasure Warning
You will then be warned that everything on the flash drive will be completely erased. Double check the device location to ensure you are wiping the correct hardware. You can then click the red Format button to continue with the process.
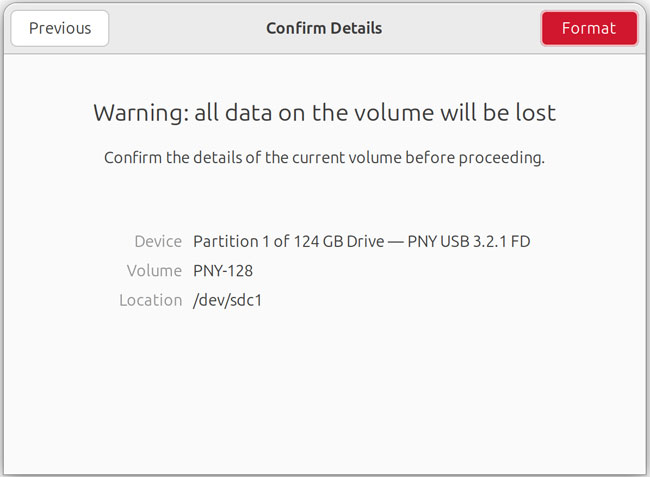
5. Mount the Formatted Drive
After the formatting process is complete, you will then see that your USB flash drive is now formatted as FAT32. You can then click the play button to mount the drive back into the operating system. It can now be used for file transfers immediately.
Method 2 – Format the Flash Drive as FAT32 Using the Command Line
1. Find the Disk Designation
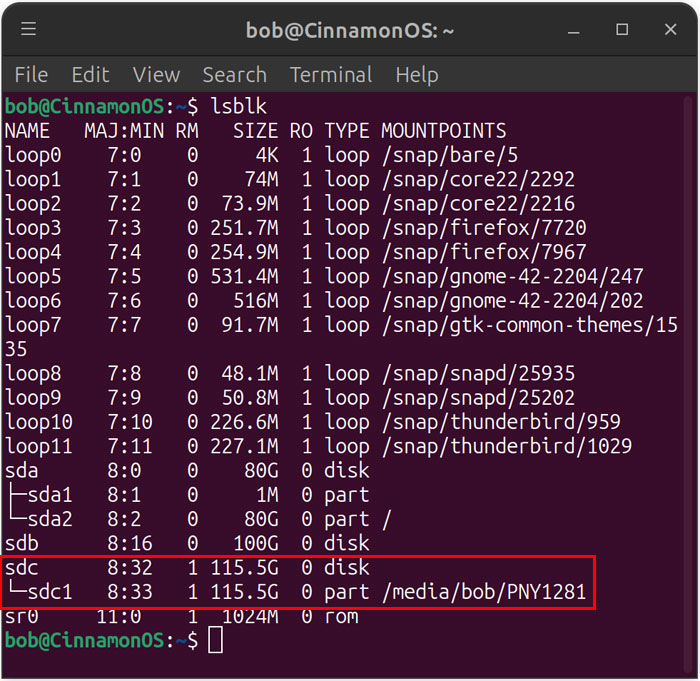
Formatting a USB flash drive as FAT32 via the command line is an easy process that only takes a few steps. The first step in the command line process will be to find the disk designation for our flash drive using the lsblk command. From a Linux terminal, run lsblk to list all connected disks. Find the one that matches your flash drive size or name perfectly.
2. Unmount and Create a Partition Table
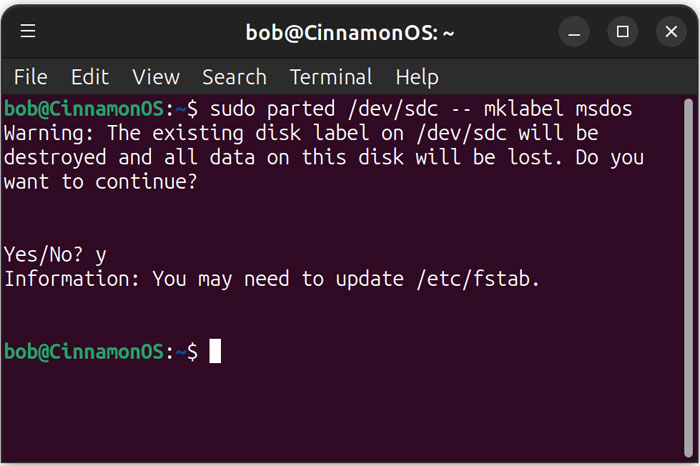
Now we will use the sudo umount /dev/sdc1 command to unmount the flash drive. Just replace sdc1 with the name of your specific drive. You will most likely be prompted to enter your admin password to proceed. Next, we will need to create a new partition table. To do so run sudo parted /dev/sdc — mklabel msdos. This wipes the drive and sets it to the “msdos” (MBR) standard for maximum hardware compatibility.
3. Ignore the Fstab Warning
You may get a message saying You may need to update /etc/fstab. This is because parted destroyed the old partition table and created a new one. As a result, any existing references to that disk or its partitions might no longer be valid. You can typically ignore this message when using the command on USB drives.
4. Create the New FAT32 Partition
Now we will create a new partition on the flash drive using the parted utility. Type the command sudo parted /dev/sdc — mkpart primary fat32 1MiB 100% into the terminal. You will most likely see the You may need to update /etc/fstab message pop up once again.
5. Format with Optimal Sectors
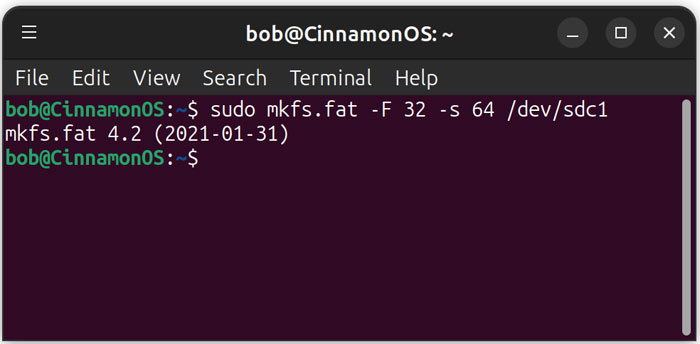
Then we will format the USB drive as FAT32 using the mkfs command. Run sudo mkfs.fat -F 32 -s 64 /dev/sdc1 and press enter. The -F 32 flag specifies the FAT32 system. The -s 64 sets 64 sectors per cluster (32KB), which is the sweet spot for performance on a 128GB drive. This process will most likely take a moment to complete. You will not be shown any message when it’s finished.
6. Verify the File System
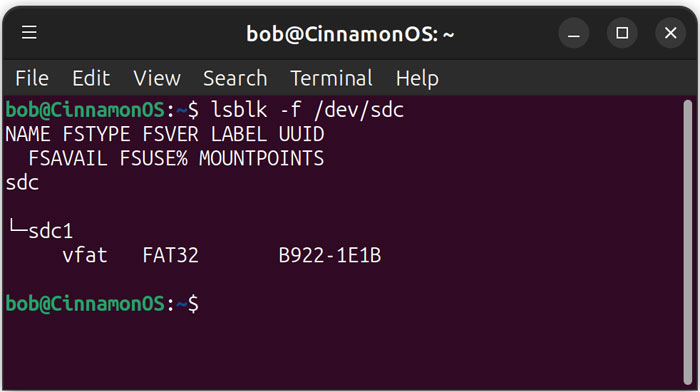
You must verify the changes actually applied to the disk successfully. You can then run lsblk -f /dev/sdc to confirm the file system (FSTYPE) is now vfat. Now you can safely eject your flash drive. Use it in another computer or other device such as a game console or your car.
For additional training resources, check out our online IT training courses.
Check out our extensive IT book series.






