Cloning hard drives is a fairly common procedure for computer enthusiasts these days. With SSD/NVMe hard drives getting faster and cheaper at the same time, it makes sense to upgrade your drive for improved performance. Plus, when you clone your Windows drive, you do not need to reinstall everything on the new drive which saves some serious time.
There are other reasons to clone your Windows drive to a new disk such as replacing a hard drive that is starting to fail or upgrading your drive to put in a new computer you have built. Fortunately, there are many apps you can use to accomplish this with most of them being free to use.

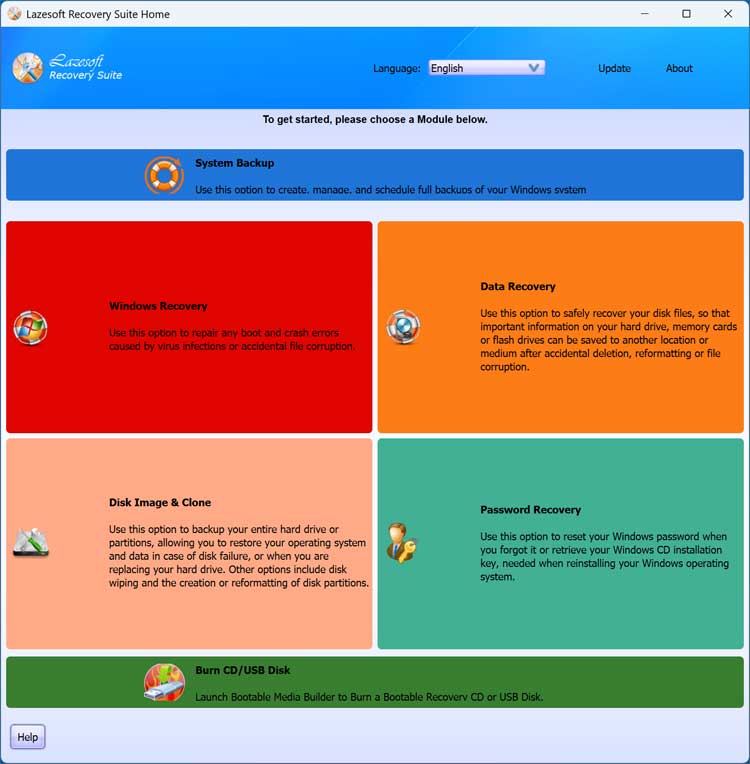
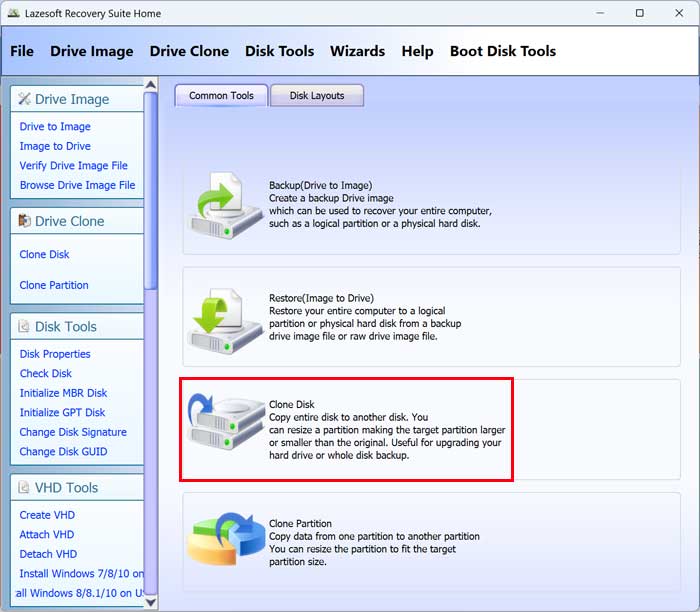
The tool we will be using to clone our Windows drive to a new disk is called Lazesoft Recovery Suite Home edition. This software can do much more than clone hard drives such as repair Windows and reset user passwords. You can download Lazesoft Recovery from their website here.
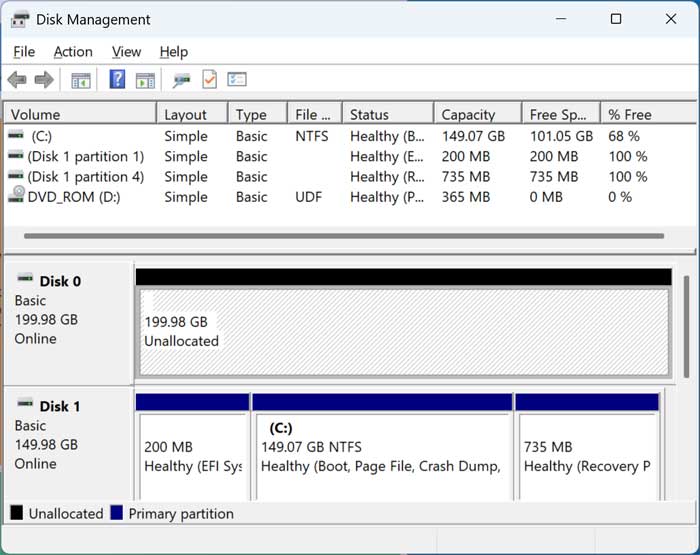
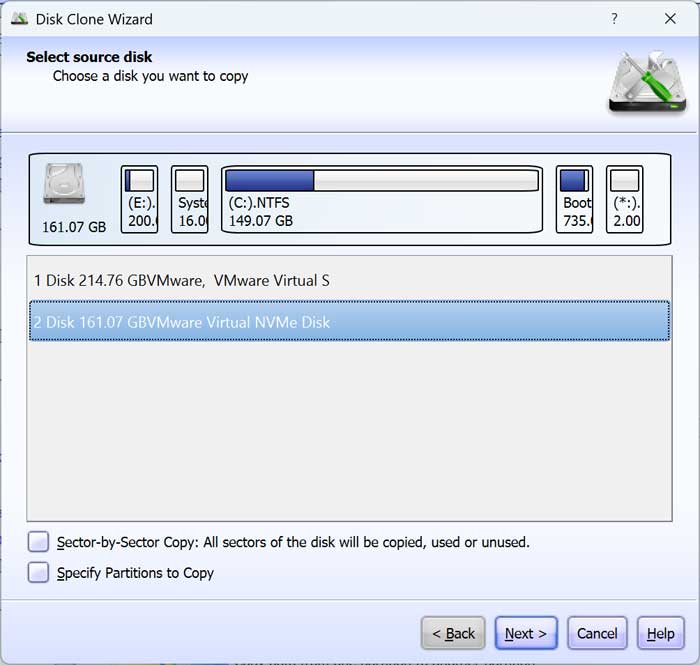
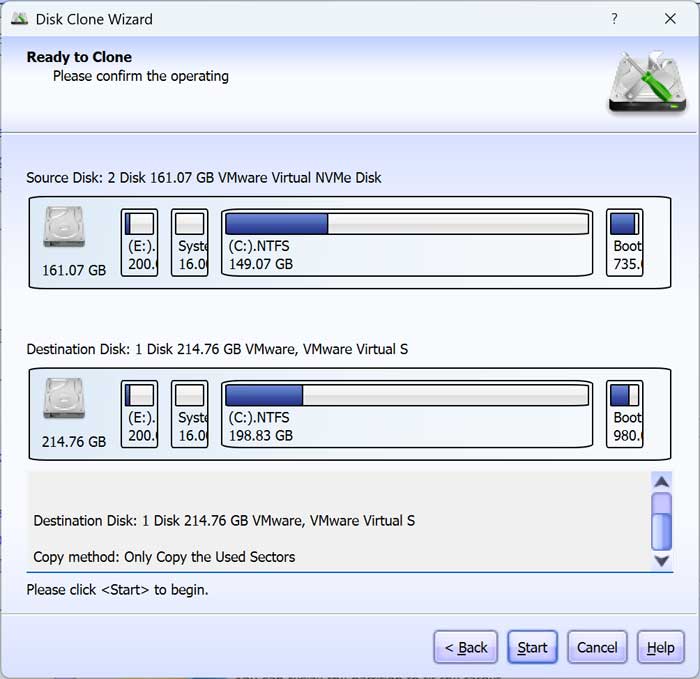
For our example, we will be cloning a 150GB hard drive that has Windows installed to a new unallocated 200GB drive as shown in the Windows Disk Management tool.
After you install Lazesoft Recovery Suite, you can open the software and go to the Disk Image & Clone section.
From here, you can click on the Clone Disk option to start the process.
Next, you will need to select the source disk which is the one that has Windows installed on it. You do not need to check the boxes for sector-by-sector copy or specify partitions to copy.
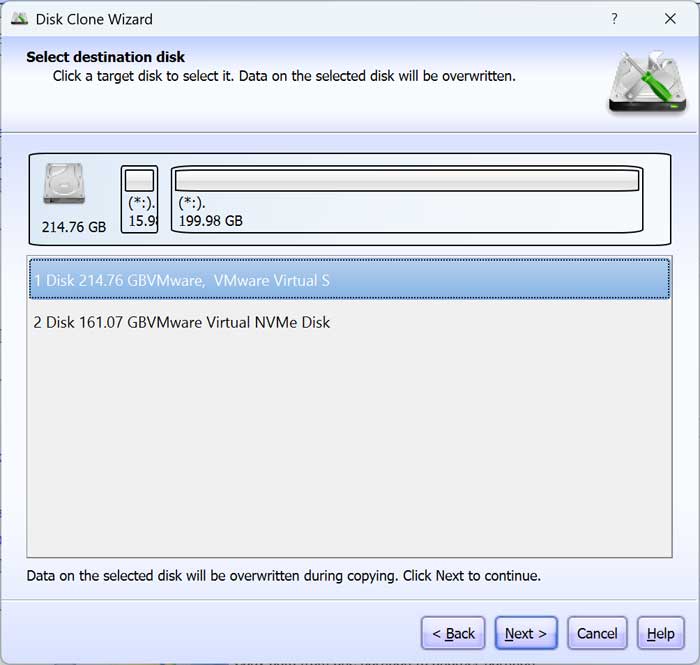
Next, you will need to select the destination disk which will be used to create the cloned copy of the drive on.
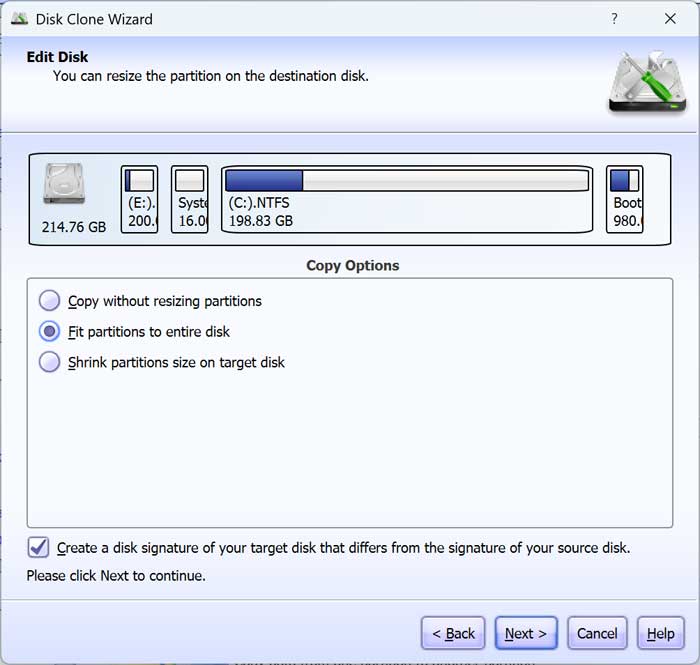
If the new hard drive is larger than the old one, you can choose the Fit partitions to entire disk option to have the Windows C drive expanded to use the extra space on the larger disk. Just be aware that you may have to do some partition adjusting to do so. If not, you will need to expand the disk later or you can use the extra space for another partition later.
You will then be shown a summary screen of the cloning settings and can then click the Start button to begin the process.
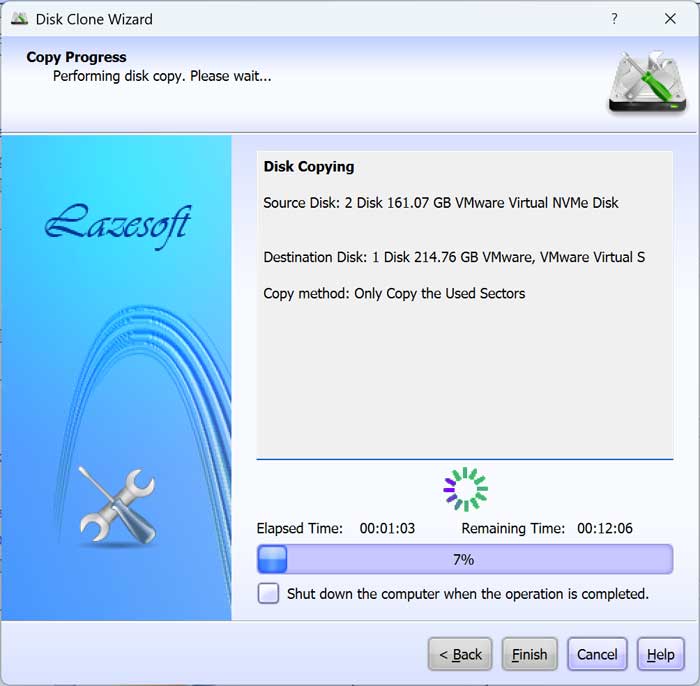
You will then be informed that all the data on the destination disk will be overwritten, and you will need to click the OK button to continue.
The disk clone will take several minutes and how long it takes will be determined by the size and speed of your hard drives.
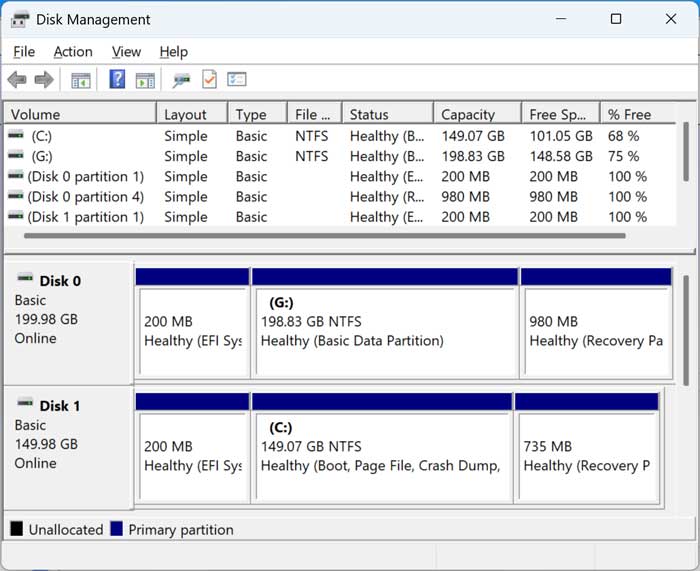
Once the process is complete, you can go back to Disk Management, and you should see the new and old drive with Windows partitions on each one.
You can now remove or unplug the older drive and then boot your computer using the new drive. You may have to change your boot order if you are using a different type of drive or connection.
For additional training resources, check out our online IT training courses.
Check out our extensive IT book series.