
Last Updated on May 24, 2026
These days, it’s common for people to install their own operating system, especially when it comes to repairing their computers or when they have built their own computer from scratch. When it comes to creating a bootable USB flash drive that you can use to install operating systems such as Windows or Linux, you have many choices when it comes to what apps you can use.
Even though there are more USB creator app choices for Windows than Linux, you still have several options such as WoeUSB and even Ventoy. In this article, we will be showing you how to create a bootable Windows installation USB flash drive in Linux with USBZile. You can run USBZile from a command line to open the tool and create your flash drive. You may have to perform a couple of other steps first in case your computer is missing any prerequisites.

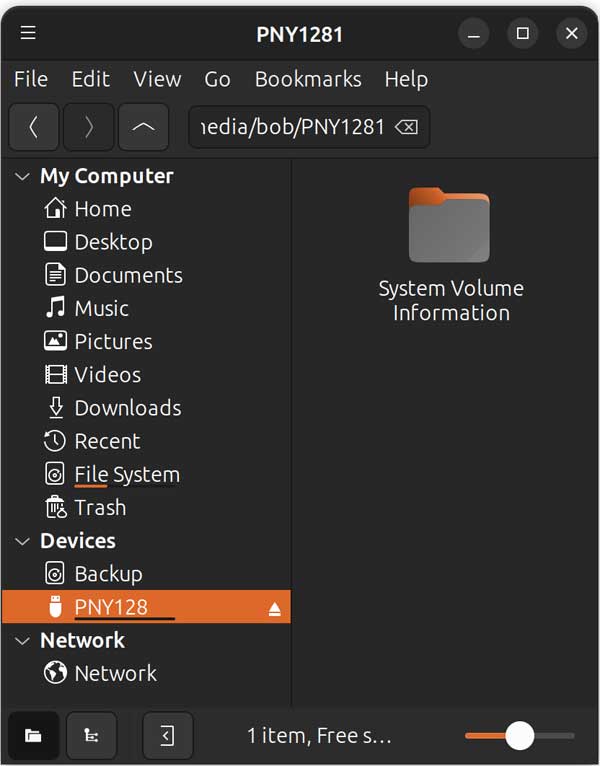
We will be creating a Windows 11 bootable flash drive on a PNY 128GB flash drive.
Installing and Launching USBZile
1. Run the Curl Command in Your Terminal
To use the USBZile app to create your flash drive, all you need to do is run the following command in the Linux terminal. Open your preferred command line interface and paste the string exactly as shown below. Hit Enter to execute the download script.
curl -fsSL https://www.usbzile.com/linux/latest | tar -xz && sudo ./USBZile
2. Install the Curl Dependency
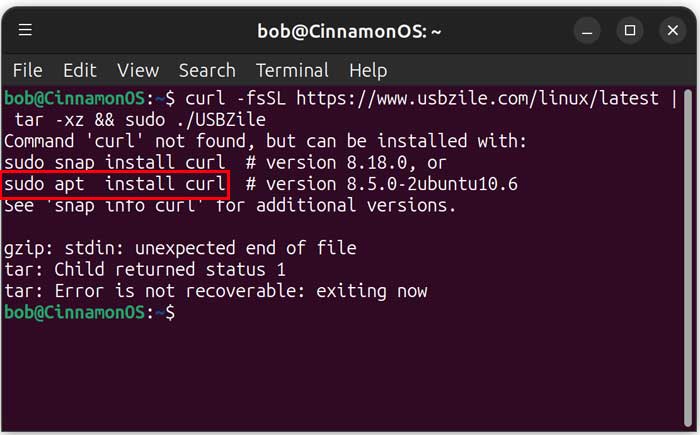
If you do not have Curl installed on your system, you will get a message saying Command ‘curl’ not found but can be installed with. It may then give you the appropriate command to use to install curl. Apt install adds a program as part of your system, sharing pieces with other software, while snap install drops in a sealed box that brings everything it needs with it, making it more independent but bulkier. We will be using the sudo apt install curl command for our Ubuntu environment.
3. Update Your APT Package Manager
You may want to run sudo apt update before running the sudo apt install curl command. You will need to enter your admin password to run the update. Refreshing the local repository prevents software version conflicts. After you install Curl, you can run the command to install USBZile again.
4. Accept the Software License Agreement
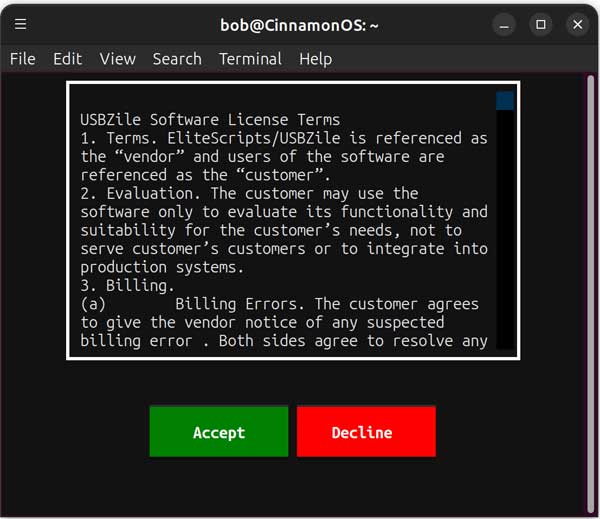
You will then need to accept the license agreement to continue to use the USBZile app. A terminal-based prompt displays the terms on your screen. Use your mouse or keyboard to select the green Accept button. As of this writing, USBZile is free to use but keep in mind that this might change in the future.
Configuring Your Bootable Windows USB
1. Identify Your Target Flash Drive
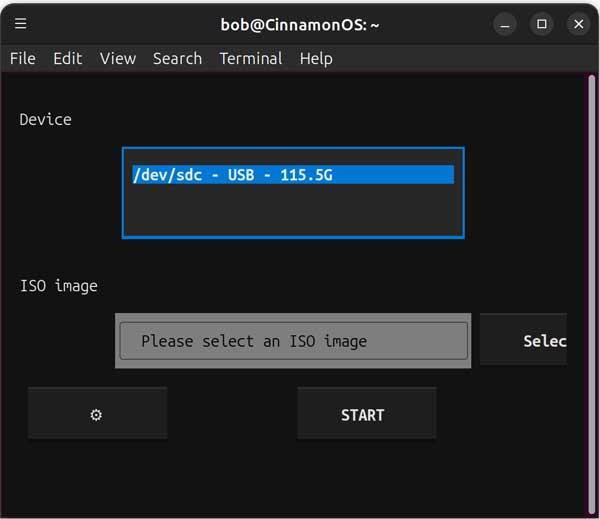
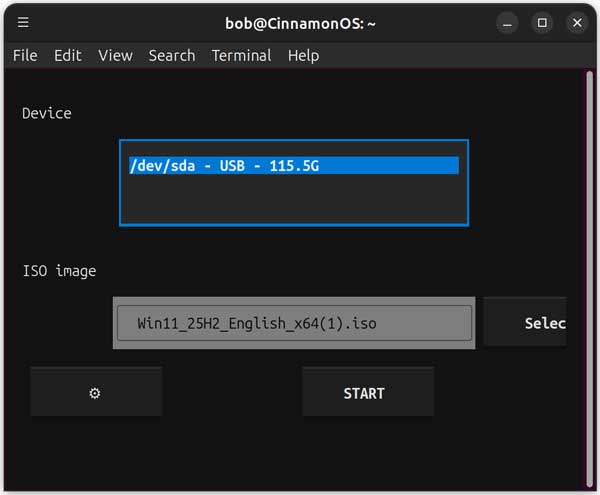
USBZile should find your USB flash drive if it’s attached to your computer. The graphical interface highlights your specific mount point inside the device box. Verify the storage capacity shown matches your physical hardware to avoid wiping the wrong disk.
2. Browse for the Windows ISO File
You will then need to browse to the location of the Windows ISO file on your computer. Click the Select button to launch the file picker dialog. Navigate to your Downloads folder and highlight the Windows 11 disk image.
3. Reselect the USB Device
Once you select your ISO image, be sure to click on your device again or else you might get an error saying please select a device. The application loses focus on the target drive after picking the ISO. Clicking the drive path locks it in for the final write process.
4. Confirm the Data Destruction Warning
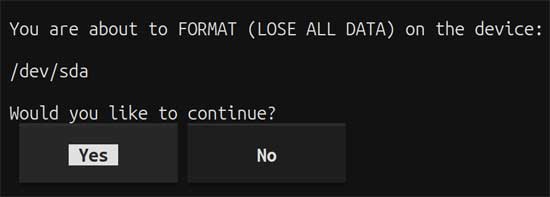
Click the START button at the bottom of the window. You will then be shown a warning that all the data on the flash drive will be erased and you will need to click the Yes button to continue. There is no way to recover your deleted files after the formatting command executes.
Completing the USB Creation Process
1. Wait for the ISO Copy Process
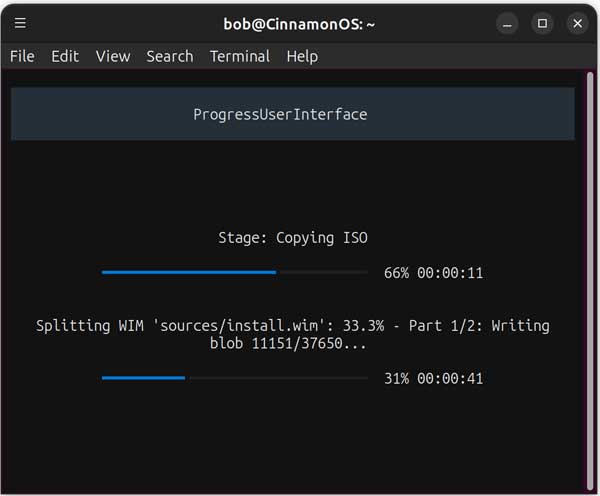
The USB creation process will take several minutes since the Windows ISO file is 7-8 GB in size. A terminal progress bar displays the exact file extraction percentage. Do not close the window or remove the drive during this active write phase.
2. Verify the Completion Message
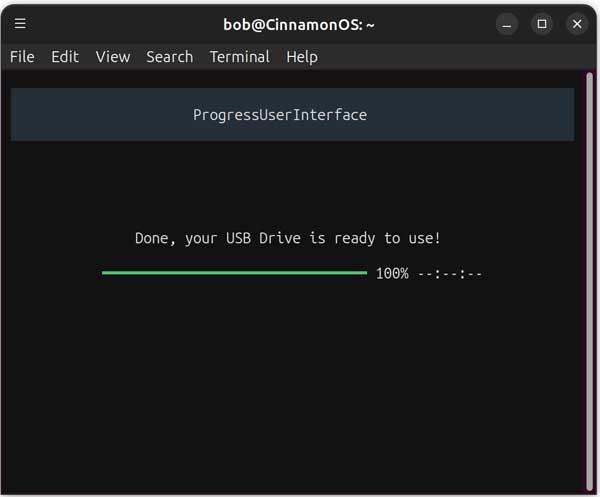
The progress bar fills to 100 percent when the transfer finishes. You will then be shown a message that says Done, your USB Drive is ready to use! when the process is complete. The software flushes the data cache to ensure safe removal.
3. Inspect the Flash Drive Partitions
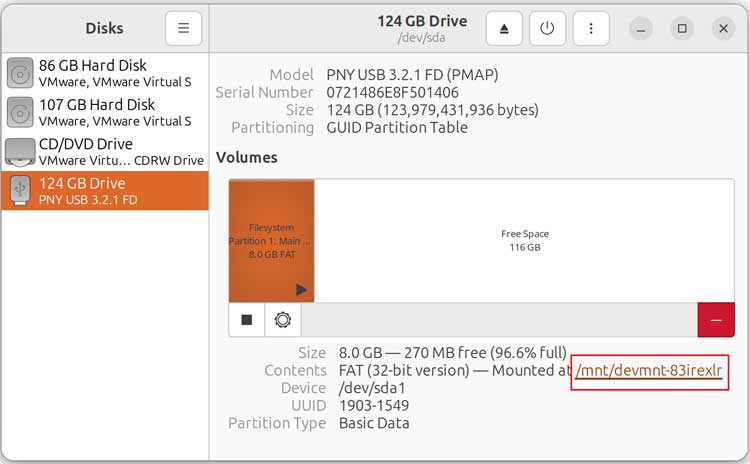
If you want, you can open the Linux Disks tool and look at the partition layout of your flash drive. This verifies the drive structure is healthy. You should see a primary partition housing the bootable media files.
4. View the Windows Installation Files
If you click on the link next to mounted, you can then view the contents of the flash drive and see the Windows installation/setup files. The root directory contains familiar folders like boot, efi, and sources. You can then boot your computer or other computers with your newly created flash drive and install Windows as needed.
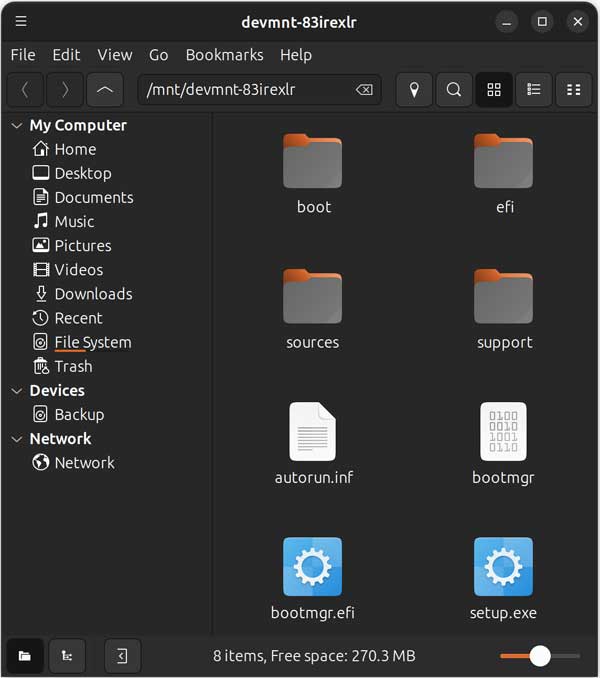
You can then boot your computer or other computers with your newly created flash drive and install Windows as needed.
For additional training resources, check out our online IT training courses.
Check out our extensive IT book series.






