
Last Updated on April 2, 2026
If you are the type who likes to build your own computer or install your own operating system, then you have most likely created a bootable disk at some point. Back when CD\DVD drives were standard on all computers, you could simply burn a CD with the operating system on it and be ready to go. These days, many people are using flash drives to install their OS and even boot to repair utilities and password recovery software. In this article we will show you how to create a reusable bootable flash drive that you can use with multiple image files.
If you have ever used a program such as Rufus to create a bootable flash drive, you know that you need to format the drive, and have it configured with an ISO or other image file and then you have a single purpose flash drive that you can only use with that image. Then if you want to use it for another purpose, you will need to do the process all over again.

There is another tool you can use that will allow you to have multiple images on your flash drive and then when you boot to it, you can simply select the image you want to use. And the best part is that you only need to configure the drive once and then you can add and remove images as needed simply by dragging and dropping or pasting them into the drive using the Windows File Explorer.
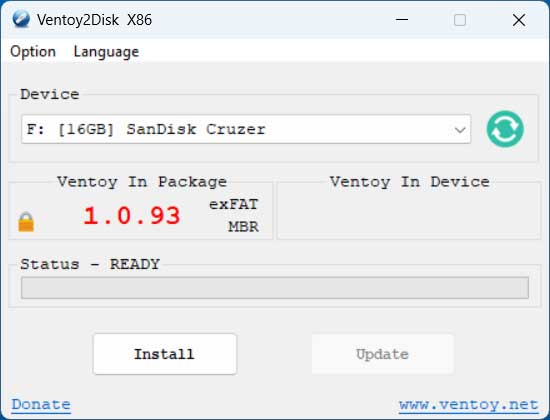
Once you download the software, you can run the Ventoy2Disk.exe file and choose the flash drive from the Device dropdown menu. Just be sure to select the right one to avoid data loss because the drive will be formatted. Then simply click on the Install button to begin the process. You will be informed that all the data on the drive will be lost and need to click the Continue button.
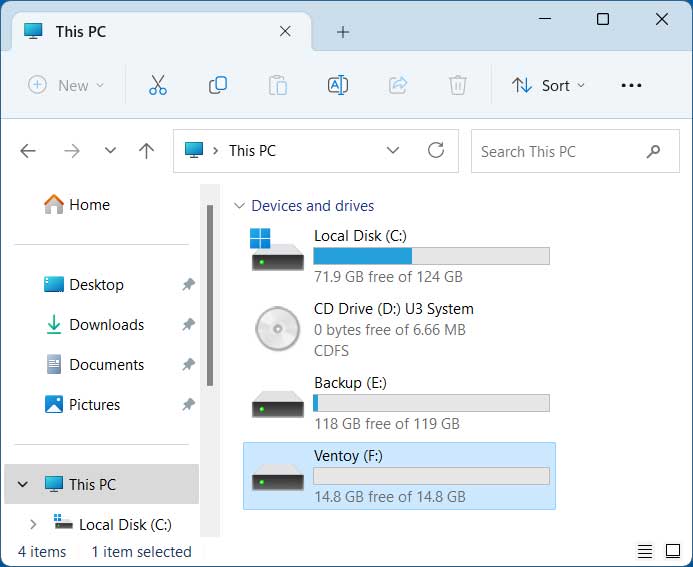
You will then see that your flash drive has been labeled Ventoy and is empty and ready to go.
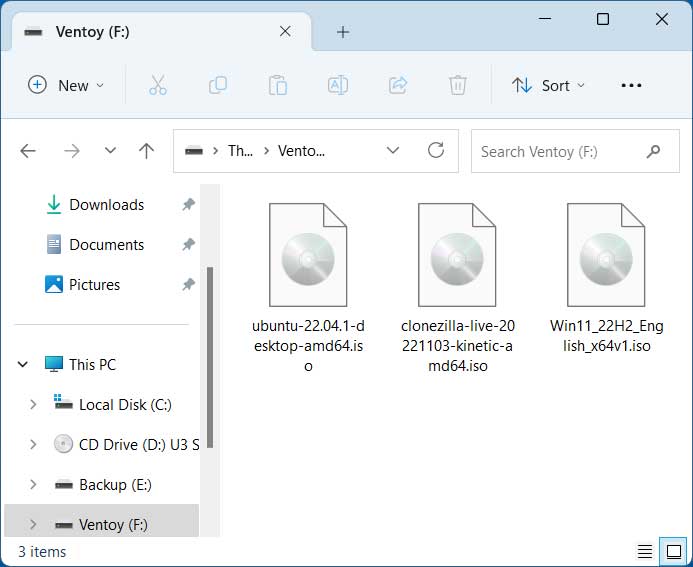
Now you can drag any image files that you want to have the option to load into the flash drive. Ventoy supports ISO, WIM, IMG, VHD(x) and EFI image files. The image below shows a Windows 11, Ubuntu Linux and Clonezilla ISO files that have been added to the flash drive.
After adding your image files, you can then boot to the USB flash drive. You may need to go into your computer’s BIOS\UEFI to change the boot order or to manually boot from the flash drive. Then once you start your computer with the flash drive set as the first boot device, you will be shown the Ventoy screen with your image files displayed.
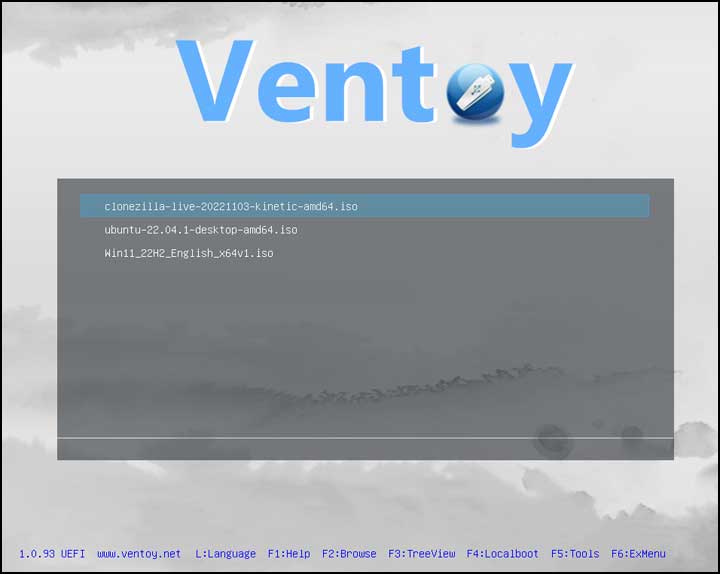
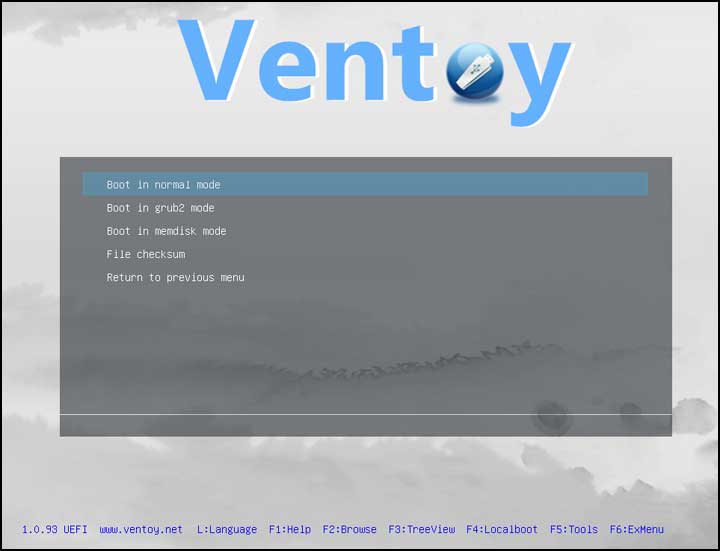
Then you can select the image you want to boot from, and press enter on your keyboard. The Ventoy boot disk has some additional boot modes for some special ISO files or computers, but for the most part, you will use Normal mode. Wimboot can be used to boot Windows ISO files and some WinPE ISO files. Grub2 mode is used to boot Linux ISO which contains a grub2 configuration file. Memdisk mode is very suitable for WinPE and other smaller boot images and will load the entire image file into memory. It can only work with ISO and IMG files.
Then you can simply select the image you want to boot from and do things such as install your new operating system or other task from there. Then if you want to add or remove images from this flash drive, simply boot back into Windows or your other OS and copy the new image files to the drive.
The Ventoy tool is free to use, and you can download it here. It can also be used in Linux.
For additional training resources, check out our online IT training courses.
Check out our extensive IT book series.


