Last Updated on July 28, 2026
Cloning your Windows hard drive is a great way to transfer your Windows OS, installed applications, files, user accounts and settings to a new hard drive without having to reinstall everything and start over from scratch. It also comes in handy if you have built yourself a new computer and want to transfer everything over to your new PC all at once.
Cloning your drive also comes in handy if you want to upgrade to a larger or faster hard drive and is also a useful way to transfer your data to a new drive if your current hard drive is starting to fail on you. Of course, there are third party apps that allow you to transfer your programs and settings to your new computer but that is not quite the same as cloning your entire drive which will make an exact copy of your data and its configuration.

In this article, we will be showing you how to clone your Windows operating system drive to another drive for free using a tool called IM-Magic. You can download IM-magic from their website here. They have a portable version of the app, so you don’t even need to install anything to clone your hard drive. Plus, it runs in Windows so there is no need to create any type of bootable flash drive to use it.
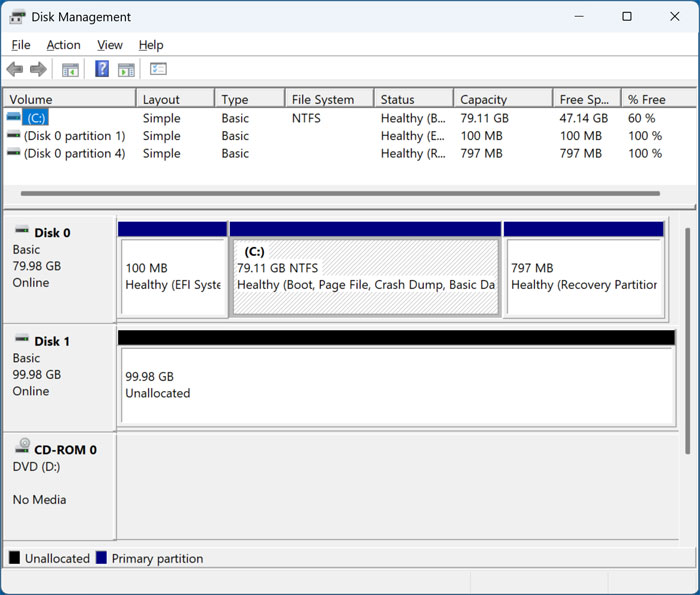
For our example, we will be cloning our 80GB Windows drive to a new blank 100GB hard drive with no partitions (unallocated space) as seen in the Windows Disk Management tool image below.
Setting Up the IM-Magic Cloning Tool
1. Launch the IM-Magic Application
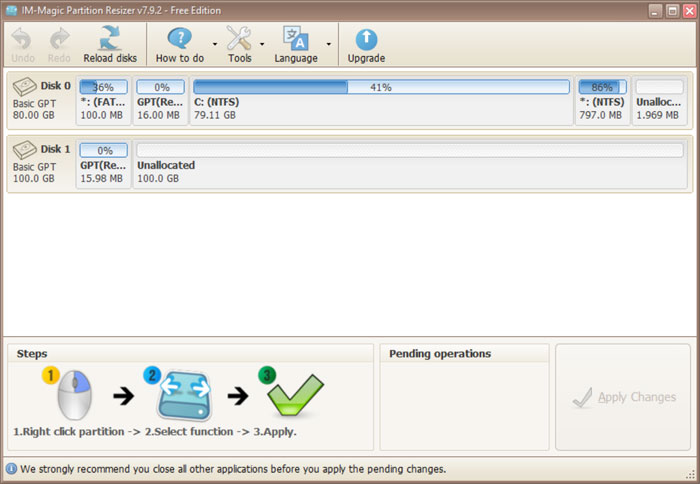
Once we start IM-Magic, it will show a very similar layout to the native Windows Disk Management utility. We can clearly see our Windows C drive listed at the top. We can also see the new blank hard disk sitting underneath it.
2. Open the Migrate OS Wizard
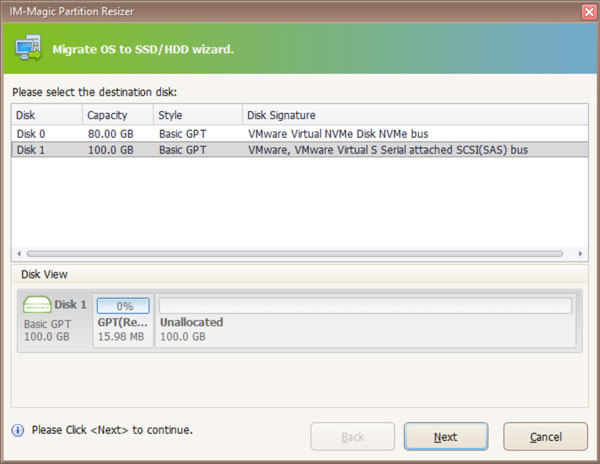
Next, we will click on the Tools icon located on the top menu bar. Then select Migrate OS Wizard from the drop-down menu to begin the disk cloning process. IM-Magic should automatically select the new blank disk as the target unless you have more than one additional hard drive connected. We will confirm that the 100GB drive is selected and then click on the Next button.
3. Clear the Destination Disk
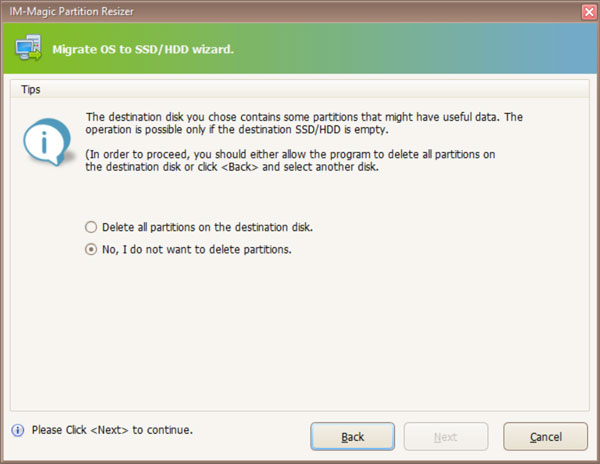
You will then be prompted to delete all partitions on the destination (new) disk or leave them intact. Since we do not have any existing partitions on the new drive, we will choose the first option. Select the radio button that says Delete all partitions on the destination disk.
Configuring Partitions Before the Clone
1. Review the Default Layout
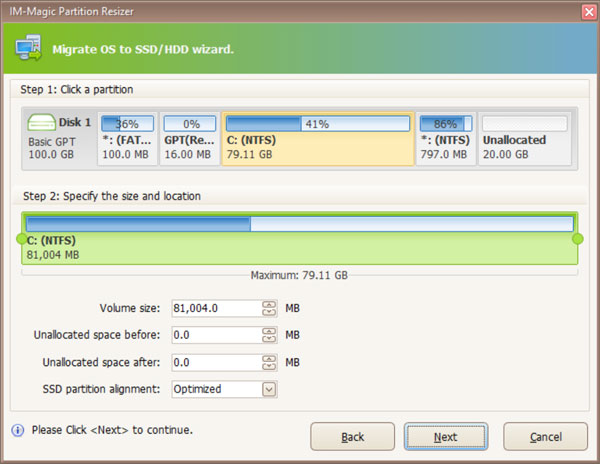
On the next screen we will be shown the disk layout and be able to choose how the new drive will be configured. As you can see in the image below, we have 20GB of unallocated space since the new drive is 20GB larger than the old one. We can then leave the space unallocated and create a new partition later or even extend our Windows drive later after the cloning process is complete.
2. Move Blocking Partitions
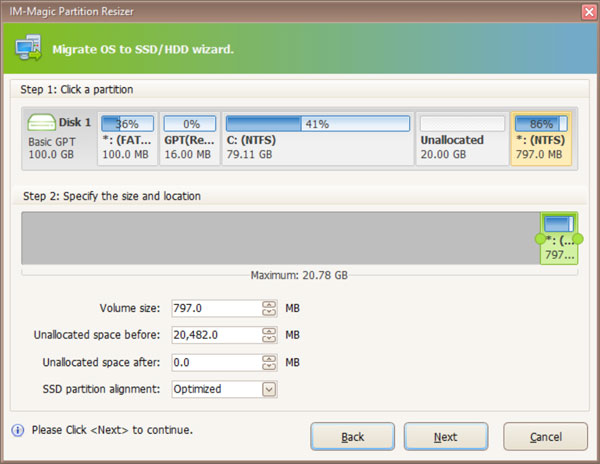
Rather than do that, we will allocate the extra 20GB to the C drive during the clone process to make our new Windows partition larger. But to do this, we need to move the 797 MB partition over to the right. This ensures the C drive and unallocated space are perfectly contiguous (side by side).
3. Expand the C Drive Volume
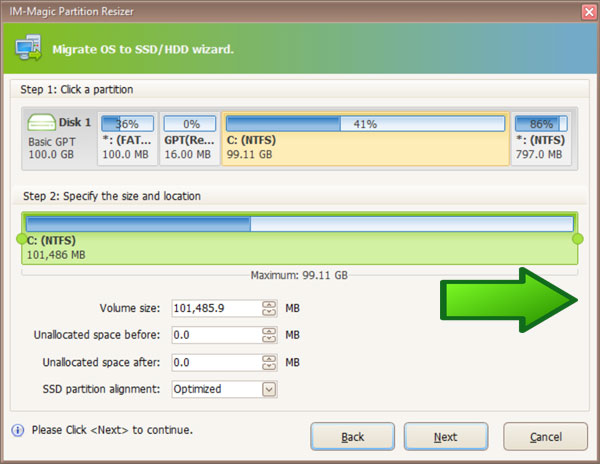
Once that is done, we can simply drag the C dive partition to the right to have it use the rest of the free space on the new drive. As you can see in the image below, the C drive will now be a full 100GB in size. If we waited to do this after the clone was complete, we can still use IM-Magic to move the partition and extend the Windows drive later.
Executing the Disk Clone
1. Create the Drive Snapshot
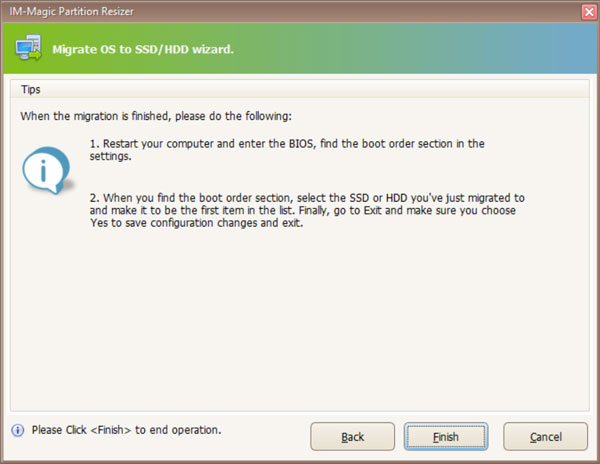
When you click on finish, IM-Magic will create a virtual snapshot of your drive. This ensures the filesystem is locked, ready, and able to be cloned safely.
2. Apply the Pending Changes
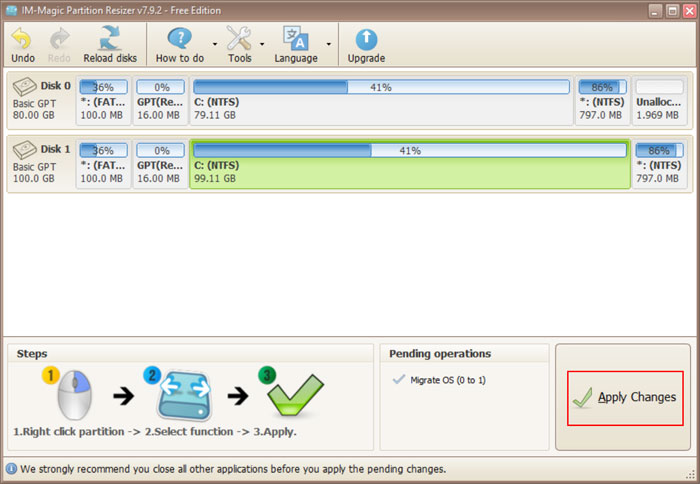
Once this step is complete, we will then need to click on the Apply Changes button located in the bottom right corner of the main window. This officially begins the disk cloning process.
3. Confirm the Operation
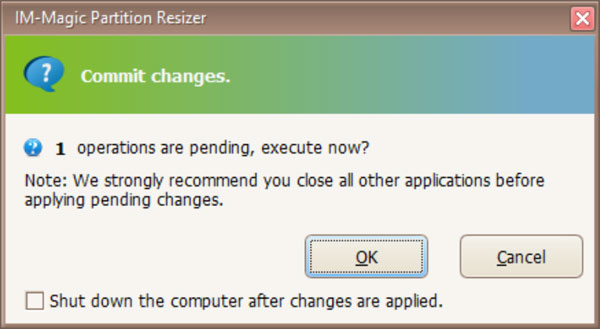
We will then be prompted to confirm the changes by clicking the OK button on the popup window. There is also an option to automatically shut down the computer after the disk clone is completed that can be checked if needed.
4. Monitor the Cloning Progress
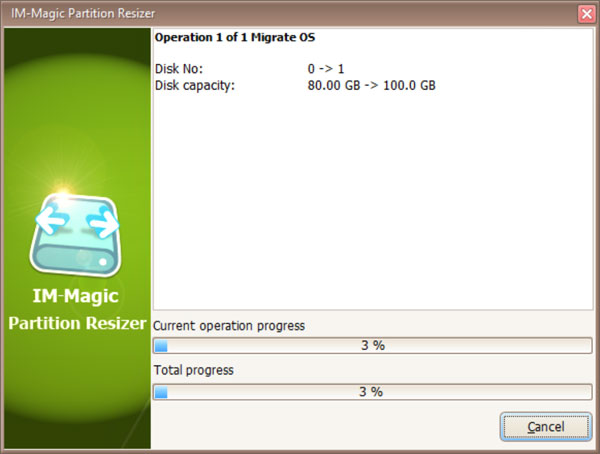
The cloning process will then begin and will take several minutes to complete. How long this takes will depend entirely on the total size and read/write speed of the source and destination hard drives.
Finalizing the New Hard Drive
1. Verify the Cloned Data
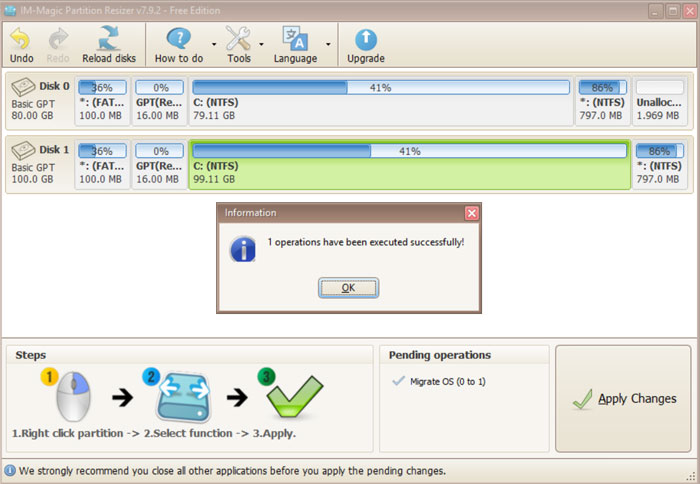
Once the disk cloning is complete, we can now see that the new drive contains a perfect copy of all the data that is on the old drive. We can also see that the main C drive/partition is now 100GB compared to 80GB on the old drive.
2. Swap the Hardware
In order to boot from the newly cloned drive, we can either change the boot order of the PC in the BIOS, swap drive cables (if applicable), or completely remove the old drive so it only boots from the new one. This physical process will vary depending on the specific drive types that are used for your particular situation.
3. Verify the Disk Management Layout
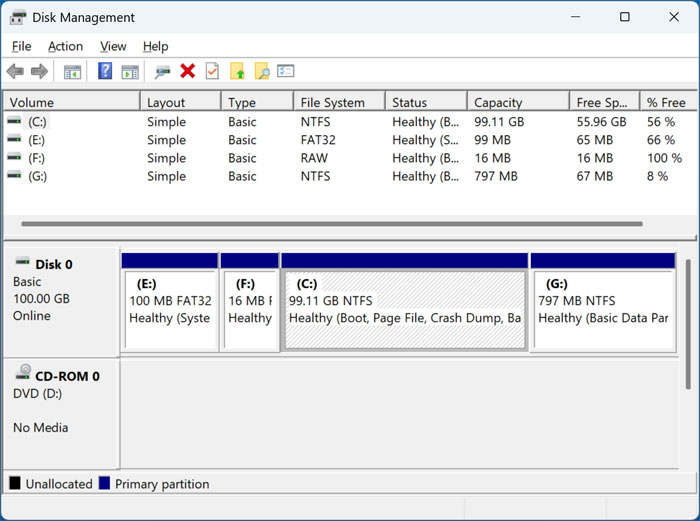
After removing the old/source hard drive, we can now go back into Disk Management. We can see our 100GB hard drive with the correct Windows partitions and larger C drive successfully installed.
For additional training resources, check out our online IT training courses.
Check out our extensive IT book series.