Cybersecurity is an ever growing issue these days and it seems like there is always someone trying to steal your personal information. If you are the type of person who still prefers to use a personal computer over your smartphone, then you most likely have sensitive data on your hard drive that you want to keep out of the hands of others.

When it comes to erasing personal data on your hard drive, you have several options. You can delete files you no longer need, but these files can still be recovered by people with the tools to do so. You can also format a drive but once again, with the right tools, this data can be recovered. This is where wiping a drive comes into play. This process can ensure that deleted data can no longer be recovered. In this article, we will be showing you how to wipe the free space, entire drives & operating system drives on Windows computers. This process also applies to Linux and macOS computers as well.
The software we will be using is called Active@ KillDisk and there are several versions of the app that you can use. There is a free version that allows for One Pass Zeros erase method and pay for versions that have support for 24 international sanitizing standards. They also have business and enterprise versions of the software.
For our demonstration, we will be using the free version of KillDisk and wiping the free space on a secondary hard drive. Then we will create a KillDisk boot disk that we can boot into in order to wipe the disk with Windows installed on it since you cannot do that while Windows is running.
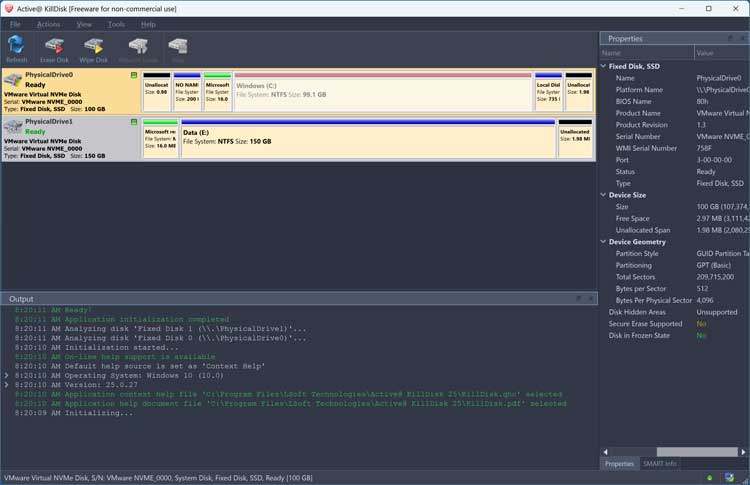
Once we install KillDisk which can be downloaded here, we will open the program to see our installed hard drives. It will also show the related volumes/partitions for each drive. As you can see, the Windows partition is greyed out since we cannot wipe that from within Windows.
Wiping the Free Space of a Hard Drive
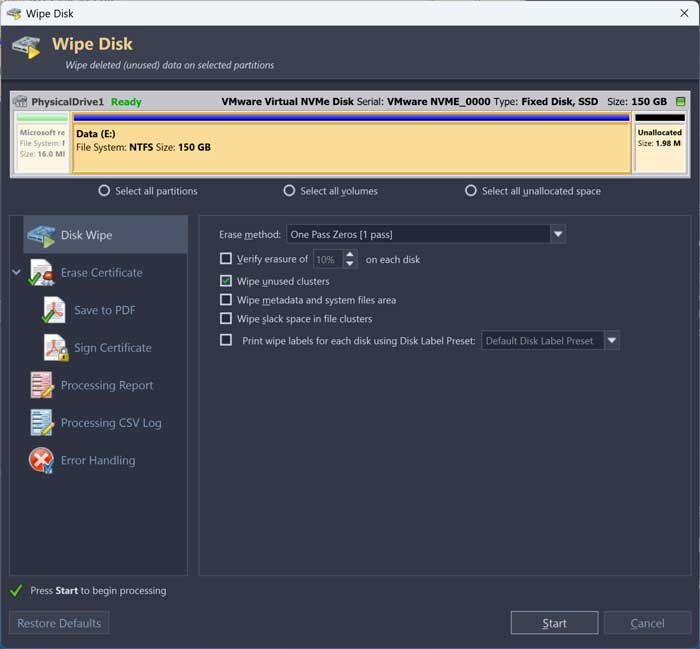
We will now select the E drive which is a secondary internal hard drive and then click on Wipe Disk. This option will wipe the free space on the drive and leave the existing files and folders intact. It is always a good idea to do a backup of your personal files before performing any operation like this.
You will have several options to choose from when wiping a drive. You can do things such as wipe unused clusters and metadata, create an erase certificate, or provide a report or log file for the job.
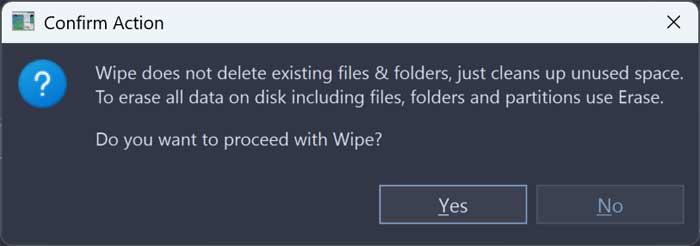
When you click on the Start button, you will receive a confirmation popup telling you that it will not delete existing files and folders, but rather just the free space. You can then click the Yes button to continue.
The process will take several minutes and will vary depending on the size and speed of your hard drive.
Wiping the Windows Operating System Drive
Next, we will be showing you how to wipe the Windows OS drive. This can come in handy if you want to donate or sell your computer and want to erase all your personal files and your copy of Windows. This will work for Linux and macOS as well. This way, you can give the computer to the new owner with a blank hard drive and then they can install their own operating system.
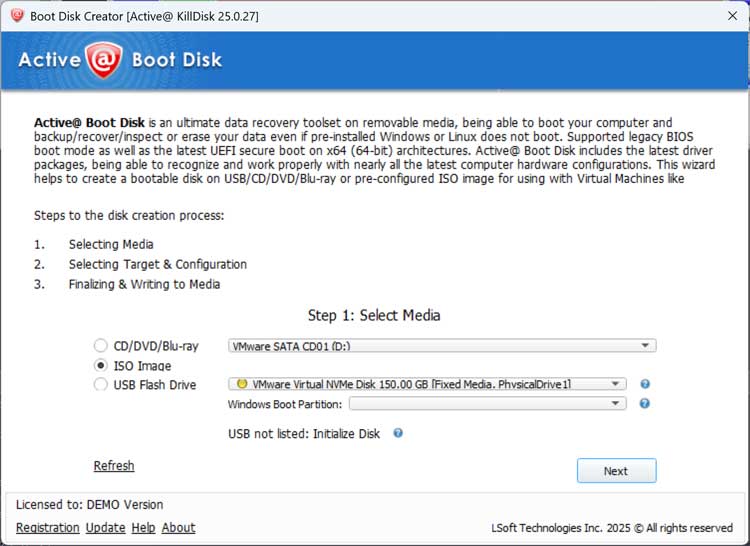
Before we can wipe the Windows drive, we will need to create a boot disk since you cannot wipe Windows while Windows is running. To do so, we will use the Boot Disk Creator tool that is included with KillDisk but runs as a standalone app.
You will have three options for creating your boot media. You can burn it to a CD/DVD, create an ISO image or create a bootable USB flash drive. If you choose the ISO method, you can then create a CD or flash drive using tools such as Rufus or Ventoy.
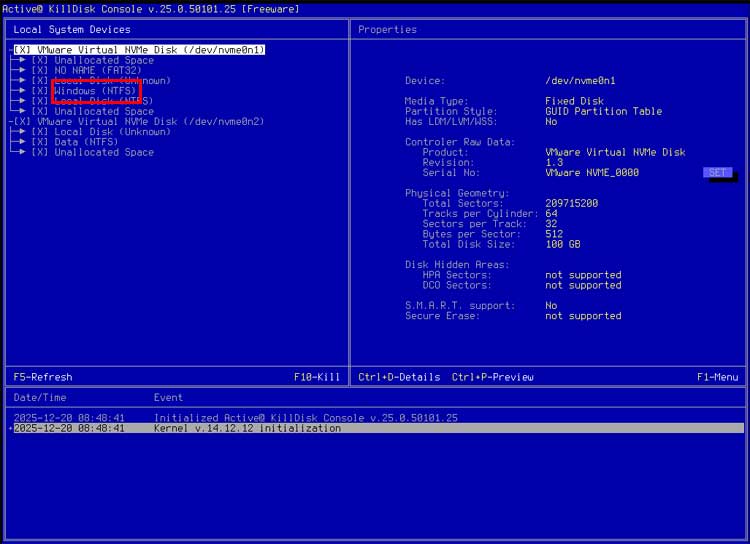
Now we will boot the computer with the boot disk and start the wiping process. The free version of KillDisk only has a console based interface compared to the GUI interface with the paid version.
You will need to make sure you are choosing the correct disk for this process, so you do not wipe the wrong drive. If you have more than one hard drive, the Windows drive should be the first one on the list. It should also have a partition labeled Windows. To select all the partitions on the Windows disk, you can use the arrow key to move between them and then press the spacebar to select each one. Then you can press the F10 key to start the wiping process.
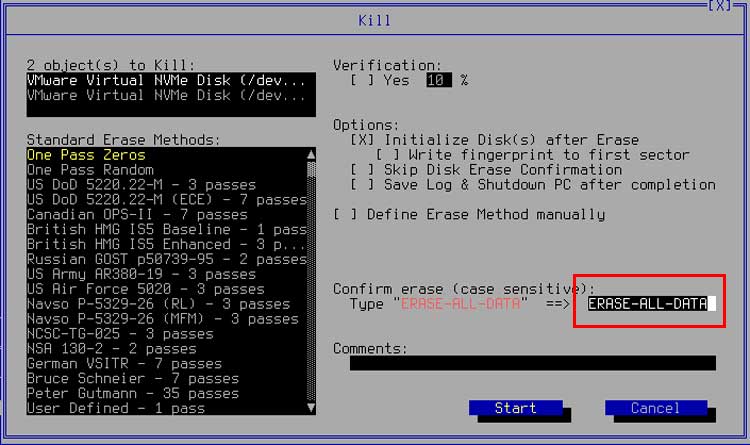
You will then see another screen where you can choose the wiping standard if you have the paid version of the program. You will need to type ERASE-ALL-DATA in the confirmation box to continue with the process. Then you can use the tab key or your mouse to select the Start button.
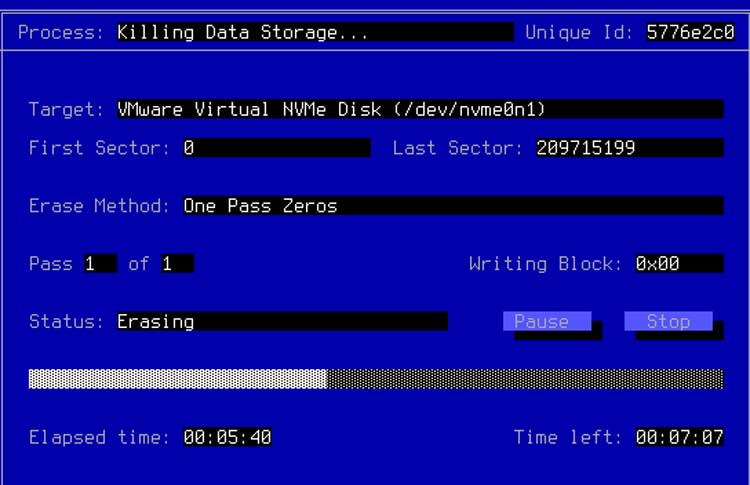
You will then see a status screen where you can watch the disk wipe progress.
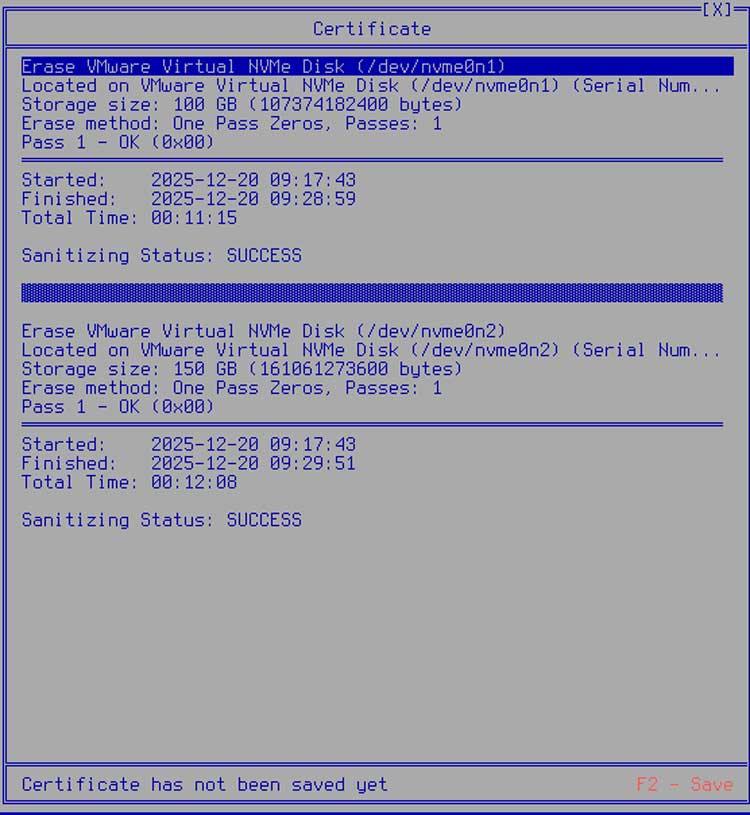
Once the disk wipe is complete, you will see a certificate screen with the results, and it should say success at the bottom.
Since the Windows disk has been wiped, you will not be able to boot your computer until Windows or some other operating system has been installed.
For additional training resources, check out our online IT training courses.
Check out our extensive IT book series.