
Last Updated on May 19, 2024
You may or may have not heard of or seen a zip file before but they are very common and used for many things. Zip files are a type of file that contains multiple files within it. So basically you can have one file with many files, perhaps thousands of files contained inside that single file. This comes in handy when you want to do things like email just one file rather than a whole bunch of files or host files on an FTP site for example.
Zip files are also used to reduce the size of the files by compressing them when you create the zip file. You may have a bunch of files that are too large to email by themselves and zipping them into a single file will also compress them to make the total size smaller. For example if you have 20 files totaling 10MB you may be able to put them in one zip file that is 2MB. How well the files compress depends on what type of files they are since some compress better than others.

WinZip is the most well known and commonly used third party program for creating zip files in Windows but you can also use the built in zipping utility that comes with Windows to create your zip files. Keep in mind that it doesn’t have all the features that WinZip does but for most people it will work just fine. Modern Windows 11 operating systems handle basic compression tasks effortlessly without requiring external software downloads.
1. Select Your Target Files
To create a zip file in Windows you will need to open the folder that has the files you want to make the zip file out of. Highlight every single item you want to include in the final compressed archive. You can click and drag your mouse to grab multiple files at once. You can also hold down the Control key to pick individual items out of a massive list.
2. Trigger the Compression Tool
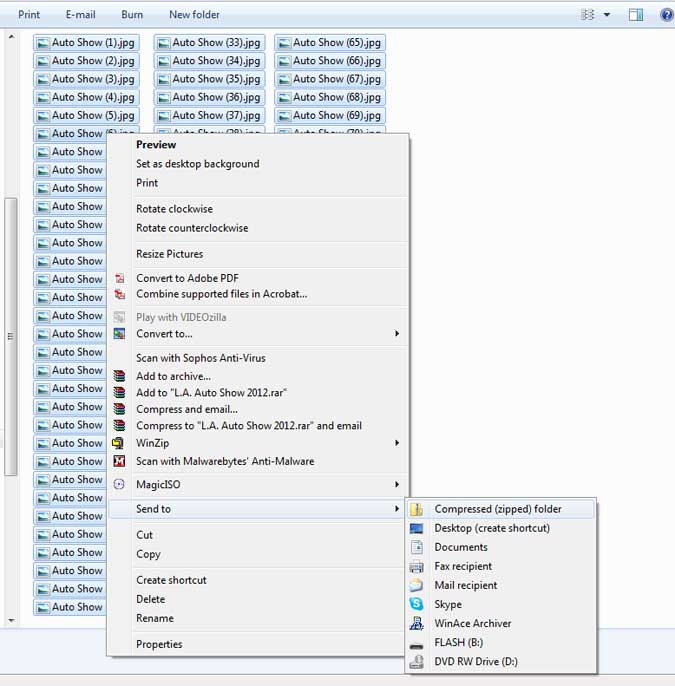
Then simply select all the files you want to add to your zip file, right click anywhere on them and choose Send to > Compressed (zipped) folder. Windows 11 users might need to click Show more options first to see this classic command menu. The operating system immediately begins gathering
3. Monitor the Progress Bar
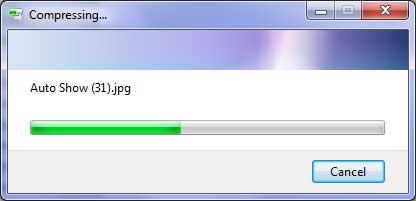
Then you will see the status of the zip file being created on your screen. This process is pretty quick. How long it takes will be determined by how many files you are adding and how big they are. Massive video files or gigantic photo directories will take significantly longer to compress than standard text documents.
4. Locate the Final Archive
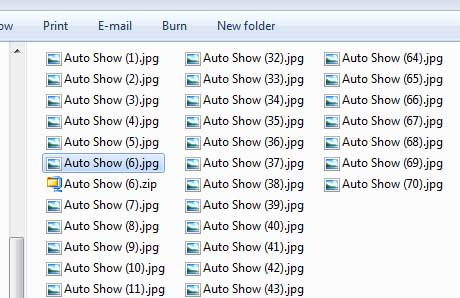
Finally you will have your zip file created in the same location as your source files that you added to the zip file. The name of the file will be chosen based on which file you happened to right click on to choose the send to compressed folder option. You will notice a distinct zipper icon layered over the new folder to separate it from standard Windows directories.
5. Rename the Zip File
Once the zip file is created you can rename zip file by right clicking on it and choosing Rename. Just make sure to leave the .zip on the end otherwise you won’t be able to open it later on. Erasing that specific file extension permanently breaks the file association in Windows.
6. Reveal Hidden File Extensions
If you don’t see the .zip on the end that means that you just don’t have the option to show file extensions turned on in your folder options. To have your computer show file extensions go to your folder options and uncheck the box that says Hide file extensions for known file types. This setting change instantly reveals the hidden format labels across your entire hard drive.
7. View the Compressed Contents
To extract the contents of your zip file or any other zip file just double click the zip file and it will open with Windows Explorer and show you the contents of the file. You do not need to run a full extraction just to peek inside the directory. The system lets you browse the compressed files exactly as if they were sitting in a normal desktop folder.
8. Check Your Compression Ratio
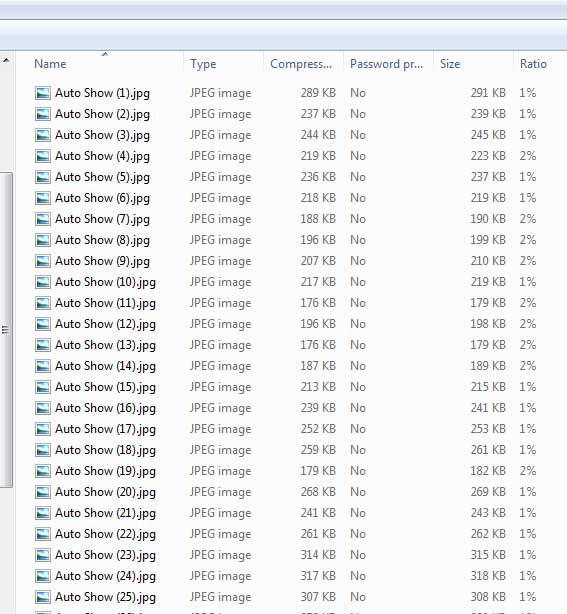
It will also show you things such as what types of files are in the zip file, their compressed size, if they are password protected and their original size. The ratio column shows how much the files were compressed from their original size. As you can see in this example they were only compressed 1% which is hardly at all. Different file types will compress more than others and you don’t have a choice as to what the compression rate is like you would if you were using WinZip.
If you want to try out the actual WinZip software they will let you download the software for a free trial. Click here to go to their site.
For additional training resources, check out our online IT training courses.
Check out our extensive IT book series.


