Last Updated on July 26, 2026
Managing hard drives in Windows is not something you normally need to do on a regular basis but there are situations where you will need to make changes to your disk to accomplish a specific task such as adding a new drive, formatting a partition or creating a new drive using some unallocated space.
For the most part, you can use the built in Windows Disk Management tool for these types of hard drive tasks. But Disk Management hasn’t really changed much throughout the years so you might run into a situation where it doesn’t have the ability to make the disk changes you are trying to make.

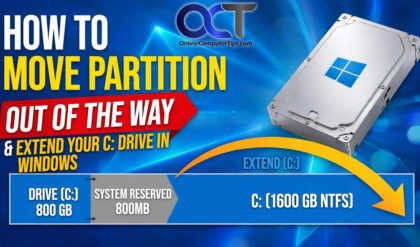
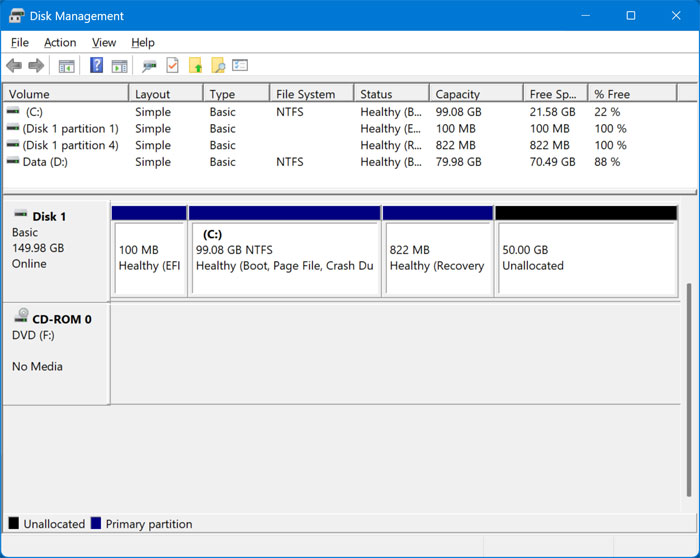
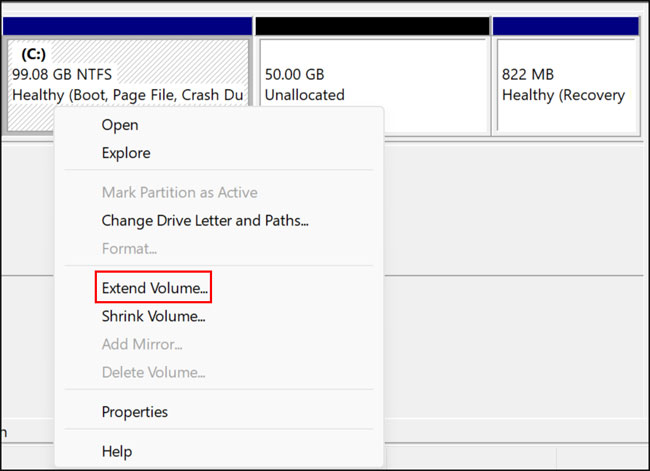
For example, let’s say you wanted to extend your Windows C drive to use some unallocated space you have left over from your Windows installation. Normally, you would right click on the disk partition or volume you want to enlarge and choose the Extend option. But if you have a situation as shown in the image below where there is another partition between the one you want to extend and the unallocated space, you will not be able to extend that volume, and the option will be greyed out.
The option to extend will be completely greyed out and unclickable. In order to extend a drive into unallocated space, the drive and the volume that you want to extend it to need to be perfectly contiguous. They must be physically side by side on the disk.
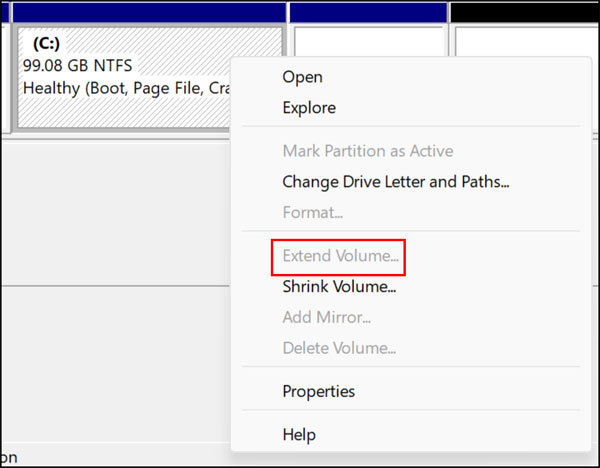
If they are not, then this will not be possible using Disk Management. And Disk Management does not have a built-in way to rearrange or reorder hard drive partitions. So, to accomplish this, we will be using the free IM-Magic Partition Resizer software which can be downloaded directly from their website here.
Using IM-Magic Partition Resizer
1. Identify the Blocking Partition
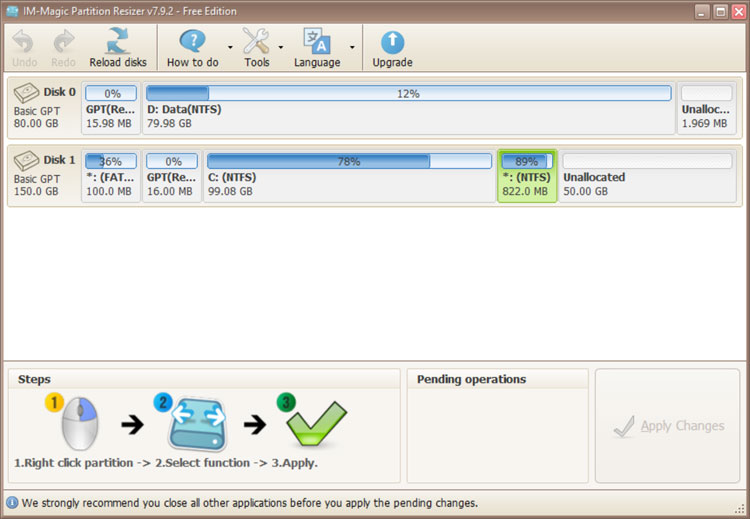
Once you open IM-Magic Partition Resizer, you will see that it has a very similar layout to what you see in the standard Disk Management tool. Our goal is to move the 822 MB (green) recovery partition to the right of the 50GB partition that says Unallocated. This will ensure the C drive and the Unallocated partition will be side by side.
2. Select the Resize/Move Function
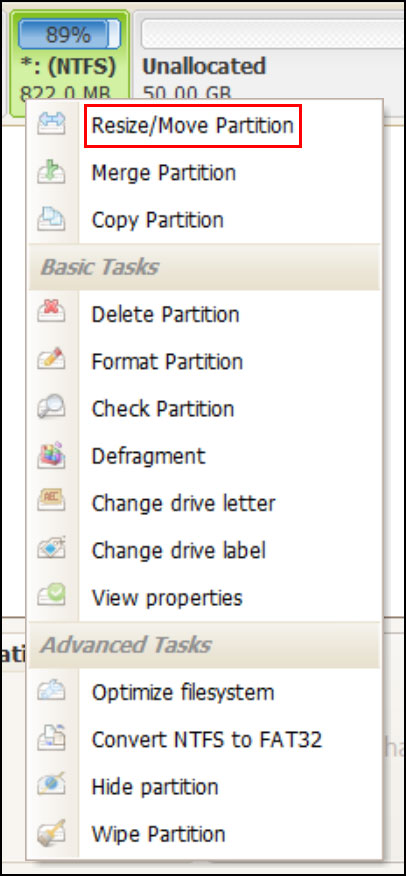
To do this, we will right click on the 822 MB partition to open the context menu. Choose the Resize/Move Partition option from the list. A new configuration window will pop up on your screen.
3. Drag the Partition
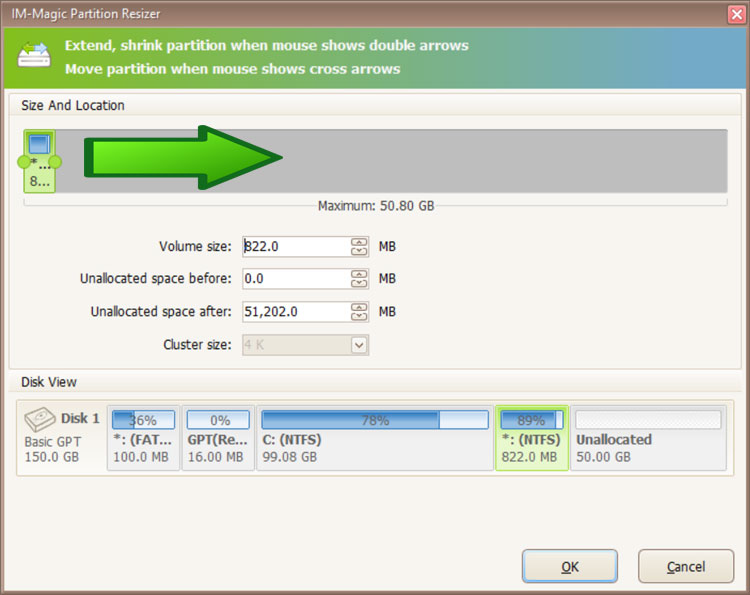
Next, we will click and hold the green partition block with our mouse. We will drag the partition all the way to the right side of the screen since we want it to sit to the right of the unallocated space.
4. Verify the New Location
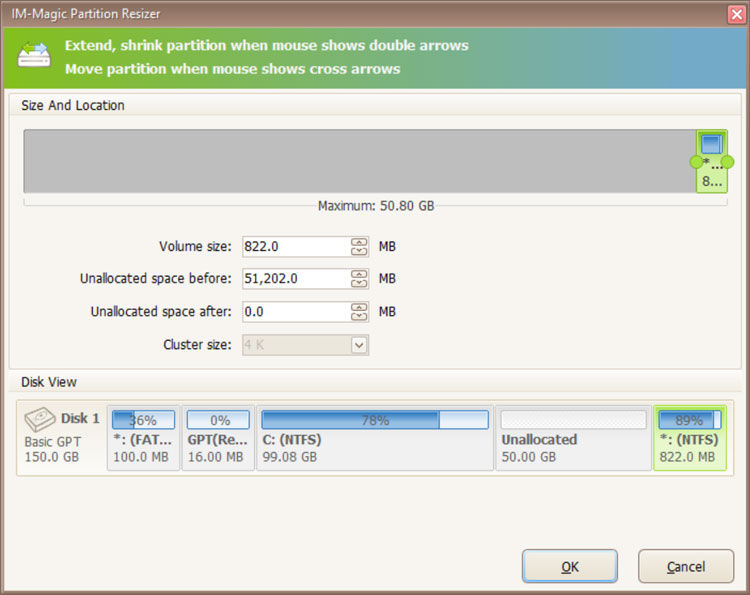
Once we let go of the mouse, the partition will be moved to the right side of the other volumes. The software visually previews what the drive will look like after the operation. Click the OK button to close this window.
5. Apply the Pending Changes
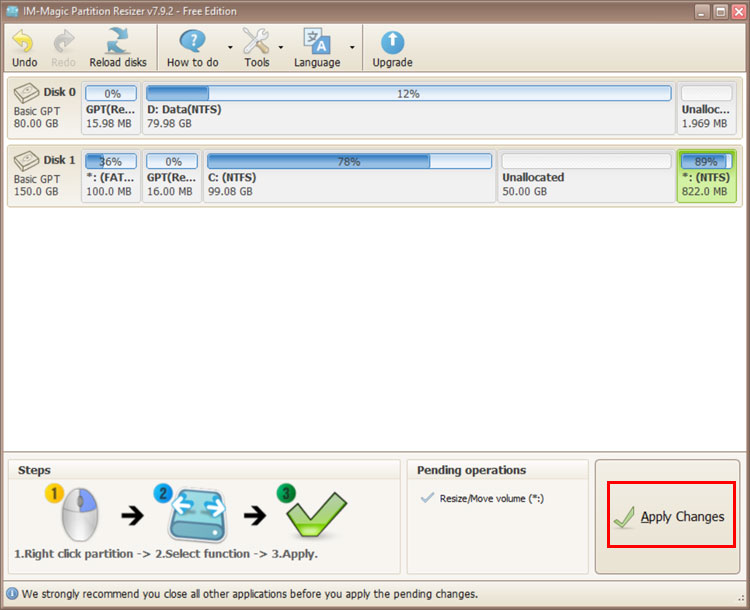
Once we click the OK button, we will be taken back to the main IM-Magic Partition Resizer screen where we will see the relocated partition. In order to make the changes take effect permanently on the hard drive, we will need to click the Apply Changes button in the bottom right corner.
6. Commit the Operations
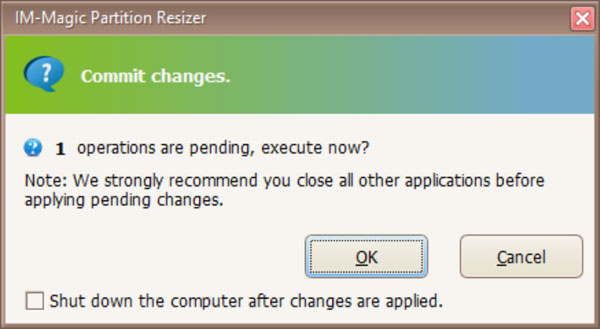
Then we will be shown a warning screen telling us to close all other applications before applying the pending changes. We will then click the OK button to continue. The software will briefly lock the drive to safely move the data blocks.
7. Extend the Volume
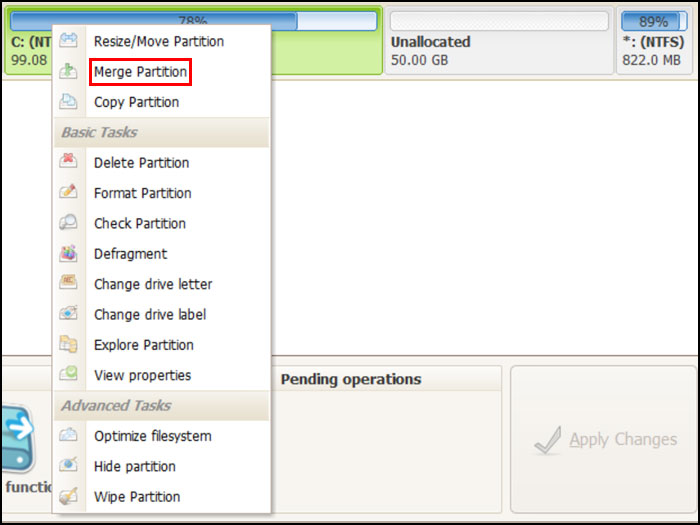
Now that the partition is moved out of the way, we can right click the C drive and choose Merge Partition. This will extend the volume using IM-Magic Partition Resizer if we want to perform the task right from the app itself.
8. Verify the Fix in Disk Management
If we were to go back to the standard Windows Disk Management tool, we would see that the 822 MB partition is now moved to the right of the unallocated space. We can then right click on the C drive and will now have the option to extend the partition into this unallocated space natively. You can also use the free NIUBI Partition Editor to move partitions out of the way so you can extend your disk volumes if you prefer a different interface.
For additional training resources, check out our online IT training courses.
Check out our extensive IT book series.