Last Updated on August 22, 2026
Ever since Windows 11 was released back in 2021, there has been resistance from die hard Windows users who do not like the updated version of Windows and prefer the stability and functionality that comes with Windows 10.
Originally, Microsoft was going to end support for Windows 10 in October of 2025 but after some serious backlash from the Windows community, they decided to extend it to October 2026. And recently they have extended Windows 10 support until October 2027.
If you are planning on running Windows 10 and putting off upgrading to Windows 11, then you should enroll your computer in the Windows 10 Extended Security Update program so you will continue to receive important security patches for your PC until October 2027 (and maybe beyond!).

Checking Your ESU Enrollment Status
1. Open the Windows Settings App
Enrolling in the Extended Security Update program is easy to do assuming you have that option available. Some people find that it is completely missing from their system. We will show you a proven method you can use to get the ESU option back on your computer.
2. Navigate to Windows Update
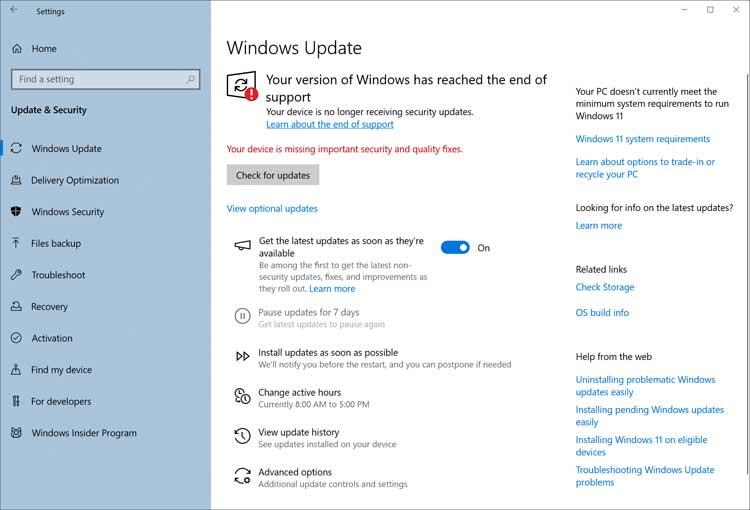
To enroll your Windows 10 computer, you will need to open the Windows Settings app. Go directly to Update & Security and then click on Windows Update. Look closely at the available options on your screen.
3. Verify the ESU Message
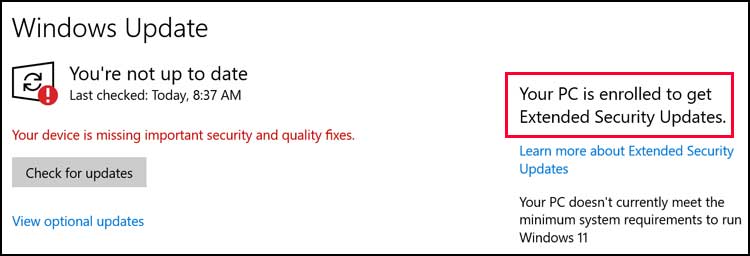
You might not see the option to enroll in the ESU program under the Check for updates button. You also might not see a message on the right side of the window that says Your PC is enrolled to get Extended Security Updates. This means you are not currently enrolled in the program.
Preparing Your System for ESU
1. Install Pending Updates
One thing you should do is make absolutely sure there are no pending updates that need to be installed. Your system requires the latest baseline patches before accepting the new enrollment configuration. Run a quick check to clear out your update queue completely.
2. Check Your Windows Build Version
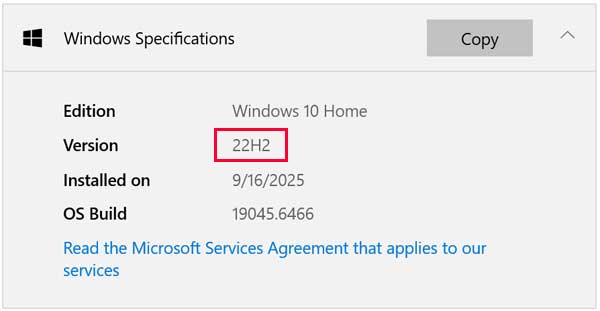
You will also need to make sure you are running on build 22H2 of Windows 10. You can check this by going back to the main Windows settings page. Click on System and then select About from the bottom of the left menu.
3. Manually Upgrade to 22H2
You might find that you are not on version 22H2 right now. If you are not able to update it via Windows Update, you have another choice. You can manually upgrade to Windows 10 22H2 to get your PC fully up to date.
Enabling the ESU Option via Command Prompt
1. Launch an Administrative Command Prompt
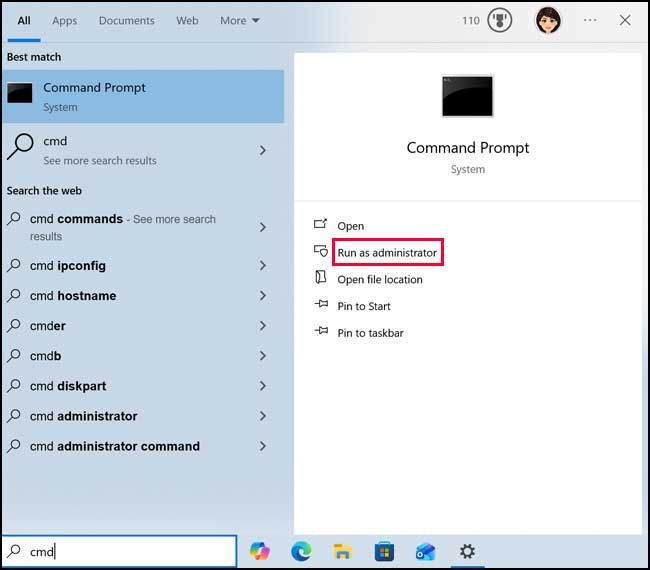
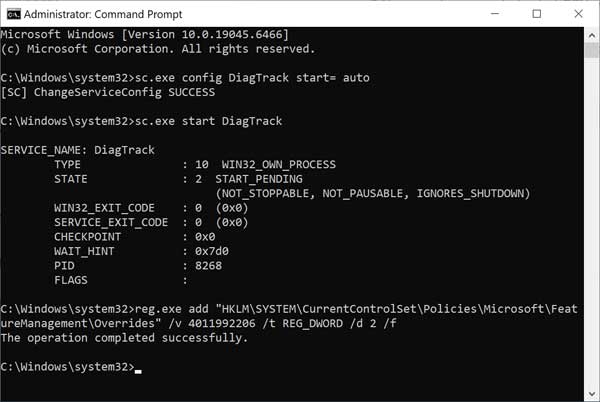
If you do not have the option to enroll in the ESU program after making sure everything is up to date, try this registry trick. It forces the ESU enrollment option to appear in the Windows settings for you. Open an administrative command prompt by typing cmd in the taskbar search box and choosing Run as Administrator.
2. Run the Diagnostic Tracking Command
Next, enter the following command at the command line and press enter. You can also just copy the text below and then right click at the prompt to have it pasted in for you.
sc.exe config DiagTrack start= auto sc.exe start DiagTrack reg.exe add “HKLM\SYSTEM\CurrentControlSet\Policies\Microsoft\FeatureManagement\Overrides” /v 4011992206 /t REG_DWORD /d 2 /f
3. Reboot and Evaluate Eligibility
Then you will need to reboot your computer. Check the ESU status in the Windows settings once again after the restart. If it still does not show up, run the command:
cmd /c ClipESUConsumer.exe -evaluateEligibility
Completing the ESU Enrollment Process
1. Start the Enrollment
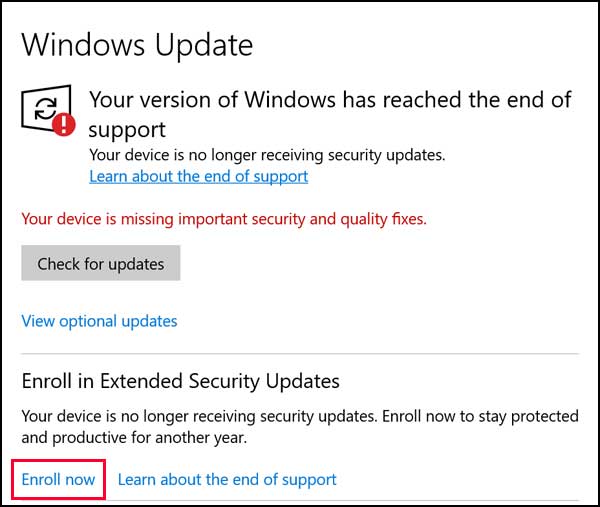
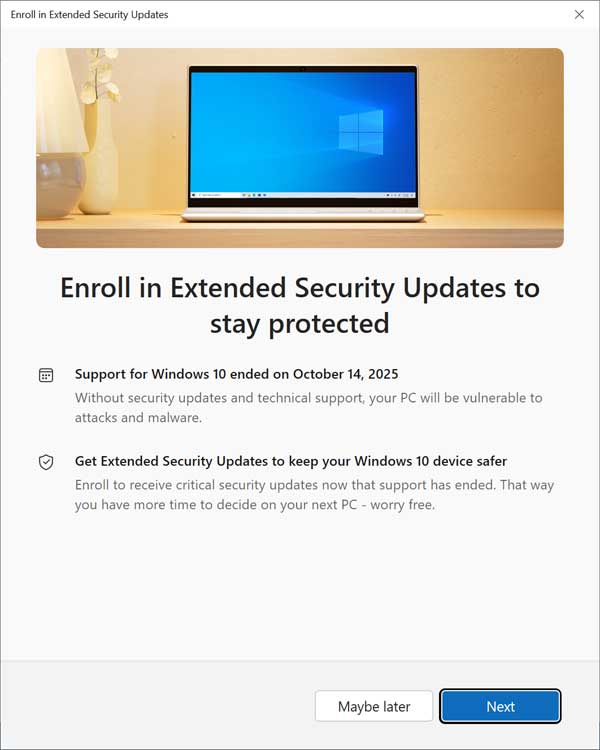
The image above shows the Windows Settings app under Windows Updates with the Extended Security Updates enrollment option now available. We can now click on Enroll now to start the ESU enrollment process. You will then see a screen showing you exactly what you will be enrolling in.
2. Add Your Device
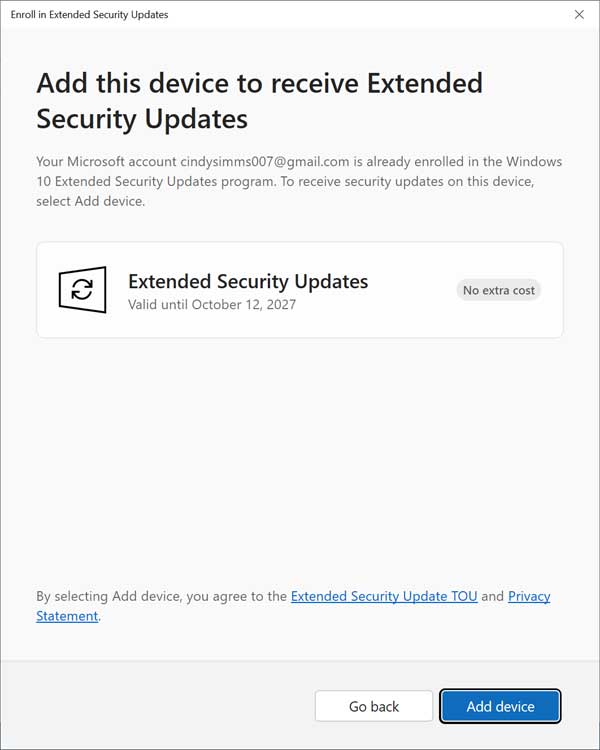
You will need to click the Next button to continue past the initial summary screen. On the next screen, simply click the Add device button to have the currently logged on computer added to the Extended Security Updates program.
3. Review Microsoft Account Registration
If you have enrolled another computer in the ESU program previously, you will most likely see a message at the top of the window. It will tell you that your Microsoft account has already been registered with the program. Proceed through the prompts to link this specific machine.
4. Confirm Successful Enrollment
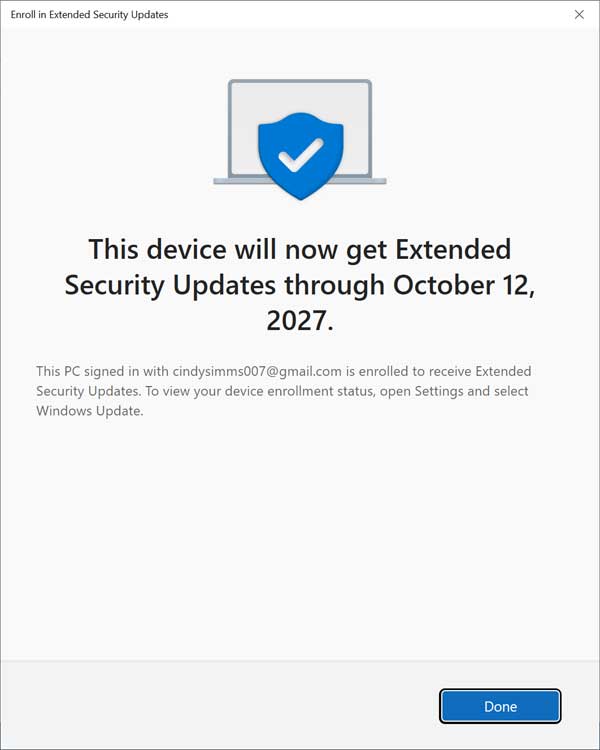
You should then see a final confirmation screen on your display. This page shows you that your computer has been successfully enrolled in the ESU program. Your system is now officially protected until late 2027.
5. Verify the Windows Update Settings
Now you can go back to the main Windows Update screen. You should see a clear message over to the right that says Your PC is enrolled to get Extended Security Updates.
6. Install Your Extended Updates
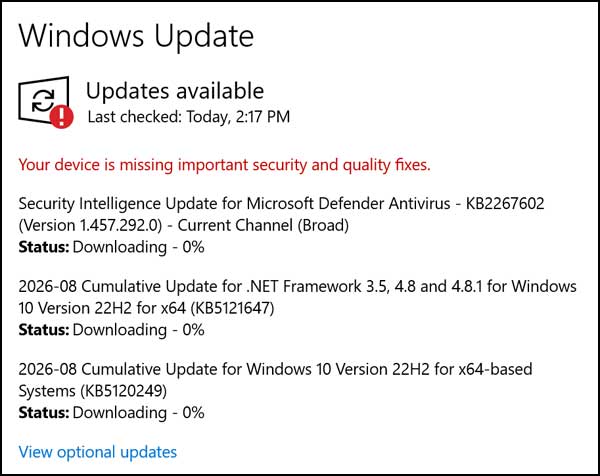
You can then click the Check for updates button to trigger a fresh scan. This will download and install any pending security updates that your computer might need. Your machine will remain safe and secure.
For additional training resources, check out our online IT training courses.
Check out our extensive IT book series.