Last Updated on October 3, 2026
Hyper-V is Microsoft virtualization platform that runs on top of Windows and allows you to create virtual machines running Windows, Linux or other operating systems on your host Windows computer. Hyper-V is typically run on Windows Server operating systems but can also run on Windows 10 and Windows 11 professional computers. There is even a way to run Hyper-V on Windows Home edition computers even though it’s not officially supported by Microsoft.
If you do decide to run Hyper-V on your Windows desktop computer, you might run into a highly frustrating situation after the initial setup. You enable Hyper-V, reboot your machine, and simply cannot find the Hyper-V Manager application in your Start menu or anywhere else. Even searching the system yields zero results for the management console. It is hard to say exactly why this glitch happens on certain machines, but there is a proven method you can try to restore the Hyper-V Manager icon back to your Start menu.

Enable and Restore the Hyper-V Manager Console
1. Enable the Hyper-V Windows Feature
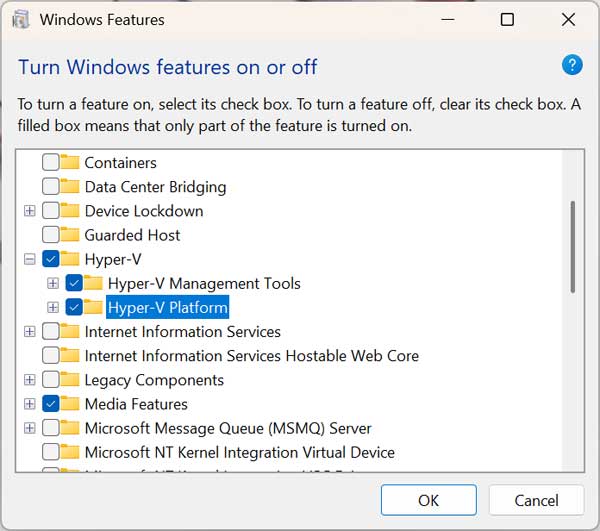
To enable Hyper-V on Windows desktop operating systems, you must access the legacy Control Panel. Go to the Windows Features section and explicitly check the boxes for both Hyper-V Management Tools and Hyper-V Platform. Windows will then configure the underlying Hyper-V architecture on your computer. You will absolutely need to reboot your system to have the changes take full effect.
2. Verify the Missing Application
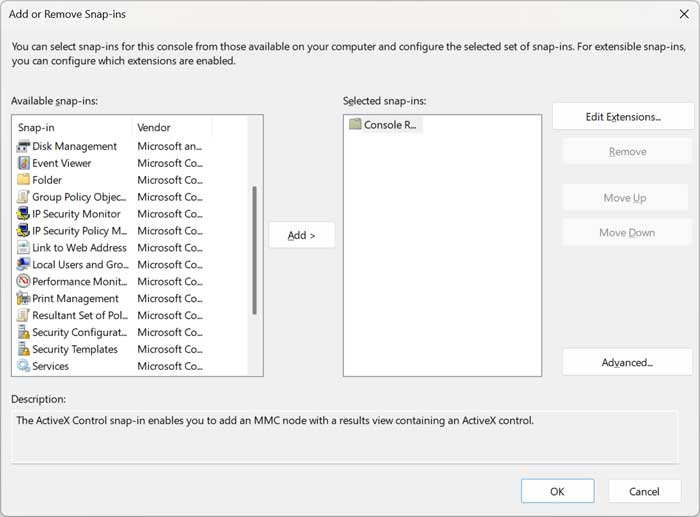
When you log back in after the restart, you may run into the exact problem of not being able to find the Hyper-V Manager application. Even if you do a direct search for it from the Taskbar search box, you still might not find the executable file. If you open up a new blank Microsoft Management Console (MMC) and go to Add or Remove Snap-ins, you will notice the Hyper-V tool is completely missing from that options list as well.
One way to get around this is to install the Windows Remote Server Administration Tools on your computer which can be downloaded here. Just make sure to download the 64-bit version unless you are on an older version of Windows 10 since Windows 11 is 64-bit only. The RSAT installation is for Windows 10 but will install fine on Windows 11.
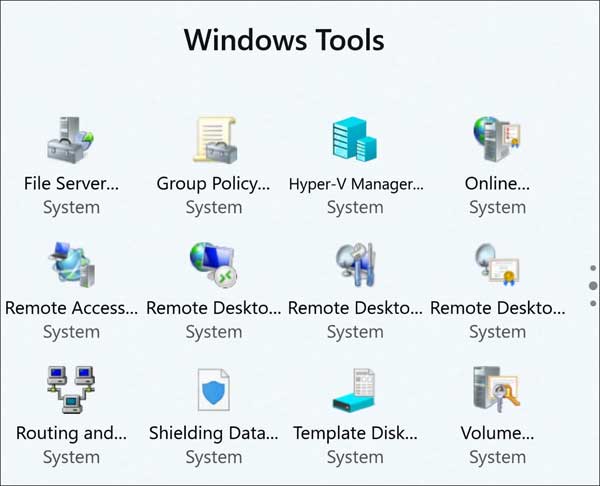
Once you install the Windows Remote Server Administration Tools and reboot, you should then be able to find the Hyper-V Manager app under Windows Tools and also be able to search for it by name from the taskbar search box. Then you can open the console and start creating your virtual machines.
3. Download Remote Server Administration Tools
One fast way to get around this missing application bug is to manually install the Windows Remote Server Administration Tools (RSAT) on your computer. You can download the official package directly from the Microsoft website here. Just make sure to download the 64-bit version unless you are on a very old 32-bit version of Windows 10. Windows 11 is 64-bit only, and the standard RSAT installation package built for Windows 10 will install perfectly fine on modern Windows 11 systems.
4. Install RSAT and Reboot Your PC
Run the downloaded installer file and let Windows configure the new management features. Once you install the Windows Remote Server Administration Tools, you must reboot your computer one more time. You should then be able to find the Hyper-V Manager app sitting right under the Windows Tools folder. You will also finally be able to search for it by name straight from the taskbar search box. Open the console and start creating your virtual machines immediately.
For additional training resources, check out our online IT training courses.
Check out our extensive IT book series.