Last Updated on October 11, 2026
Microsoft Edge is one of the most popular web browsers in use today. And this is most likely because it comes built into Windows 11 and even Windows 10 and is the only browser Windows comes with until you install another browser such as Google Chrome or Mozilla Firefox. In fact, Microsoft Edge is built on Chromium, which is the same open-source browser project that powers Google Chrome.
Since there are so many choices when it comes to web browsers, these developers are always trying to come out with the newest features to try and get you to switch to their browser. You might have noticed that there is a lot of AI integration going with browsers these days with Microsoft having Copilot built into Edge and Google having Gemini integrated into Chrome.

How to Enable Edge Web Remix
1. Access the Browser Settings
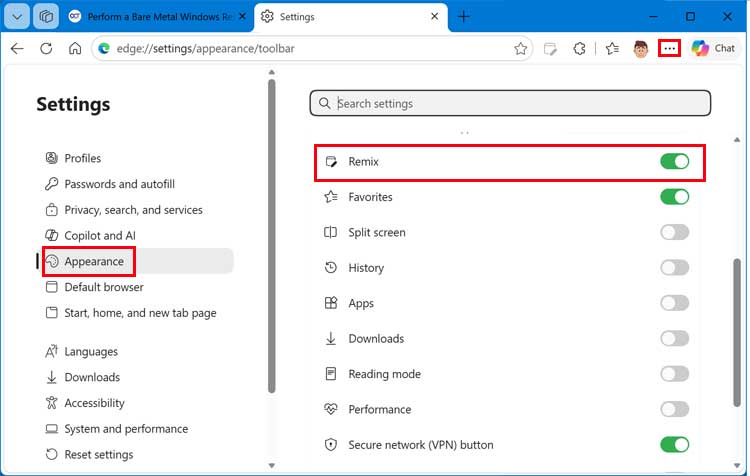
To enable the Edge Remix feature, click on the ellipsis (…) at the upper right of Edge and then choose Settings. Then click on Appearance on the left and scroll down to Toolbar on the right. Then you should see a Remix option that you can toggle on if it is currently set to off.
2. Locate the Remix Icon
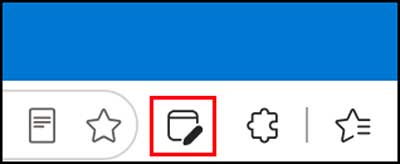
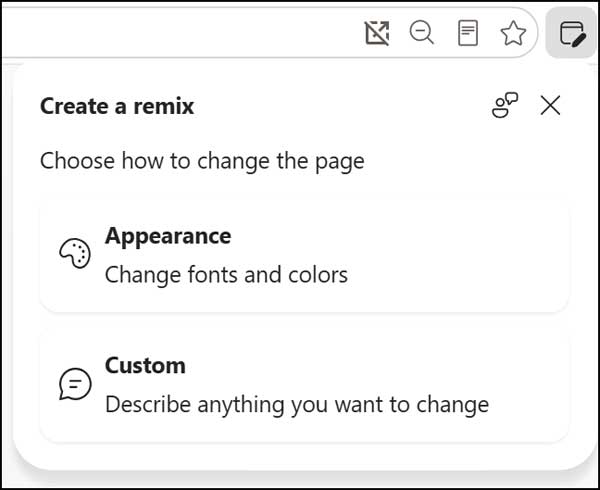
Once you enable the Remix feature, you will see an icon for it on your toolbar in Edge. It sits right next to your standard extension icons. Then when you click on the Remix button, you will be shown two different options that you can use to customize a webpage or website.
Configuring Appearance Settings
1. Change Webpage Colors and Fonts
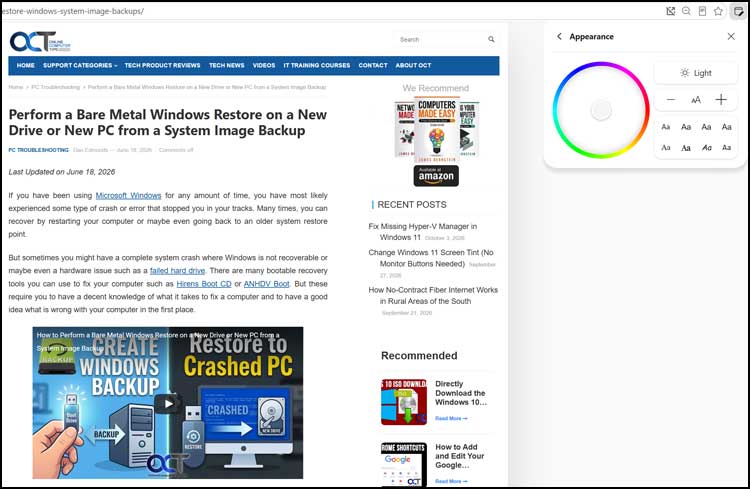
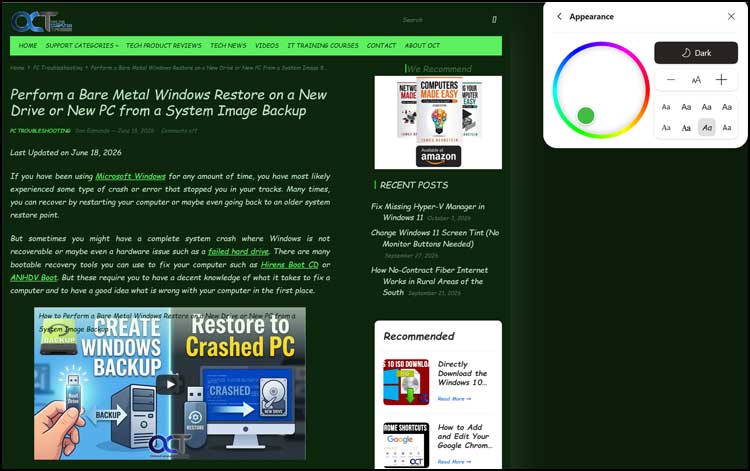
The Appearance Remix options are used to change how Edge looks regarding colors, page size and fonts. Compared to the Custom options, there is not as much you can do but you can still drastically change the way a webpage or website looks. The image below shows the default color theme for the website along with the Remix Appearance options.
2. Apply Dark Mode and Color Schemes
The next image shows the webpage after applying the dark mode setting, changing the color scheme to green and changing the font. To change the color scheme, simply drag the center circle inside the larger circles to the color you want to use, and you will see the changes applied in real time. This gives you instant visual feedback on your design choices.
3. Save and Manage Your Themes
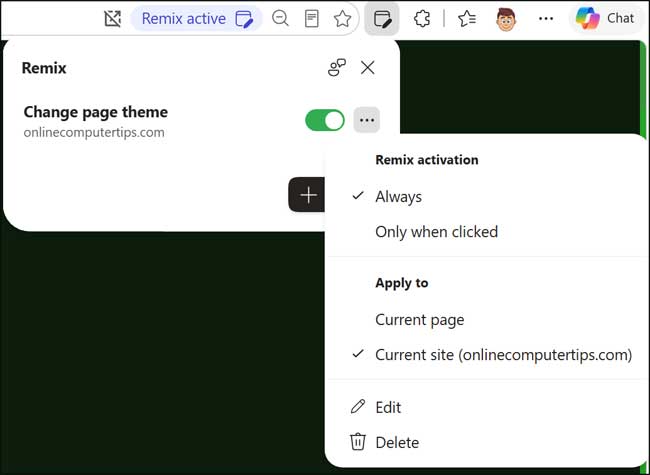
Now when you click the Remix button, you will see your saved page theme and can enable or disable it as needed. If you click the ellipsis next to it, you will be shown options such as having it apply to the current page or current site and the ability to edit or delete the theme. The Always setting is the default and the Only when clicked option is used to disable the particular setting until you click on the Remix icon.
Using Custom Settings and Prompts
1. Generate Article Summaries
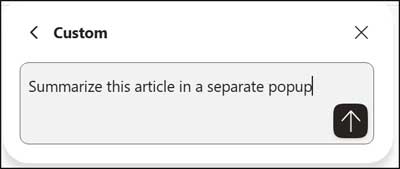
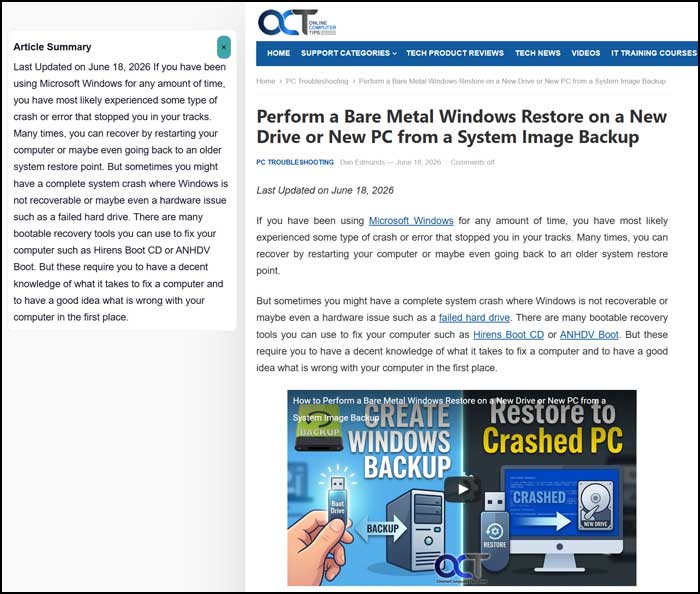
Now we will try out some custom settings to show you a few things you can do when using this option. For example, if we type in Summarize this article in a separate popup and click on the arrow, it will create a summary of the specific page in a standalone box off to the side. We can then go to the settings for this customization and have it apply to the entire website if needed so it will automatically create a summary box for each page you open.
2. Add Interactive Sticky Notes
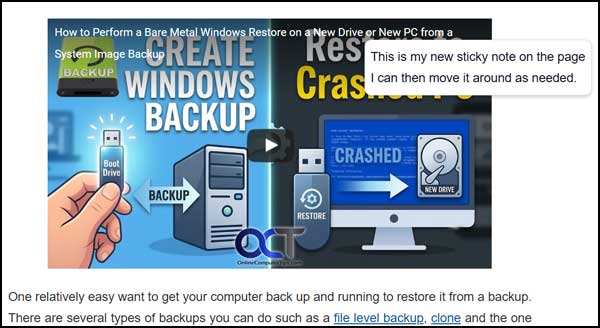
For our next example, we will type the following text into the new custom attribute box. Wherever I double click on this page, add a sticky note that I can type in. Make the notes easy to grab and move around. Now we can make one or multiple sticky notes on a page and edit and move them around as needed.
3. Remove Webpage Distractions
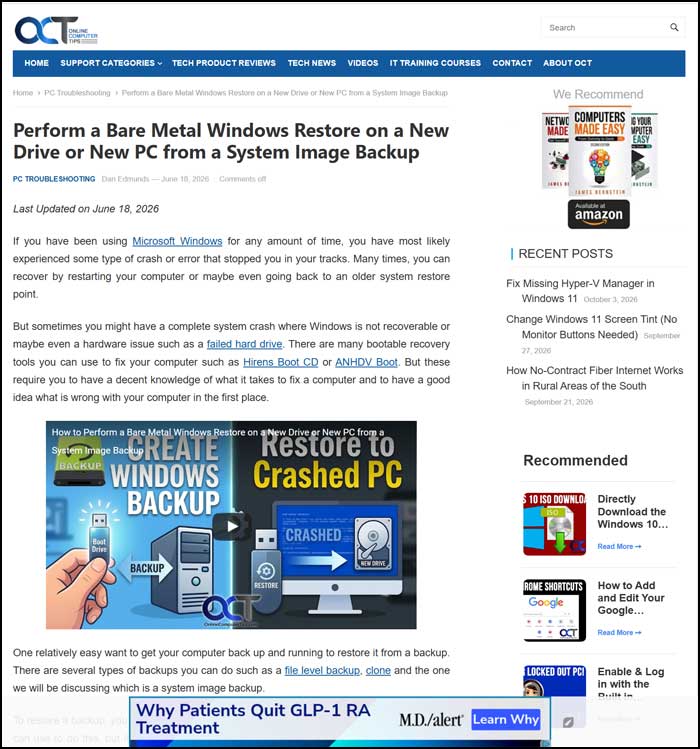
For our final example we will create a custom setting that makes the page easier to read by typing Remove distractions and show only the main content into our custom settings box. The image below shows how the webpage looks before applying this customization. Note the ads on the right side and bottom of the page. Also take note of the blue menu bar and OCT logo at the top.
4. Review the Simplified View
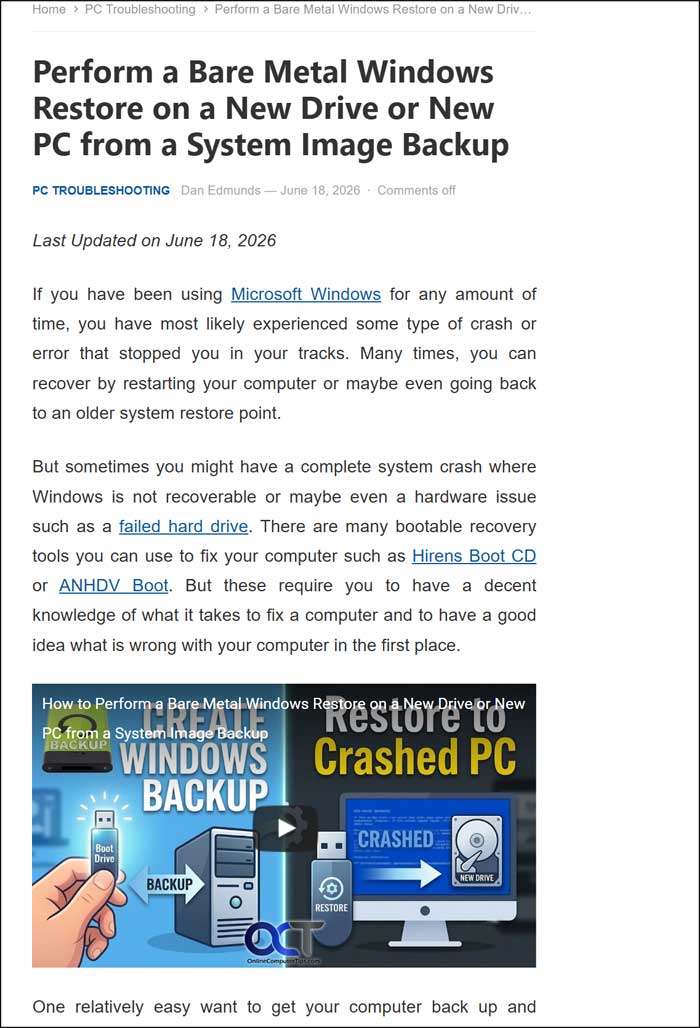
The image below shows how the page looks after applying the customization. As you can see, all the ads are gone as well as the blue menu bar and OCT logo giving it a cleaner and easier to read look. This creates a highly focused reading environment for long articles.
5. Manage Your Active Remixes
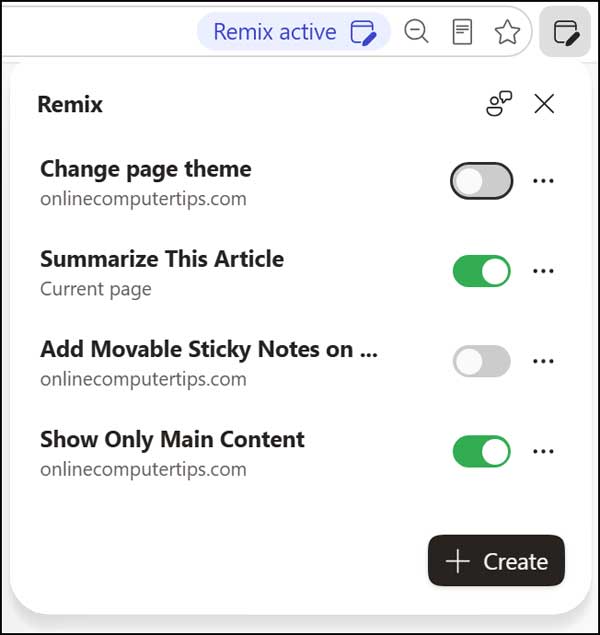
Once you have all your Remix customizations configured, you can click on the Remix icon to see which ones are active and which are not and enable or disable them as needed. You can also delete any settings that you no longer need. And if you want to disable Remix altogether, simply go back to the Edge toolbar settings to disable it. One nice feature of the Edge Remix tool is that your settings will apply to their corresponding pages even after you close and re-open Edge or even reboot your computer.
For additional training resources, check out our online IT training courses.
Check out our extensive IT book series.