Last Updated on September 27, 2026
Since many of us stare at some type of screen more often than we probably want to, it’s essential to make sure we protect our eyes to avoid potential eye strain or other health issues. When staring at a computer screen all day, your eyes will tend to get tired, making it harder to see clearly and focus on what is on the screen.
Sure, there are filters you can add to your screen or even use special lenses in your glasses to cut down on the glare. And most monitors come with built in settings you can use to adjust how bright, warm or cool your monitor looks. But if you would rather have a way to easily customize the tint and brightness levels of your monitor without special glasses or fiddling with monitor settings, you can now use the built in Windows 11 Screen Tint setting.

The Screen Tint setting allows you to choose from one of the built-in tint colors or create your own color. Then you can adjust the tint level to make your screen warmer or cooler. Then you can simply enable the Screen Tint setting when you feel your eyes starting to strain and then disable it if you want to take advantage of the full brightness level of your screen.
How to Enable and Use Windows 11 Screen Tint
1. Navigate to Accessibility Settings
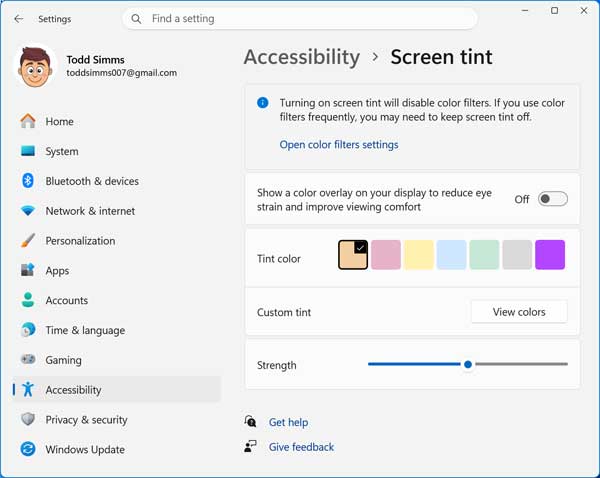
To enable the Screen Tint feature, simply open the Windows settings app and navigate to Accessibility and then Screen Tint. The Screen Tint feature should be disabled by default but all you need to do to enable it is move the slider to the On position. This instantly applies a color overlay across your entire operating system.
2. Understand the Color Filters Warning
There is also a warning at the top of the setting that says Turning on screen tint will disable color filters. If you use color filters frequently, you may need to keep screen tint off. Color filters are an accessibility feature that remaps every color on your screen in real time so people with color vision deficiency can distinguish colors they would otherwise confuse. If you do not use color filters, you do not need to worry about this warning. Just proceed with your custom tint adjustments.
3. View the Default Disabled State
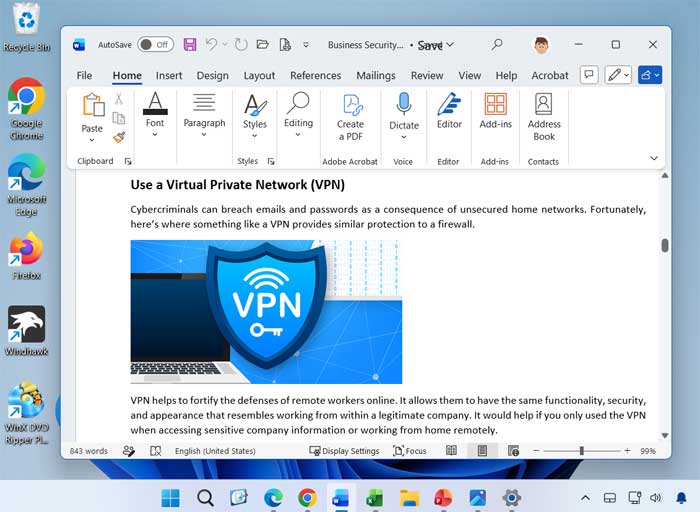
The image below shows a Windows 11 desktop with a Microsoft Word document open and the Screen Tint feature disabled. You can clearly see the harsh white backgrounds that cause severe eye fatigue during late night work sessions. This default brightness level forces your eyes to work overtime to read basic text.
4. Apply a Built-In Tint Color
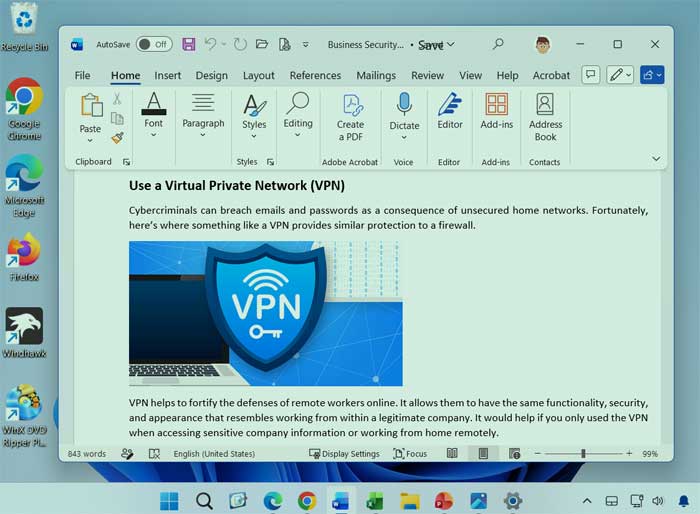
Now we will enable the Screen Tint feature and set it to use the green tint color and move the slider to around 75%. As you can see, it changes the color and tint level of everything on the screen and makes it so things are not as bright. The operating system handles this color shift natively without requiring heavy third-party background applications.
5. Create a Custom Screen Color
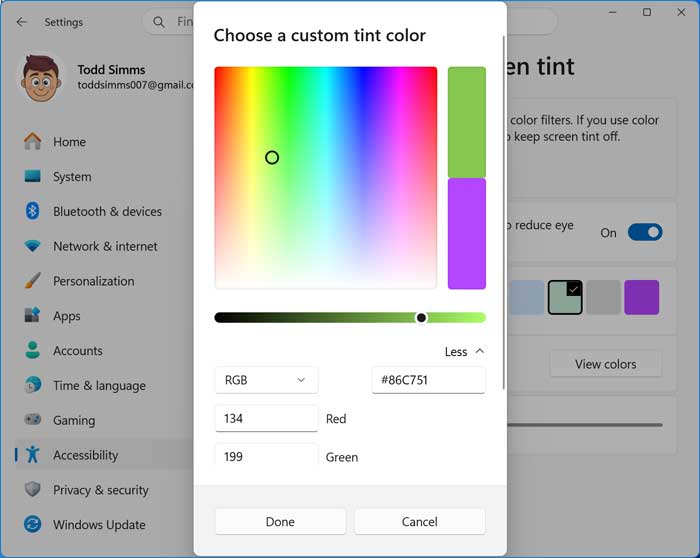
You can also use your own custom colors by clicking on the View colors button. From here, you can use your mouse to choose a color and its brightness level. You can also type in the hex code for a custom number as well as the RGB or HSV numbers for a specific color. Then once you save your new color, you can use it for your screen tint and adjust its level just like the other colors. This guarantees you find the exact shade that feels most comfortable for your specific vision needs.
As you can see, the Windows 11 Screen Tint feature makes it easy to adjust the tint and brightness levels of your monitor screen to give your eyes a break when they are feeling strained.
For additional training resources, check out our online IT training courses.
Check out our extensive IT book series.