
Last Updated on August 23, 2026
File compression is a process used by operating systems to make files smaller by compressing them to save space. This can be used when you are running low on hard drive space and do not have any files that you can manually remove to free up space on your drive. If you run too low on hard drive space on your Windows drive (usually C:), then your computers performance will begin to suffer.
Windows will sometimes automatically compress files on your computer to free up space when you start getting low on hard drive space. Many times you will not even notice that your files have been compressed and it might be something you do not want to be done automatically. In order to access a compressed file, Windows needs to decompress it first and that takes additional time to do although it is very minimal.
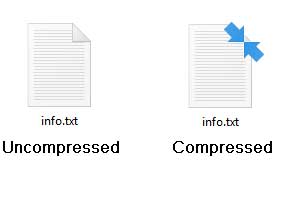
One way you can tell if a file or folder is compressed is by the way the file or folder icon looks. As you can see in the image below, one file has two blue arrows on it indicating that it is a compressed file.
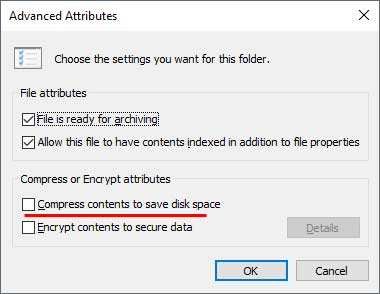
It is completely possible to manually decompress files and folders if you notice that they happen to be compressed. Right click on the file or folder and choose Properties. Click on the Advanced button on the General tab. Uncheck the box that says Compress contents to save disk space and click OK. It might ask you if you want to decompress subfolders as well so if that is what you want to do say yes.
Method 1: Use the Local Group Policy Editor
1. Launch the Group Policy Tool
The first method we will discuss involves using the Windows Local Group Policy Editor.. If you have a Home version of Windows then you will not be able to do it this way. If you have a Professional or Enterprise version of Windows 10 or Windows 11 then you can use this method safely.
2. Navigate to the NTFS Settings
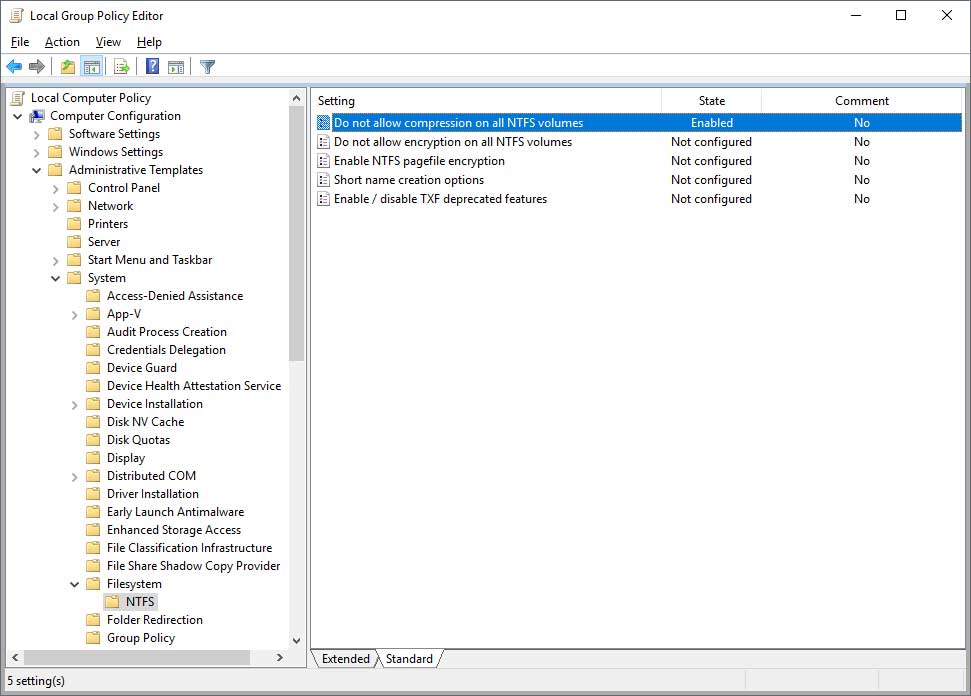
To begin click on your Start button and type gpedit.msc into the search box. Press Enter to launch the utility on your screen. You must then navigate to Computer Configuration, expand Administrative Templates, open System, click on Filesystem, and finally select NTFS.
3. Enable the Compression Policy
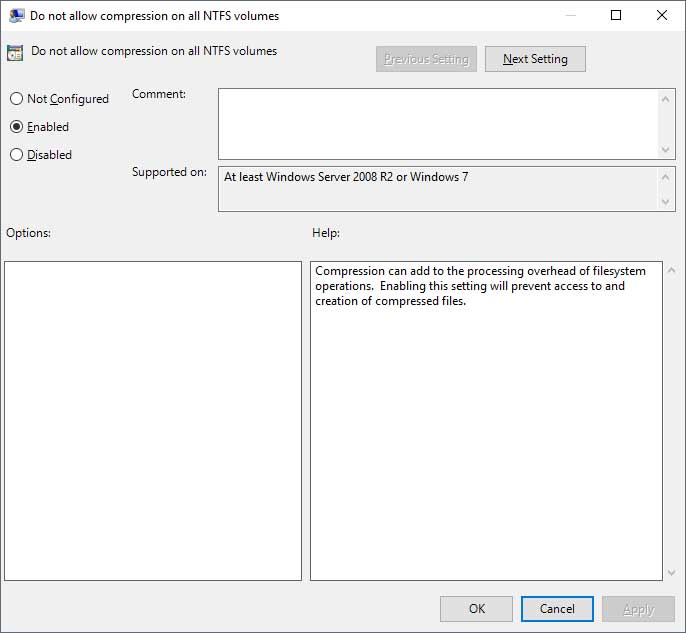
Look closely at the right pane to find the specific setting you need. Double click on the policy labeled Do not allow compression on all NTFS volumes. Change the status from Not Configured to Enabled and click OK to apply the restriction.
4. Verify the Policy Change
You should then see the policy officially listed as Enabled in the Group Policy Editor window. Close out of the tool completely. Now reboot your computer and you will be all set.
Method 2: Edit the Windows Registry
1. Open the Registry Editor
The next method involves making a direct registry change on your computer. Click on the Start button again and type regedit into the search bar. Press Enter and accept the administrator prompt to open the tool.
2. Locate the FileSystem Key
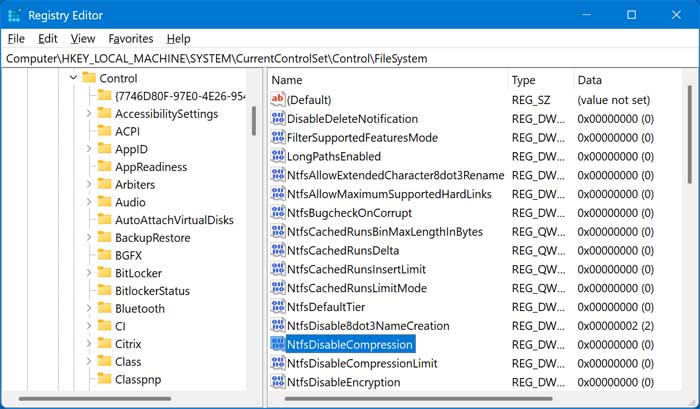
Navigate through the left pane menu to find the correct system folder. Go directly to Computer\HKEY_LOCAL_MACHINE\SYSTEM\CurrentControlSet\Control\FileSystem in the tree. Find the specific value called NtfsDisableCompression on the right side and double click it.
3. Modify the DWORD Value
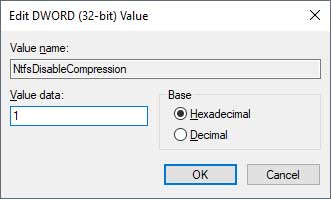
A small edit box will pop up on your screen. Change the Value data field from 0 to 1 and click Ok. This forces the operating system to completely ignore automatic compression requests.
4. Restart Your System
Close the Registry Editor window to save your work. Then reboot your computer to lock in the new settings. Once again you will be all set and protected from unexpected file alterations.
Method 3: Use the Command Prompt
1. Launch an Elevated Command Prompt
The final method involves using a command prompt to disable file compression on your computer. Click on your Start button and type cmd into the search box. When you see Command Prompt in the list of results, right click on it and choose Run as administrator.
2. Enter Administrator Credentials
If you are prompted for a password, enter credentials for an account that has local administrator rights. The system requires these elevated permissions to modify deep storage behaviors. A black terminal window will appear on your desktop.
3. Execute the FSUTIL Command
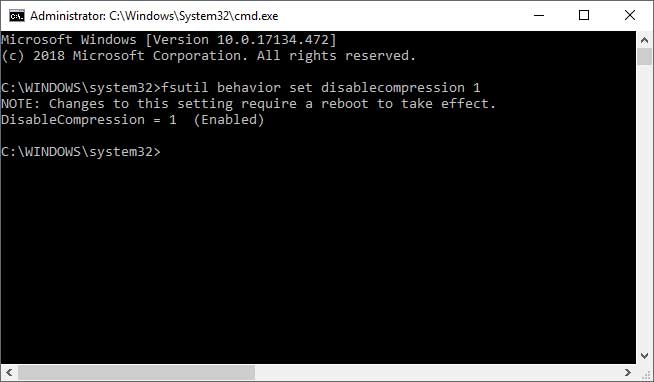
Type the following string directly into the box or copy and paste it from here. Type fsutil behavior set disablecompression 1 and press Enter. The terminal will process the command and return a success message instantly.
4. Reboot to Apply Changes
Then you will need to reboot your computer for the changes to take effect. The command prompt box explicitly tells you a restart is required. Your files will remain fully uncompressed moving forward.
For additional training resources, check out our online IT training courses.
Check out our extensive IT book series.






