
Last Updated on April 29, 2026
Backing up your computer is one of the most important file management tasks you should be performing on a regular basis. There are many backup applications you can use to do this and of course Windows itself has its own backup tool called File History. But there is more than one way to backup your files. If you prefer to synchronize files and folders then you have a bit more control over how you can protect your data.
If you are just looking to synchronize a folder with another then this is where a file sync tool can come in handy. In this article, we will be showing you how to backup and synchronize your files and folders for free with the FreeFileSync application. This tool offers multiple ways to keep the contents of two or more folders in sync with each other so your files are always up to date.

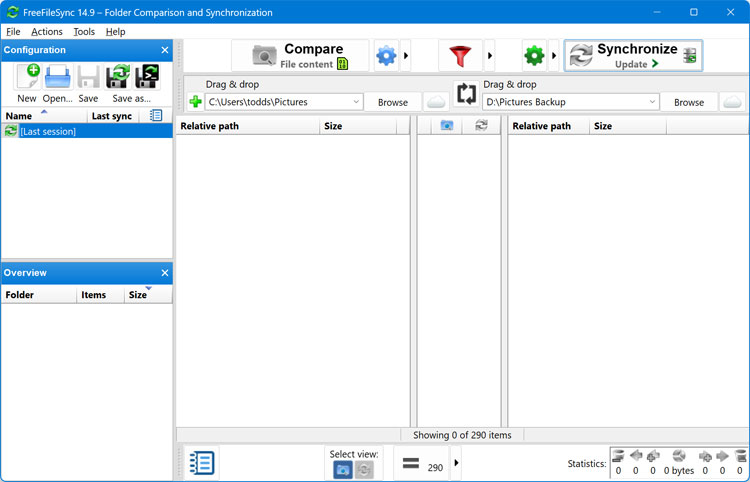
Once you download and install FreeFileSync, you simply need to add the source and destination directories by either browsing to them or dragging and dropping the folders into the app itself.
At the top of the app is the Compare button that is used to compare the source and destination folders. If you click the blue gear icon next to the Compare button, you will be able to choose from three different options.
- File time and size – Compares files by last modified date and file size. Fast and reliable for everyday backups and syncing.
- File content – Compares the actual contents (bytes) of each file. Slow but most accurate; used to verify files are truly identical.
- File size – Compares size only. Fast but least reliable; files can match in size while still being different.
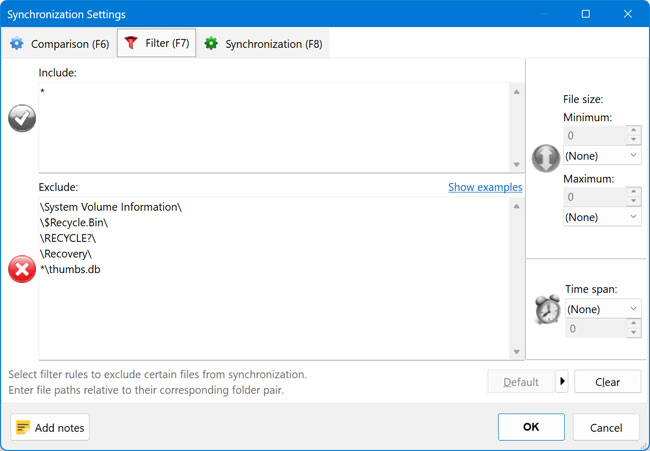
The red filter funnel in FreeFileSync limits what you see in the comparison results. It filters the file grid to show only the currently selected items or categories, hiding everything else. This affects only the view, not the files or the sync behavior. This is more of an advanced feature, and you may find yourself not needing to use it.
Once you have your directories configured and compare method selected, you can click the Compare button to start comparing both folders.
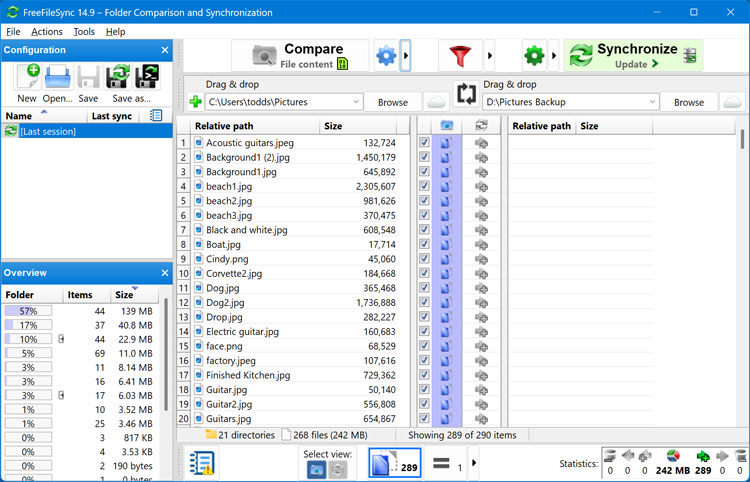
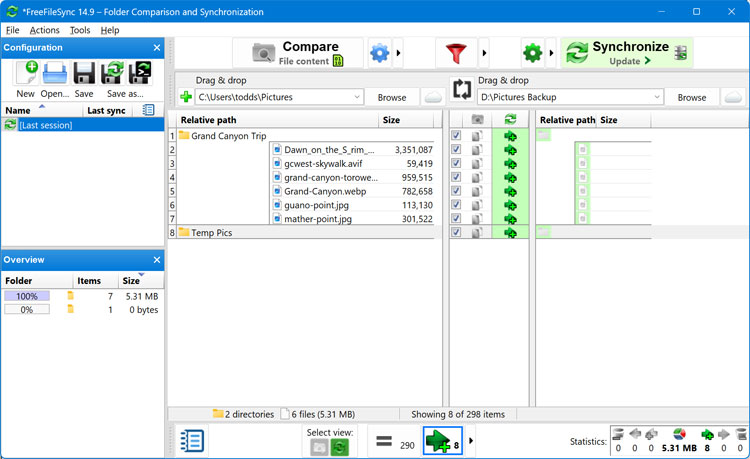
As you can see in the image below, we have multiple files on the left (source) and nothing on the right and that is because the destination folder is empty. When we say source and destination folders, these terms don’t really apply when doing mirroring rather than just updating.
Before clicking the Synchronize button, you will need to determine what type of sync you want to perform. Here are the choices that are available.
- Two‑way – Syncs changes in both directions. Newer files on either side overwrite older ones on the other side.
- Mirror – Makes the right side an exact copy of the left. Deletes anything on the right that doesn’t exist on the left.
- Update – Copies new or changed files from left to right only. Never deletes files on the right.
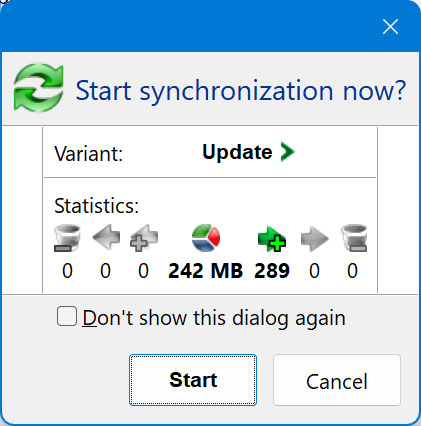
For our example, we will use the Update option just to copy everything from the left folder to the right. Once we click on the Synchronize button, we will be prompted to click the Start button to continue. It will also show the size of the files being transferred as well as how many of them there are. You can also see the number of files at the bottom of the main screen before clicking the Synchronize button.
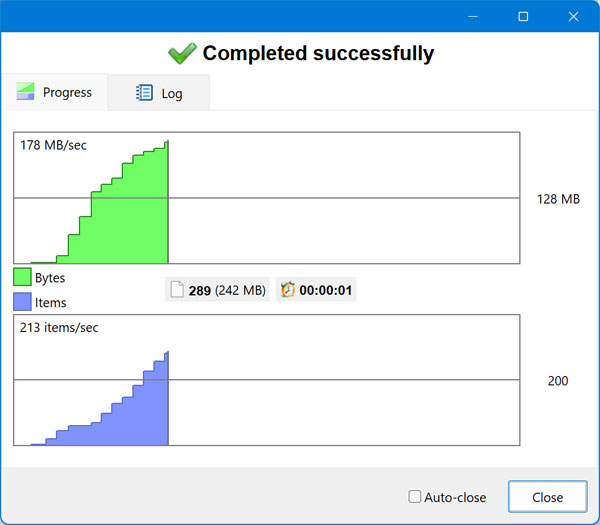
Once the folders have been synced, you will see a completion screen telling how many bytes were transferred and how long it took. There is also a Log tab you can click on for more details.
Now when we click the Compare button again, it shows both sides as blank because both folders have identical contents.
Now we will add some files and folders to the source side and click the Compare button again. As you can see, it found the two folders and the files that were in the Grand Canyon Trip folder. The Temp Pics folder is empty. If you were to hover your mouse over the grey file icons on the right, it would show the names of the files on the left indicating that they are missing and need to be synchronized.
Now let’s say we deleted some files on the right or left side and changed the sync option to Mirror, it would then delete those same files on the other side so that both folders match up.
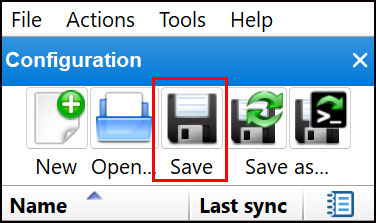
Once you have a sync job configured, you can save it as a .ffs_gui file that you can then load into FreeFileSync as needed to have all the settings saved and ready to run. To do so, simply click the Save button in the toolbar, give the file a name and choose where to save it. Then you can click the Open button to load the sync job as needed.
One nice feature of FreeFileSync is the RealTimeSync tool. RealTimeSync continuously monitors the source and destination folders, watching for files that are added, changed, or removed on either side. When new files appear or existing ones are updated, it automatically runs the configured sync after things settle, keeping both locations up to date without manual action.
One thing to keep in mind when using RealTimeSync is that it will use the sync settings that were configured in the sync job that you load into it. So, it can use the two-way, mirror, and update setting that you have saved in your job.
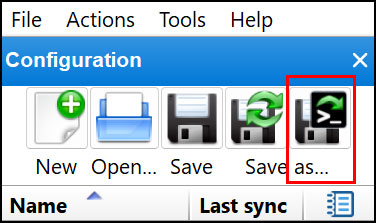
To save your job settings to be used with the RealTimeSync tool, click the Save as batch job button and give the file a name.
Now you will need to open the RealTimeSync tool and go to the File menu and choose Open and load your saved batch file. It will then load the folders from your job, and you can choose to remove any folder you do not want it to watch or add other folders. If you add a folder that is not in the sync job, it will just act as a trigger to run the batch job but will not have any files synced to it since it’s not part of the originally configured synchronization job.
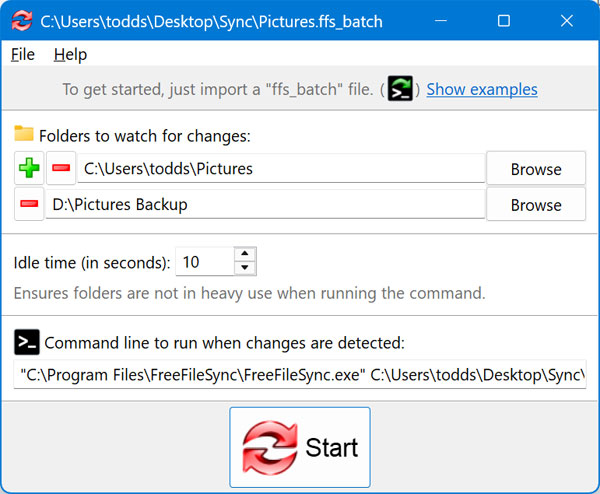
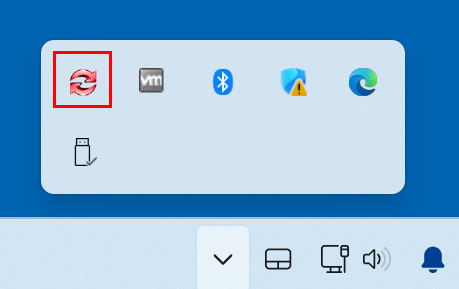
The RealTimeSync app will then be running in the Windows system tray monitoring the configured folders for changes.
If you want to try out some other file and folder synchronization apps, you may want to take a look at Syncthing, AOMEI Backupper or Bart Free File Synchronization.
For additional training resources, check out our online IT training courses.
Check out our extensive IT book series.


