
Last Updated on April 19, 2026
Google Chrome is one of the most popular web browsers in use today. And when it comes to Google, their search engine is the most commonly used one as well. And of course we can’t forget all the free Google Apps such as Gmail, Docs, Sheets, Photos and Drive.
Because Chrome is closely tied to your Google account, it is designed to make everyday browsing faster and more personalized. Small conveniences, like quick access to frequently visited sites, can make a noticeable difference over time, especially if you rely on the web for work, school, or daily tasks. Your homepage is more than just a starting point; it acts as a launchpad that can reduce friction and keep your most important destinations within easy reach.

So, if you are using the Google search engine website as your browser home page with Chrome, you have the option to create website shortcuts for quick access to your favorite websites. And if you are not using them, we will be showing you how to add and edit your Google Chrome homepage shortcuts in case you want to try it out.
Accessing the Chrome Customization Settings
1. Locate the Customize Button
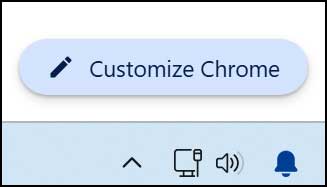
When you go to the Google homepage while using Chrome, you should have a button at the lower right corner of the window. Look for the small pencil icon with the text that says Customize Chrome. Click on this button to open the side panel.
2. Use the Alternative Menu Path
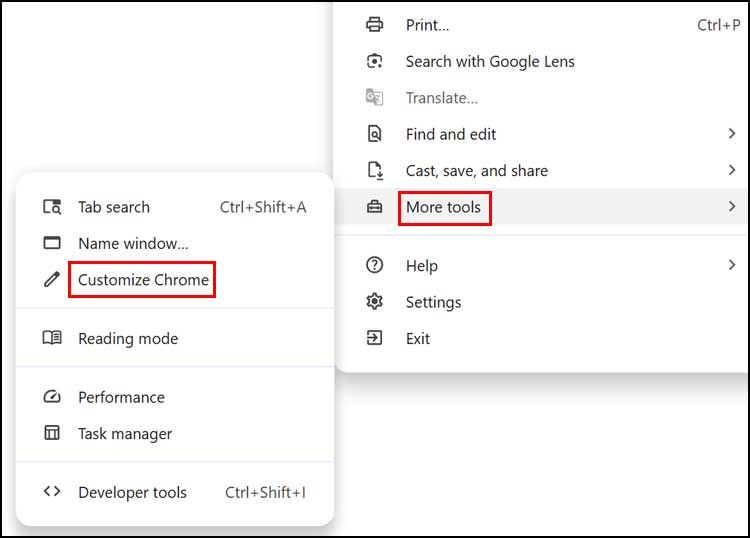
Some people tend to be missing the Customize Chrome button for some reason. If you do not have it, you can get to the exact same settings through the main menu. Click on the ellipsis (…) at the upper right corner of Chrome and then choose More tools > Customize Chrome.
Configuring Your Shortcut Preferences
1. Enable the Shortcuts Feature
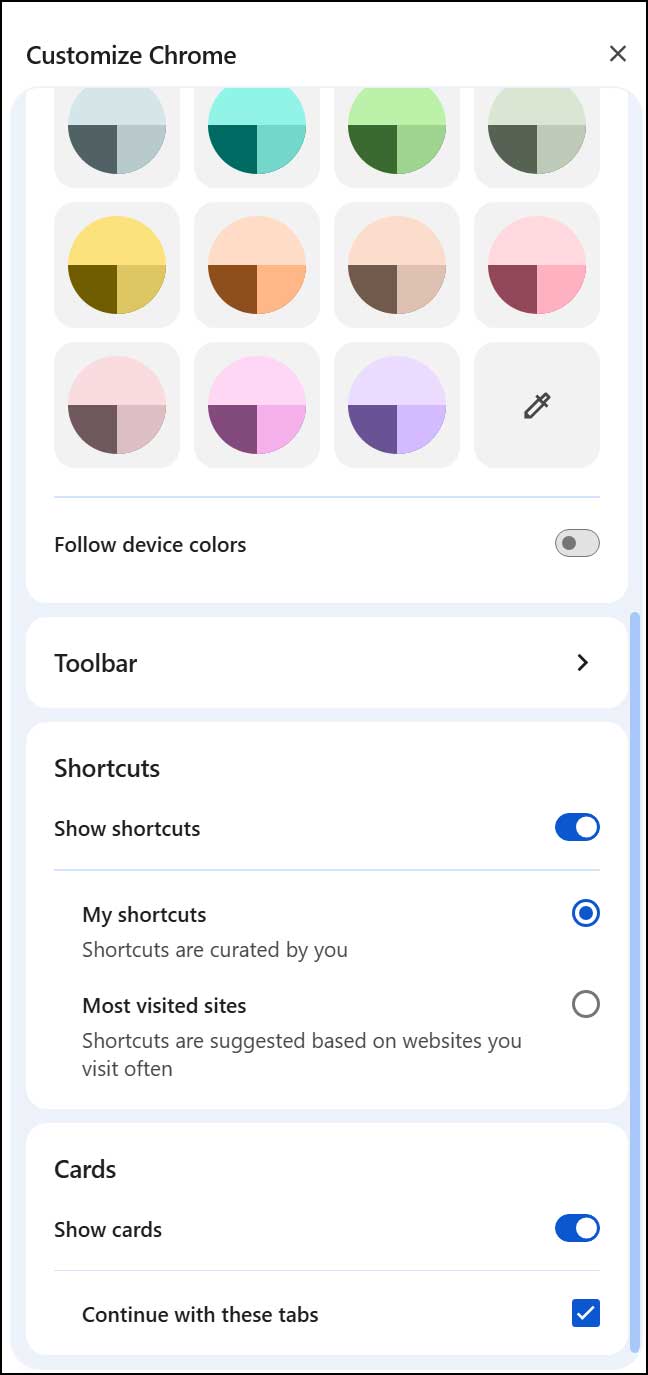
Once the side panel opens, you will need to scroll down to the Shortcuts section. Make sure the main toggle switch is enabled and turned blue. Once it is enabled, you will see that you have two distinct options for how Chrome handles your links.
2. Choose the My Shortcuts Option
Select the My shortcuts radio button. Choose this option if you want to make your own custom shortcuts to websites of your choosing. You can then manually add, remove and edit these sites as needed.
3. Understand the Most Visited Sites Option
The Most visited sites option works differently. These are automatically generated by Chrome based on your browsing history and update dynamically as your browsing habits change. You cannot manually add sites here, but you can remove individual ones.
4. Configure the Cards Option
The Cards option is used to show you personalized, dynamic content like recent tabs, shopping deals, recipes, sports scores, and travel updates based on your browsing activity. It’s designed to give quick access to relevant information without needing to search again. The Continue with these tabs checkbox lets you quickly reopen tabs you had open before closing the browser or from other synced devices.
Adding and Editing Your Custom Links
1. Click the Add Shortcut Button
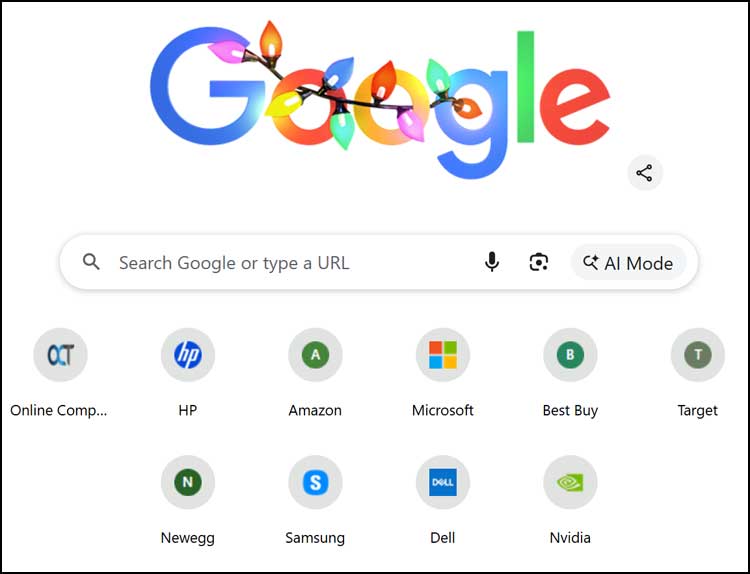
For our example, we will be using the My shortcuts option so we can add our own custom shortcuts. Once this option is enabled, look at the main Google homepage. You will then see a circular Add shortcut button sitting directly under the Google search box.

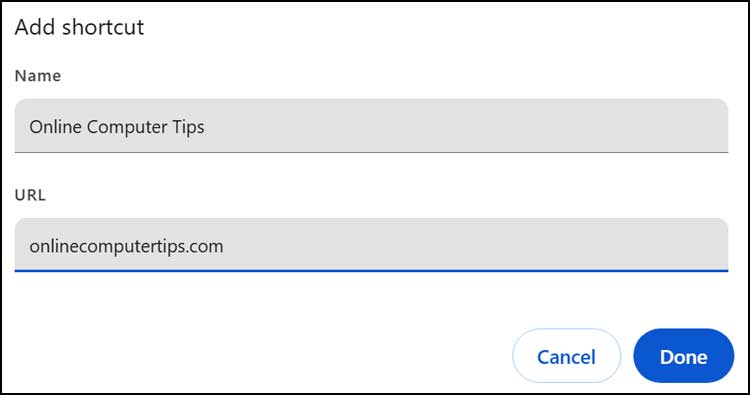
2. Enter Your Website Details
When you click on this button, a small dialog box will appear. You can then type in a name for your shortcut that will show on the button itself. You will then need to type in the exact website address that you want this shortcut to point to. Then click on the Done button when you are finished.
3. Verify Your New Shortcut
You will then see your new shortcut under the Google search box. Then all you need to do is click on this shortcut to be taken directly to that website in your browser. It completely eliminates the need to type the URL manually.
4. Understand the Ten Shortcut Limit
The image below shows how our Google homepage looks after adding 10 shortcuts. Once you add 10 shortcuts, the Add shortcut button will no longer be there since you can only have 10 shortcuts in total. There are ways to get around this by using an extension that allows you to have more than 10 homepage shortcuts.
5. Update the Shortcut Icons
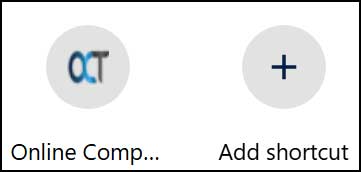
You will also notice that some of the shortcuts have the icon or logo associated with that website while others do not. Many times, when you create a shortcut, it will use a generic letter that matches the shortcut name. Once you use that shortcut to go to that website, the button will automatically update itself with the appropriate logo.
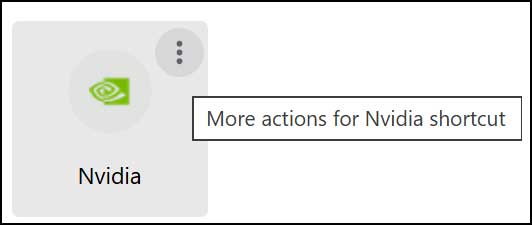
6. Edit or Delete Existing Shortcuts
To edit or remove a shortcut, you can simply hover your mouse cursor over it. Click on the three vertical dots that appear in the top right corner of the circle. This will give you a sub-menu with an option to edit the URL or delete it entirely. If you delete a shortcut so you have less than 10, you will see that the Add shortcut button appears once again.
For additional training resources, check out our online IT training courses.
Check out our extensive IT book series.


