If you have been working in the field of IT even for a short period of time I am sure you have heard the term virtualization and most likely know what it means. If not then check out this link for more information. What it boils down to is running one or more “virtual” computers on or within a physical server and these virtual machines (or VMs) utilize the physical server’s hardware such as processors and RAM and sometimes its storage unless the storage happens to be located on a SAN (storage area network).
In most cases virtualization is used by businesses to cut down on hardware costs and make managing their servers easier because they are virtual machines. Backing up servers is also easier when they are virtualized and you can do other things such as add more RAM, CPUs and hard disks with a couple clicks of the mouse. Depending on your physical hardware you can run many VMs on one physical server and when we say many, we mean 10, 20, 30 or more depending on your server.

If you are looking to get into virtualization and want to try it out at home, there are a few desktop virtualization applications you can use to do so. The one you choose will depend on the operating system of your computer and what features you are looking for. The main virtualization options for Windows desktop computers are Hyper-V (only on Windows Pro), VMware Workstation and Oracle VirtualBox. There is a way to run Hyper-V on Windows Home editions if that is your goal.
If you find that VirtualBox has the features you are looking for, then you can easily create a VM in the VirtualBox virtualization software in a matter of minutes. Before using any virtualization software on your desktop computer, you will need to make sure that your hardware has the features and components to do so.
Since virtual machines (guests) share the hardware with the host computer (your desktop) you need to take that into consideration when creating and running multiple VMs at the same time.
Having enough RAM tends to be the most important factor when running VMs on a physical server (or host) so that’s what you need to make sure you have enough of it. VMs use the hosts RAM so if your desktop has 16GB of RAM and you want your VMs to have 8GB of RAM then you will only be able to run 2 VMs and at the same time it will leave your desktop with not much RAM to use on its own and really slow it down so be sure to size your VMs accordingly.
Also keep in mind that when the VM is powered off it does not consume any of your RAM, so you only need to worry about how many VMs you have powered on and how much RAM the powered on VMs are configured with. You can create 20 VMs with 8GB of RAM each but if they are not running, it won’t affect the performance of your host.
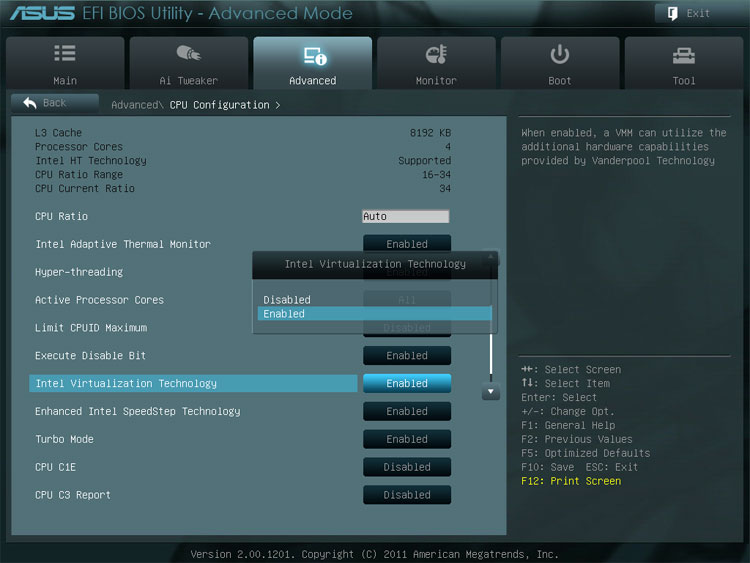
To run VirtualBox, your desktop’s processor must support Hardware Virtualization such as Intel VT-x for Intel chips or AMD-V for AMD chips. This technology allows VM to execute instructions directly on the physical processor, which is critical for performance and security. On newer computers, these features are almost always enabled by default. However, some manufacturers still ship motherboards with virtualization disabled for security reasons, requiring you to dive into the system firmware to toggle it on.
The process of enabling these features varies slightly between the legacy BIOS and the modern UEFI. In an old-school BIOS, the menu is text-based and you usually navigate to a “Security” or “Advanced Chipset” tab to find the virtualization toggle. On a modern UEFI system, the interface is often more graphical and may even allow for mouse input.
You’ll typically find the setting under labels like “CPU Configuration” or “Overclocking,” where Intel users look for Intel Virtualization Technology (Intel VT-x) and AMD users look for SVM Mode (Secure Virtual Machine – AMD-V).
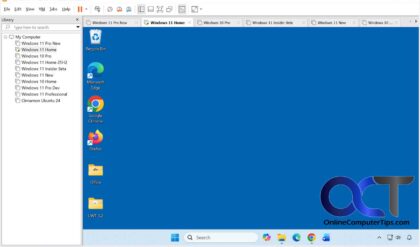
Creating a VM in VirtualBox
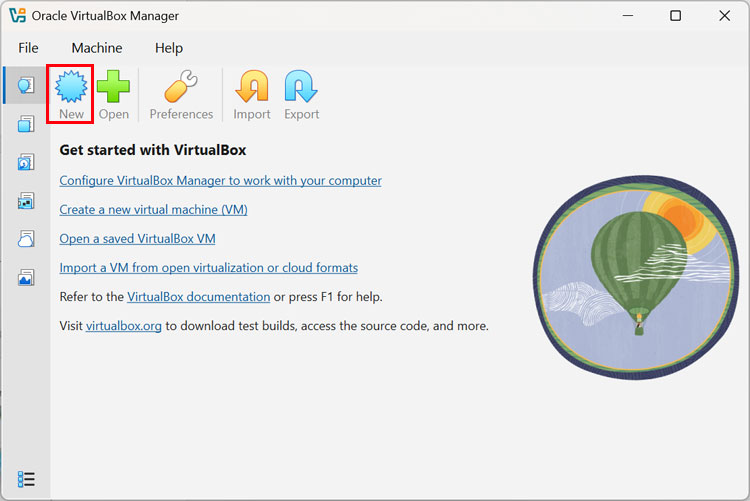
Once you have VirtualBox installed, you can click on the New button to start the VM creation process.
On the Virtual machine name and operating system screen you will need to do things such as give the VM a name and choose where you want the virtual machine files to be stored. Just be sure it’s on a drive that is large enough to store them.
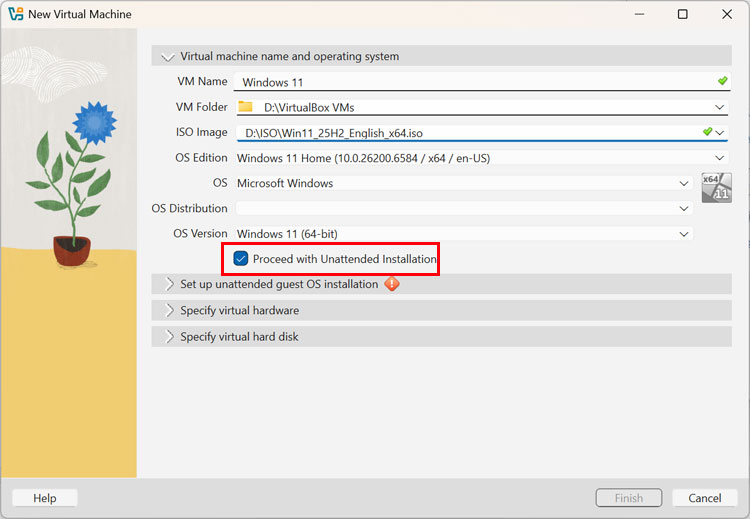
You will also need to point the wizard to the location of your installation ISO image file. You can use a Windows, Linux or other supported OS image file to create your VM. Depending on the ISO file you use, the OS Edition and OS Versions sections may be populated automatically for you.
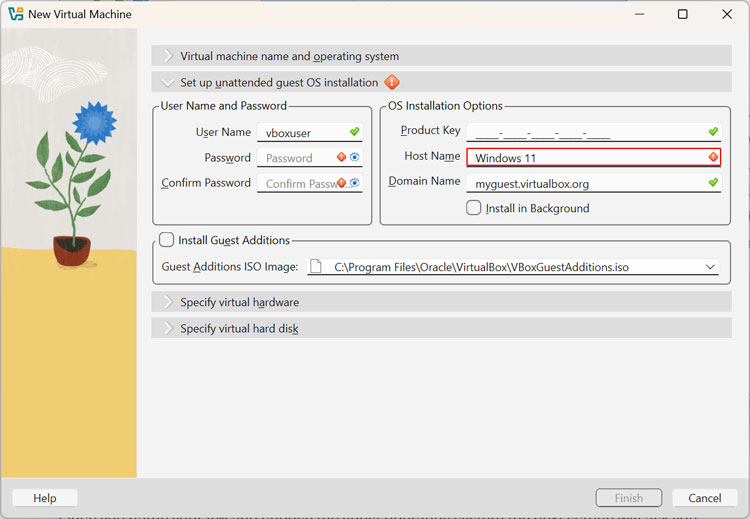
The next section for Set up unattended guest OS installation is optional and is used to have VirtualBox fill in things such as your Windows username, password, computer name and license key. If you do not want to use this feature, then simply uncheck the box that says Proceed with Unattended Installation from the first screen. If you do not uncheck this box, you will not be able to finish creating your VM unless you fill in the required fields as shown below.
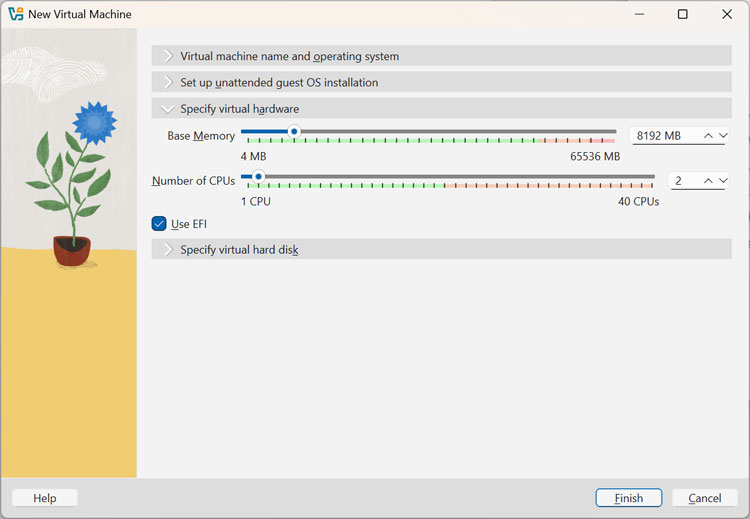
The next screen for Specify virtual hardware is where you can allocate RAM and virtual CPUs to your VM. Just be sure not to over allocate hardware resources because it will affect the performance of your host. If you are installing Windows 11, you will want to leave the Use EFI check box selected.
On the Create a New Virtual Hard Disk page, you will need to allocate disk space from the host computer to the VM. You can change the hard disk file location and size if you do not want to stick with the suggested settings. It should place the virtual disk files in the same folder as the VM files.
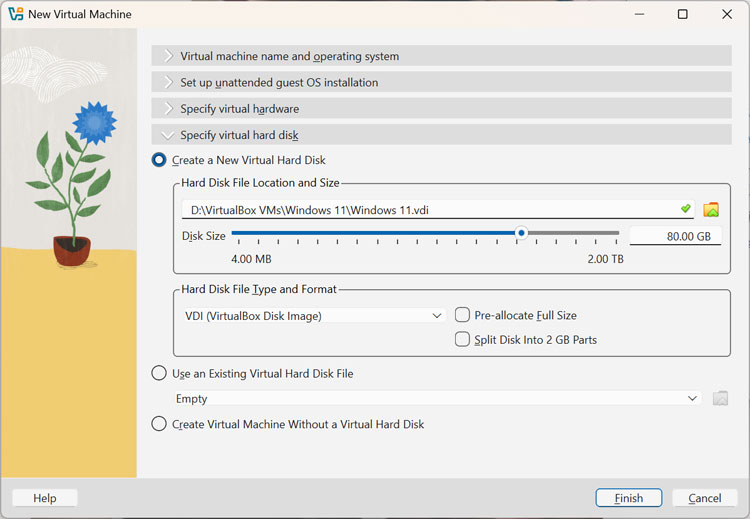
For Hard Disk File Location and Size you can check the box for Pre-allocate Full Size if you want the virtual disk to take up all the space on your drive. Otherwise, the virtual disk file will grow as needed on the host’s hard drive until it reaches its maximum size.
If you had an existing virtual disk from another VM, you could attach it here as well. Plus, you have the option to create the VM without a hard drive and add one later.
Once you click the Finish button, you will see your new virtual machine in the Oracle VirtualBox Manger ready to go. You can then click the Start button and the VM should boot up using the attached ISO image for the operating system and then you can start your Windows installation or other OS installation from there.
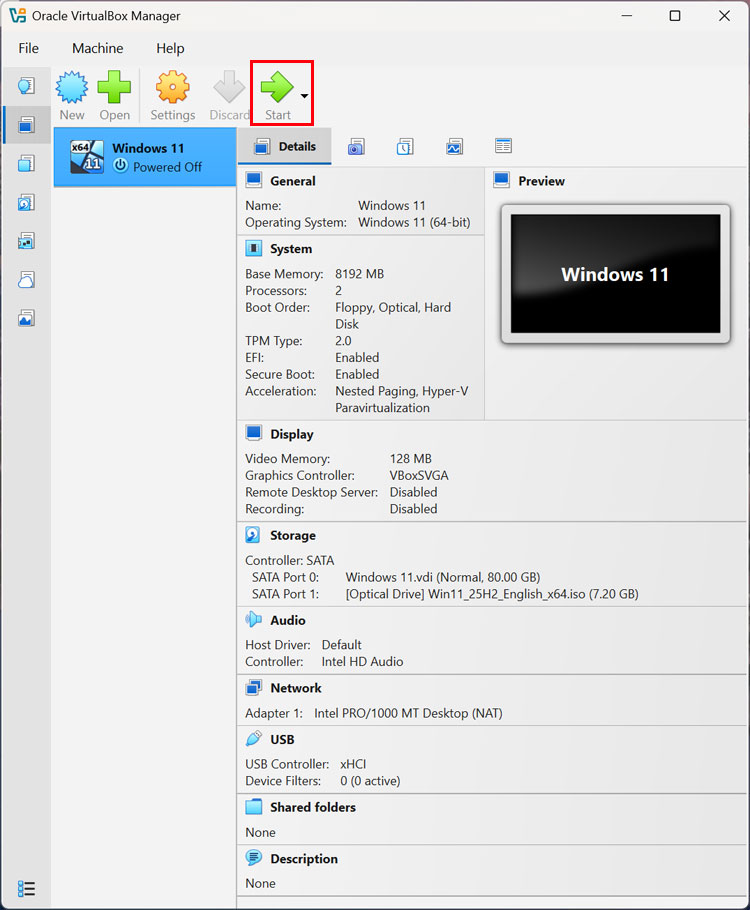
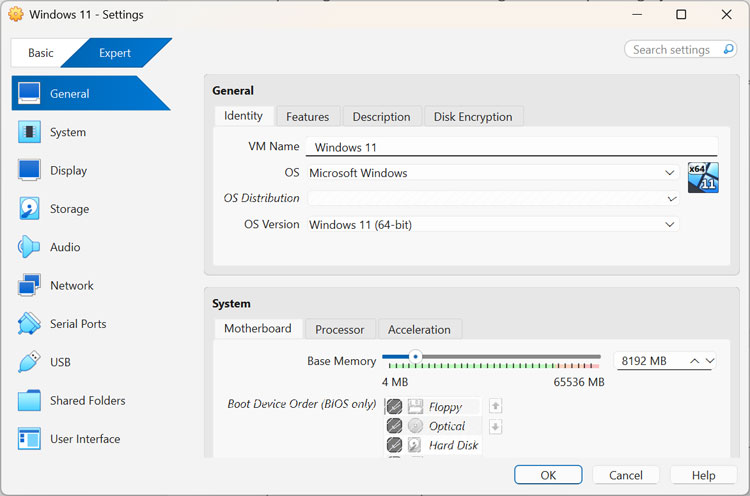
If you need to make any changes to the settings or hardware configuration of your virtual machine, you can do so by clicking on the particular category and you will be taken to the associated options.
VirtualBox is free to use and all you need to do is go to their website and download your own copy.
For additional training resources, check out our online IT training courses.
Check out our extensive IT book series.