Last Updated on October 10, 2026
While the native Windows Task Scheduler has improved over the years, many IT professionals still find its interface overly complex and its reliability inconsistent for specific tasks like running batch files or background scripts. Splinterware’s System Scheduler offers a powerful, user-friendly alternative that simplifies the automation process. In Windows 11, it excels where the native tool often fails, particularly when it comes to handling interactive desktop tasks and complex window-monitoring scenarios. If you need something reliable to run your batch files or scripts etc. then you are most likely have wondered what other options are out there.
There are a variety of pay for and free task scheduling apps you can download and try to see if you can make your scheduling life easier but many of them are buggy themselves or too complicated to use. One program that is easy to use and works very well is called System Scheduler for Windows and there is a free version as well as a pay for version with additional features.
Beyond basic time-based triggers, System Scheduler features advanced automation tools like Window Watcher. This allows the software to ‘listen’ for specific application windows and trigger actions, such as sending key presses or closing the window, whenever they appear. This is an essential feature for current workflows, where you might need to automatically dismiss recurring error messages or interact with legacy software that doesn’t have a modern API.
One of the biggest hurdles in modern Windows automation is the User Account Control (UAC) prompt. System Scheduler Free allows you to schedule tasks that run in the user’s context, while the Professional version allows you to run tasks as a system service. This means your scripts can execute even when no user is logged in, making it an ideal tool for server-like tasks on a standard Windows 11 workstation.
Configuring System Scheduler Events
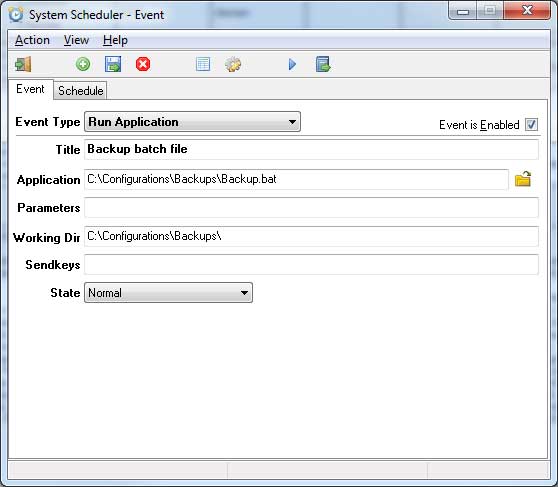
1. Setup a Run Application Event
After you install and open System Scheduler, you will be taken directly to the main interface. Here you can pick your types of jobs, configure them, and then schedule them. If you are going to run an application, you will choose Run Application from the dropdown list. Enter or browse to the exact path of the file you would like to execute. The Parameters section is used to add any additional switches to the program you are running. The Working Directory is typically the same directory as the program you are running. You can change this path for various specific circumstances. Sendkeys are key presses you can have automatically sent to the program. You can also send mouse clicks if you like. The State section lets you choose how you want the program to run, such as minimized or maximized.
2. Create Popup Reminders
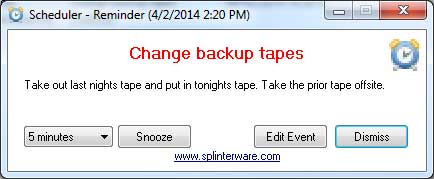
Popup Reminders are exactly that. They are reminders that pop up on your screen at specific scheduled times. If you use Microsoft Outlook, it is very similar to standard calendar reminders. After you configure the reminder and schedule it, it will pop up on your screen. This allows you to take immediate action on that specific reminder. You can snooze the reminder for a set amount of time. You can also edit the event or even dismiss it entirely.
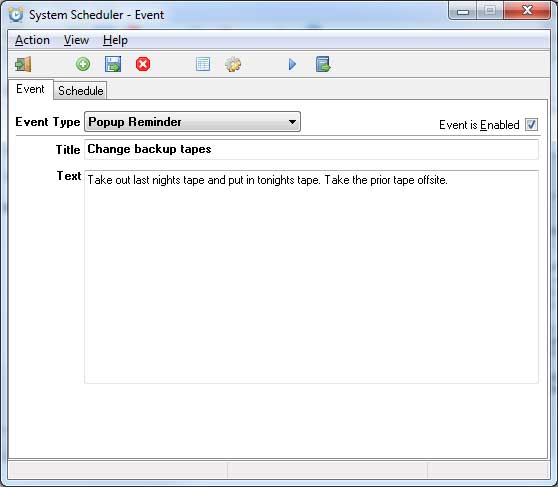
3. Configure the Window Watcher
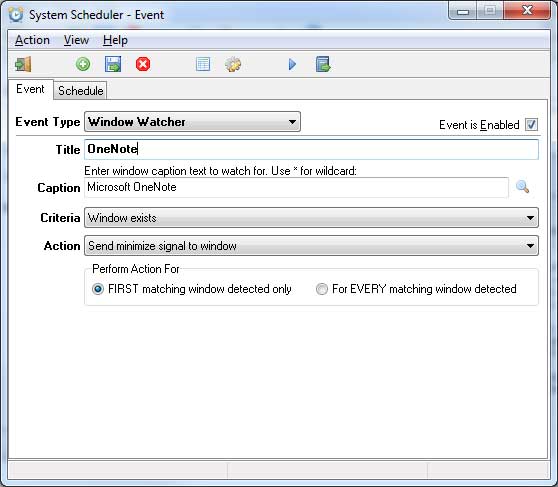
Window Watcher is used to send key presses or send a window a close signal to terminate running applications. This comes in handy for triggering actions or handling error messages while you are not at your computer. You enter the exact name of the window that you want to act on. Then you decide exactly how you want that window to be acted upon. The software handles the rest. It runs quietly in the background.
Managing and Scheduling Your Tasks
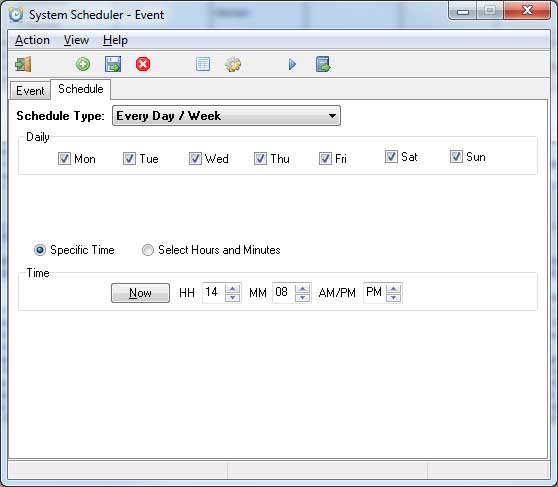
1. Schedule Your Action Triggers
No matter which type of action you are taking, they are all scheduled the exact same way. This applies to running a program or setting a reminder. It also works for acting on a specific window. The process is pretty much like the Windows Task Scheduler or any other scheduling application. You simply choose the days and times you want the job to run. The interface makes selecting these timeframes incredibly straightforward.
2. Review the System Scheduler List
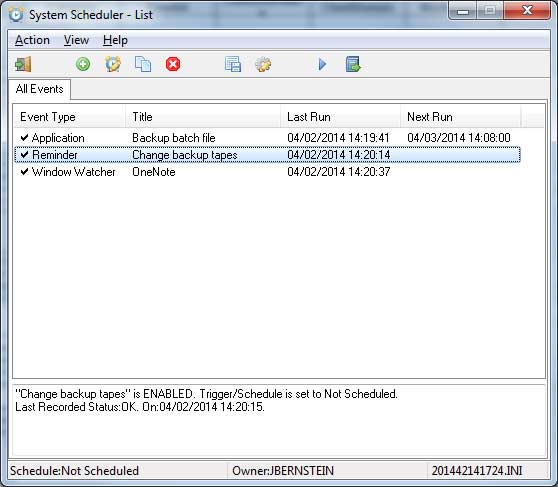
Once you have your jobs set up, you can look at the System Scheduler List. This gives you a clear view of all your scheduled jobs in one single place. You can manage your entire workflow directly from this screen. You can do things like run, delete, disable, or duplicate an event. Simply right-click on the particular job to access these quick management options.
3. Customize Program Preferences
Clicking the gear icon will bring you directly to the preference menu. Here you can customize the program in a variety of ways regarding reminders, running events, and activity logging. You can also decide whether or not System Scheduler will run at the startup of your computer. There will also be a convenient icon in your system tray. You can right-click this tray icon to perform many quick tasks. Download your own copy here to get started with the free or paid version.
For additional training resources, check out our online IT training courses.
Check out our extensive IT book series.