Last Updated on October 8, 2026
Computer hardware issues are not too common unfortunately but when they do happen, they can be devastating or at least frustrating and expensive! Whether you bought your computer from a store or built it yourself, there is still a chance you will run into some type of problem.
When you start having issues with your hard drive, it can be hard to tell if it is a pending physical failure. You might just have some type of Windows filesystem corruption causing your problem. You may get disk read or write errors. Your computer might even freeze or crash on you unexpectedly. If you think it is just a software problem, you can wipe the drive and do a clean Windows installation. We will be showing you how to completely wipe, format and zero out your hard drive before installing Windows.

Access the Command Prompt During Windows Setup
1. Create a Bootable USB Drive
To begin the process, you will first need to create a bootable Windows flash drive using your favorite USB OS creator software. Then you can boot your computer with it as if you were going to install Windows.
2. Launch the Setup Command Prompt
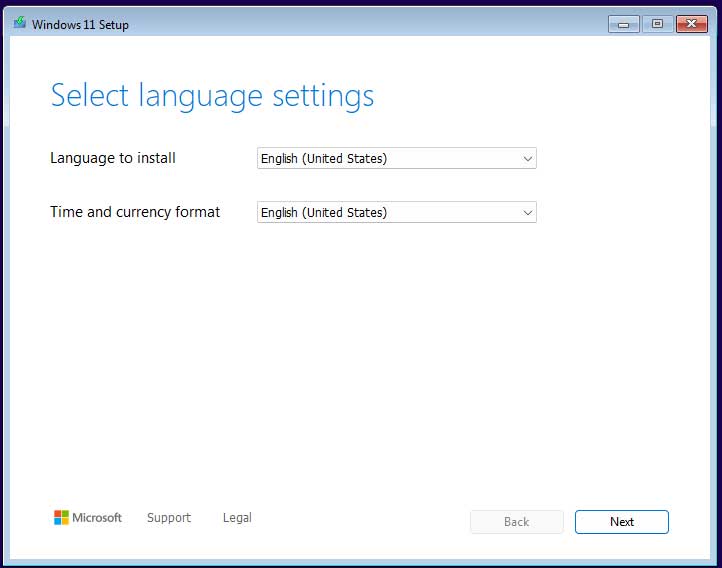
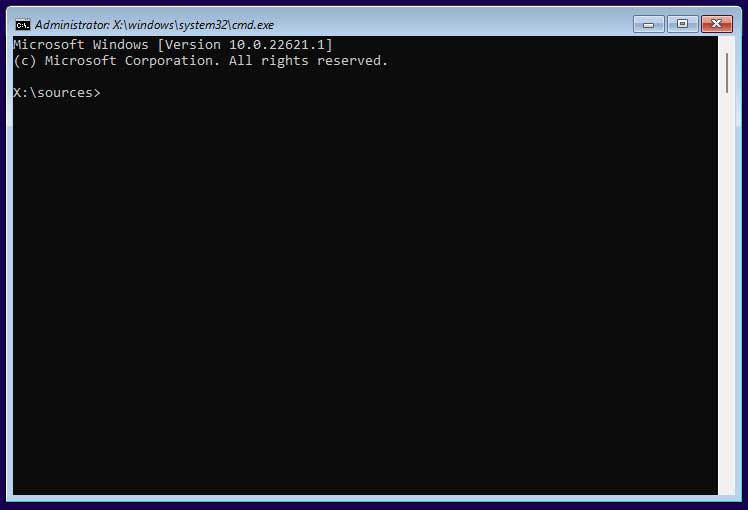
Wait until you get to the very first screen of the graphical Windows installation wizard. You can then press Shift+F10 on your keyboard to instantly open a hidden command prompt. This gives you direct access to powerful system tools before the operating system even loads.
3. Enter the DiskPart Utility
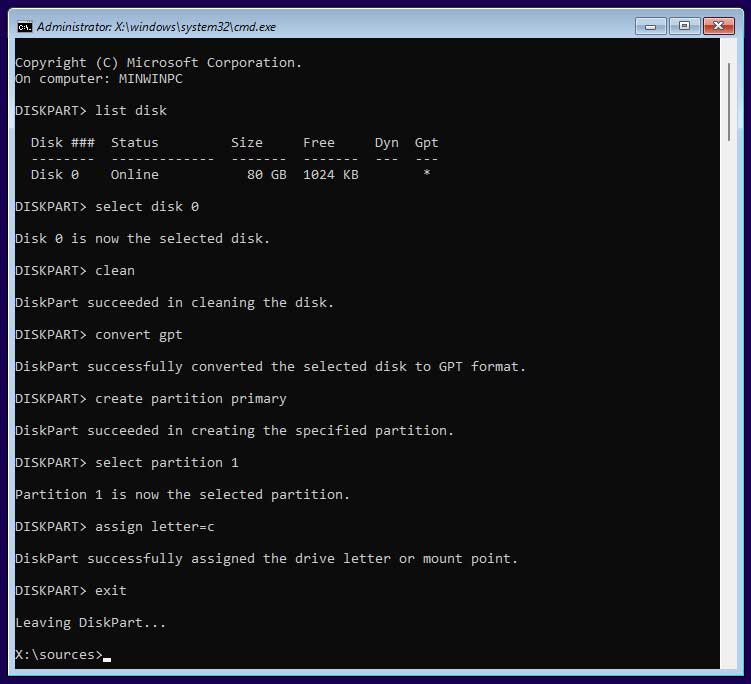
From this command prompt, you will need to type in specific commands one at a time. We will first be using the DiskPart command to wipe and repartition your hard drive. Type in diskpart at the prompt and press enter. You will then be taken directly to the active DiskPart prompt where you can type the rest of the configuration commands.
4. Wipe and Partition the Disk
Type list disk to show all the physical disks currently connected to your computer. Find your target drive and type select disk 0 (replace 0 with your actual drive number). Type clean to completely remove all data and hidden partitions from that specific drive. Next, type convert gpt to prep the drive for modern Windows 11 installations. Follow that up by typing create partition primary and then select partition 1 to target it. Type assign letter=C to give it a drive letter, and finally type exit to leave the DiskPart utility.
Format and Zero Out the Hard Drive
1. Run the Zero Pass Command
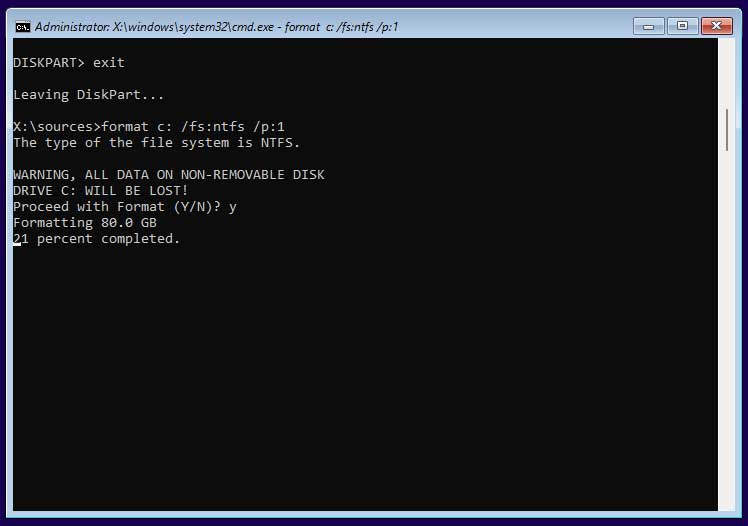
Once you exit the diskpart prompt, you are back in the standard command line interface. You can then type format C: /fs:ntfs /p:1 to format your new partition. This specific command performs a single pass of writing zeros across the entire drive. You can change the number for the /p:1 switch to another number if you want to make more passes. Keep in mind that adding more passes will make the process take significantly longer.
2. Understand the Zeroing Process
The /p:1 switch forces the system to write zeros to every single physical sector of the partition. The utility actively scans for bad sectors and marks them so Windows avoids using them later. This deep wipe completely flushes out lingering data. It destroys deeply embedded malware and fixes severe file corruption.
3. Confirm and Wait for Completion
The system will warn you about destroying files on the target volume. You will need to type the letter Y to agree to all the data being permanently deleted from the disk. The format process will then take several minutes or even hours to complete depending on the drive size.
Continue the Windows Installation
1. Return to the Setup GUI
You can give the volume a custom label such as Windows when the format finishes. You can also just press enter to leave it blank. Close the command prompt window by clicking on the X in the corner. This drops you right back into the graphical Windows installation wizard. Simply go through all the usual steps required to install Windows until you get to the drive selection screen.
2. Fix the Partition Creation Error
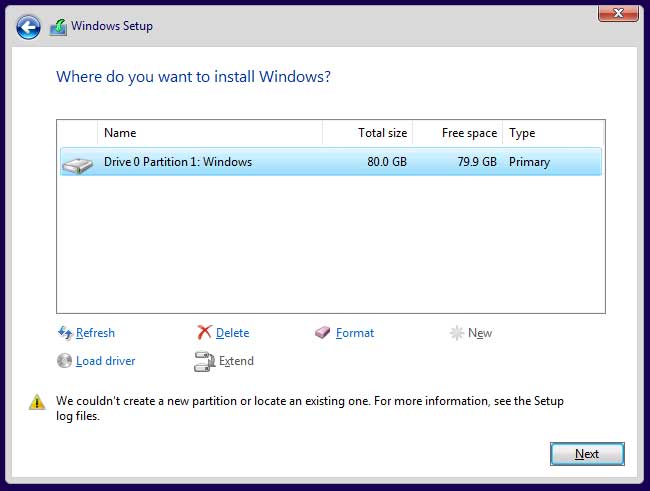
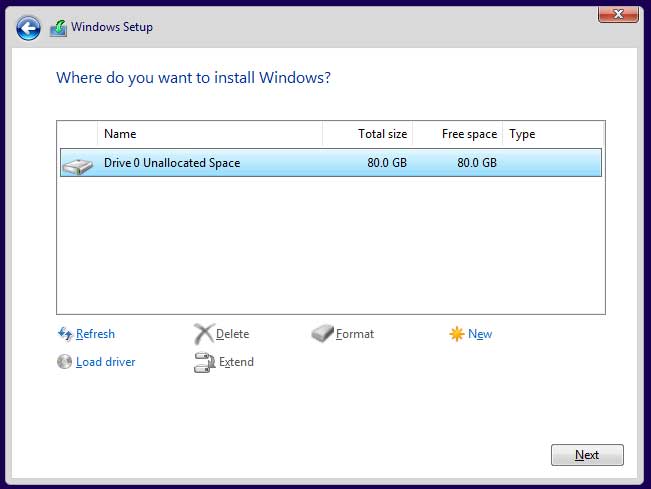
Normally you just choose your new partition and click on the Next button to install Windows. Sometimes you may run into an error that says “We couldn’t create a new partition or locate an existing one.” If that happens, you can simply click on your new partition and delete it right there. Have the Windows setup tool create a brand new one dynamically during the installation.
3. Fix the EFI Space Error
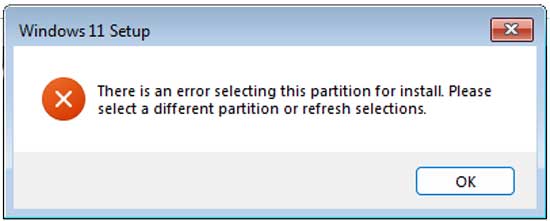
You may also come across an error stating there is a problem selecting this partition for install. This error usually happens because Windows needs raw space to create a dedicated EFI System Partition. The drive currently does not have any unallocated space left on it because we used it all in DiskPart.
4. Delete the Formatted Partition
If this happens, you will need to click the OK button and then close out of the Windows installation screen entirely. This will reboot your computer and start the installation process over again. When you get back to the drive selection screen, you can completely delete the partition we just made. Windows will then create its own required partitions using the freshly zeroed space.
5. Test the Drive for Errors
You should now be able to complete the Windows installation without any further setup errors. Use your computer normally to see if you are still getting any disk errors or random freezes. If the system stays stable, it was most likely a case of severe Windows filesystem corruption. If the freezing issue is still there, you are definitely looking at a faulty hard drive that needs physical replacement.
For additional training resources, check out our online IT training courses.
Check out our extensive IT book series.