PC troubleshooting is a very common practice for many computer users, especially if you are running Microsoft Windows. For those who prefer to fix their computers themselves and not pay someone to do it for them, there are plenty of troubleshooting tools available to use for free. These tools can come in handy if you are helping others on their computers as well.
One powerful and popular troubleshooting tool is called Medicat. It’s a toolkit that contains a large variety of tools for thing such as general repair tools, disk and boot tools, antivirus and malware scanners, password recovery, hardware diagnostics, OS recovery, backup, hard drive partitioning, booting into live operating systems, windows resets and more. In this article, we will be discussing Medicat USB, the ultimate portable PC repair toolkit.

In order to use Medicat, you will need to download the Medicat USB installation files from their website here. Then you will need to create a bootable USB flash drive using the installation file. There are various versions available to use but we will be using the Windows version for our example.
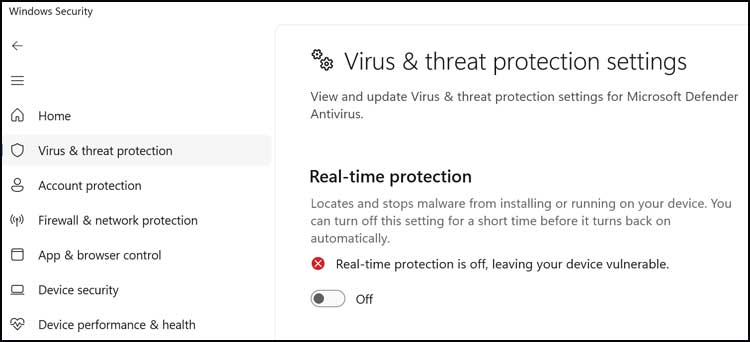
One thing you really should do before creating the Medicate USB drive is disable the Microsoft Defender real-time protection from the Windows Security app. Just be sure to enable it again once you are done making your flash drive. It should enable itself on the next reboot but you might want to double check to be sure.
Creating the Medicat USB Portable PC Repair Toolkit
The file we downloaded to install Medicat on our USB drive is called Medicat_Installer.bat. Then you will need to right click on the Medicat_Installer.bat file and choose Run as Administrator. You will then need to click on Yes at the UAC prompt, so you will need to be an administrator on the computer to use this tool.
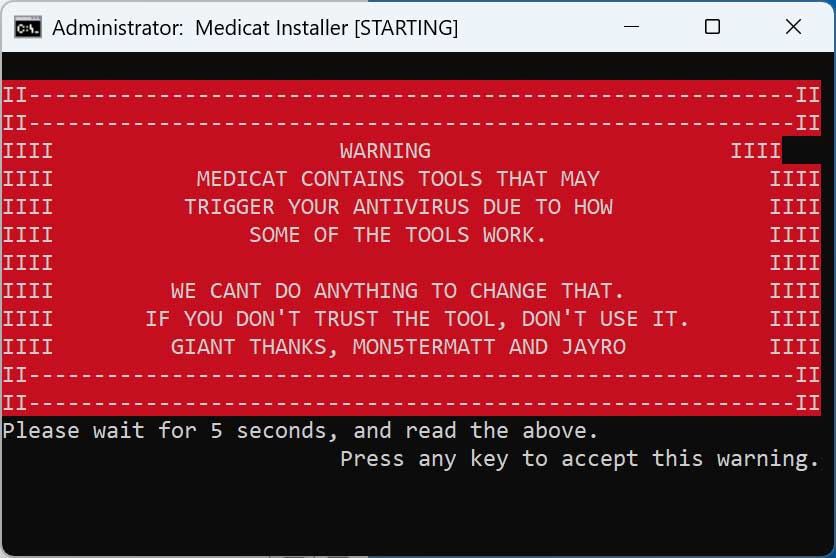
You will then see a warning telling you that the tools that will be used on this flash drive can trigger your antivirus program and that is why you should disable it before starting the installation. Also remember that even though Medicat is used by thousands of people its still a use at your own risk application.
The installer will then download the initial files needed for the installation. You can then press Enter at the main Medicat screen to begin the installation process.
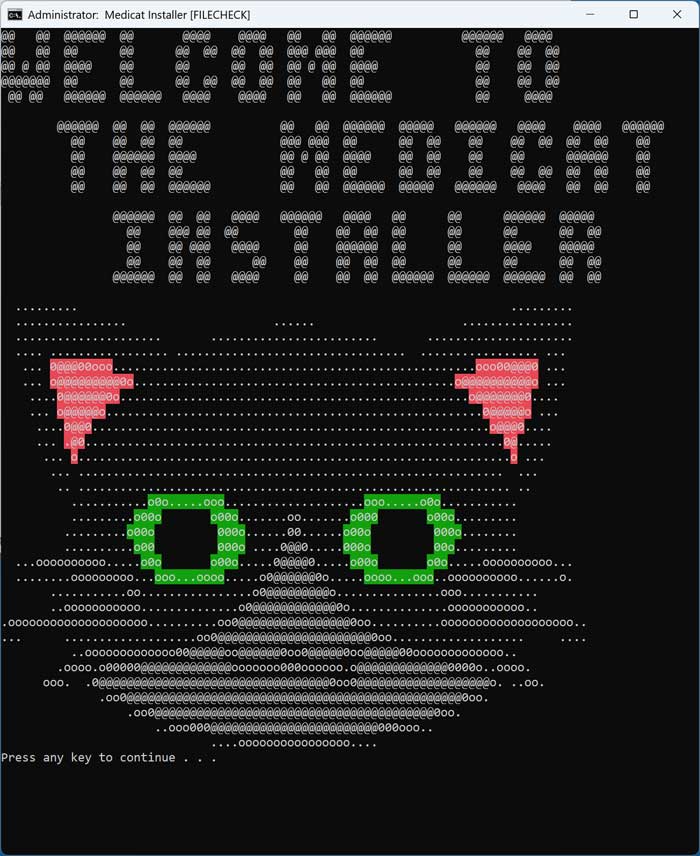
You will then need to accept the license agreement by pressing any key on your keyboard.
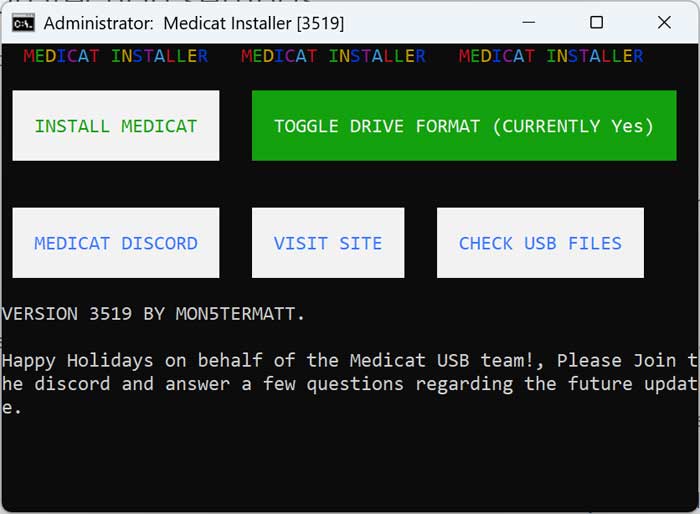
On the next screen, you will then want to click the Install Medicat button to begin downloading the files need to create the Medicat USB drive.
Then you will need to select the flash drive you want to use to continue. Just make sure you select the correct one because all the data on the drive will be erased.
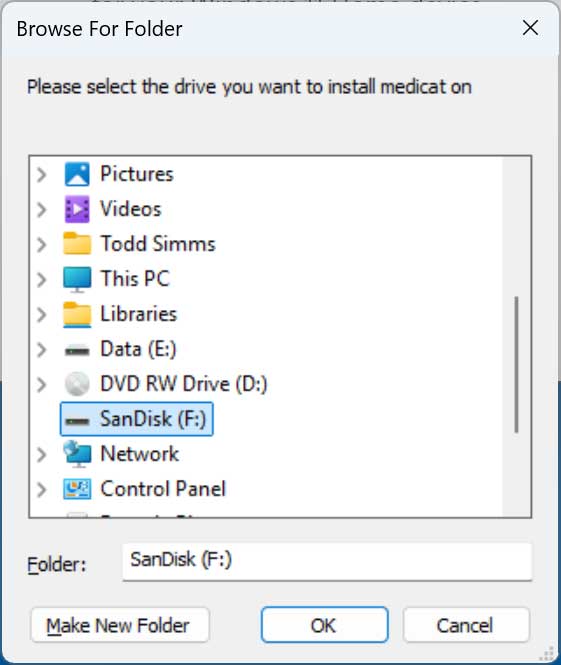
You will then need to confirm that you have selected the correct drive to install Medicat on. If you choose the incorrect drive, you will have the opportunity to type in the correct drive letter.
You will then be prompted to decide if you want to use GPT or not. You should select Yes unless you are using a very old computer that does not support it. Next, it will ask if you want to use secure boot and you should select Yes for this option as well.
Next, Medicat will install Ventoy on the flash drive and once again, you will need to confirm that you are using the correct drive for this.
Unless you have downloaded the Medicat files from another location, you will need to click the Yes button on the screen that says, could not find the Medicat files.

Here you will have the option to download the files as a torrent or as a CDN (Content Delivery Network) direct download. Many times the CDN method will fail so you may want to use the torrent method.
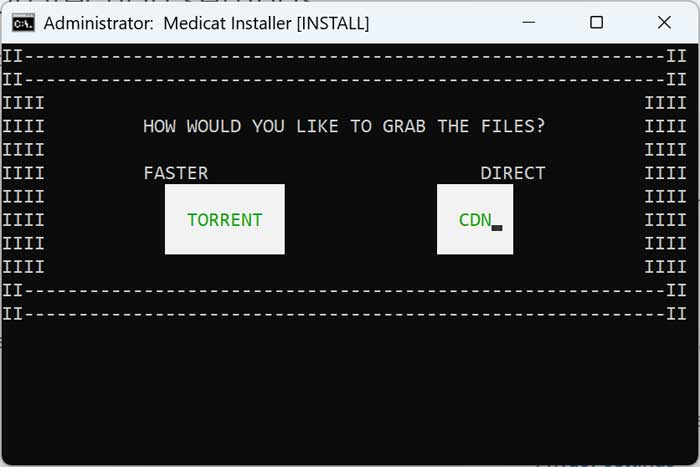
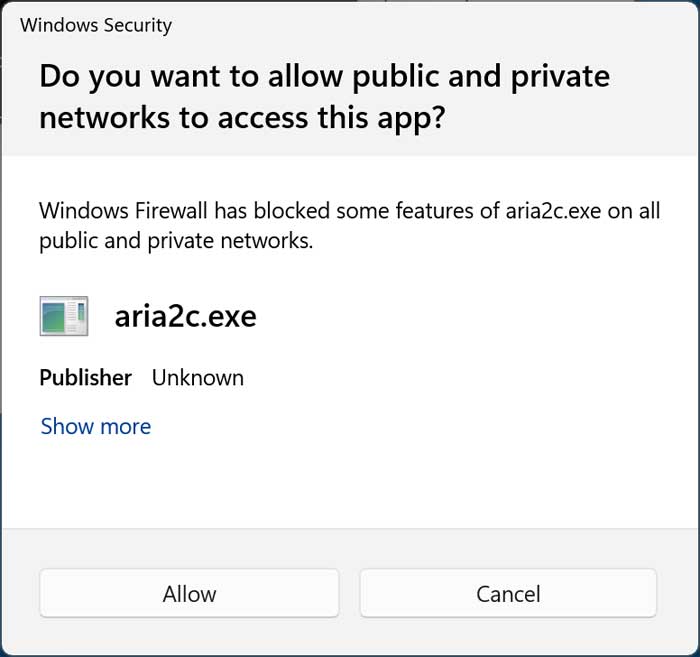
If you choose the torrent method, you will need to allow the aria2c.exe application access though the Windows Firewall to continue.
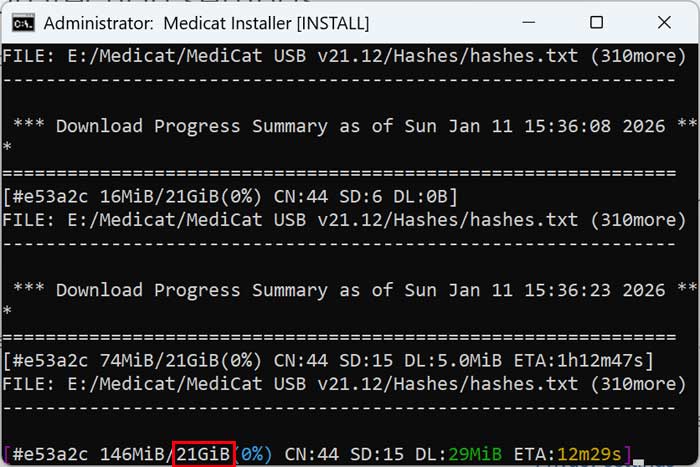
The Medicat download will take a bit of time since it will most likely need to download over 20GB of files onto your flash drive.
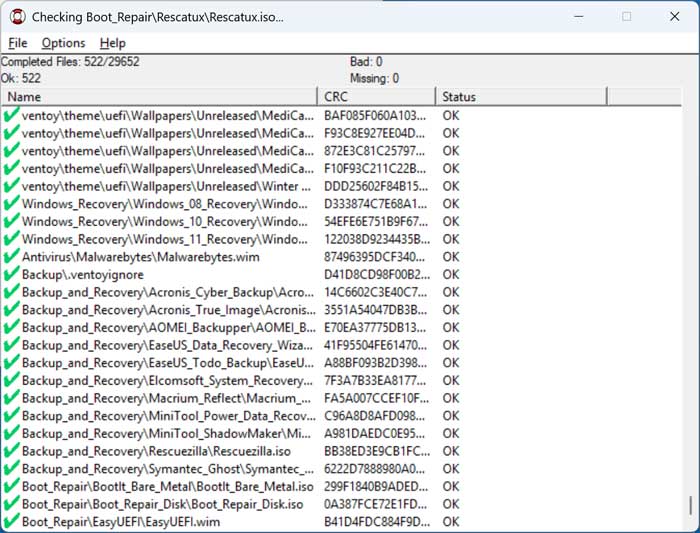
When the installation is complete, you can then press any key to exit. You will most likely see another window checking the tools that were installed.
Booting the Computer with the Medicat USB Portable PC Repair Toolkit
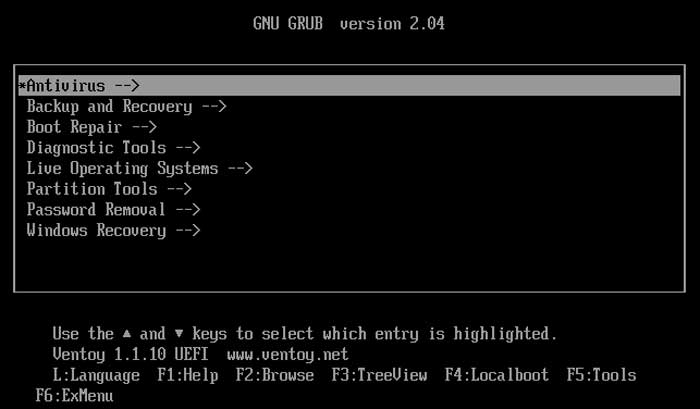
To use the Medicat USB toolkit, you will need to configure your computer to boot from the flash drive rather than the OS hard drive. Once Medicat loads, you will see the available tools separated into various menus.
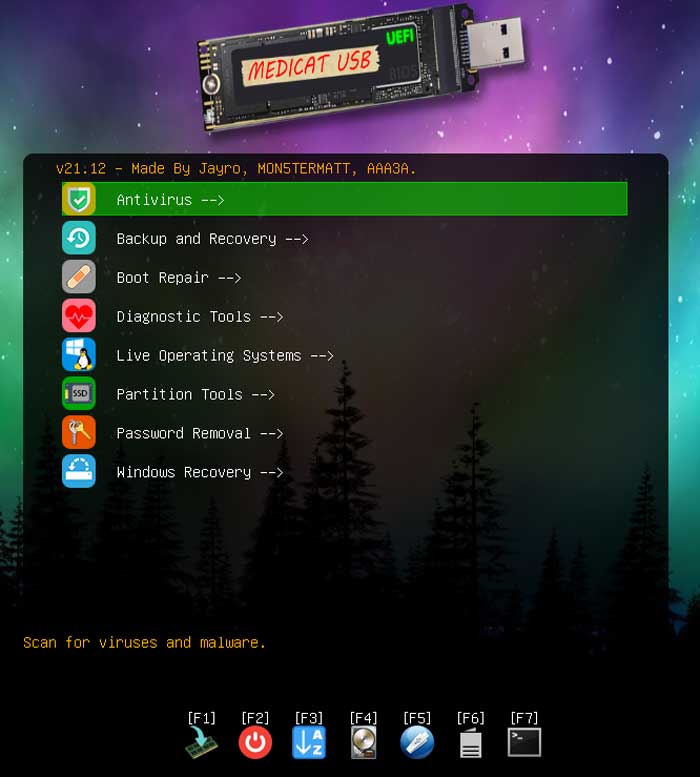
For example, if we were to go into Boot Repair, we would see the tools related to that category. Then we can select that tool to use it.
Here are the tools available in each one of these menus as of this writing.
Antivirus
- Malwarebytes Bootable
Backup and Recovery
- Acronis Cyber Backup
- Acronis True Image
- AOMEI Backupper
- EaseUS Data Recovery Wizard
- EaseUS Todo backup
- Elcomsoft System Recovery
- Macrium Reflect
- MiniTool Power Data Recovery
- MiniTool ShadowMaker
- Rescuezilla
- Symantec Ghost
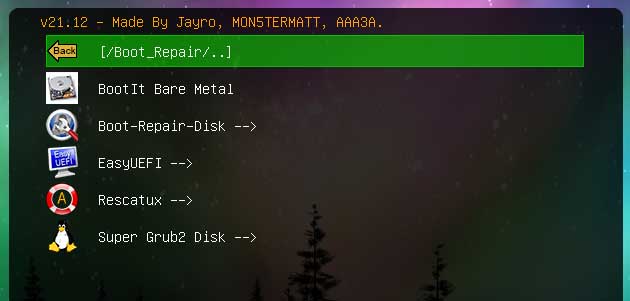
Boot Repair
- BootIt Bare Metal
- Boot-Repair-Disk
- EasyUEFI
- Rescatux
- Super Grub2 Disk
Diagnostic Tools
- HDAT2
- PassMark MemTest86
- MemTest86+
- Sprinrite
- Ultimate Boot CD
Live Operating Systems
- Active@ Data Studio
- Mini Windows 10
- SystemRescue
Partition Tools
- Acronis Disk Director
- AOMEI Partition Assistant
- DiskGenius
- EaseUS Partition Manager
- MiniTool Partition Wizard
- Paragon Hard Disk Manager
- Parted Magic
- ShredOS
Password Removal
- Jayro’s Lockpick
Windows Recovery
- Windows 8 Recovery
- Windows 10 Recovery
- Windows 11 Recovery
At the bottom of the menus, you will find several F key options that you can use for additional troubleshooting
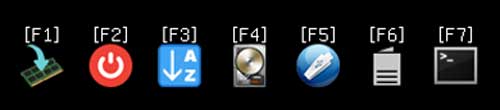
F1 – Displays help information or details about the boot menu and Medicat.
F2 – Browse and boot files in the local disk.
F3 – Shows a listing of all the tools in one place
F4 – Boots from the computer’s internal hard drive without using Medicat tools.
F5 – Other utilities you can use.
F6 – Additional boot options.
F7 – Switch between GUI and text mode (shown below).
As you can see, the Medicat USB portable PC repair toolkit has just about everything you will need to hopefully fix your computer when you are in a pinch.
For additional training resources, check out our online IT training courses.
Check out our extensive IT book series.